System Center Configuration Manager (SCCM) Installation Guide
Deploying software and patching systems was always a challenge for system administrators because of the lack of automation, control and reporting. WSUS solves some of these issues but as you probably know, it has some limitations which do not suit well in medium to large environments. Off course, we ca use scripting with WSUS to make it work even better, but what about the advanced reporting and software deployment? To overcome all these limitations and improve the work for system administrators, Microsoft created Endpoint Configuration Manager (MECM), formerly System Center Configuration Manager or SCCM for short. Using MECM we are not just deploying software and patching systems, but also create baselines, deploy certificates on endpoint devices, install Windows OSs and some other very useful and nice stuff.
In this article I am going to use the names SCCM and MECM interchangeably since it points to the same product, just different branding, but SCCM is mostly used because of the popularity in the industry.
SCCM it’s a very complicated service when you deploy it in large environments since it has multiple parts which I am going to treat in some future series articles. Right now, let’s start small then expand. The first part of SCCM is the installation, which is not just clicking the Next button of the wizard but doing things like extending the Schema, creating entries in the Active Directory Configuration partition and some other security tasks that I am going to show in this article. Since there are a lot of software prerequisites for SCCM, I really like taking care of them one-by-one since the installation wizard shows us the ones that are missing/needed.
For this article we are going to deploy SCCM with a single Primary Site System role which is one server doing it all. There are multiple Site System server roles in SCCM and I am going to explain them in the series that will come up, since these are more like design things.
1. Installing the SCCM prerequisites
For this lab I have three machines: the Domain Controller, the SCCM (build 2002) machine with 6GB of RAM, two vCPUs and a second disk for hosting the software/patches. The third machine is a SQL Server 2019 VM with Reporting Services installed for the SCCM database having 12 GB of RAM and two vCPUs. All the VMs are running Windows Server 2019 with the latest updates installed and joined to an Active Directory domain. Again, you will have to size your machines accordingly once you go into production, and as an idea, you can take a look at this Technet article. When it comes to the firewall configuration, I am going to allow everything between the mentioned machines since this is a large subject and it requires it’s own topic.
As it comes to hardware requirements it all depends how large the SCCM infrastructure is and how many clients it will manage. Microsoft posted some recommendations which are huge, but I find SCCM working for way less. Depending on the number of endpoints you have in your infrastructure you can start small and increase the resources as you go; virtualization makes it very easy.
SCCM has a lot of software requirements and if we do one or two new deployments in a year, we are not going to remember them. A better approach that I like to use is to let SCCM tell me what prerequisite should I install, and this way I know that everything it needs it’s in the system and configured for the deployment.
1.1 Running the SCCM prerequisites checker
The first thing that I like to do in order to see what’s needed for the SCCM installation, is to launch the SCCM Prerequisites Checker from the installation ISO.
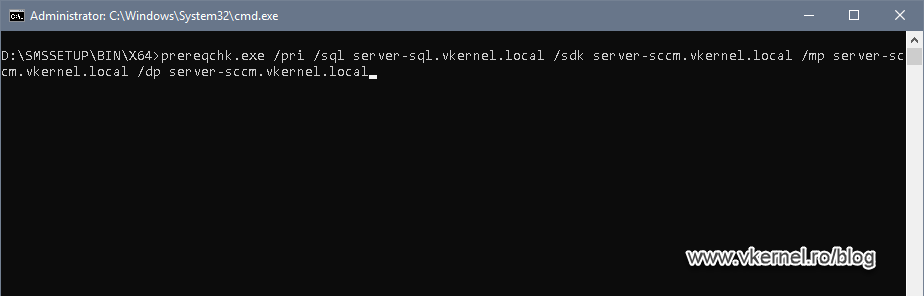
On the SCCM server, mount the downloaded SCCM ISO then open a command prompt and browse to Configuration Manager installation media > SMSSETUP > BIN > X64. Here, type the bellow command line to launch the Prerequisites Checker on the server so we can see what prerequisites are missing and what configurations we need to fix. Off course you will need to replace the server names with your own, like the SQL server name and the SCCM one; and don’t freak out about the errors and warnings presented in the wizard, because remember…this is a clean servers with nothing on it, so it is expected.
prereqchk.exe /pri /sql <SQL server FQDN> /sdk <SCCM (local server) FQDN> /mp <SCCM (local server) FQDN> /dp <SCCM (local server) FQDN>
The operation will take a few minutes to complete, and once it is done, we will have all the missing software and miss-configurations in a nice colored list. The next thing is to go over all the prerequisites one-by-one until the list it’s empty on the next prerequisites check. The Prerequisites Checker also creates a log file on the root of the C drive if you want more details about what it finds.

1.2 Extending the AD schema for SCCM
This is the first task in the list and it’s not mandatory, but it’s recommended so we can benefit from all the SCCM features. By extending the Active Directory schema we are simplifying the deployment and configuration of clients and also let them locate resources (content servers) more efficiently.
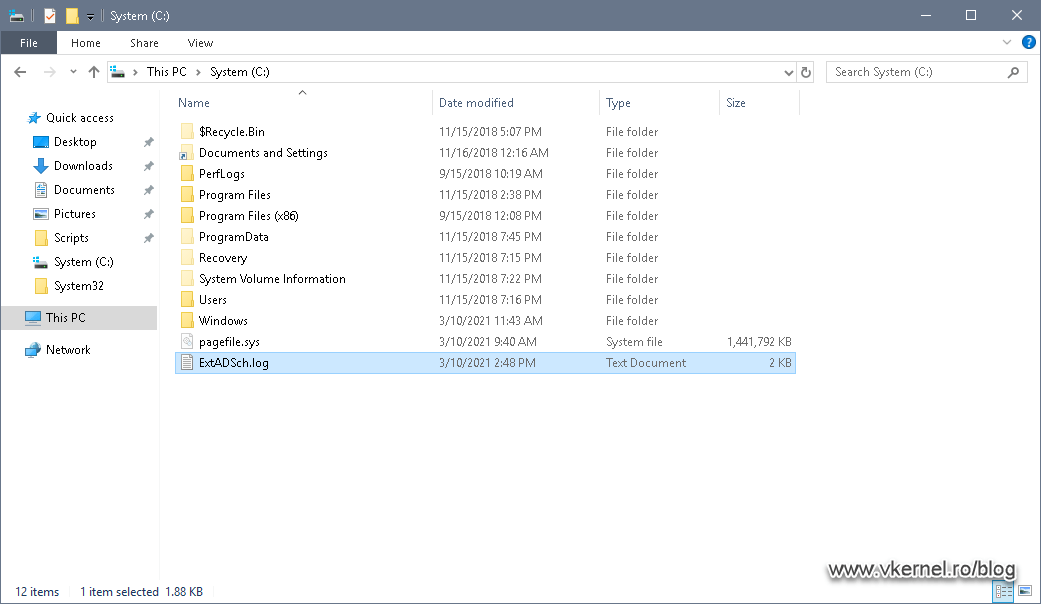
In order to extend the AD schema we need to mount the SCCM ISO on a domain controller, open the command prompt and browse to Configuration Manager installation media > SMSSETUP > BIN > X64. From this path just type extadsch.exe and press Enter. In a few seconds the process of schema extension will be done.
To extend the Schema, the account used will need to be part of the Schema Admins security group

The command also creates a log file –ExADSch.log– on the root of the C drive if we want to see what classes and attributes it adds to the schema.
1.3 Creating the System Management Container
Since we are on the domain controller, we will go a little bit out of order from the SCCM prerequisites check list so we don’t have to come back later on. What we are trying to resolve here is the Verify site server permissions to publish to Active Directory warning. This is also not mandatory, but highly recommended to do so Configuration Manager can publish data like Management Points (MP) and Boundary details in order for clients to select the best one possible.
On one of the domain controllers, open the ADSI Editor console, right-click the ADSI Edit node and choose Connect to.
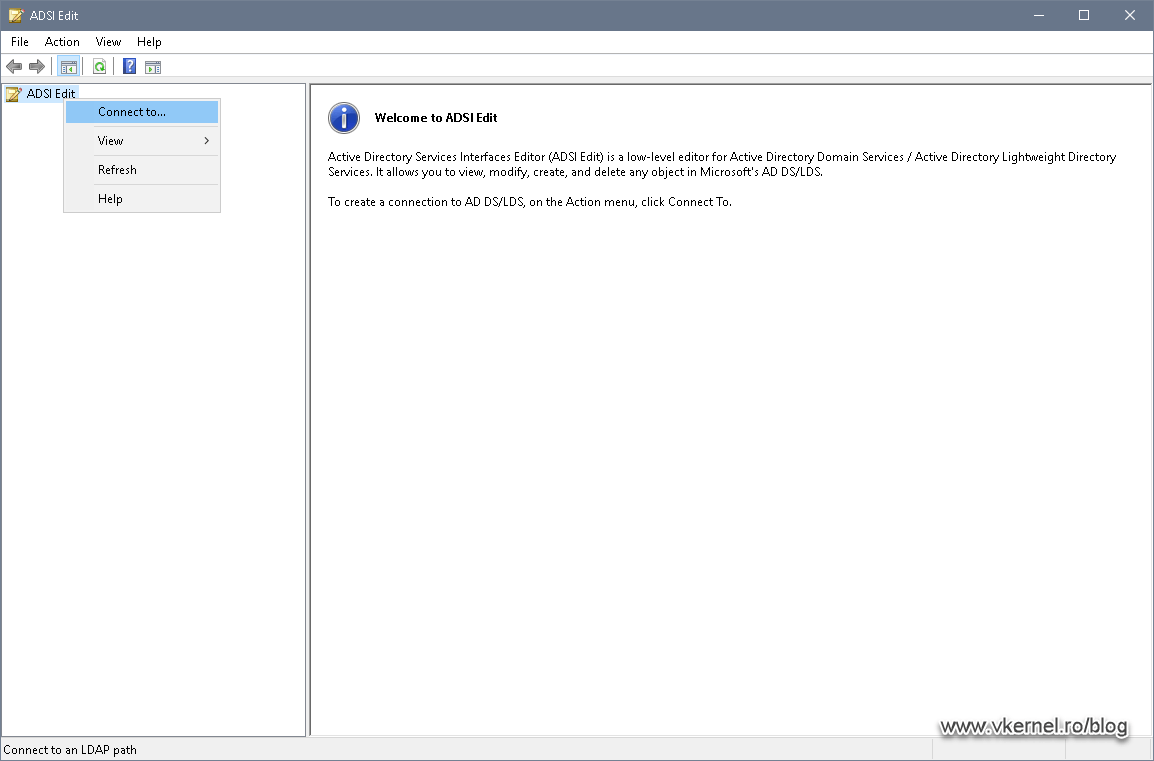
On the Connection Settings window that pops-up, just leave the defaults and hit OK.

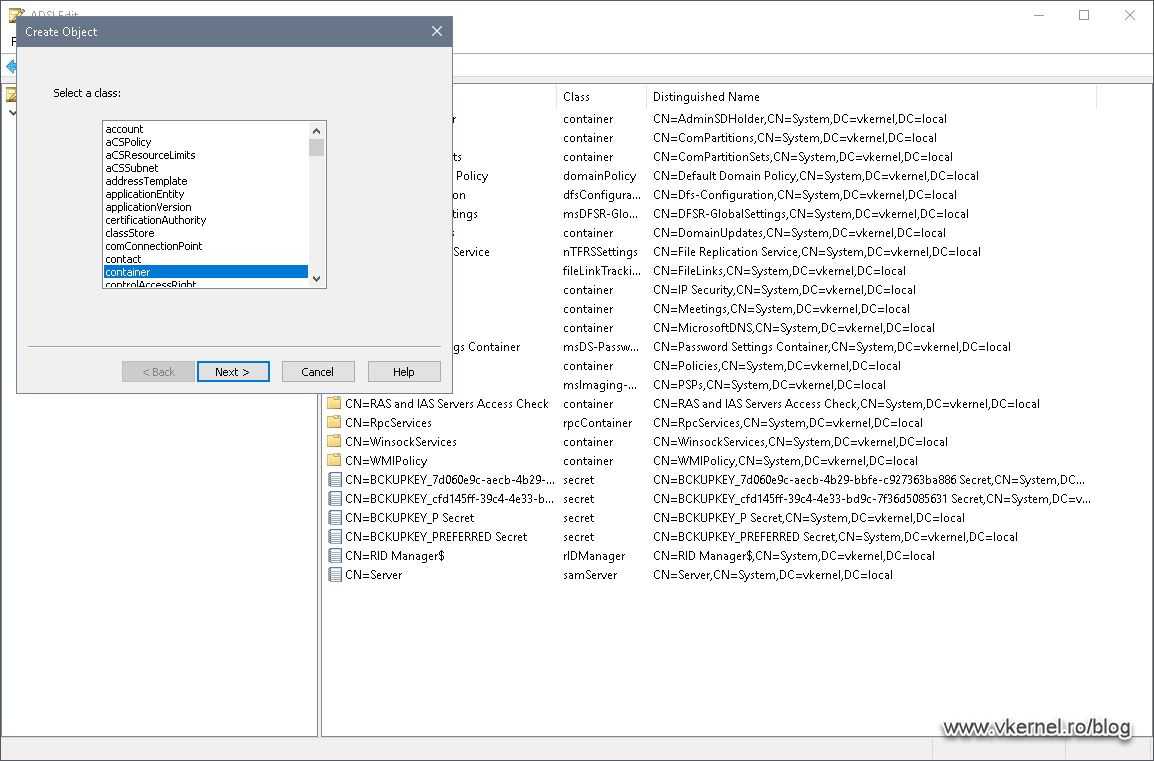
Expand the Default naming context then the domain name. Right-click CN=System and choose New > Object.

From the Create Object wizard that opens up, select container and click Next.
In the Value box type System Management then continue the wizard.
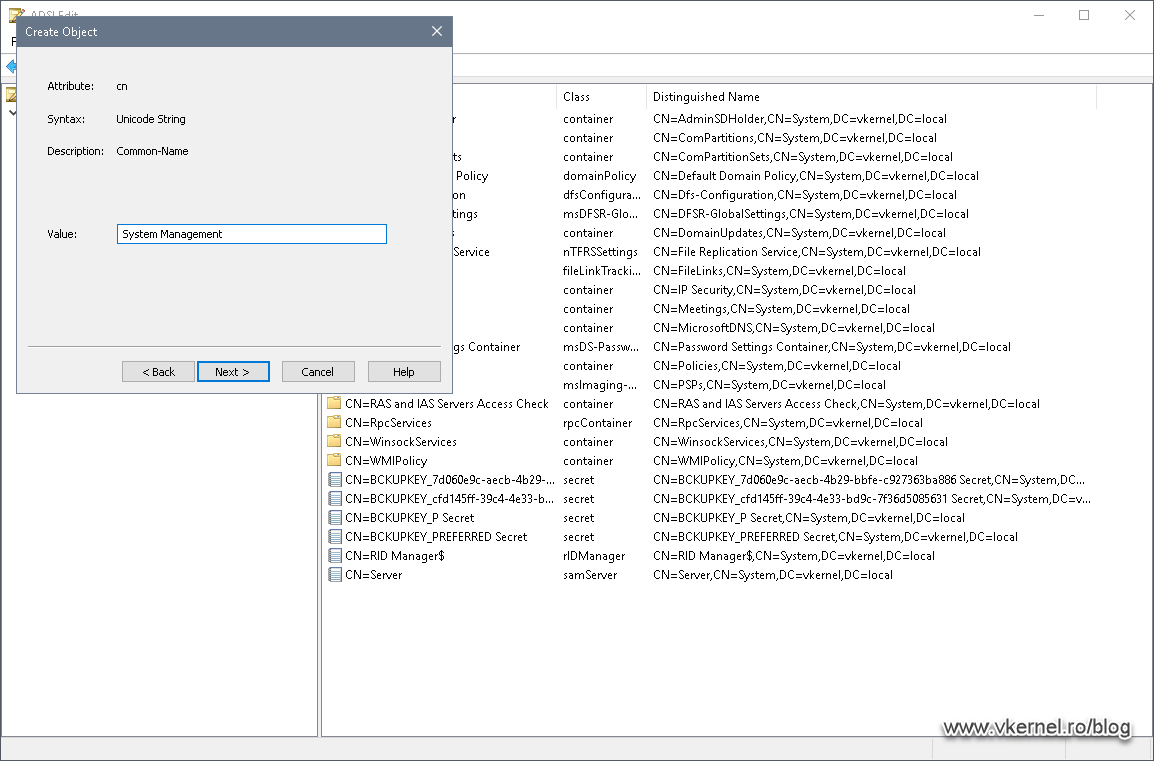
Click Finish to close the wizard.

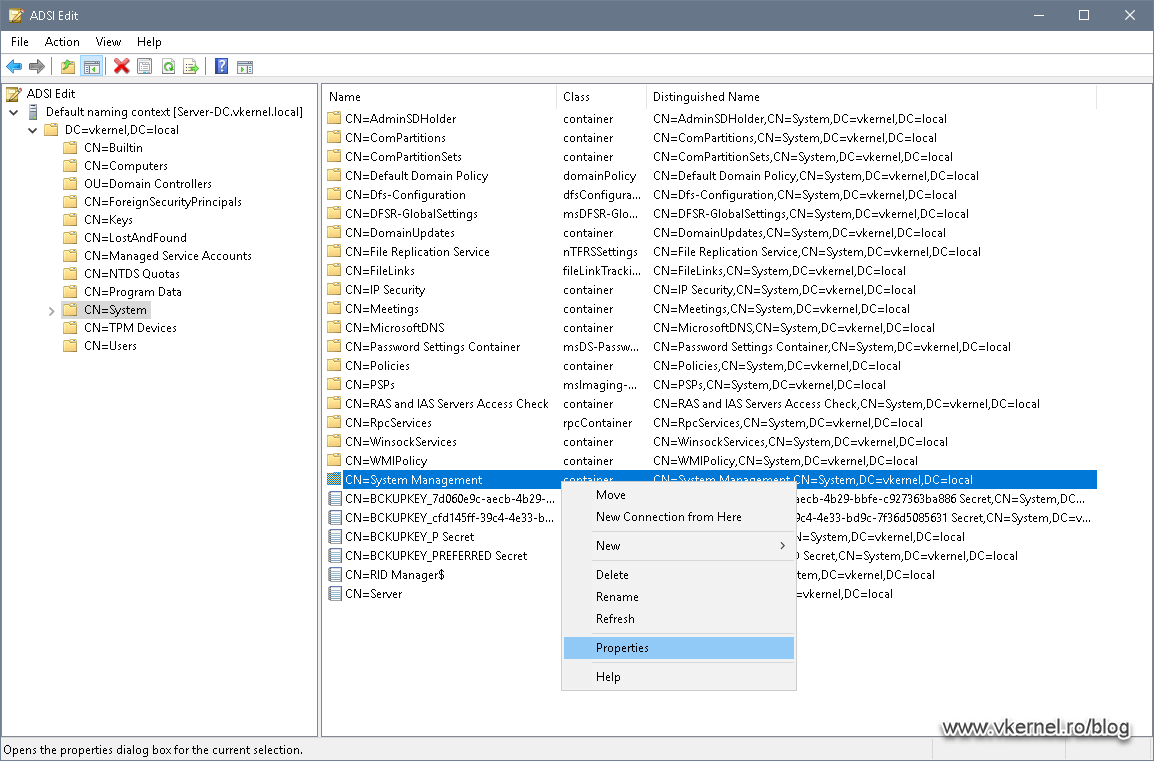
Now that our container is created, we need to set up the proper security permissions so SCCM can publish the necessary data in it. Right-click the System Management container and choose Properties.
From the Security tab hit the Add button and search for the SCCM server.
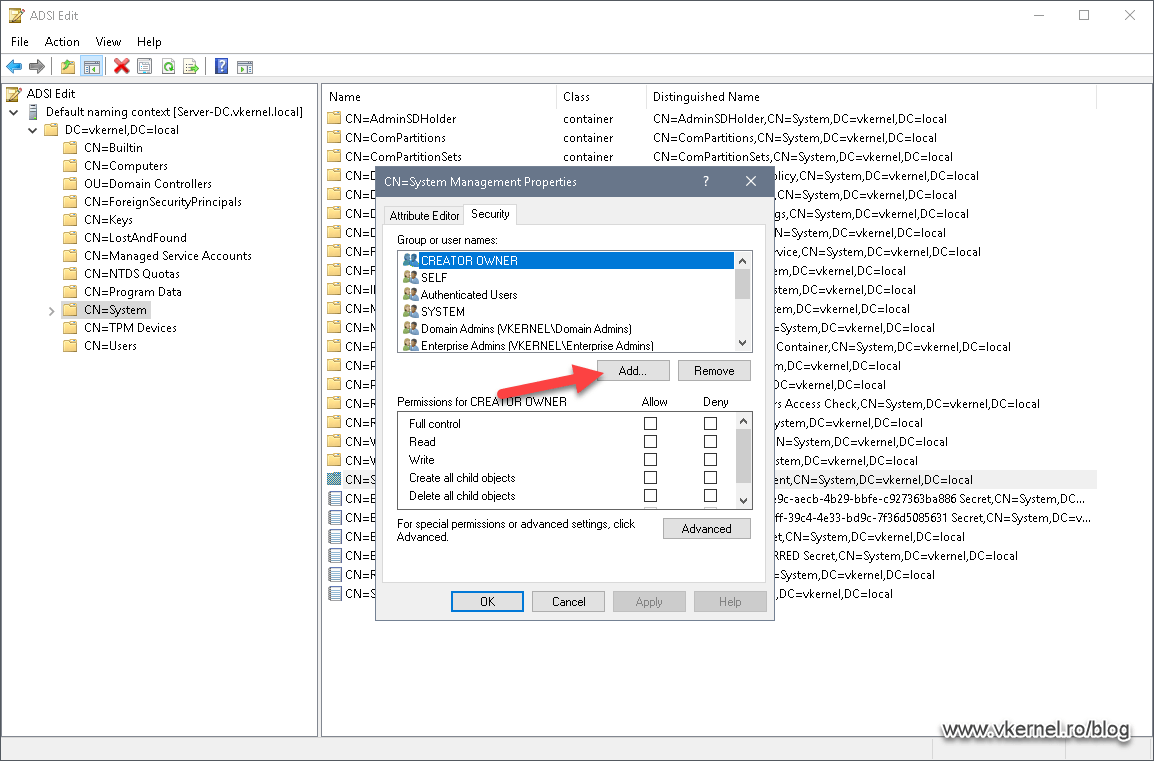
Once the SCCM server is in the Access Control List (ACL) give it full permissions on the System Management container by clicking the Full control box.
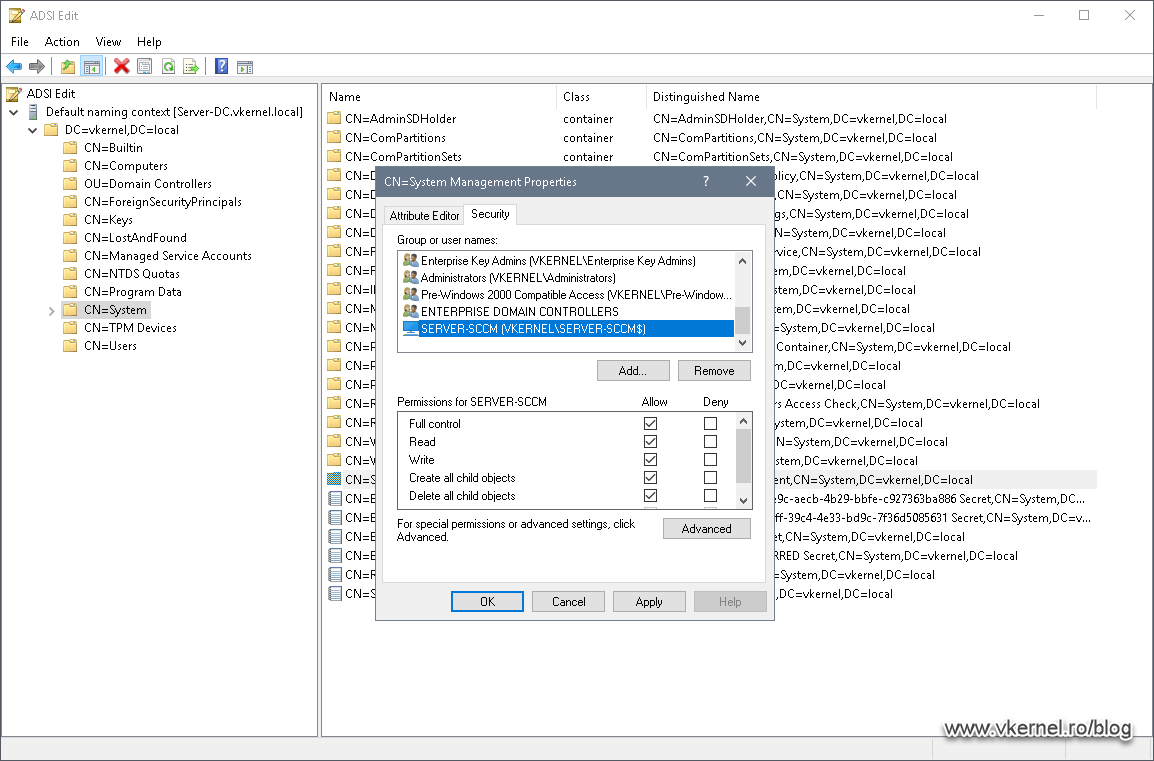
Click the Advanced button. From the Advanced Security Settings window that opens up, select our SCCM server then hit Edit.
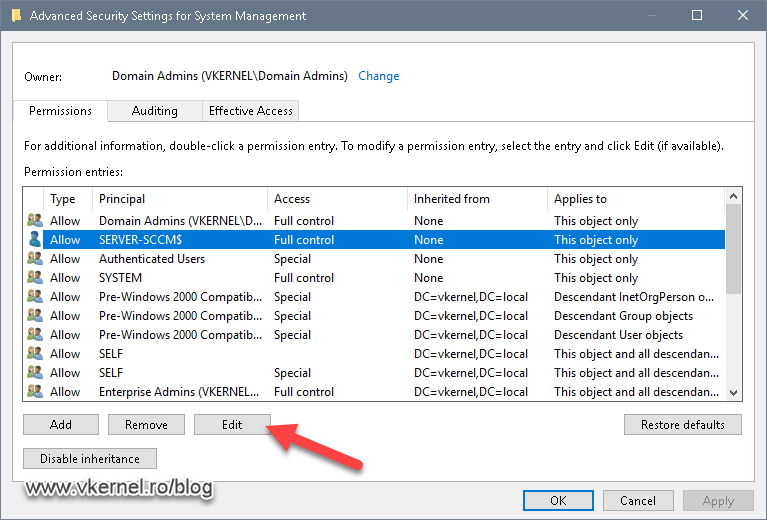
From the Applies to drop-down box select This object and all descendant objects. Click OK on all properties windows to close them and save the changes.

1.4 Creating the SQL Server service account
Still on the domain controller, open Active Directory Users and Computers (ADUC) and create a simple user account which later on we are going to use it a service account for our SQL Server instance. Make sure you set the password for the account to never expire.

1.5 Configuring the SQL Server
SCCM supports a wide majority of SQL Server versions, and since we are using SQL 2019 for this SCCM instance, we need to have at least CU5 installed on our SQL server. More details can be found in this Technet article.
| SQL Server Version | Edition | Min Cumulative Update |
| SQL Server 2019 | Standard, Enterprise | CU5 |
| SQL Server 2017 | Standard, Enterprise | CU2 |
| SQL Server 2016 SP2 | Standard, Enterprise | Not CU Required |
| SQL Server 2016 | Standard, Enterprise | Not CU Required |
| SQL Server 2014 SP3 | Standard, Enterprise | No CU Required |
| SQL Server 2012 SP3 | Standard, Enterprise | No CU Required |
1.5.1 Adding the service account and SCCM host to the local Administrators group
Presuming you already have your SQL Server and the SQL Server Reporting Services installed, we can move forward with our SCCM setup by login into our SQL host and open the Local Users and Groups console (lusrmgr.msc). Once the console opens, click the Groups folder, and open the Administrators group properties.
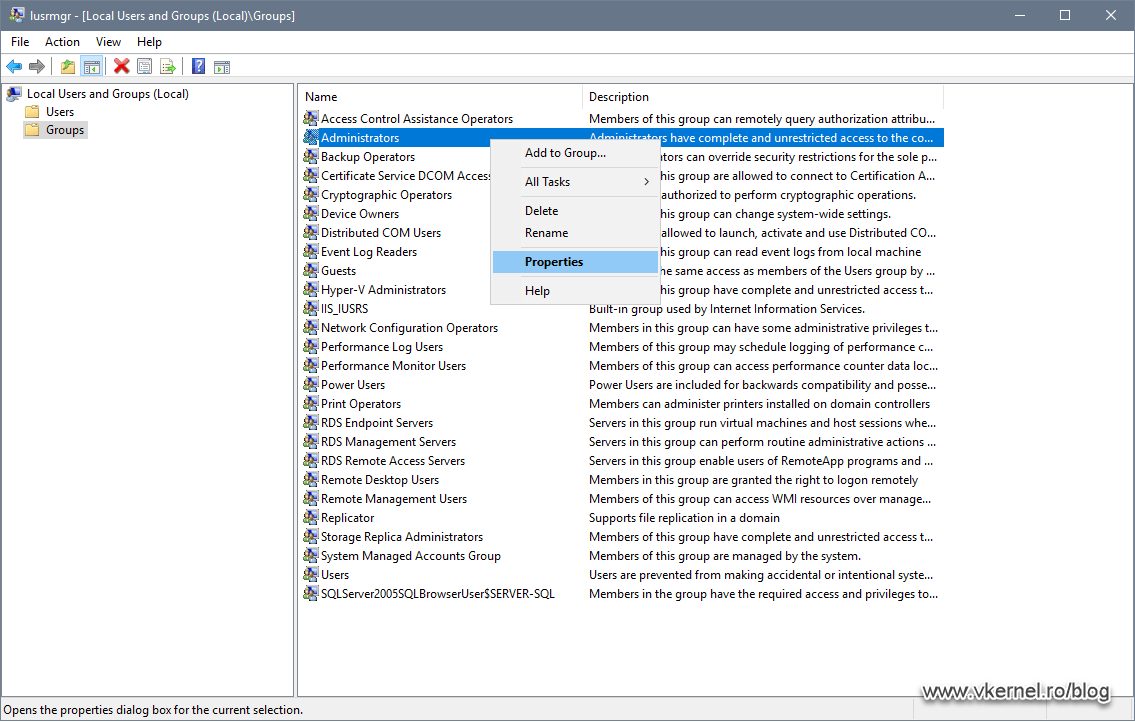
Click the Add button and search for the service account that we created in section 1.4.
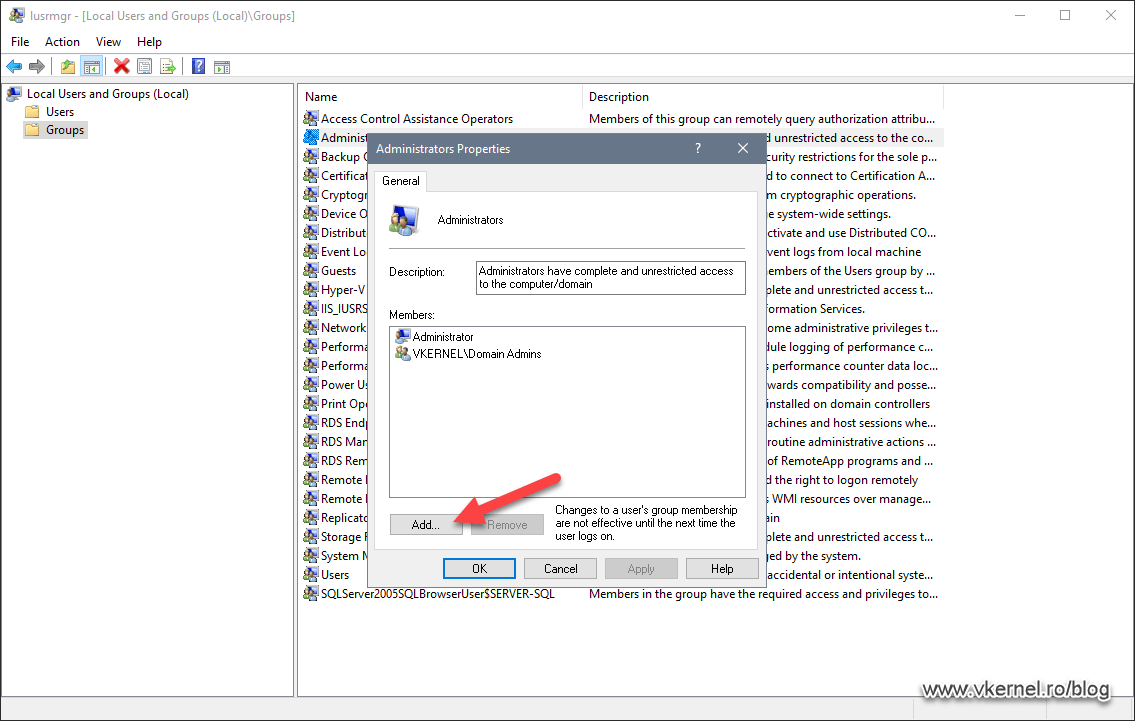
Add the account to the Administrators group then click Apply to save the changes. Don’t close the Administrators Properties window yet!
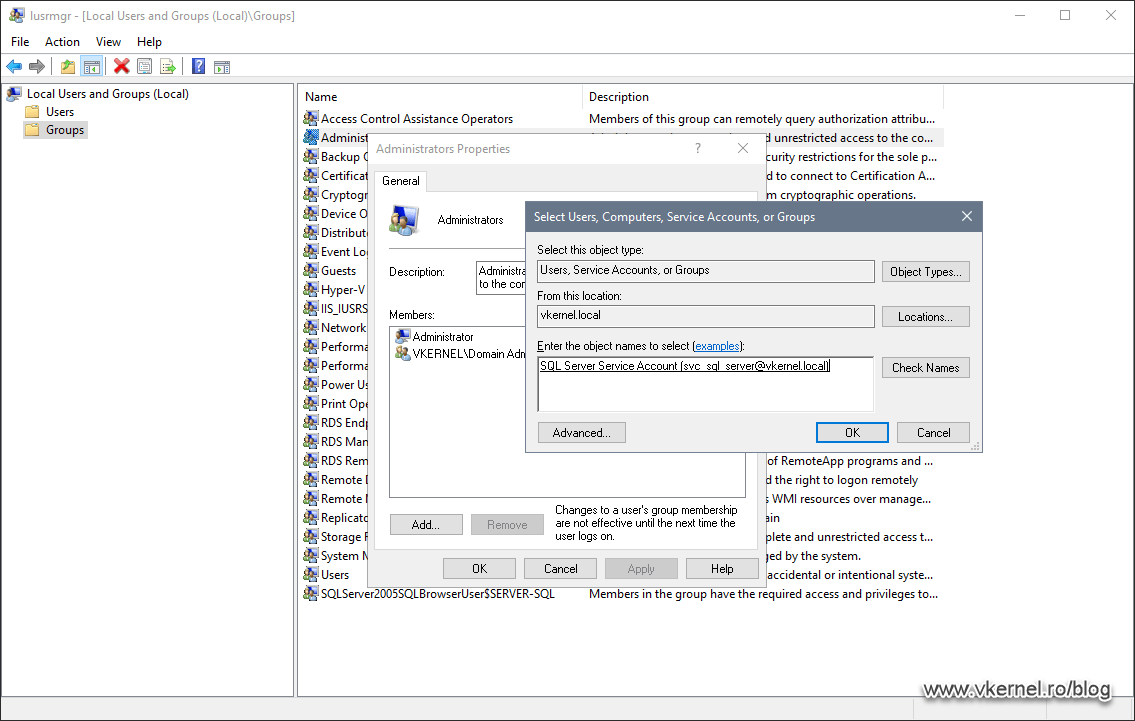
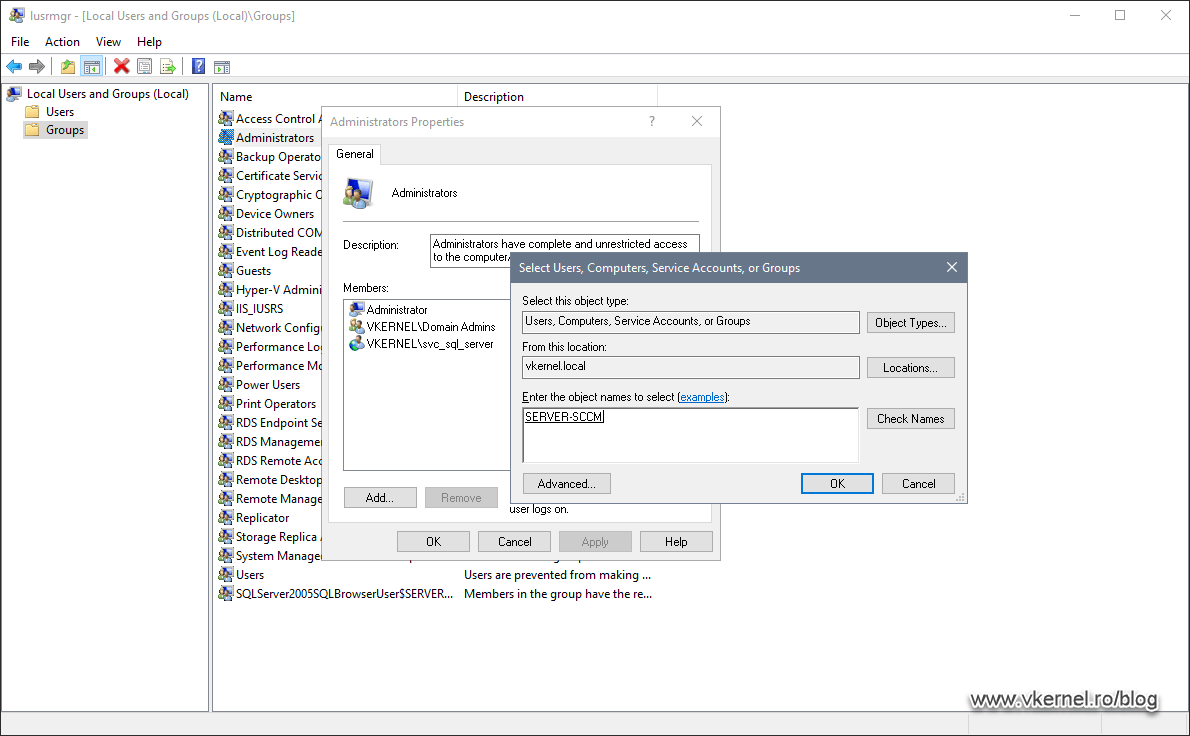
Click the Add button again, and this time we need to add the SCCM computer account as a member of the local Administrators group on our SQL server. Click OK when done.
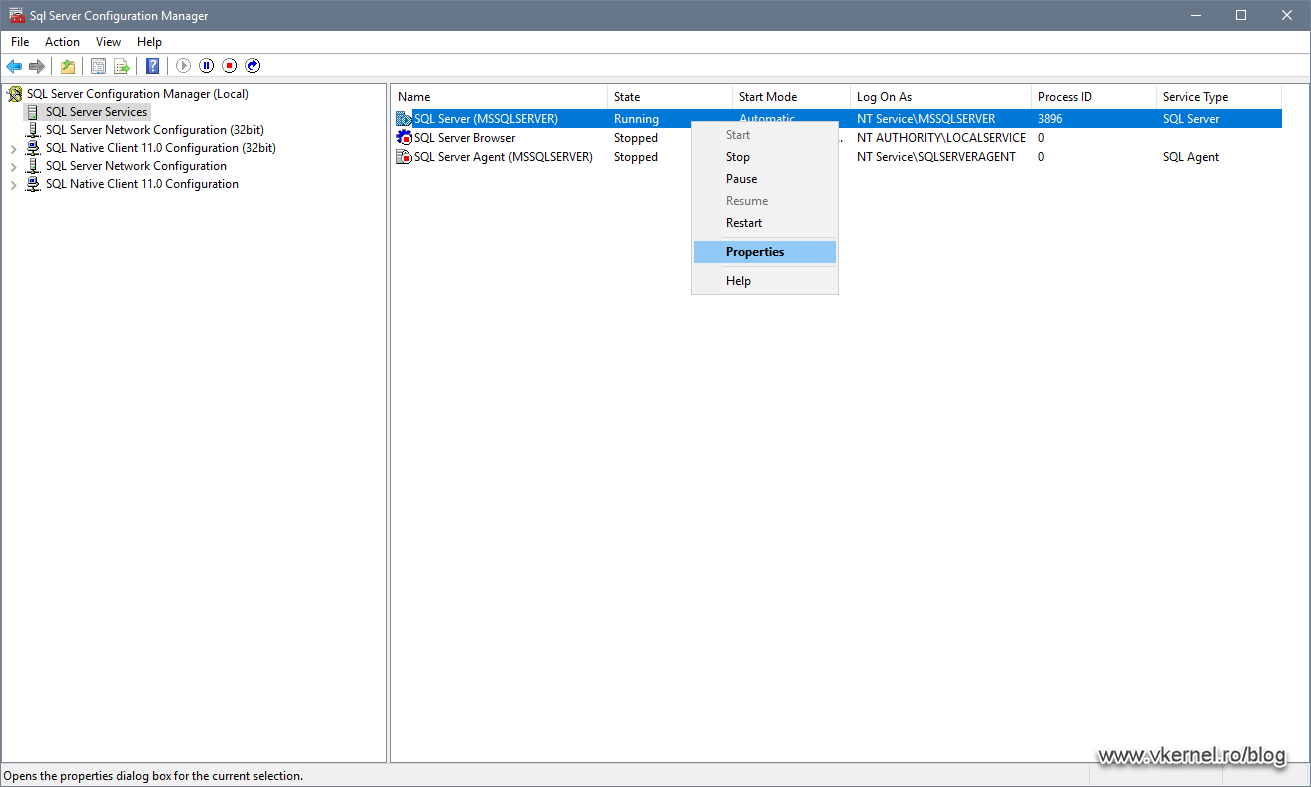
1.5.2 Configuring the SQL service running account
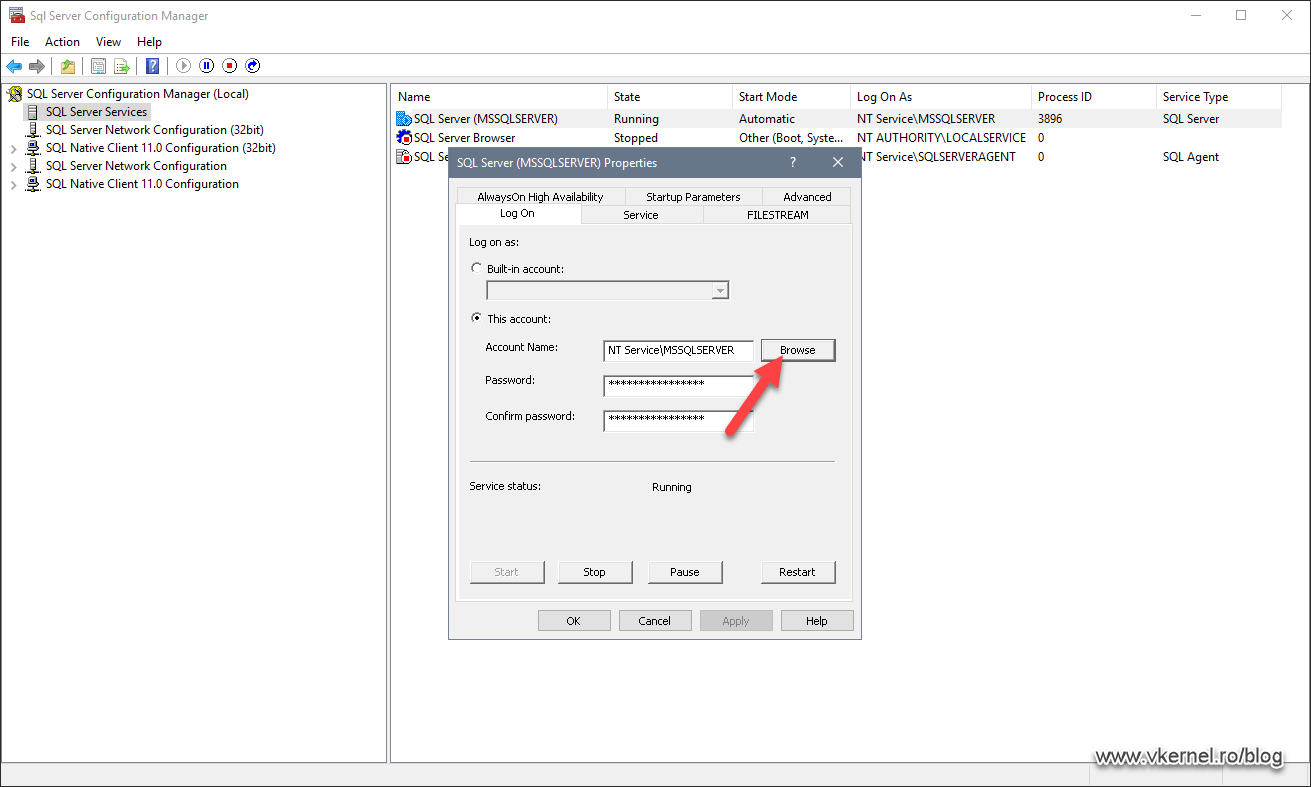
Now we need to set our SQL service to use the domain service account, and for that, we are going to use the SQL Server Configuration Manager console that can be found in the Start menu. Once the console opens and we click the SQL Server Services object, we can see on the right-hand side that our SQL Service is running under a local account. To change that, right-click the SQL Server service and choose Properties.
From the Log On tab, click the Browse button.
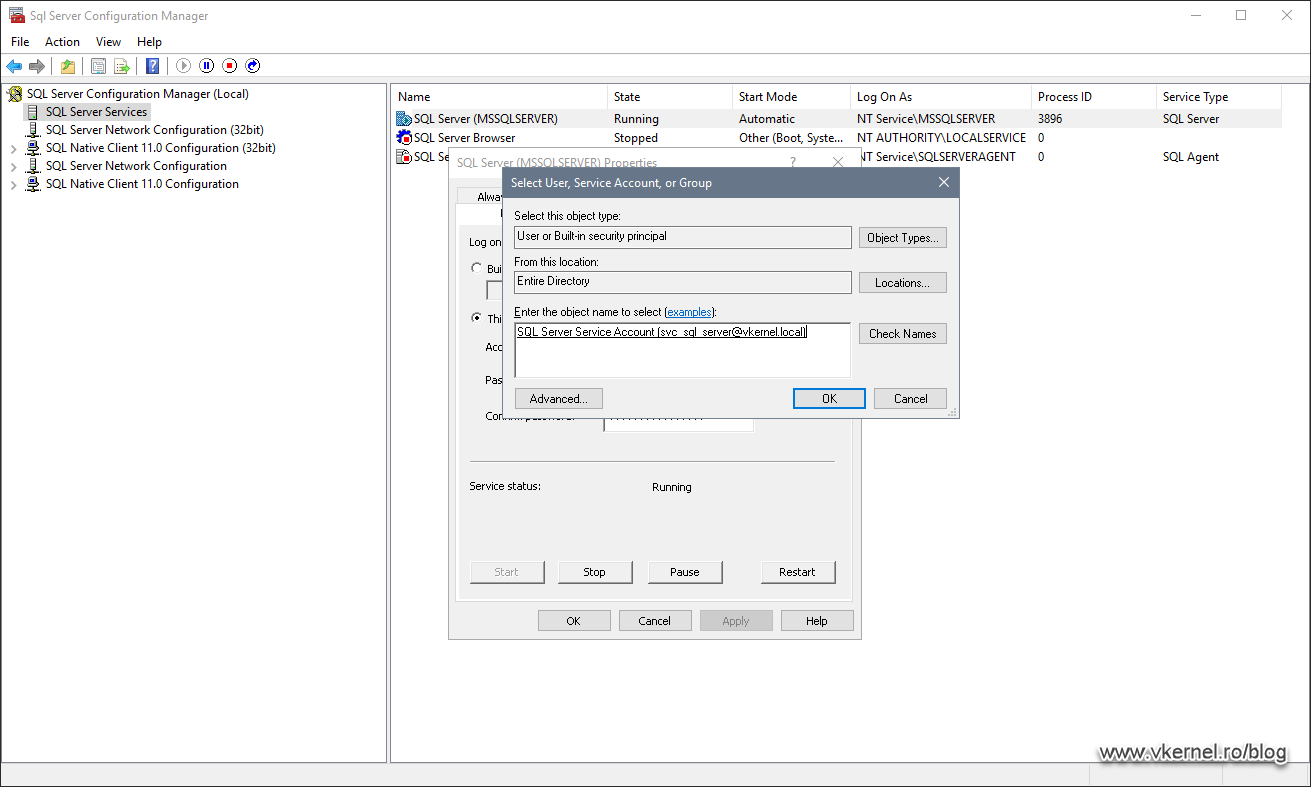
Here we need to add our SQL service account created in section 1.4. To be able to add the account we need to select our domain using the Locations button then search for the account. Click OK when done.
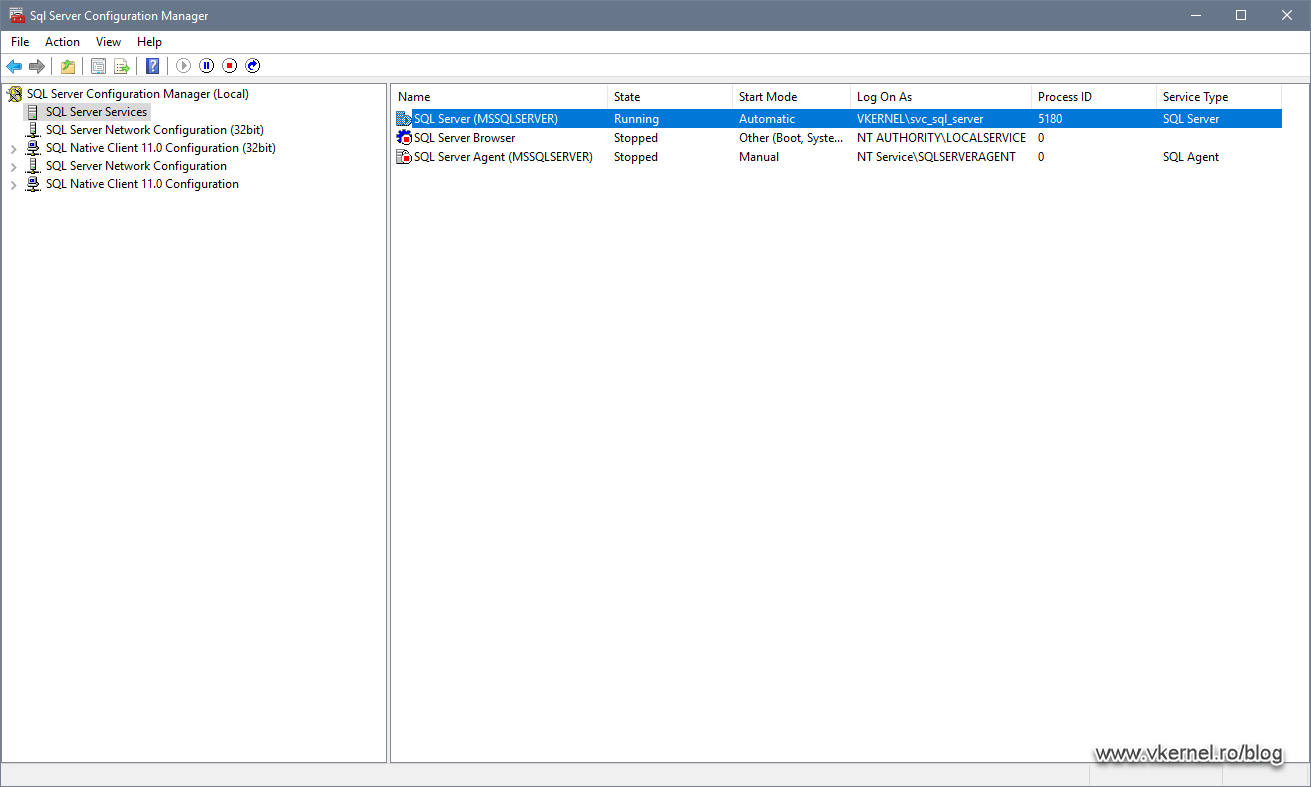
Back on the SQL Server service Properties window, we need to provide the service account password in the two password boxes then hit OK. Choose Yes on the warning that pops-up to restart the SQL service and apply the changes.

And there you have it, our SQL Server service is now running under a domain service account, which is what SCCM wants for us.
1.5.3 Setting up memory usage for the SQL instance
We still have one more to go on the SQL Server configuration side, and that is setting up a minimum and maximum memory for the instance to use. For this, we are going to use SQL Management Studio. Once we log in, we need to right-click the server name and choose Properties.
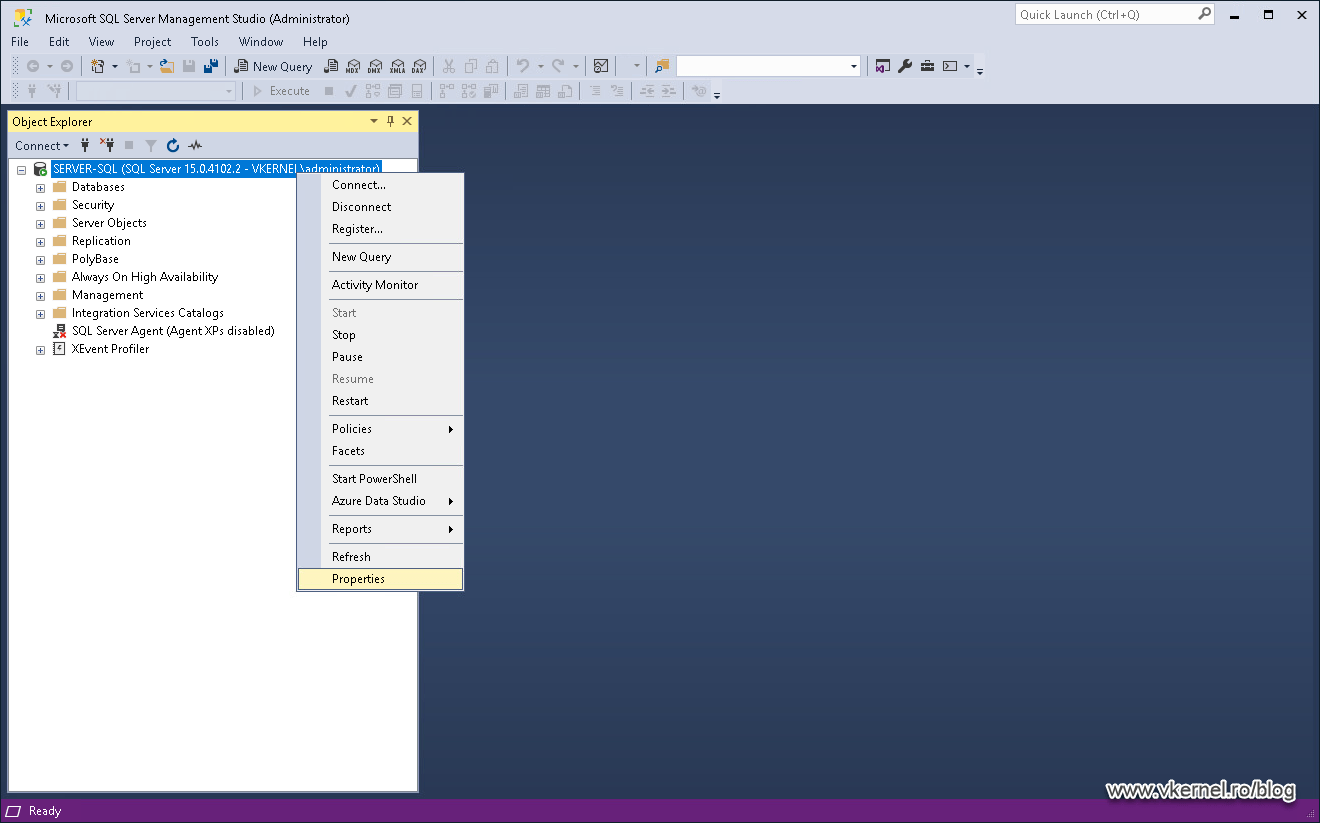
On the Properties window, click the Memory page then on the right-hand side set a minimum value of 8GB of RAM -which is what SCCM requires- and as a maximum value set it close to what your SQL system has. Since I have 12 GB of RAM on this host, I will set the maximum value to 9 GB and leave something for the system. Click OK when done.

1.6 Installing missing features on the SCCM server
The next prerequisite will be WSUS, which is also not mandatory but since we are deploying a single Primary Site which is also our Management Point and Distribution Point site, we need this role. Also, by opening the Add Roles and Features Wizard, it will be a good time to install the rest of the missing features and roles for SCCM not just WSUS.
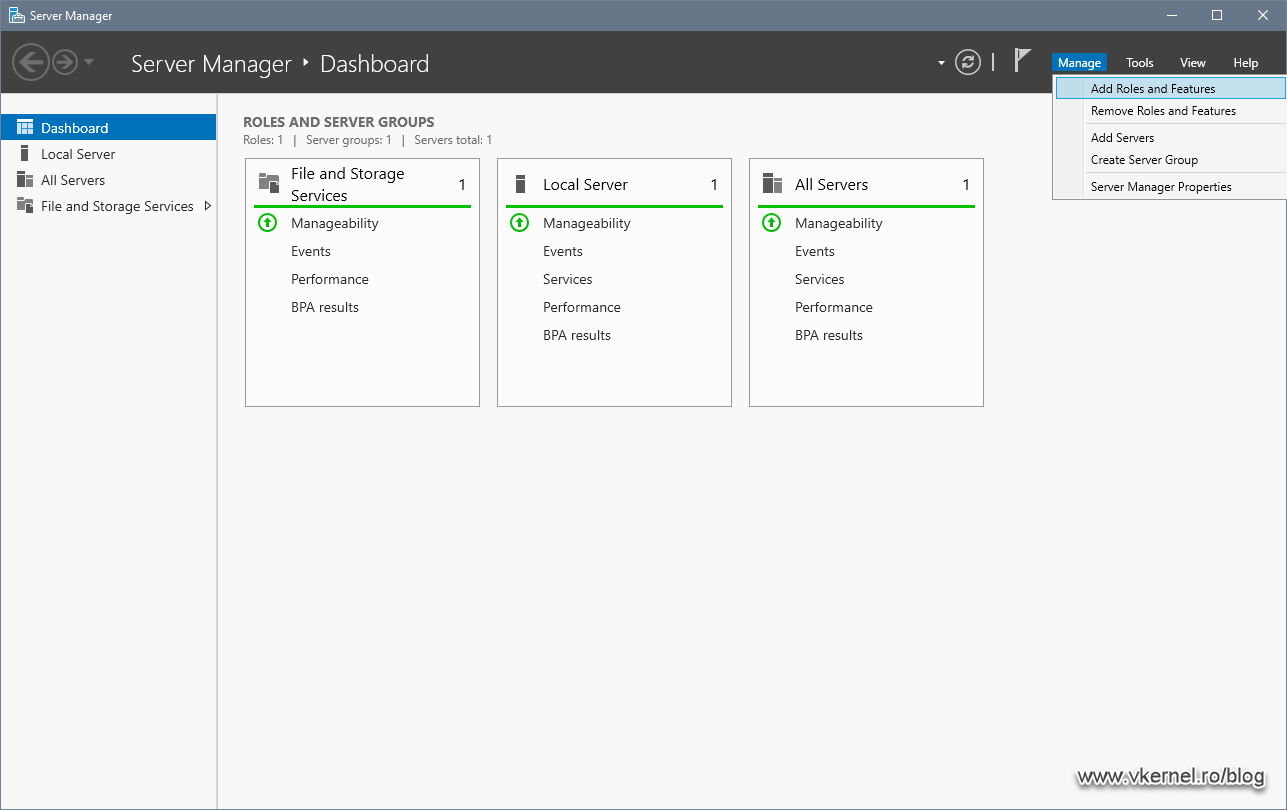
On the SCCM server open Server Manager and click Manage > Add Roles and Features.
Once at the Select server roles screen, tick the Web Server (IIS) and Windows Server Update Services boxes then click Next.

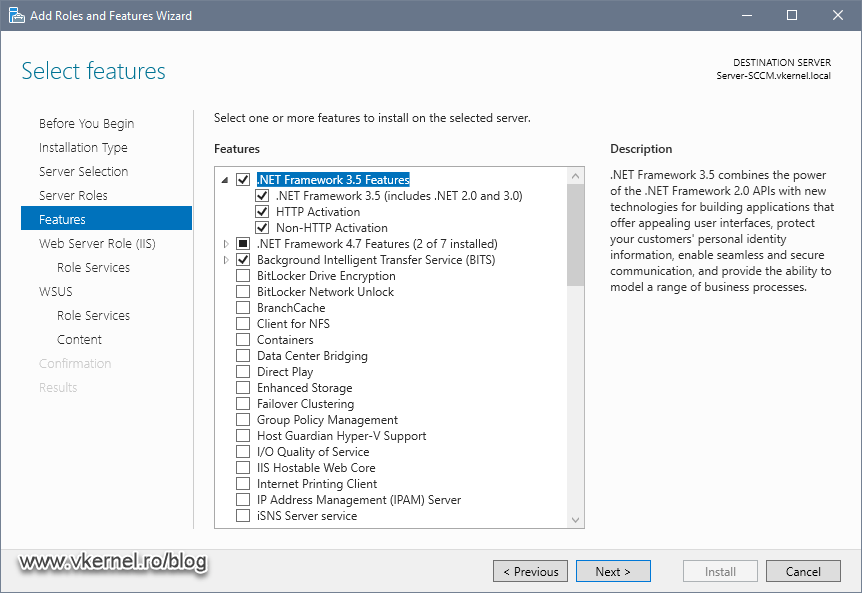
On the next screen of the wizard select .NET Framework 3.5 Features and all sub-features, Background Intelligent Transfer Service (BITS), Remote Differential Compression and click Next.
In the IIS Role Services page, scroll down at the bottom, expand Management Tools > IIS 6 Management Compatibility then tick the IIS 6 WMI Compatibility box.

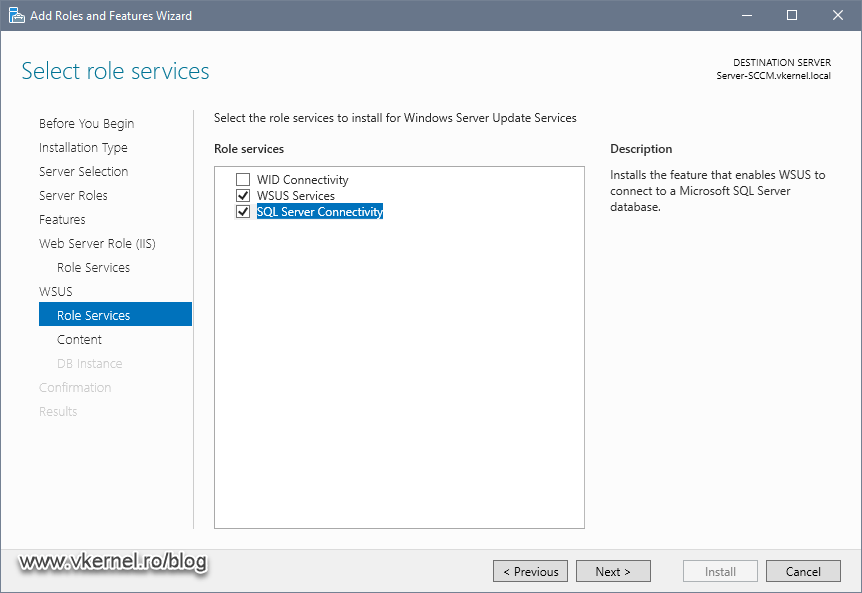
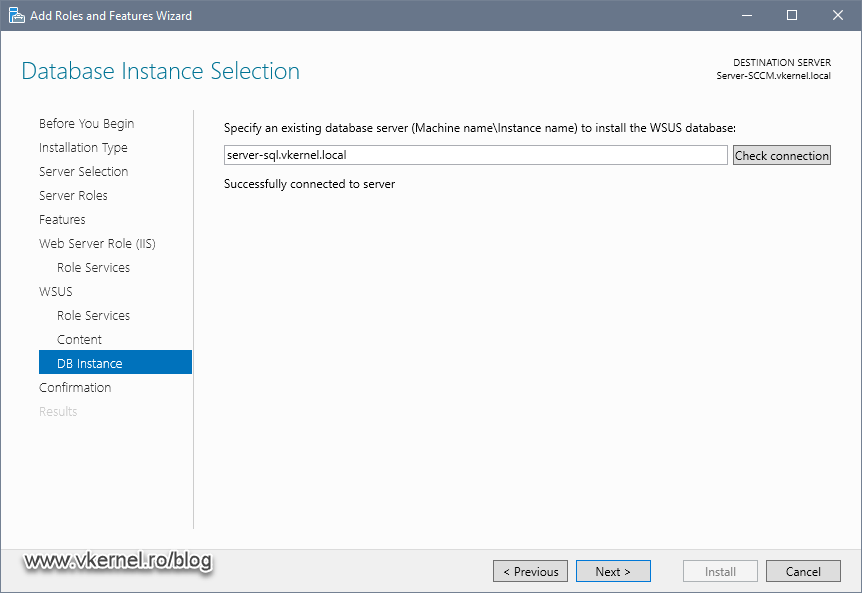
Since we already have a SQL server deployed, we can use it to store our WSUS database. On the WSUS Role services screen select the SQL Server Connectivity option and continue the Add Roles and Features Wizard.
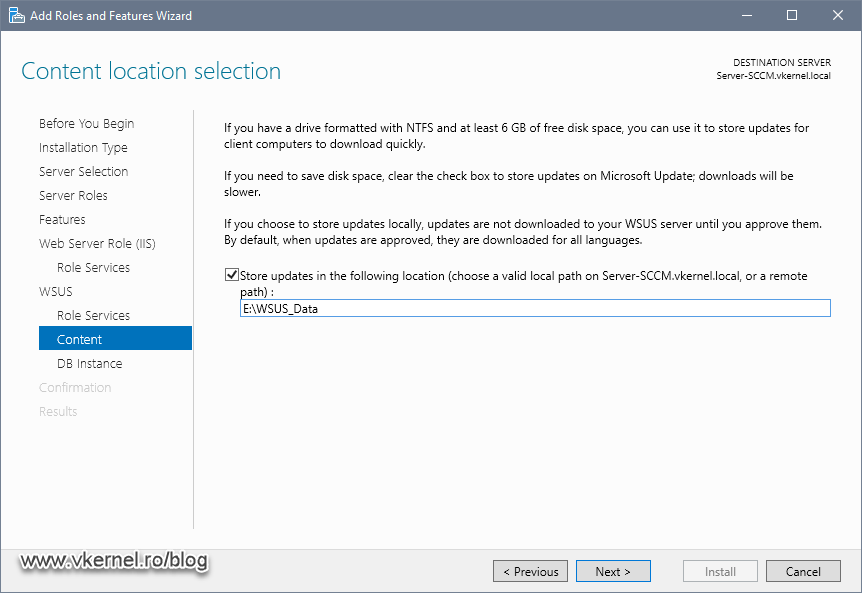
Here we tell WSUS where to store the updates. This is a bit misleading in this case since updates will be stored on the so called SCCM Distribution Point, but we need to set this up so we can continue the wizard.
On the next screen of the wizard we configure the SQL server for our WSUS instance.
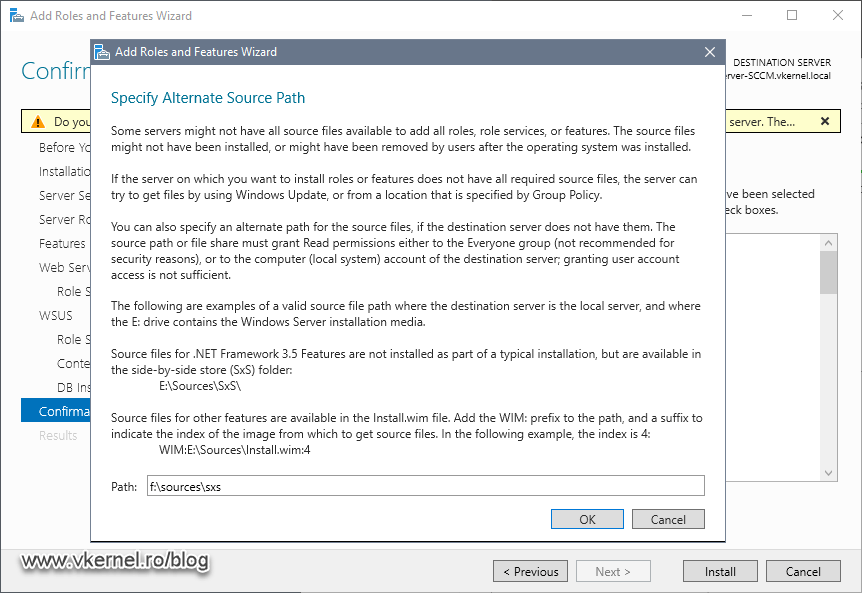
One other thing that I like to do is to provide a custom path for the .NET Framework 3.5 source files. It is way faster than letting the wizard connect to Microsoft’s update site.
Mount the Windows Server 2019 ISO then click Specify and alternate source path link from the bottom of the wizard.
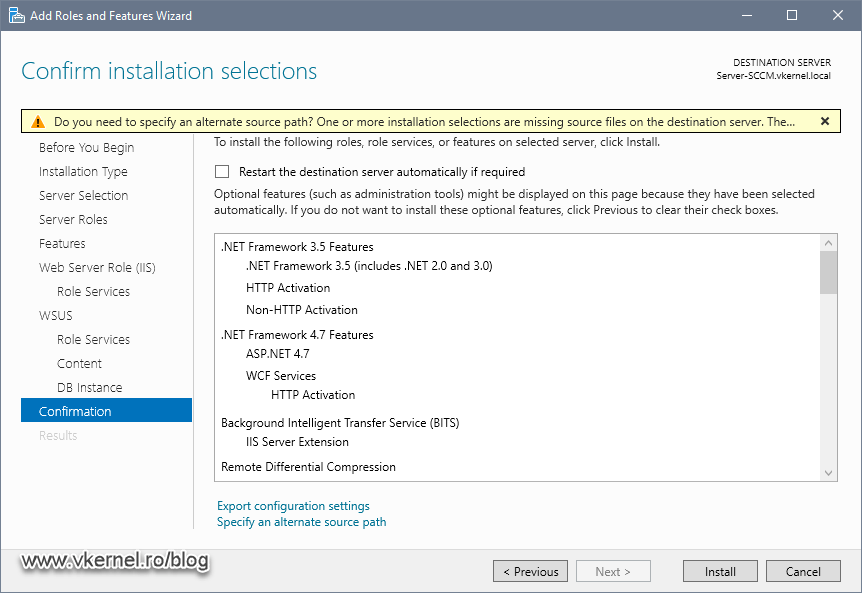
In the Path box type <Windows Server installation media> > sources > sxs and click OK.
Click the Install button and let the wizard install all the features and roles we selected. After a few minutes everything should be set up. One important thing is NOT to launch the post-installations tasks of WSUS. The role is configure from SCCM after we finish it’s installation, so just hit Close here.

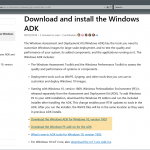
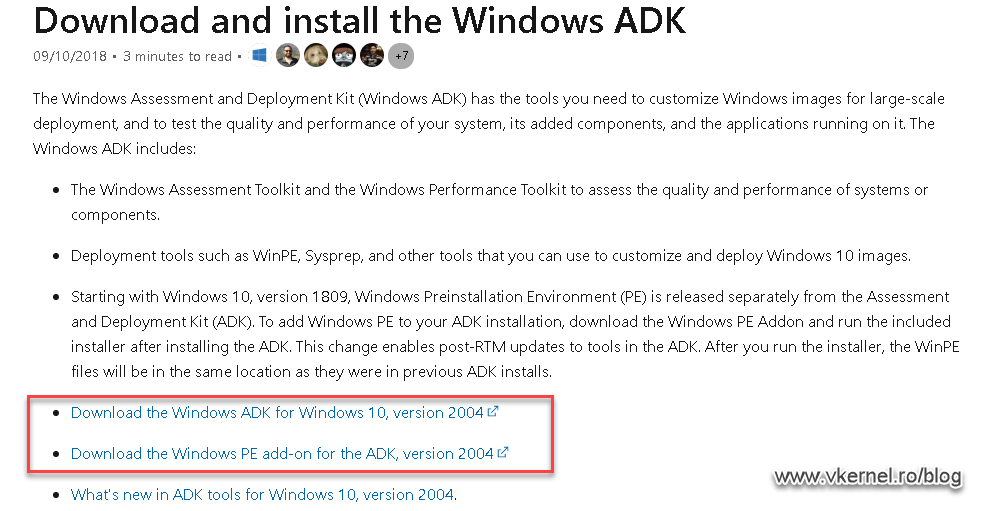
1.7 Installing Windows ADK
Another SCCM prerequisite that we need to take care of, is the Windows Assessment and Deployment Kit (Windows ADK) which is mandatory as we can see in the prerequisites checker tool. Go and download the latest version of ADK from Microsoft’s website but make sure you download both components of ADK since the Windows PE add-on and ADK were separated starting with version 1809.
Once both packages were downloaded, let’s run the installation of ADK first by executing adksetup.exe. Right from the start we are given the option to change the installation path of the software, but most of the times the default one will work just fine. Click Next.
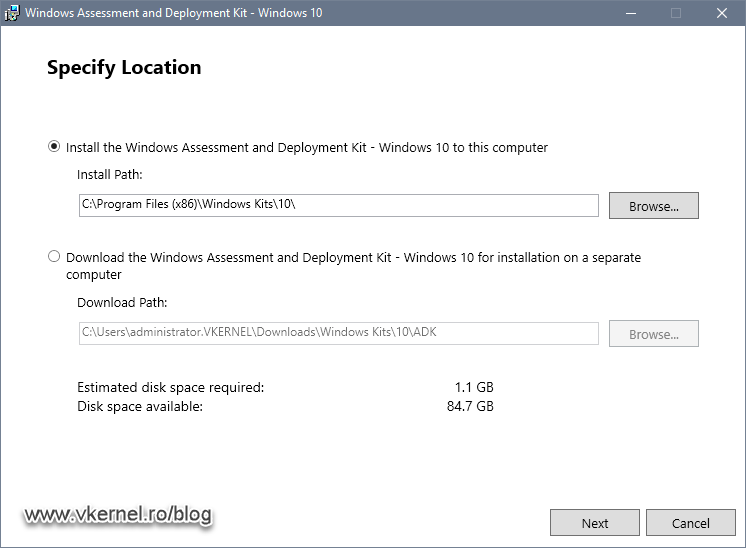
In the Select the features you want to install screen all we need are the Deployment Tools and the User State Migration Tool options. Select just the two then hit Install.

Now let’s go to our Windows PE ADK add-on and run the adkwinpesetup.exe to start the installation wizard. The installer automatically find where our ADK software was installed and it will set itself up to the same installation path with no possibility to change it. Click Next.

In the features screen, all we have is one option. Click the Install button to begin the ADK Windows PE add-on.

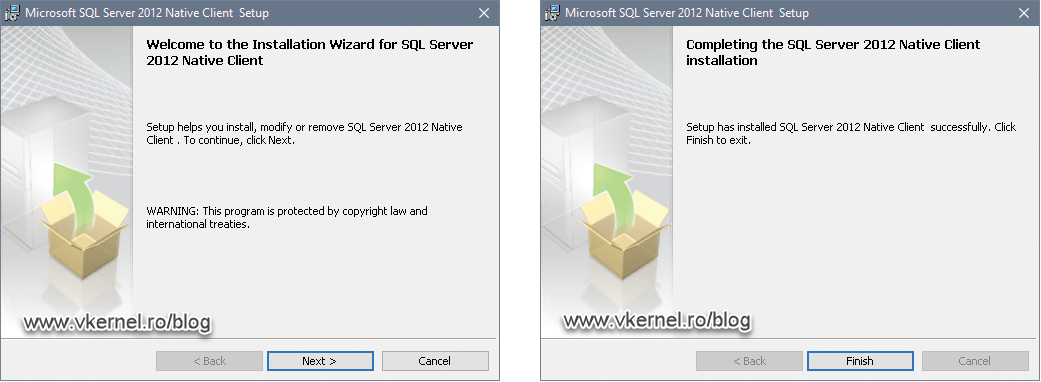
1.8 Installing the SQL Native client
This requirement it’s an easy and fast one. All we need to do, is go and download the SQL Native client installer and run it.
1.9 Re-run the Prerequisite Check
Now let’s take a look and see if we have any more warnings or errors in the prerequisite checker. If we click click the Run Check button again, after a few minutes we should have a green check mark and a message saying that we have passed all the prerequisites. If you have some warning or errors, I recommend you treat them first then continue with the deployment.

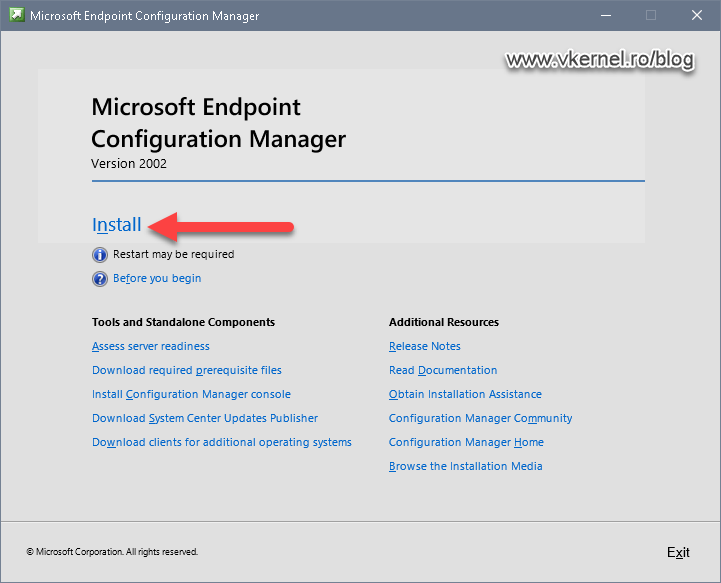
2. Installing System Center Configuration Manager
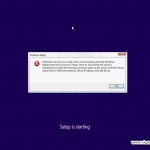
After a long road of installing and configuring the prerequisites for our SCCM instance, we are finally at the point of deploying it. So go and download the installation media if you don’t have it already, mount the ISO then launch the installer. Once we launch the installer, all we have to do is click the Install button to open the SCCM installation wizard.
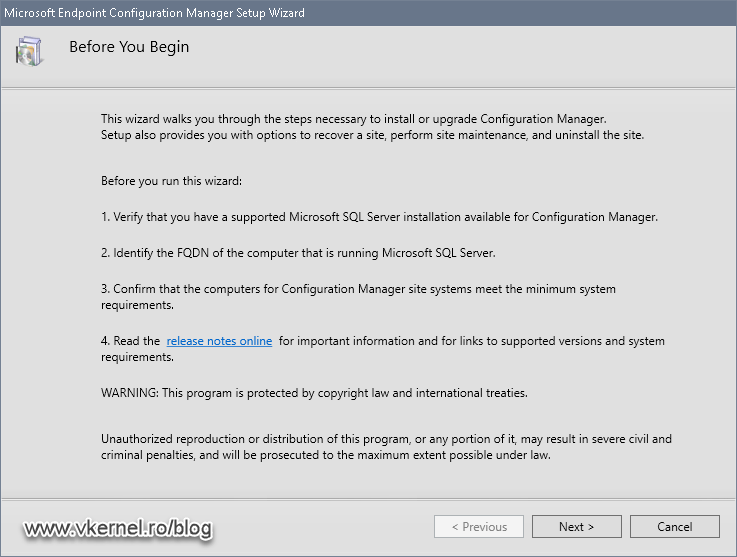
On the Before You Begin page just click the Next button since all the prerequisites are already set up.
In the next wizard screen we have a few options to choose from on how we want to install SCCM, but since we are deploying just a single primary site, we will go with the default option Install a Configuration Manager primary site. Since I am not a fan of a typical installation, and because we have a dedicated SQL Server for this SCCM instance, we are NOT going to tick the box Use typical installation options for a stand-alone primary site. The second radio button Install a Configuration Manager central administration site, it’s there in case we have a large environment with multiple primary sites. This way we centralize them with an administration site. Click Next to continue the wizard.

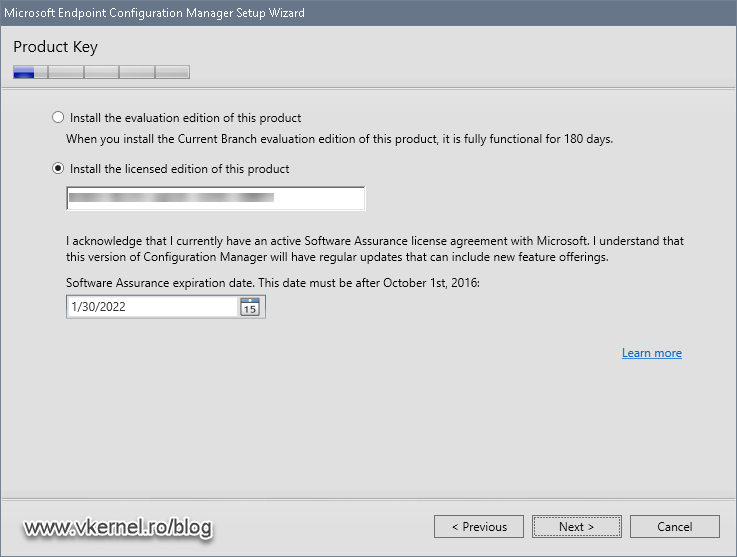
Type the product key and set the expiration of your software assurance then hit Next. If you want to evaluate the product just select the first radio button Install the evaluation edition of this product.
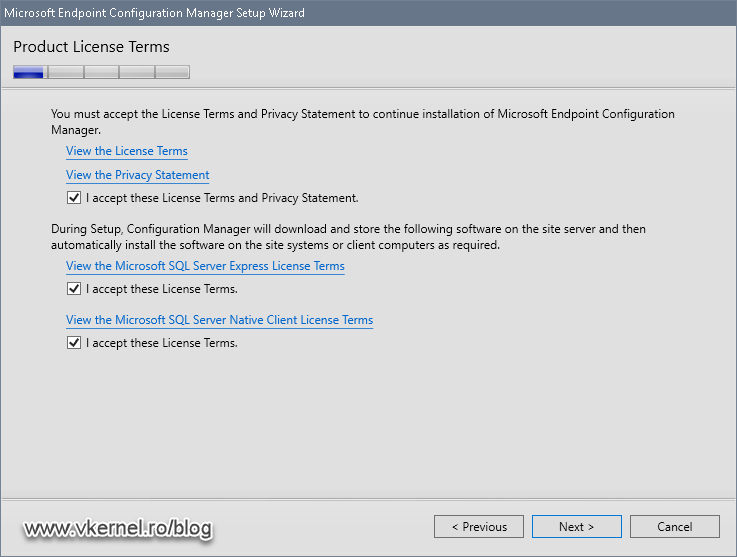
Accept the license agreements and continue the wizard.
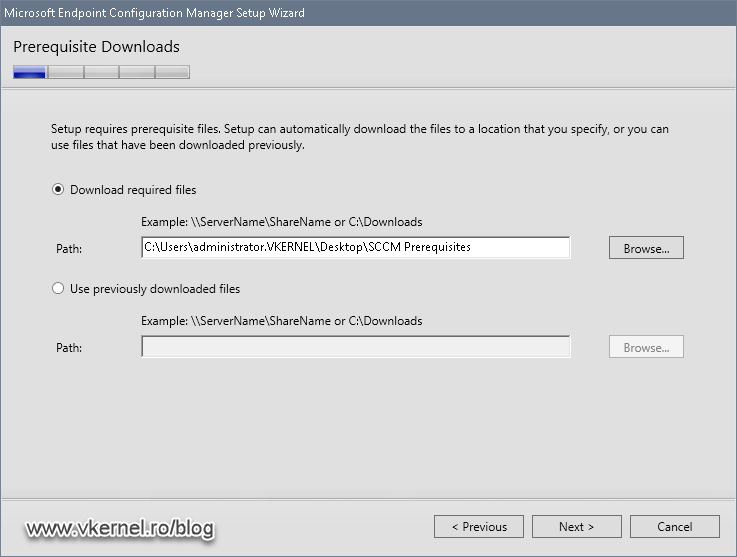
This is where the wizard needs to download some prerequisite files from Microsoft that are needed for the installation, but we also have the choice to use previously downloaded files. Since this is our first deployment, we don’t have those files and we need to download them, so select the option Download required files and then, by using the Browse button, provide a directory to store the files.
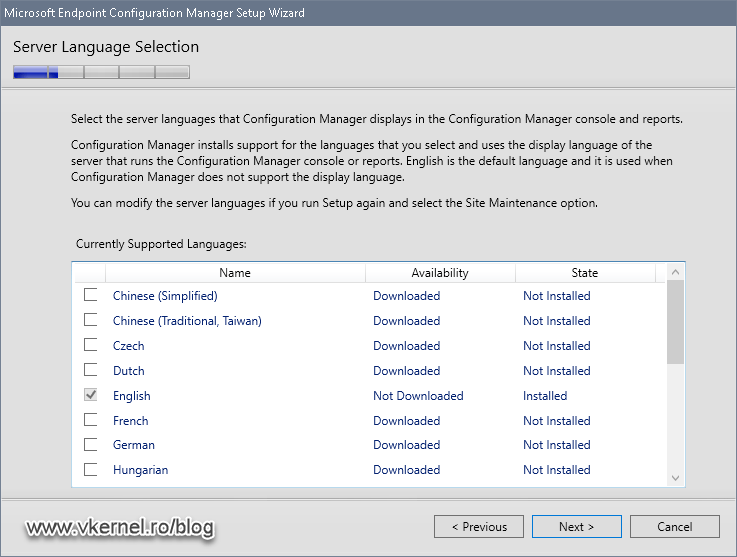
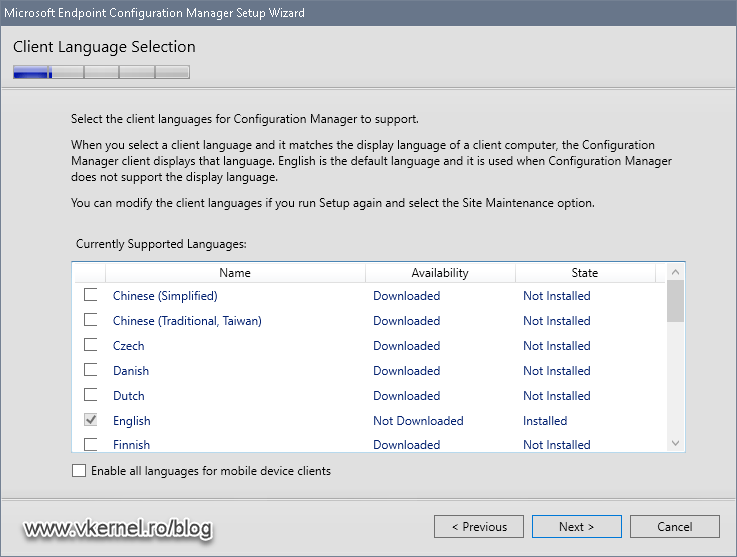
In the Server Language Selection page we have the option to install additional languages for our SCCM server which will change the language on the console and reports.
This wizard screen is similar with the previous one, but this time the installed language(s) will apply to the SCCM clients/agents. Make your selection then click Next.
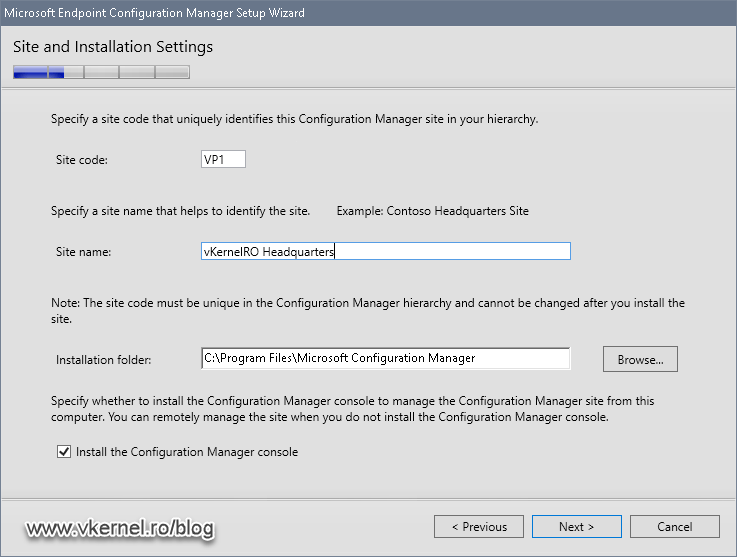
Here we have an important box, and that’s the side code box which uniquely identifies this configuration manager site in the hierarchy. That’s true, we don’t have much of a hierarchy right now with only one server, but the site code still needs to be present and unique. The side code can have only letters from A to Z and numbers from 0 (zero) to 9 and cannot use the following names since they are reserved for Configuration Manager: AUX, CON, NUL, PRN, SMS, ENV. Make sure you give it a thought about what site code you want to type in because it cannot be changed after the installation is done. Type a three letter/number code then move to the Site name box and give this site a name -which will be displayed in the SCCM console-.
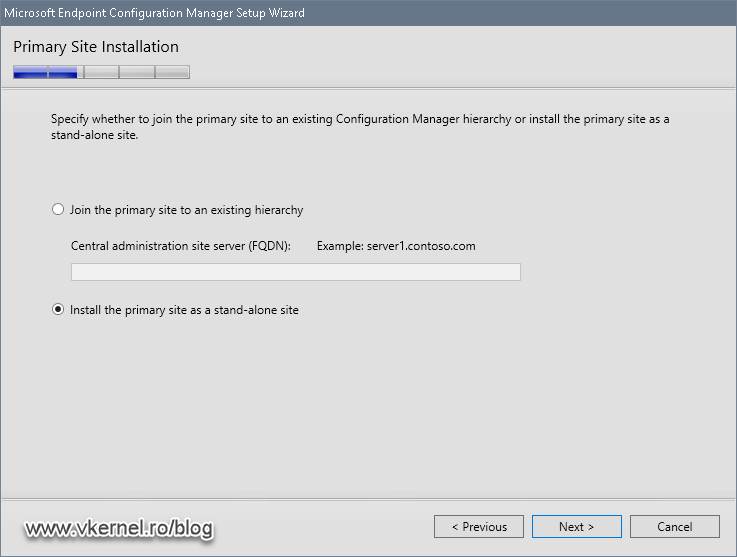
Since this is our first site, and we also don’t have an administration site to join it to, we need to choose the second option Install the primary site as a stand-alone site then continue the wizard. Click Yes on the warring that pops-up.
We are now given the option to type in our remote SQL server name, instance and SCCM database. Type your values then click Next.
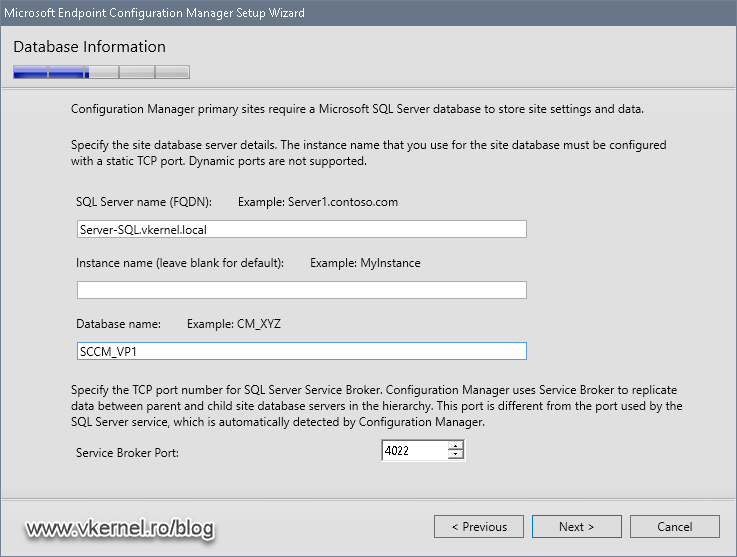
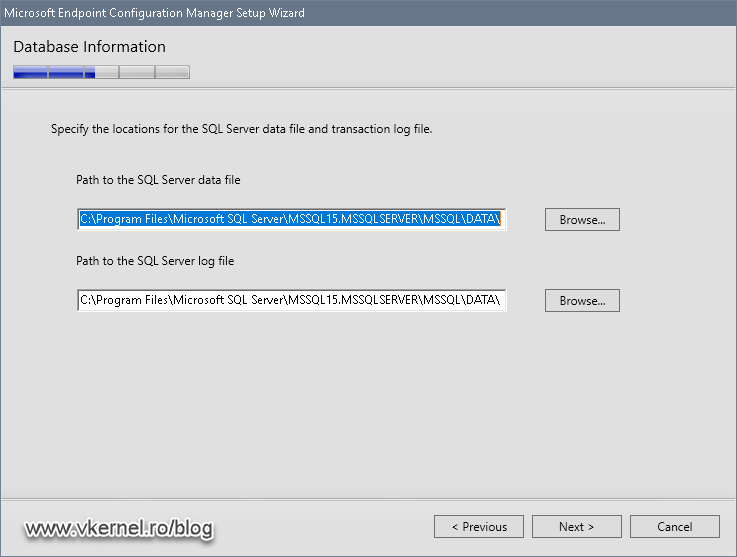
In the Database information screen we have the option to change the default SCCM database and log files location on the remote SQL server. If you have a dedicated volume for your databases on the SQL server, type the new path here.
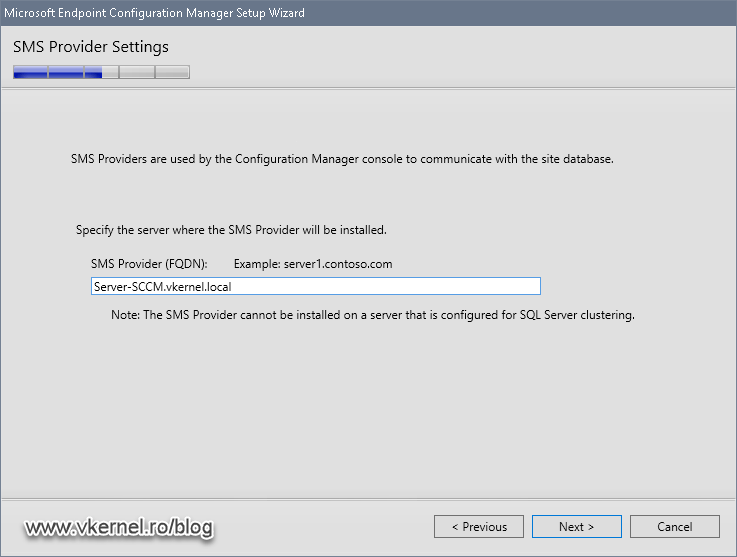
All we have to do here is click Next since we want the SMS provider to be installed on the SCCM server.
Because we want our clients/agents to be able to communicate with our primary site server, we need to choose the second option here Configure the communication method on each site site role and click Next. Going with HTTPS it’s a little bit complicated and involves deploying certificates to clients and changing some configurations in the SCCM site server(s) that are not always friendly. I will threat this subject in a future article of these SCCM series.

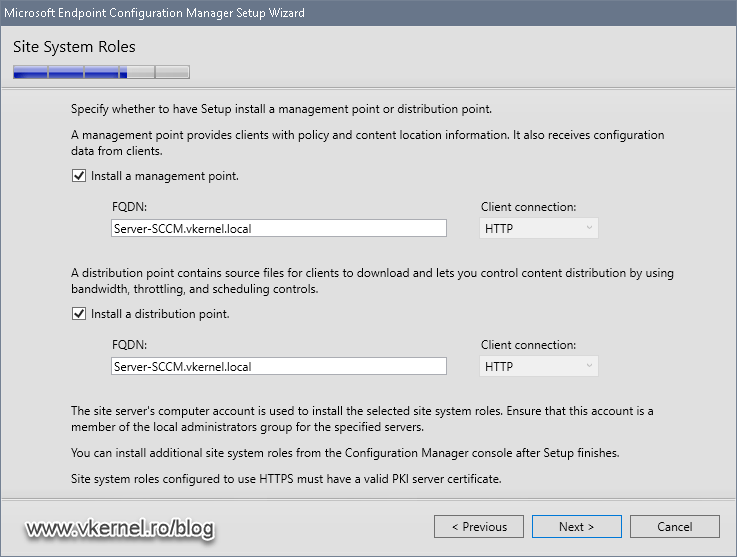
In the Site System Roles screen we have the options to install the management and distribution points on this server or on a different one. Since we want to start small and grow as our infrastructure grows, we are going to install these two site roles on this server. These can be moved later on to a different site server if needed.
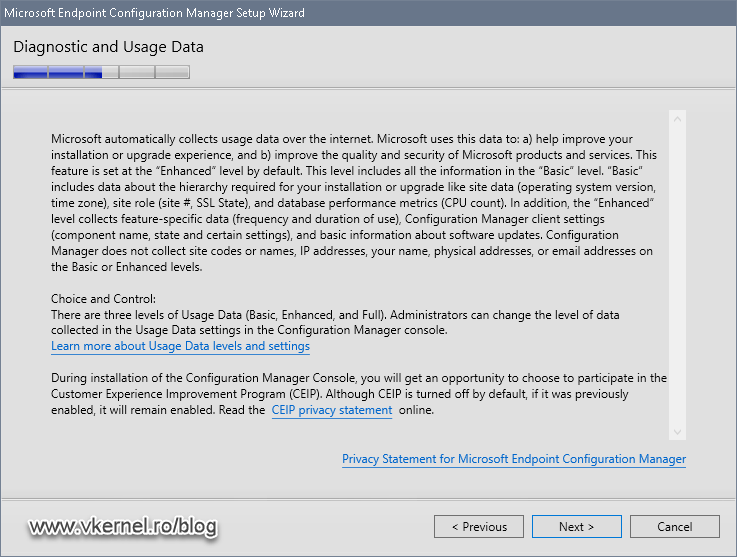
In this wizard screen we have no option to configure so click Next to continue.
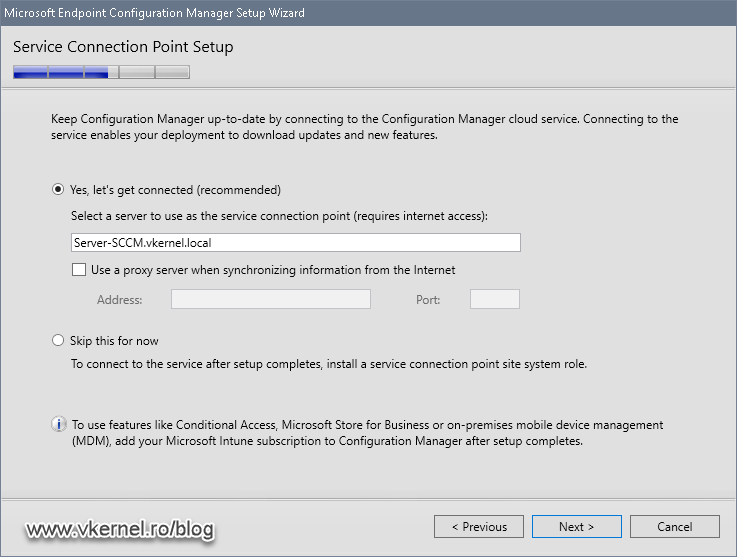
In order to keep SCCM updated with the latest builds and features, we need to connect to the Microsoft cloud. We can do this here in the wizard or later on after the installation completes. For the sake of this example I will just leave the default option so the wizard can configure the connection.
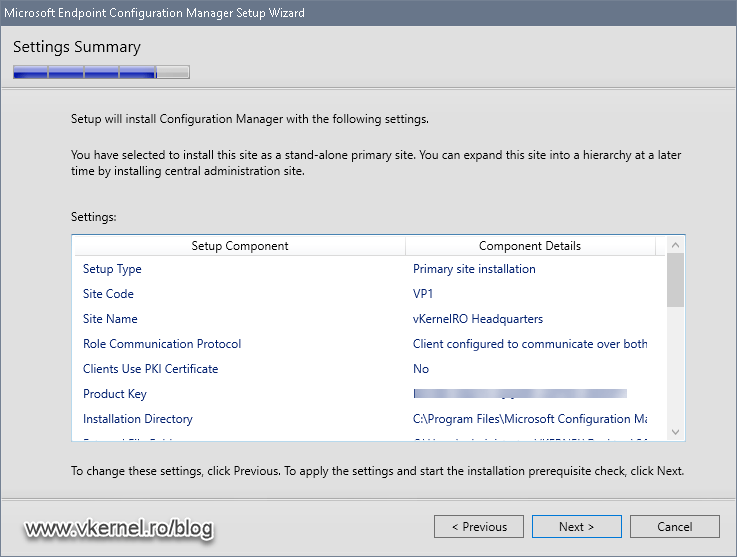
And here is a summary of all our configuration trough the wizard. Click Next and let the wizard have another prerequisite check.
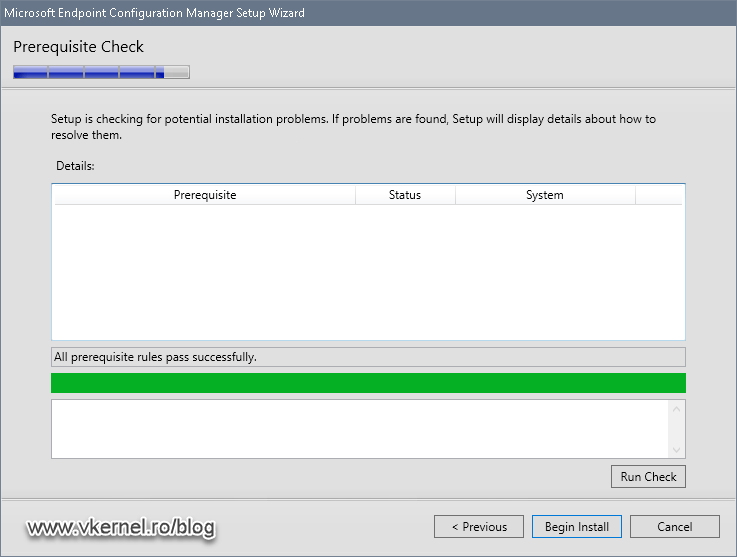
Since we already installed and configured all of the prerequisites for this site system installation, we should have an empty list with no errors or warnings. If that’s not the case, please review and fix the errors/warnings before continuing. You can also ask for help in the comments area.
Click the Begin Install button to start the SCCM installation.
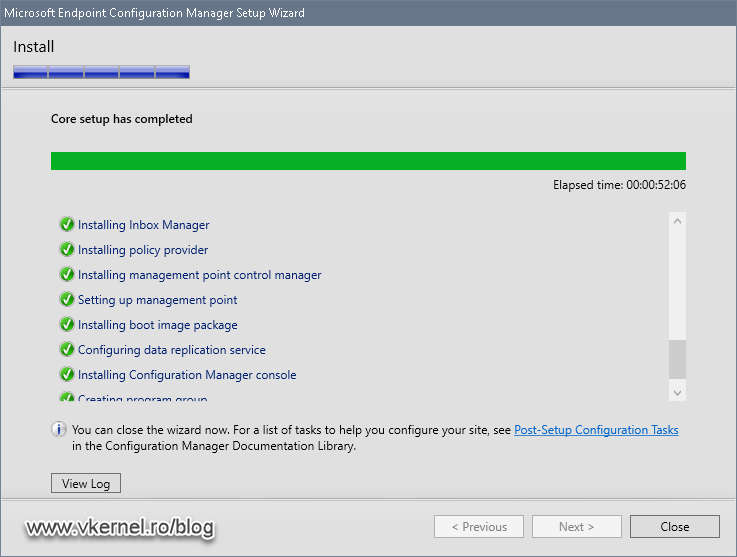
Once the installation starts, the wizard will show all the steps that is doing. We also have a log view button just in case we need more details about the deployment.
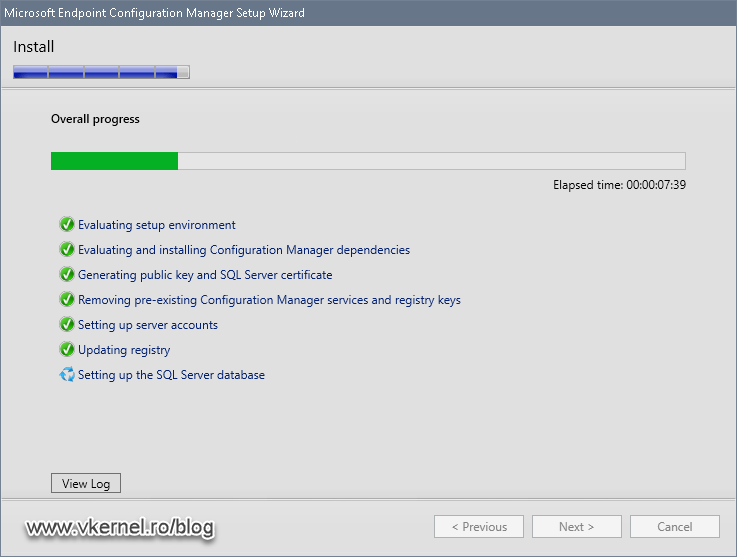
Depending on the system, the installation can take anywhere between 40 and 90 minutes and in the end we should have a nice success message. If everything is green, the installation was a success.
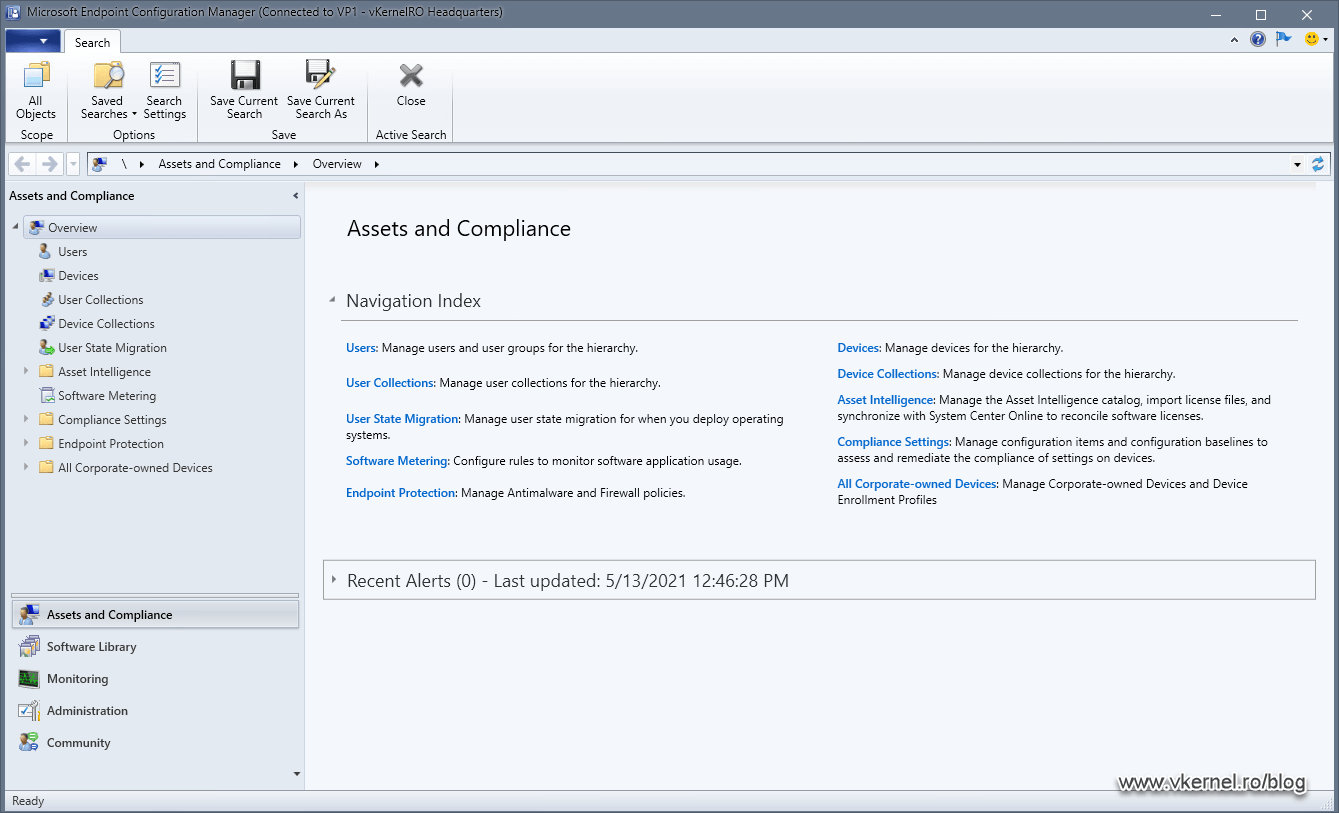
And from the Start menu we can open the console and view our first SCCM Primary site system.
Summary
In this article we have successfully installed our first SCCM Primary site which was not that easy if you are just starting to learn the product. Beside the multitude of software prerequisites we also had to do a lot of configurations. The thing that helps with all of this is the prerequisite checker, which I encourage you to use. Let me know in the comments area how your installation worked.
Want content like this delivered right to your
email inbox?
More similar articles
 Creating a USB offline MDT Deployment Media
- Installing and Configuring MDT with Windows 10 ADK
- Configuring DHCP and Firewalls for PXE booting with WDS
- Customizing the Default Local User Profile before imaging
- Integrating DaRT (8.x) with MDT (2013) and enable DaRT Remote Control
- Creating an Offline MDT Deployment Media