Install and Configure SQL Server Reporting Services (SSRS)
Starting with SQL Server 2017, Microsoft changed how the SQL Server Reporting Services (SSRS) get’s installed. Before this version, SSRS was packed with the SQL installation media, but now we have to download it and install it separately. If this is a good option, I don’t know, I’ll leave it up to you to decide since the opinions are different for everyone.
As you probably know, we can have SSRS installed on a separate/dedicate server if the developers or software using it consume a lot of resources, or have it installed on the same machine where the SQL Server instance it’s also running. For this article, I am going to use the second option and install SSRS on the SQL Server machine -the configurations are the same for both options-.
For the installation to succeed, we need to have SQL Server already installed and the SQL product key ready. Without the product key, SSRS will be installed in trial mode, and I don’t think it’s something you want in a production environment. For the lab I am going to use the latest SQL version at the time of this writing which is 2019 running on a Windows Server 2019 and joined to an Active Directory domain -optional-. It is recommended to install the same version of SSRS as your SQL Server. If you have a Windows domain in your environment, a domain service account it is also highly recommended.
1. Installing SQL Server Reporting Services (SSRS)
Before we start the installation process, we first need to download the SSRS installation package. Since I have a SQL Server 2019 I am going to user the 2019 version of SSRS.
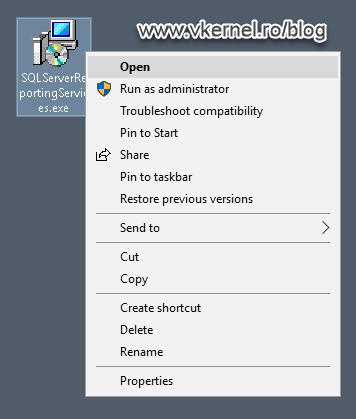
Once we have downloaded the software into our system, just double-click or right-click > Open to launch the installation wizard.
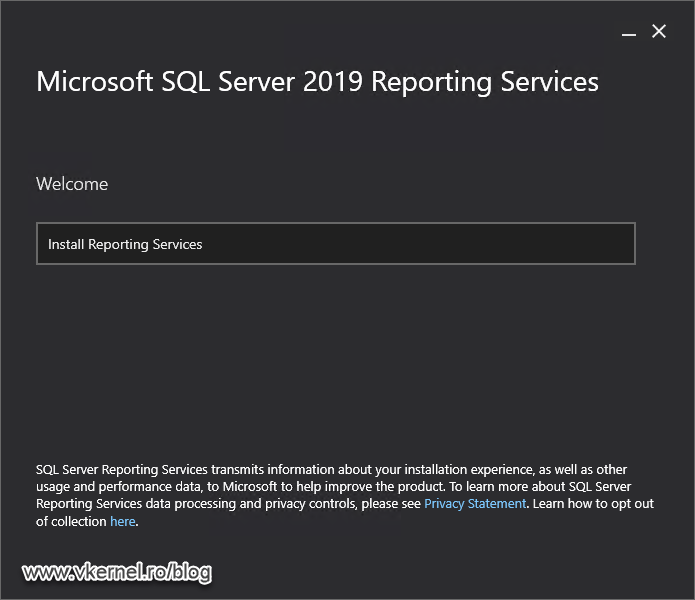
In the first screen of the installation wizard click the Install Reporting Services button.
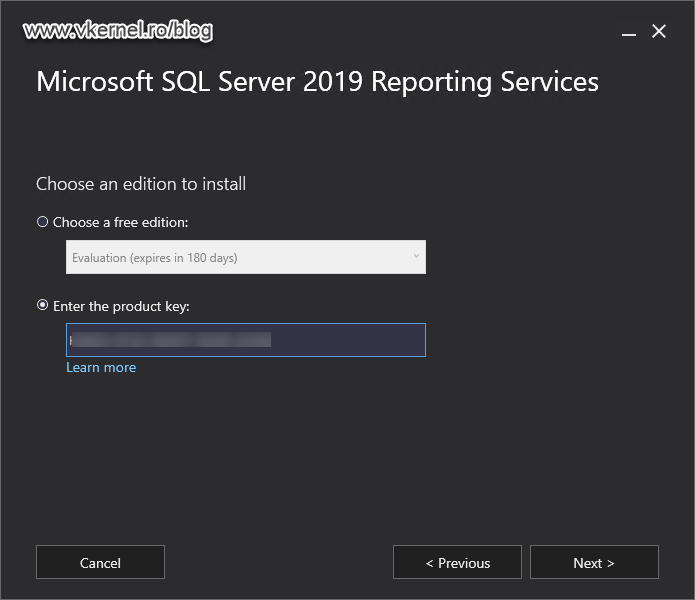
Provide the SQL Server product key then click Next.
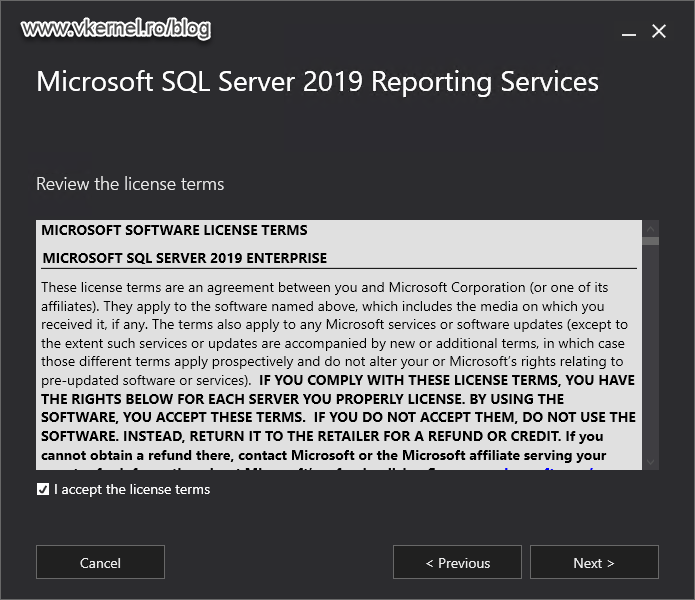
Accept the License Agreement and continue the wizard.
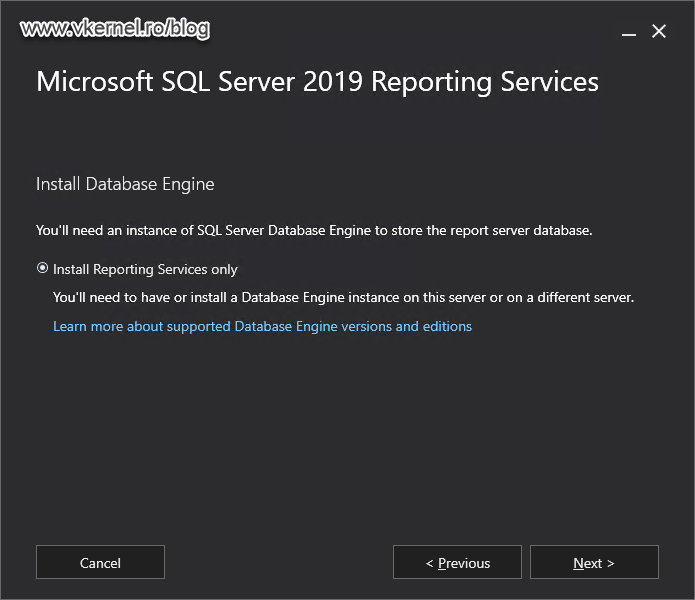
Since we only have once choice here, the only option for us is to click the Next button and move forward with the installation wizard.
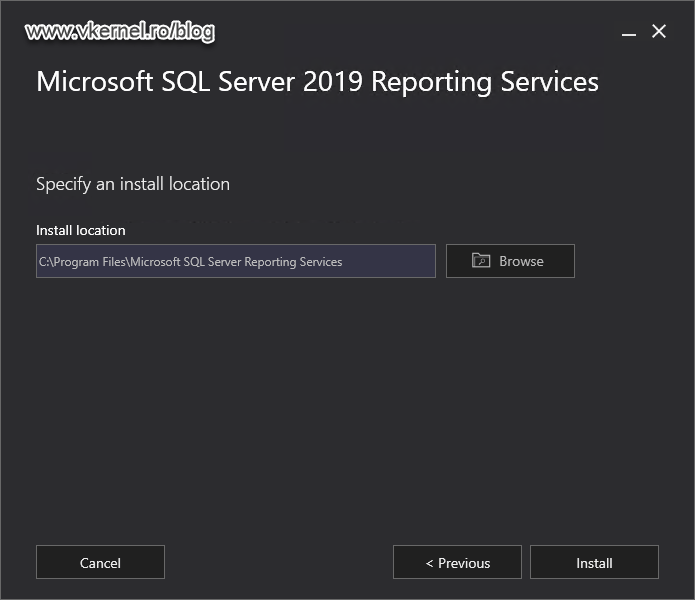
Here we can provide a different installation path for our SSRS instance if the default one does not suits us. When we are done with the configurations, all we need to do is click the Install button to begin the SSRS installation process.
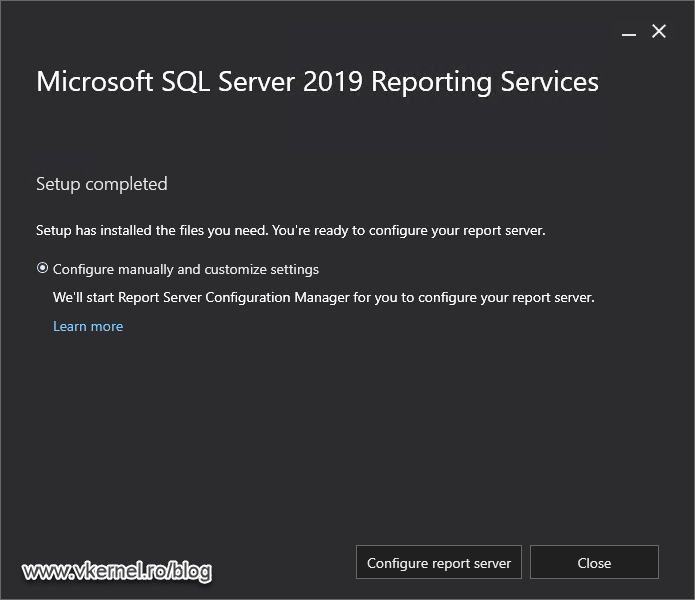
The installation will take a few minutes, and once it is done we get the Setup Completed message on the installation wizard screen. Also in this screen we have the option to open the SSRS Configuration Manager which gives us the possibility to configure our Reporting Services server.
2. Configuring SQL Server Reporting Services
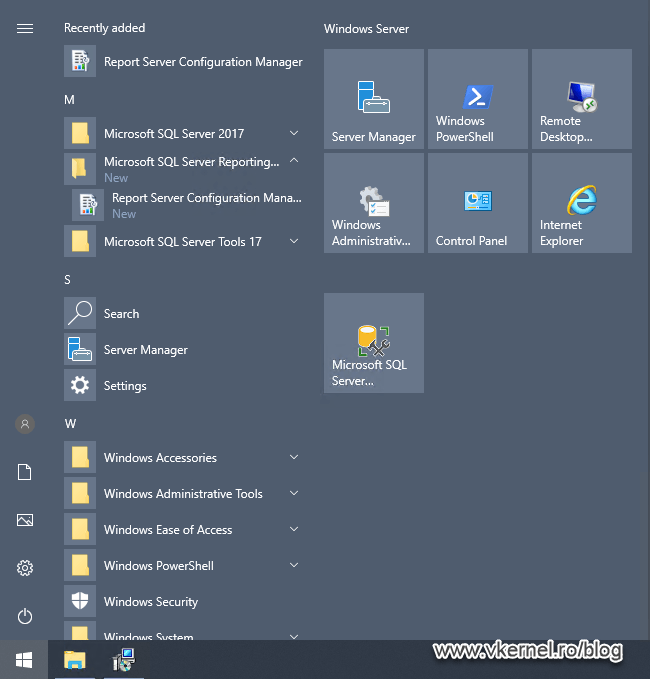
If you clicked the Close button at the end of the SSRS installation wizard, you can launch the Report Server Configuration Manager from the Start menu.
The account used to open the console must be part of the local system Administrators group.
Right after launching the console we are asked to provide and connect to the SSRS instance, so type your server name in the Server Name box then click Connect.

The first option in the navigation menu it’s our SSRS instance and the server name where it runs. If we click on it, we can see the version it runs and we also have the possibility to stop or start the service.
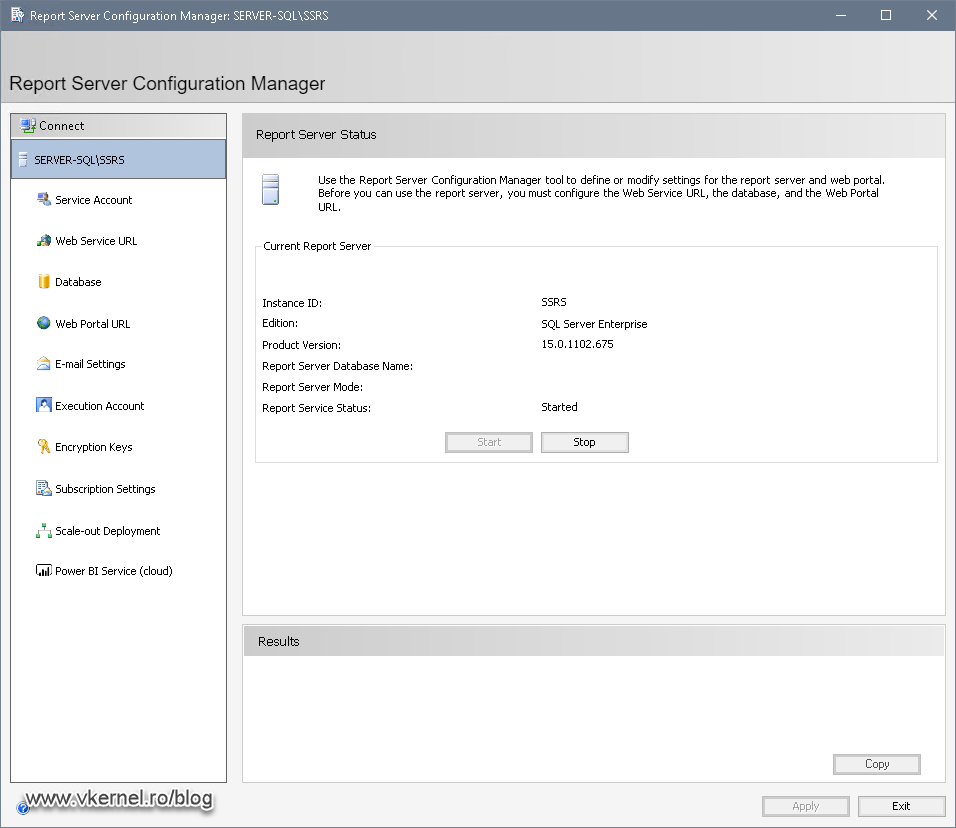
From the Service Account section we can set up the SSRS instance to run under a different service account name than the default one. Since this is a Microsoft environment, a domain service account it is most often seen here.

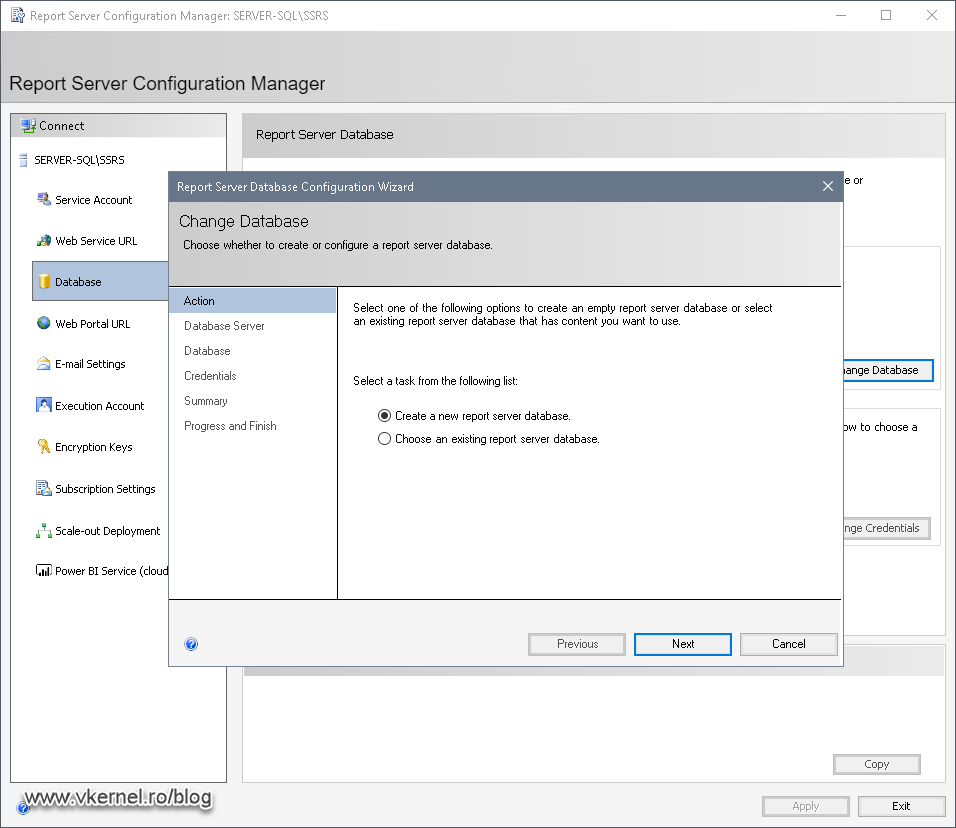
Now we are going to jump one step forward and set up the database, because without it, the Web Service URL and later on the Web Portal URL will not work; so click the Database object, then from the right-hand side Change Database.
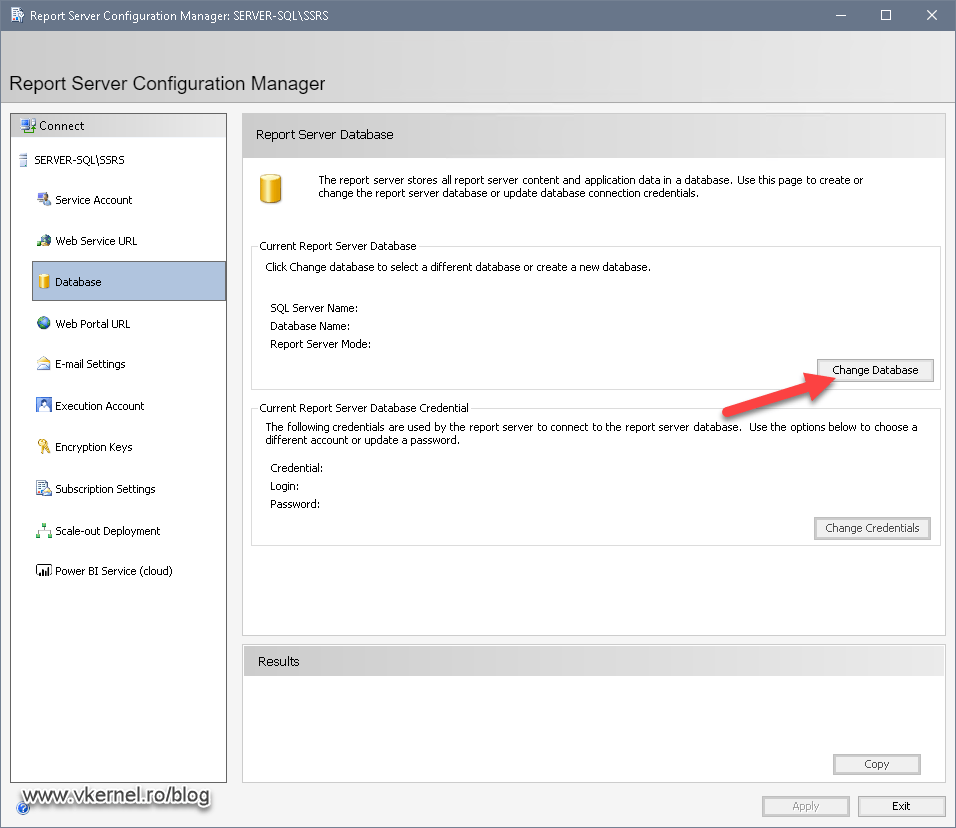
The Report Server Database Configuration Wizard opens, and in the first screen we have two options: to create a database or choose an existing one. Since this is our first instance of SSRS, we have no database, so select the first option, Create a new report server database then Next.
In the second screen of the wizard we need to provide a SQL server host name where the Report Server Database Configuration Wizard will create the SSRS database. We also have the option to provide a different account for the wizard to connect to the SQL Server and create the database. The account we provide here needs to have permissions to create a database on the SQL server, change its permissions and run queries against the database. To simplify it here, I gave my domain service account the sysadmin right on the SQL server, but for secure environments you will want to take this further and use best practices (role based access control).
Once we click the Test Connection button, and the connection succeeds, continue the wizard.

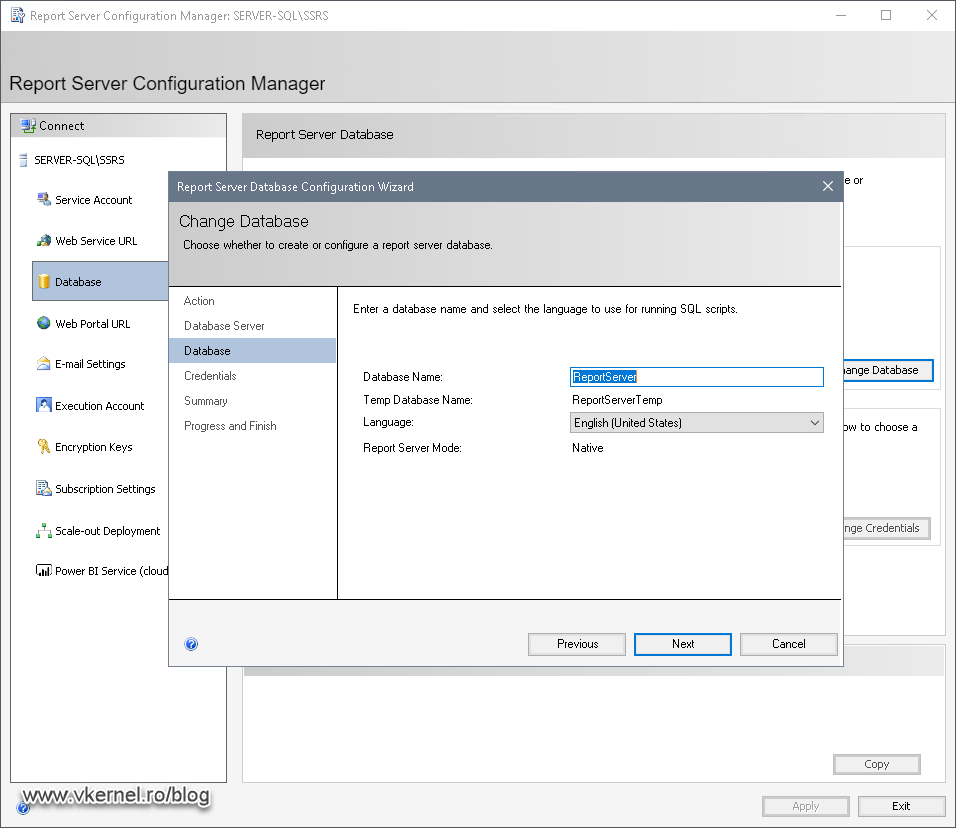
This is where we name our database -if we don’t like the default name- that it will be created on the SQL server. Change its name or leave the default one then click Next.
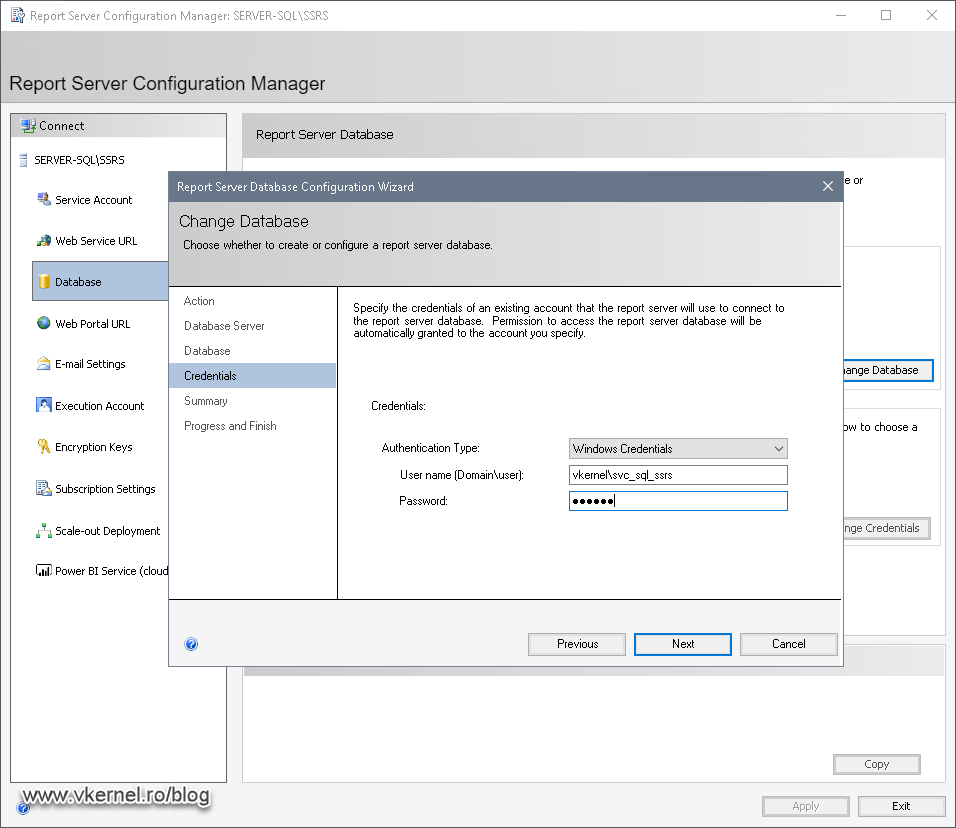
In this screen we provide the account that it is used to connect to the SSRS database, and in my case I’m using the same one running as the SSRS service account. The minimum permissions it needs to have is to log on to the SQL database server.
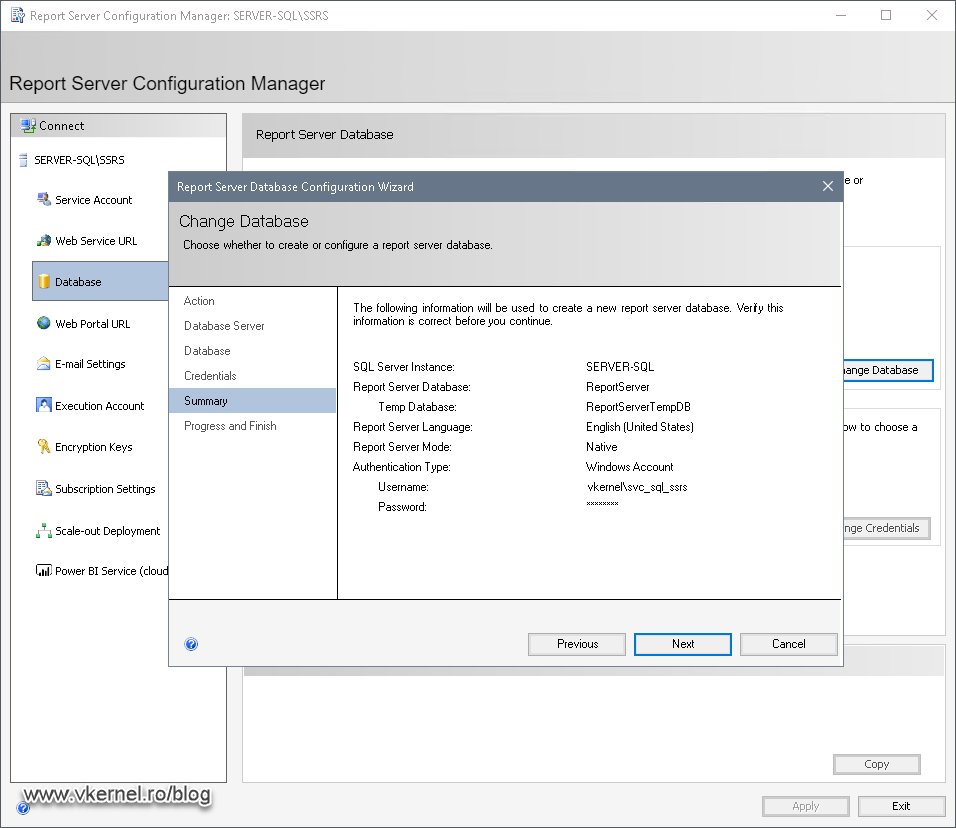
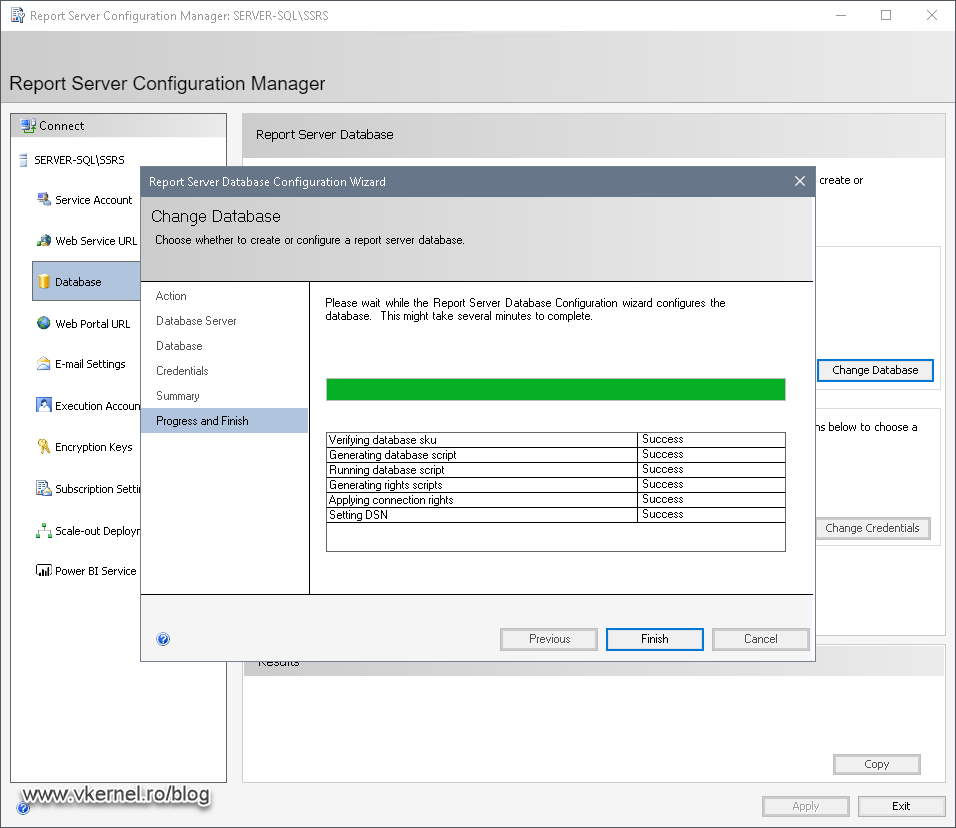
On the Summary page, review the settings then click Next to create the database.
If everything was correctly set up, we should see just Success messages in the Progress and Finish screen. Click Finish to close the wizard.
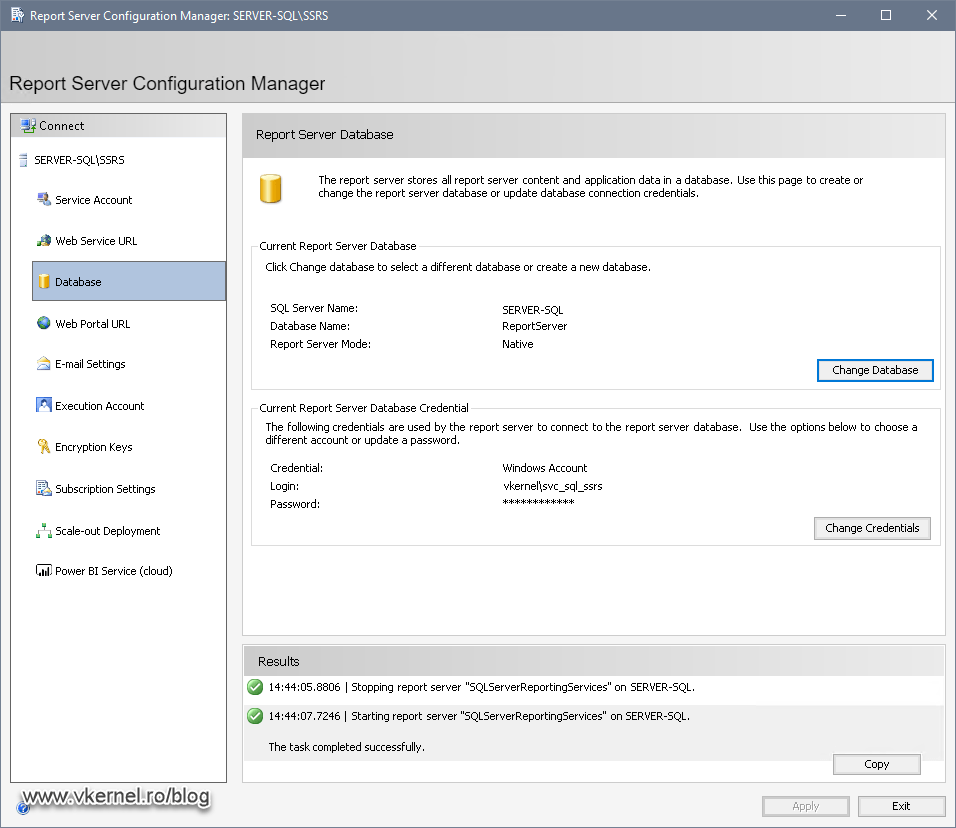
Details about the database and service account name are shown in the Database page. Also, at the bottom of the Report Server Configuration Manager console we can see some of the results which were completed successfully.
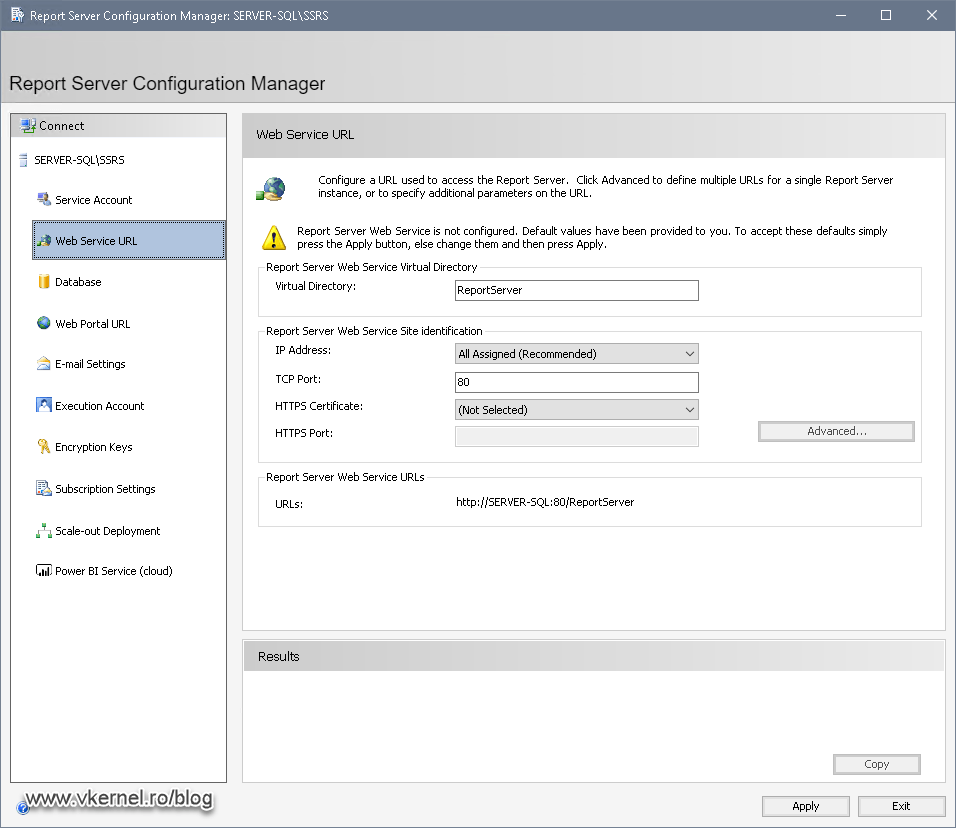
Going on the Web Service URL page, we have the option to configure the virtual directory used for accessing the Report Server. The default options are usually fine and they only need to be changed for those advanced developers or software that require custom virtual directories. We can also change the port on which the virtual directory is listening and it’s bindings from the IP Addresses drop-down box. If we have multiple IP addresses on the system, we can choose on which IP address to listen on.
If we want to make the communication between the client and the Report Server secure, we can choose a certificate from the HTTPS Certificate drop-down box. The certificate needs to be already present in the Certificates Personal Computer Store of the system. Click the Apply button to create the default virtual directory and save the changes.
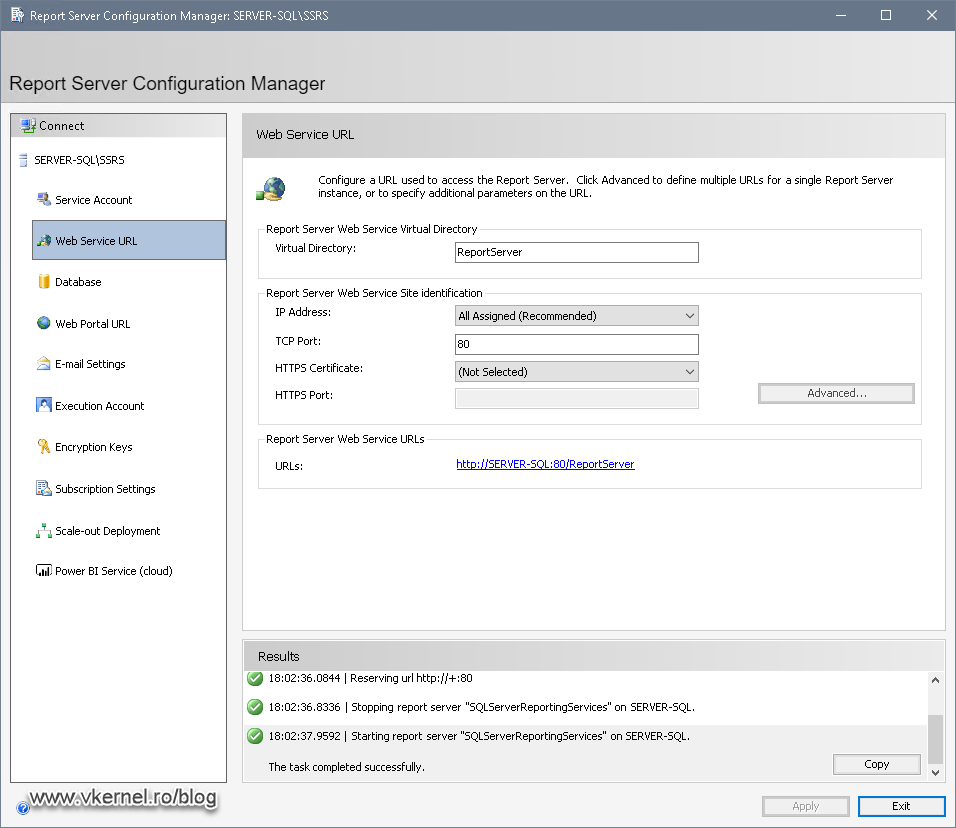
In a few seconds the process will be done and we can notice some events in the bottom section of the Report Server Configuration Manager. Also, in the Report Server Web Service URLs section, we can see that the URL has become active.
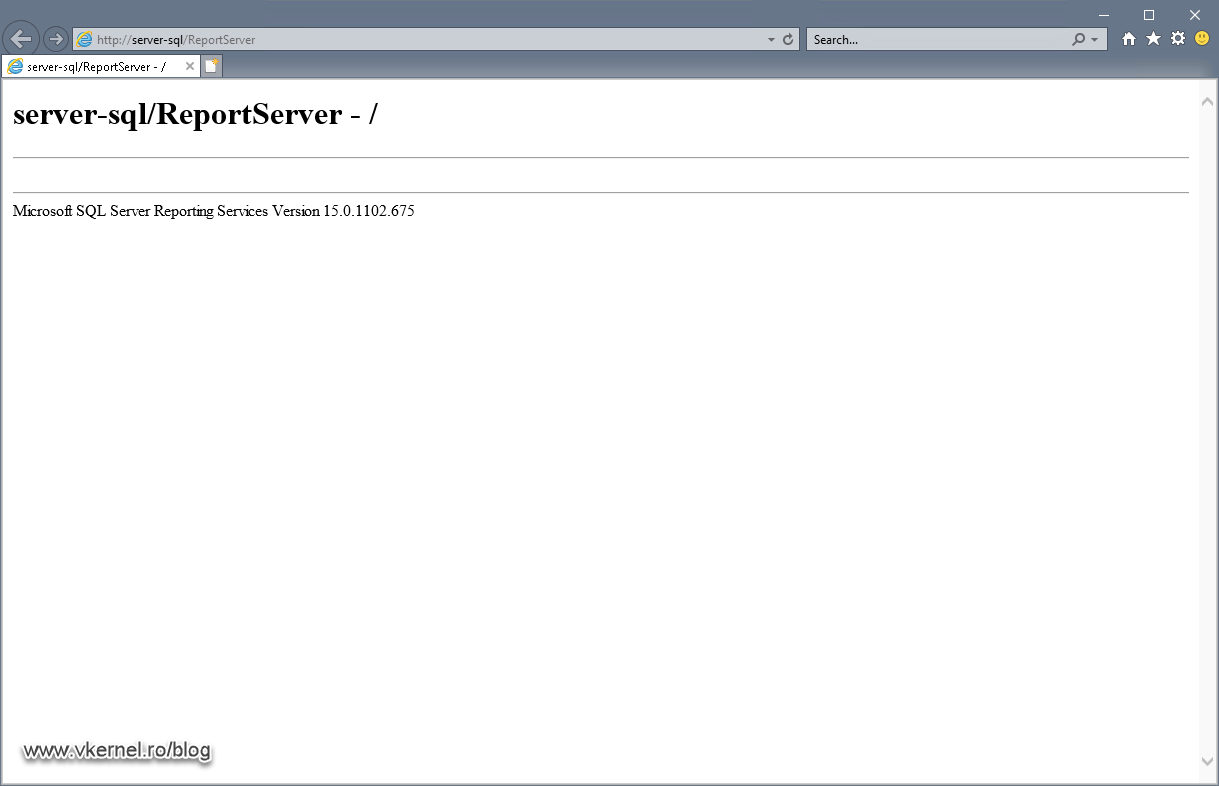
If we click that URL, a page like the one in the bellow image should be displayed.
Moving on the Web Portal URL page, we can configure another virtual directory which gives us the option to see reports in a web browser. All we need to do here is click the Apply button.
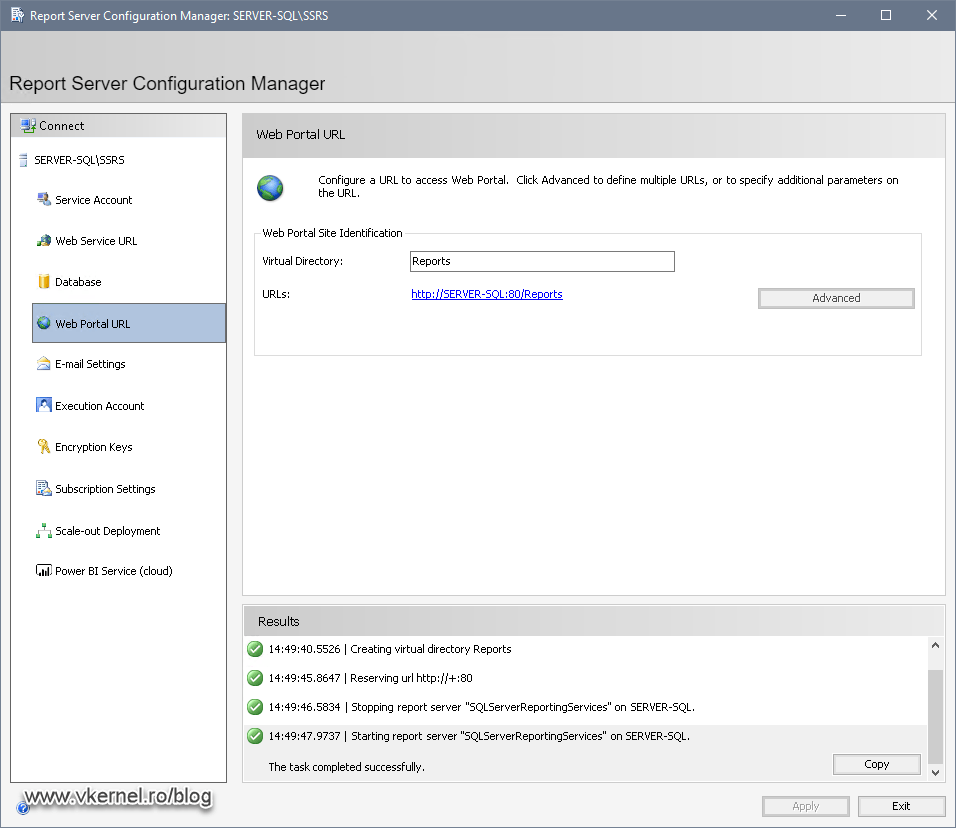
Once the configuration is done, we will get another active link, and if we click on it, a web page will open just like the one in the bellow image.

The last page that we are going to look at today is the E-mail Settings one. As you can probably figure it out, here, we can configure our e-mail server settings in order to get reports directly in our Inbox. Depending on your SMTP server configuration, you might need to authenticate on it in order for emails to flow. Click Apply once you are done in order to save the settings.

Summary
In this article you learned how to install and configure the SQL Server Reporting Services product which is essential for software and developers to create and store reports. Since now days almost every piece of software has the ability to do reporting -SCCM for example-, you can imagine that SQL Server Reporting services it’s a must have in the environment.
Want content like this delivered right to your
email inbox?
More similar articles
 Migrating the WSUS database from WID to SQL Server
- Creating an Active/Pasive SQL Server Failover Cluster
- Move a SQL database from one server to another server
- How to install SQL Server 2012 on Windows Server 2012
- How To Install SQL Server 2008 R2 on Windows Server 2008 R2
- In-place upgrade from VMware ESX 4.1 to ESXi 5