Configuring DHCP and Firewalls for PXE booting with WDS
A few days ago I was searching trough my blog and noticed I have articles about how to install and configure MDT and WDS, but none of those articles are showing how to configure DHCP and the ports necessary for these services to work. Yes, in a simple network where the WDS server, DHCP server, and clients are on the same subnet (broadcast domain), everything works on the fly, most of the times anyway.
Now I know that there are situations where you cannot boot from network and need to use an offline image to deploy your systems, but for this example, let’s imagine that this is not one of those situations. Instead, let’s imagine our DHCP and WDS servers are on a different VLAN than our Windows clients, as it usually is in most of the environments. And here lands the biggest challenge: configuring firewalls to allow the proper traffic to flow from one side to the other. As you can imagine, it will be impossible for me to list every configuration for every firewall out there in the market, but I am confident that with the bellow examples you can make it work on your side too. I will use PfSense, the great open source firewall for this lab to demonstrate what works and what doesn’t work if the proper ports are not opened.
Configuring the DHCP server for WDS
First in the line of duty is the DHCP server. Here we need to add two more scope options to tell clients where our WDS server is located, and by located I mean its IP address, and what is the boot image file name the clients need to download in order to be able to boot from network.
Open your DHCP server console, locate your scope for the clients pool, and drill down to Scope Options. Right-click this folder and choose Configure Options.
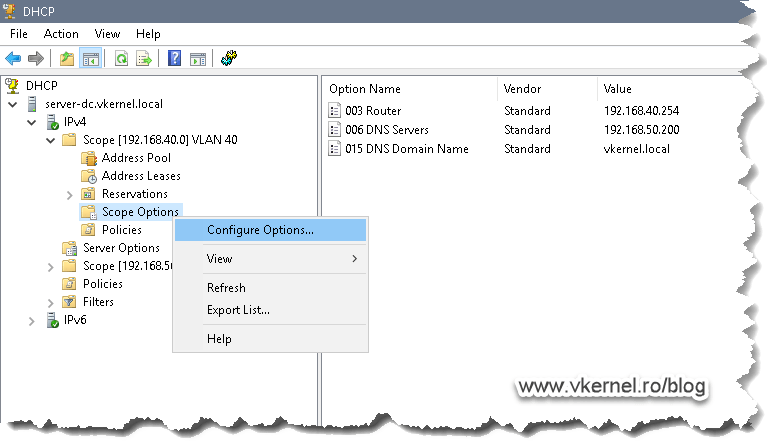
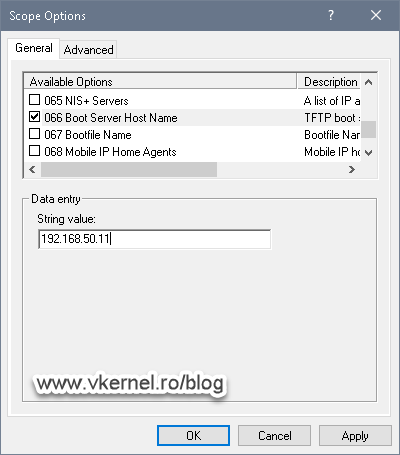
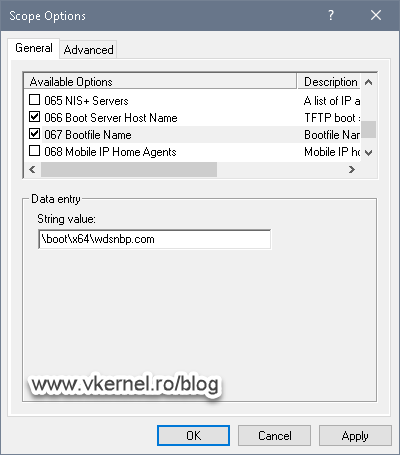
What interest us here, are options 66 and 67. Check the box next to 66 then in the String value box, type the IP address of your WDS server. Once you’re done with this, go and check the box next to option 67. Here, we need to put the path for the boot file name, and we have two options: one for the x86 architecture and the other one for the x64 one. Unfortunately we cannot put both, but since most of the systems are now x64, I will just use this one.
For the x64 architecture type bootx64wdsnbp.com
For the x86 architecture type bootx86wdsnbp.com
Configuring the WDS Server
Since we were talking about DHCP options 66 and 67, we also need to configure them by actually disable these options on our WDS server.
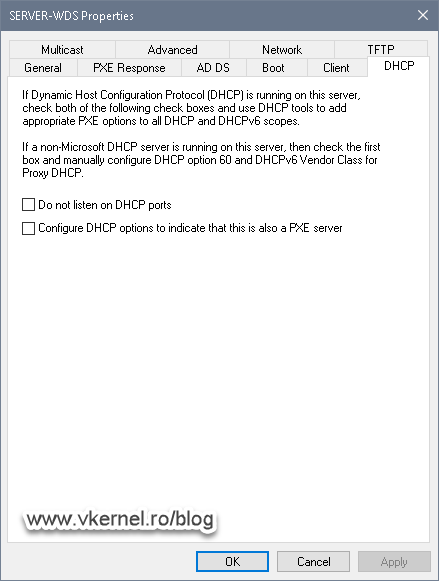
Open the WDS server console, right-click the server name and choose Properties.

On the Properties window, in the DHCP tab, un-check the two boxes then click OK. We need to do this since our DHCP service is not installed and running on our WDS server, it is on a separate box. In small network environments these two boxes are often seen enabled because the DHCP service is running on the same box as the WDS server which will automatically configure options 66 and 67 that I mentioned in the above section.
And that’s it on the DHCP and WDS servers side. Now let’s move on to our firewall configuration, where the real fun begins.
Configuring firewall ports for WDS
Configuring the DHCP Relay agent
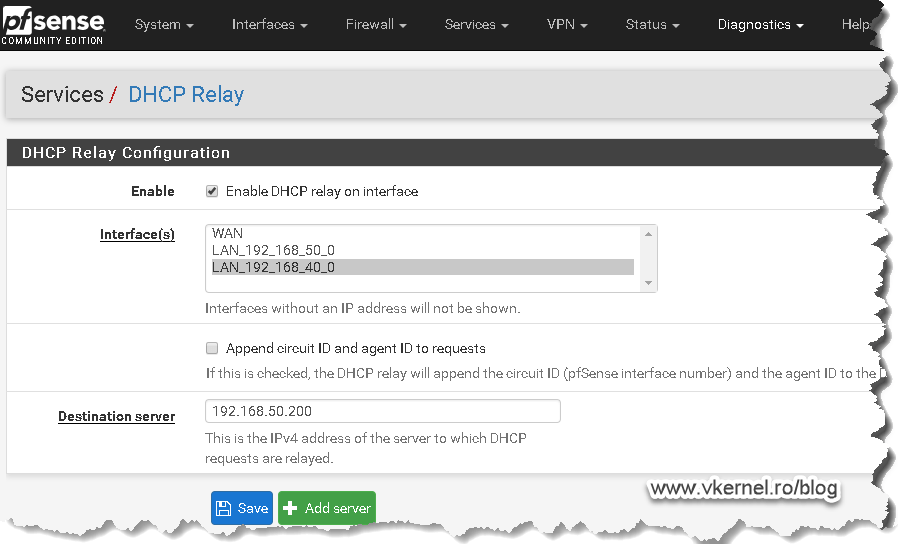
To begin with, we need to configure our firewall to forward DHCP broadcast packets to our DHCP server, also known as DHCP relay or helper address, so clients in the deployment VLAN can get an IP address from our DHCP server. In the bellow image, the clients that I want to deploy are in VLAN 40 and my DHCP server is in VLAN 50. If you are not using PfSense, read the documentation of your firewall vendor on how to configure a DHCP Relay agent on their hardware.
Once the DHCP Relay agent is configured on the firewall, clients should be able to get an IP address from the DHCP server, but still cannot boot…yet.

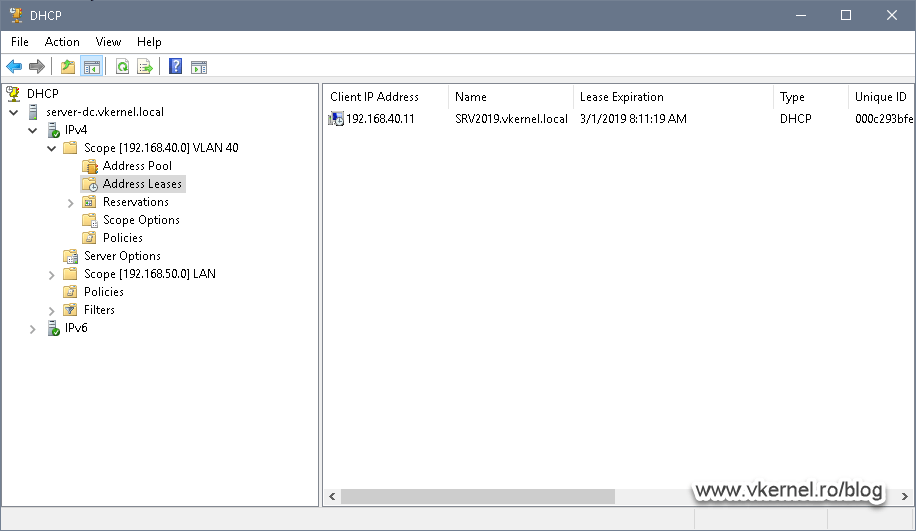
Also, taking a look in the DHCP server’s console, we can see an IP address was leased for the client I just powered on.
Configuring the TFTP port
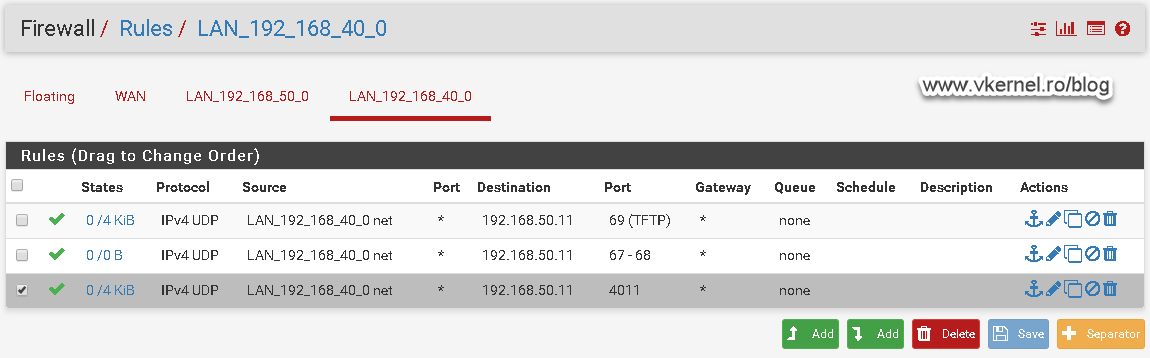
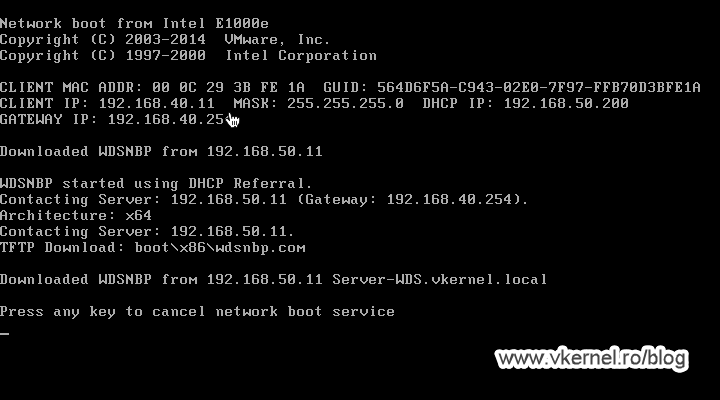
Moving to the firewall rules, we need to allow port 69 on UDP from our clients VLAN to our WDS server so they can download the boot file name.

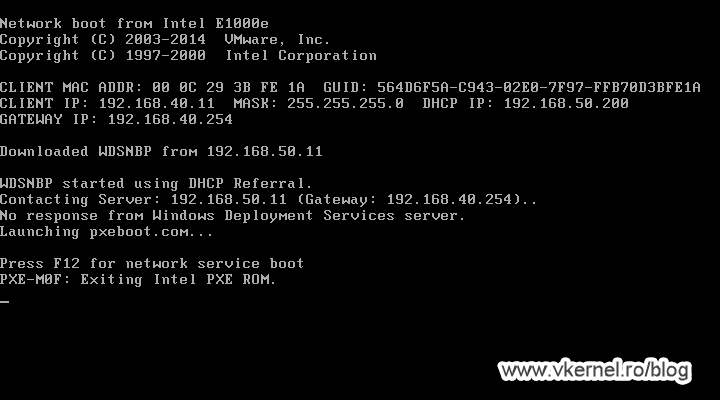
Once traffic is allowed on this port, clients should be able to download the boot file name from the WDS server, and once they do this, they will try to contact the WDS server again to send the WinPE image. As you can notice, the communication will fail with the bellow error message since we have some more work to do on opening firewall ports.
No response from Windows Deployment Services server.
Configuring the Bootstrap Protocol (BOOTP) and DHCP ports
Based on Microsoft’s documentation, we also need to allow port 67 and 68 on UDP from the clients VLAN to the WDS server. If we do not open these two ports we will have problems later on getting the WIM image for the deployment.

Configuring the PXE port
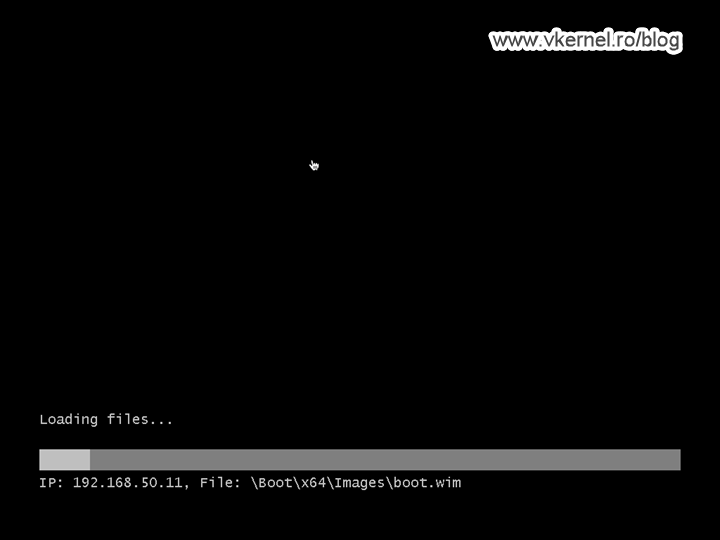
Moving forward, we need to open port 4011 on UDP from the clients VLAN to the WDS server.
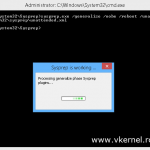
With this port open, clients should be able to load the WinPE environment until the point where another series of communications need to be addressed to the WDS server in order to send the rest of the data.
If that is not happening, the WinPE environment will throw the bellow error message.
WdsClient: An error occurred while communicating with the Windows Deployment Services server. Please check to ensure that the server is operational and that the necessary ports are opened on the server’s firewall.

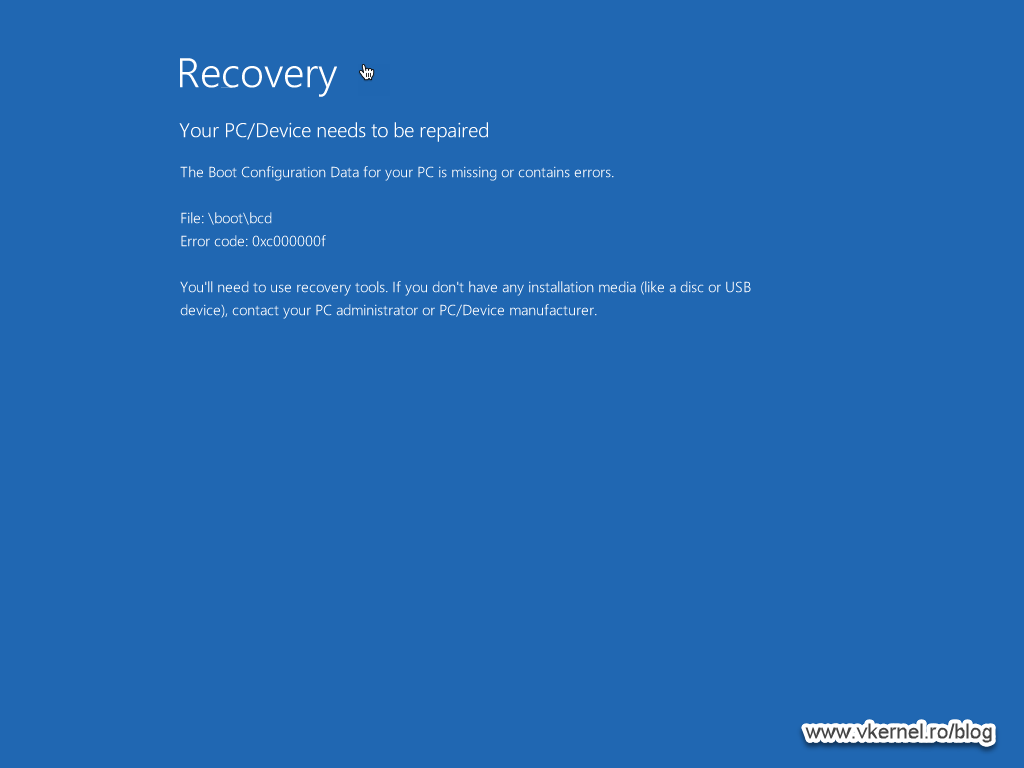
During my testing I also got some random blue screens before getting to the above error message, but no worries, by the end of the article everything will work smoothly.
Configuring the NetBIOS ports
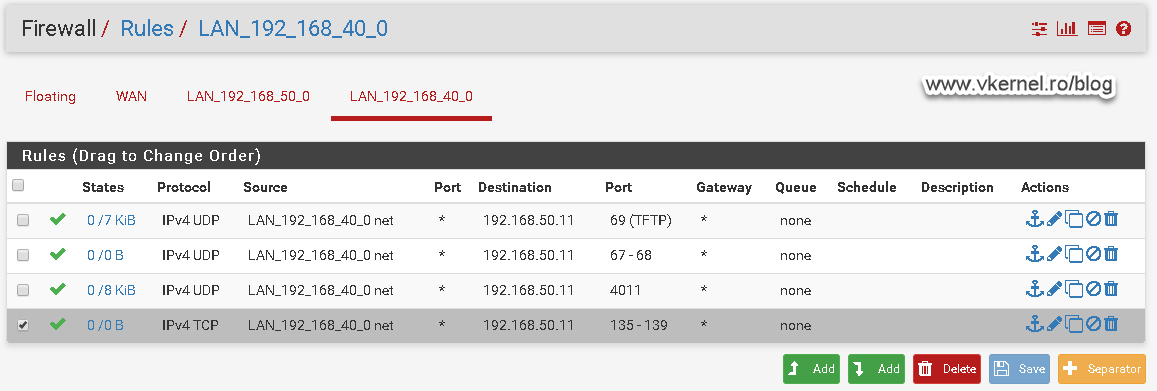
In order to move forward with the deployment we need to open the ports range from 135 to 139 on TCP from the clients VLAN to the WDS server.
Configuring WDS custom port
This one is not listed as a registered port since is goes beyond 1024, but it is a port that WDS uses, and if we open it we get to the point where we can authenticate to our deployment server. We also get rid or the error message presented in the Configuring the PXE port section. Open port 5040 on TCP from the clients VLAN to the WDS server.
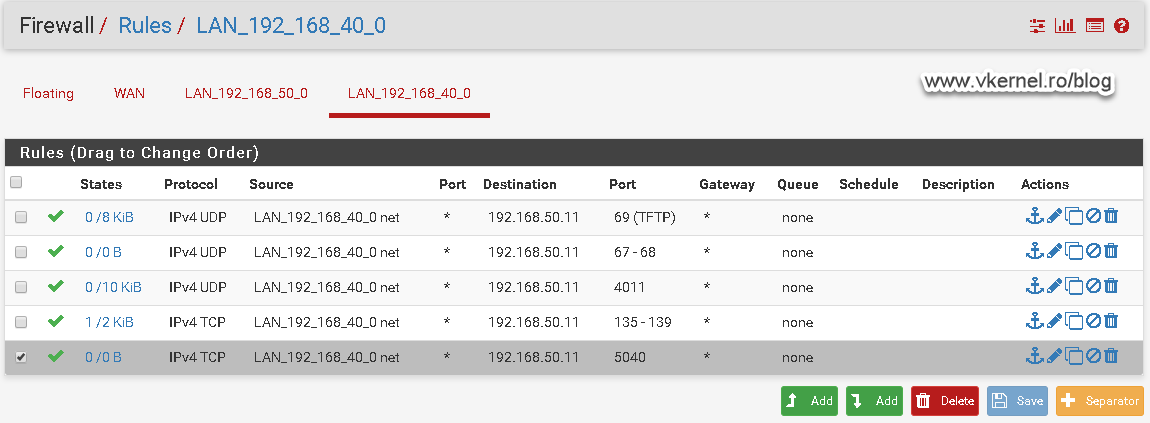
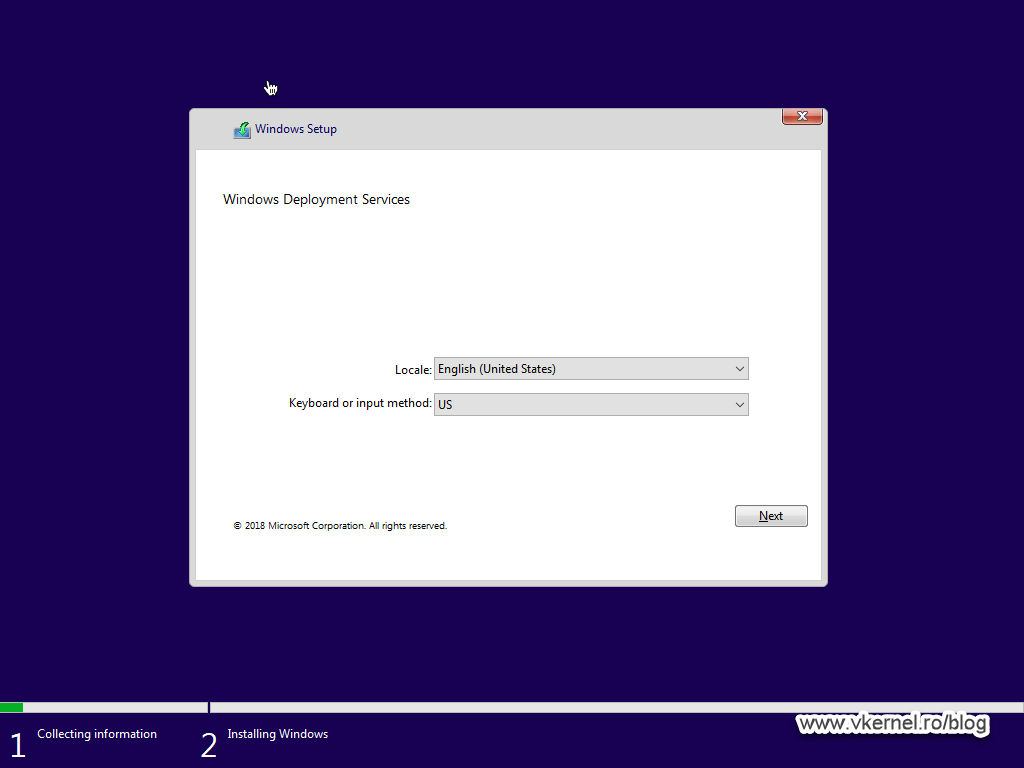
Now when we boot our client(s) we get the Windows Deployment Services wizard.
Configuring the SMB port
Port 445 on TCP from the clients VLAN to the WDS server is also an important one that needs to be opened.
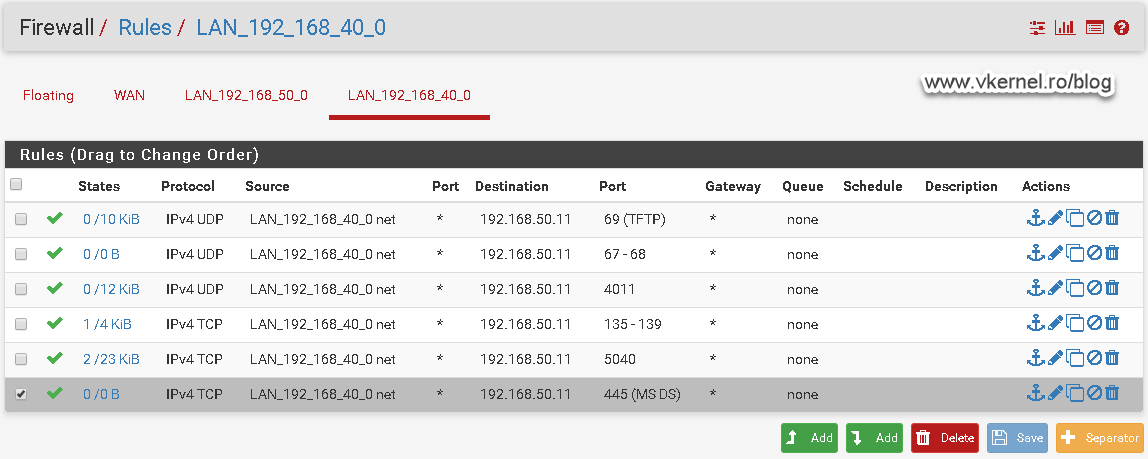
If we don’t do this, we will not be able to authenticate to the WDS server and we get the bellow error message.
An error has occurred while processing your request. The network path was not found.

Other recommended ports
Some other ports that I recommend opening are 53, for DNS resolution and ICMP for troubleshooting. As you know, without DNS not only you will not be able to browse the internet but also join deployed clients to the domain.
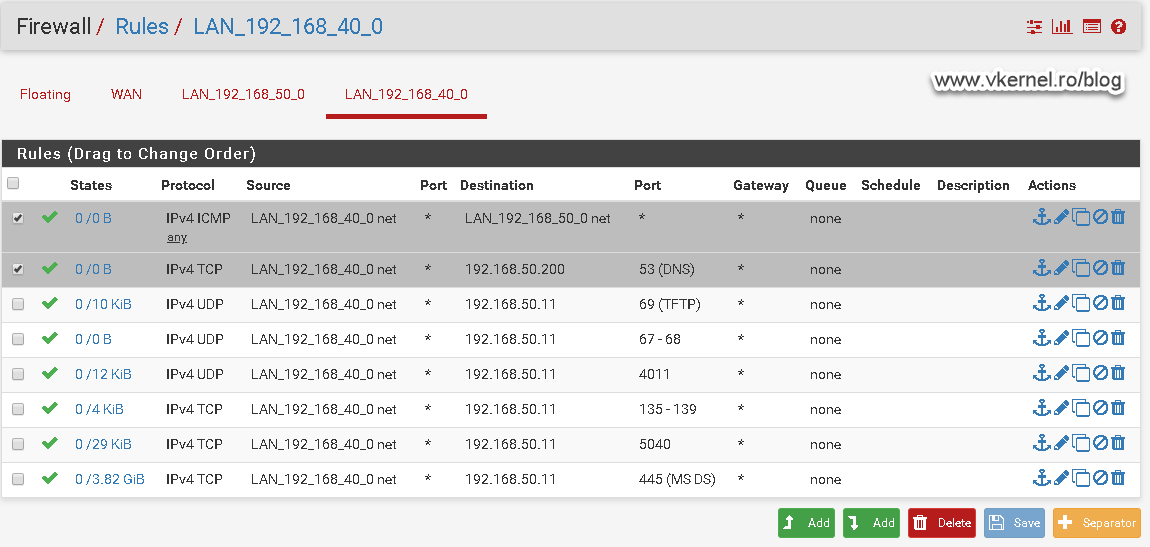
Now, to sum this up, we need the following ports opened in our firewall so clients can contact the WDS server and download the boot image to load the WinPE environment for the OS deployment:
| Protocol | From Clients VLAN to WDS VLAN |
| UDP | 67, 68, 69, 4011 |
| TCP | 135, 136, 137, 138, 139, 445, 5040 |
Off course, let’s not forget about the DHCP Relay agent since this is the first piece in the puzzle. Without it, clients cannot contact the DHCP server, meaning they will have no IP address to communicate with the rest of the network.
Summary
I have extend the article and not just put some simple ports here in order to show you the errors and what to expect if the proper firewall ports are not open, but once you have them, booting WDS images trough the network should go smoothly. Test this in you environment when you get the chance, and let the community know how it goes in the comments area.
Want content like this delivered right to your
email inbox?
More similar articles
 System Center Configuration Manager (SCCM) Installation Guide
- Creating a USB offline MDT Deployment Media
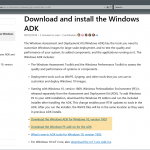
- Installing and Configuring MDT with Windows 10 ADK
- Customizing the Default Local User Profile before imaging
- Integrating DaRT (8.x) with MDT (2013) and enable DaRT Remote Control
- Creating an Offline MDT Deployment Media
Great article, thanks. We also needed to allow UDP ports 64001-65000 as per UDP Port Policy on the Network tab of the WDS server properties.
Hi,
These are only needed if you set the option for UDP, but I never had to do that and everything work out just fine with the default (winsock) option.
Great article Adrian, really well put together and as easy to understand as to read through.
Thanks,
Ian
You are welcome. Thanks for passing by.
Hello,
Thank you so much for the detailed information.
Using this method i can deployed WDS successfully.
Thanks a lot
You are welcome Surindersingh.