Customizing the Default Local User Profile before imaging
Creating a default user profile was easy and fast in Windows 2000 and Windows XP. All you had to do is create a user account, customize it, then click a button and you were done. Starting with Windows Vista everything changed about this. You still have the old and powerful “Copy to” button, but this procedure is not supported by Microsoft, and starting with Windows 7 and above the button is grayed out; you can’t even use it anymore. It was not really supported in Windows 2000 and XP either, but admins were still using the Copy to button to override the Default User profile with the one they customized, even if it meant putting their Windows installations into an unsupported state. There are methods that enable the button back, or methods that make this operation way faster without needing to sysprep the machine, but this methods bring some problems; and I noticed (tested on Windows 8):
– The right-click on the Start button is no longer working
– Icons disappear from the Start screen
– The default download directory for IE will be set to the Administrator’s Desktop folder.
– The list of most frequently run programs is not cleared
– Some programs fail to install
The correct way of doing things is by creating an answer file (.xml format), then use this file when sysprepping the OS. This will tell the installation wizard what to do with the profiles that exist on the machine. I know it’s not a five minute set-up, but it gets the job done at the end, or at least part of it. Because as you’ll see later in the article Microsoft still thinks that some of the settings you make in a user profile are not good enouch, and they customize them a little bit. To create an answer file the Windows AIK package is needed, so go ahead download it then install it on your technician workstation or a VM. When you get to the Select the features you want to install page, leave only the Deployment Tools features selected and continue the wizard.

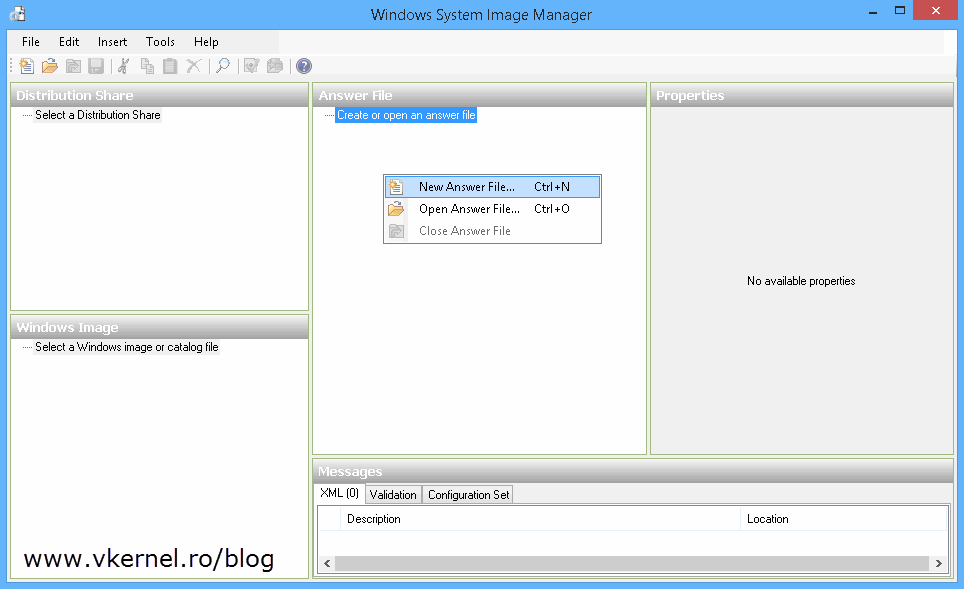
After the installation go ahead and open the Windows System Image Manager console, right-click on the Answer File pane and choose New Answer File. You will get a message that a Windows image is needed in order to have full functionality on the answer file. Click Yes and provide a .WIM file (you can find it in the Sources folder on your Windows installation media). It is recommended to use the latest edition of the OS for this.

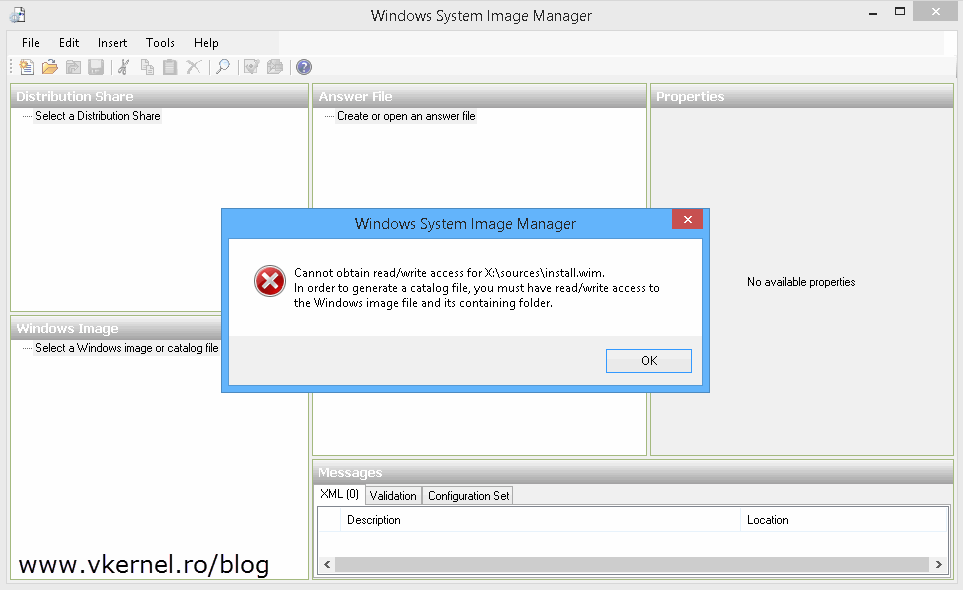
Do not open the .WIM file directly from the DVD media because it will not work and an error message is displayed:
“Cannot obtain read/write access for …/install.wim. In order to generate a catalog file, you must have read/write access to the Windows image file and its containing folder.”
Once you provide the Windows image you might have to select the edition of the OS.
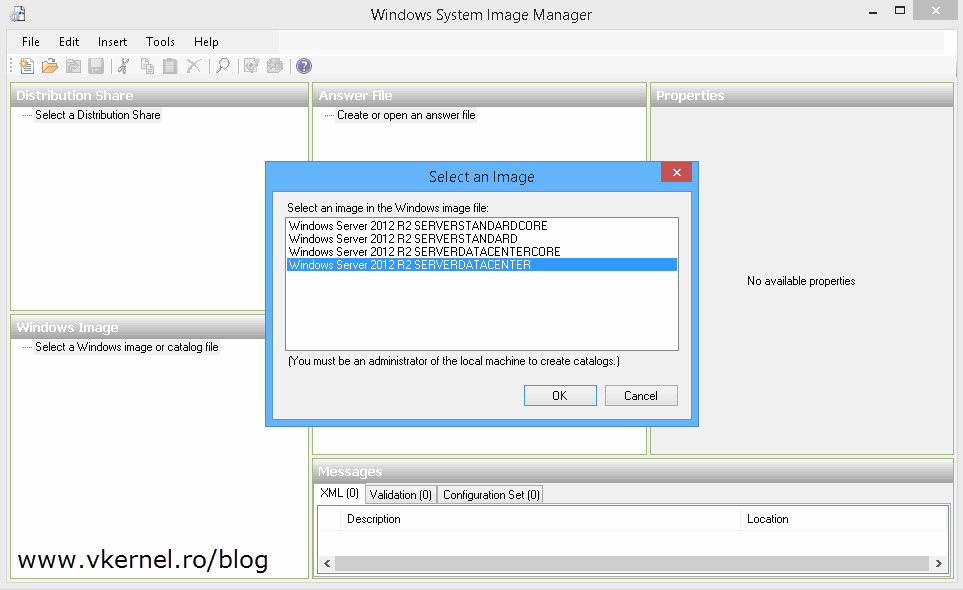
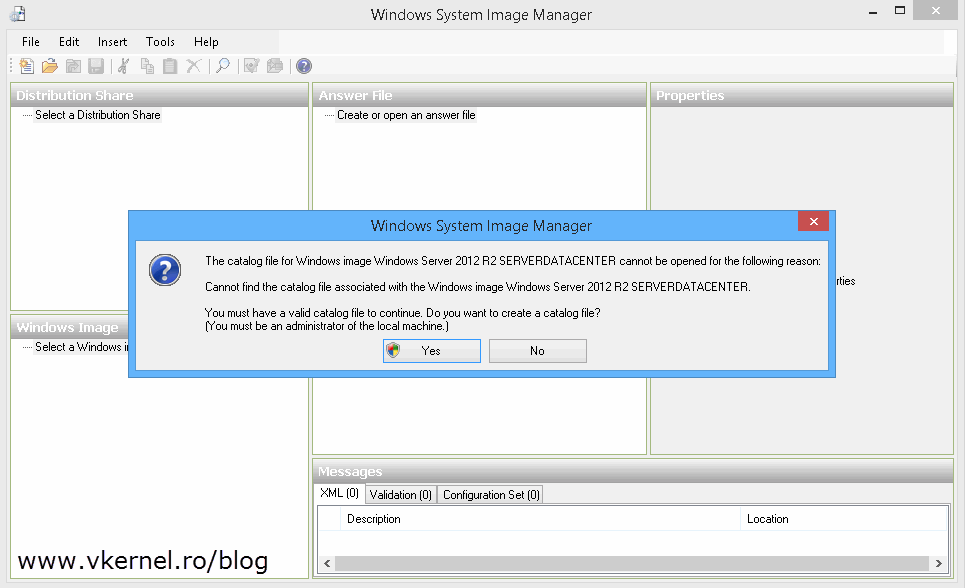
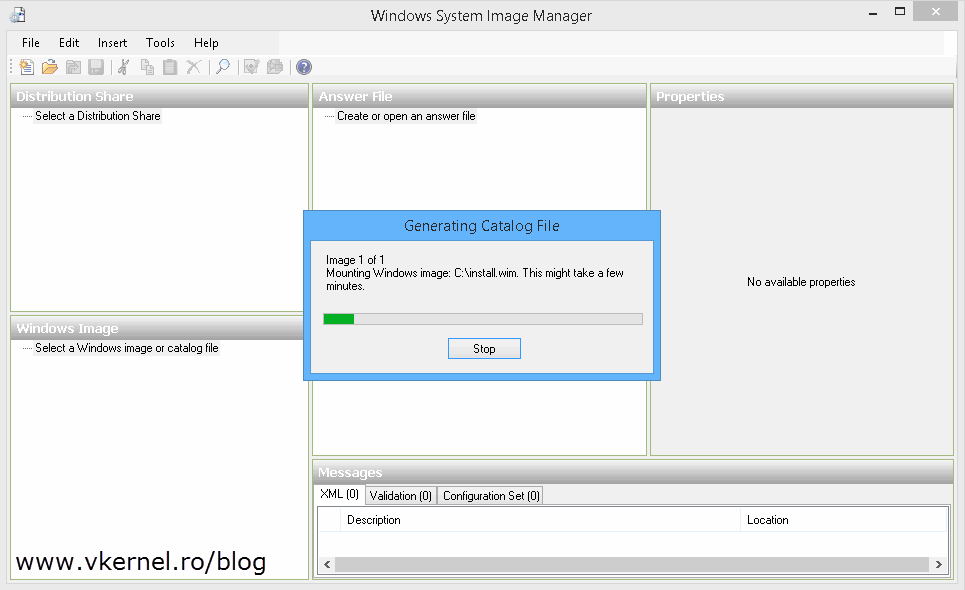
A catalog file is also needed, and since there isn’t any, choose Yes on the message that pops-up to create it.
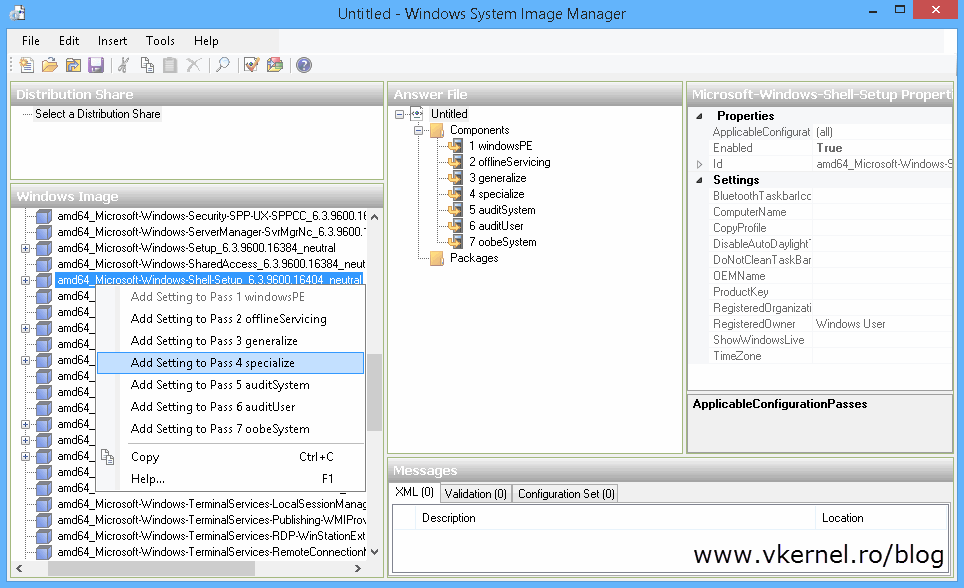
From the Windows Image pane expand Components and search for amd64_Microsoft-Windows-Shell-Setup. Right-click on it and choose Add Setting to Pass 4 specialize.
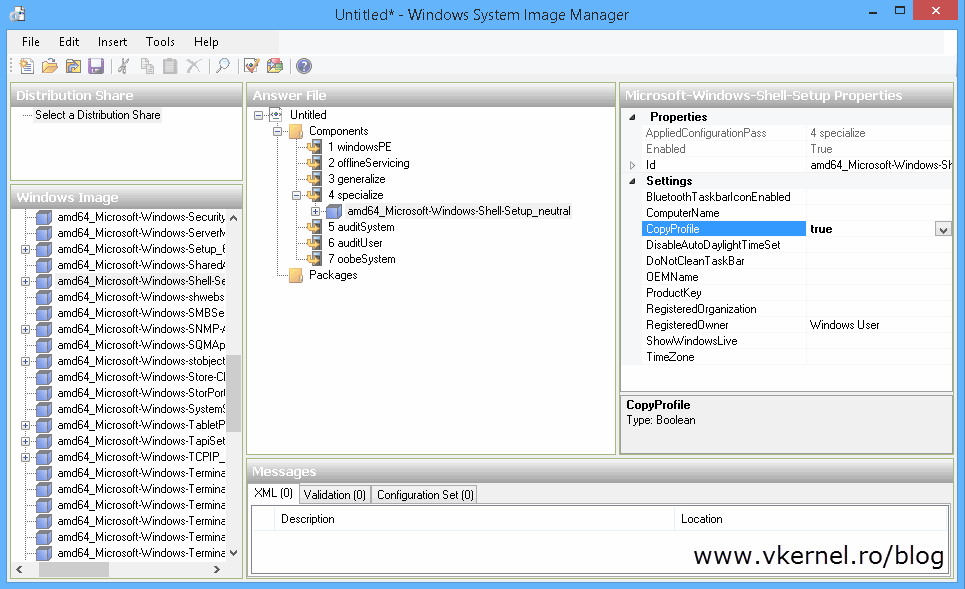
In the Microsoft-Windows-Shell-Setup Properties pane, in the Settings section, set the CopyProfile value to true. Save the answer file. You can name it whatever you want, but keep it short and no spaces; it will be easier later on. Make sure you also put in the answer file the time zone, product key etc so when the machine starts you don’t have to manually complete the getting started wizard.
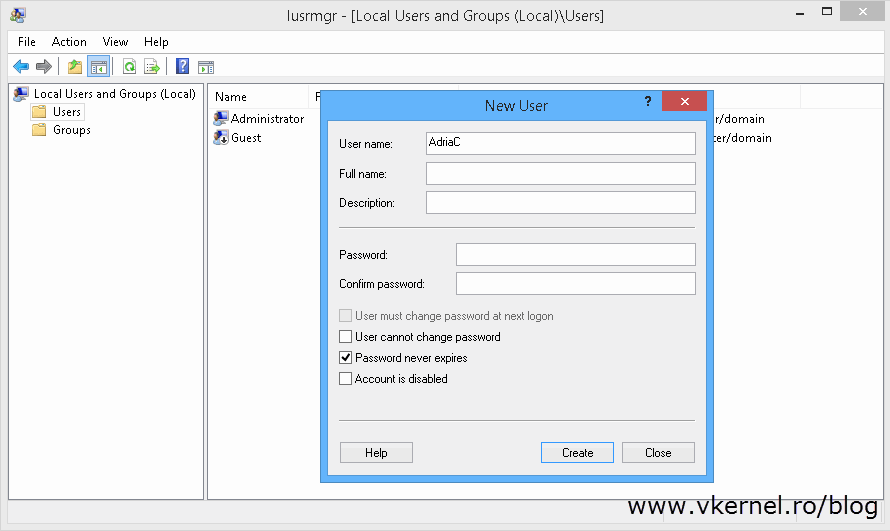
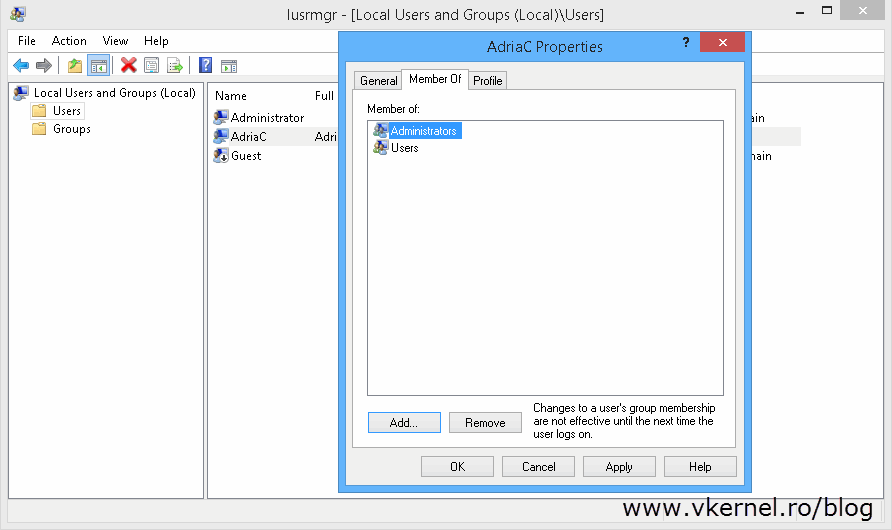
 The next step is to customize a user profile. On a VM (always try to use a VM) open the Local Users and Groups console (Start > Run > lusrmgr.msc), and create a new user with administrator privileges. You can name it whatever you want to, because at the end is going to be deleted anyway.
[warning]Do not use the built it local Administrator account because is not going to work. I struggled for three days using this account and no luck.[/warning]
Log in with the new user account and start to customize the installed applications, internet explorer settings, shortcuts, desktop background, and other configurations the way you want them to be.
[warning]Do not joint the workstation or server to a domain when customizing a user profile.[/warning]
In case you want UAC off, do not disable it from Control Panel because it will get enabled after the server/workstation generalization. Instead use the registry:
HKEY_LOCAL_MACHINE\SOFTWARE\Microsoft\Windows\CurrentVersion\Policies\System
Set EnableLUA value to 0 (default is 1, enabled)

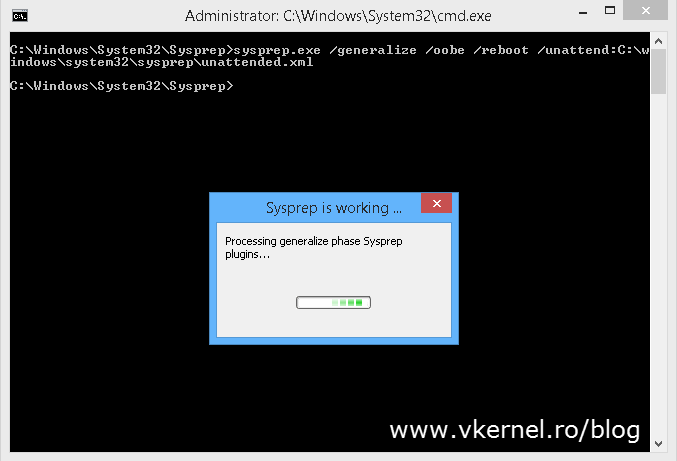
When you’re done customizing the profile, copy the previously created answer file on the local machine (I usually put this in C:\Windows\System32\Sysprep, but this is not a rule of thumb), and from a command line window run the bellow command:
C:\Windows\System32\Sysprep\Sysprep /generalize /oobe /shutdown /unattend:<PATH TO YOUR .XML FILE>

Once the machine shuts down you can go ahead and capture the Windows image to get it ready for deployment. After the image was deployed and joined to the domain all the new users, even the ones with domain accounts should get the customized profile.
Customizing the Default Profile using the CopyProfile method is not hard and gets the job done the way it should be done. I know, it takes some time until is finished and you need tools to do it, but this way you won’t have any profile problems like the ones mentioned at the beginning of the article.
Want content like this delivered right to your
email inbox?


Very helpful article…thanks!
I have a question regarding the last section – you have mentioned to capture the image AFTER we run ‘sysprep with reboot/shutdown’ and then starting up the machine again? Doesn’t this mean we are capturing an image (or Template; I use Xenserver) of a non-sysprepped machine?
Isn’t it recommended to have an image/template of a sysprepped machine, in situations where we need to use this template for provisioning new VMs?
Hi,
Thanks for the comment. I re-arranged the article a little bit so it’s not that confusing anymore.
Thanks for the update Adrian…thought so 🙂 yea it was a bit confusing previously. Thanks!
Thank you for the feedback.