Creating a USB offline MDT Deployment Media
I know that are many environments out there that cannot enable computers to boot from the network when you as an administrator want do take advantage of this technology when deploying your PCs with MDT. The solution to this problem we all know it, we create an offline MDT media, burn it to a DVD disk and walk to every PC and deploy the OS. The bad news is that nowadays most of the PCs or servers do not come with a DVD drive since this type of technology it is almost obsolete, loosing the battle in front of the USB devices. Plus, those DVDs scratch very easily and are very slow.
It will be very nice if we can just put our MDT media on a USB drive and walk with it to deploy the machines, and fortunately we can. Building a USB offline MDT media it is easy and all we need to do is issue a few commands and mouse clicks. There are a lot of technics out there, and in this article I will discuss two of them that never failed me.
1. Building USB offline MDT media from the command line
By using this method we don’t need any tools, but the downside is that we still need a Windows 10 or Windows Server ISO in order to built the boot manager. To start, mount your USB drive then open a Command Prompt and issue the bellow commands:
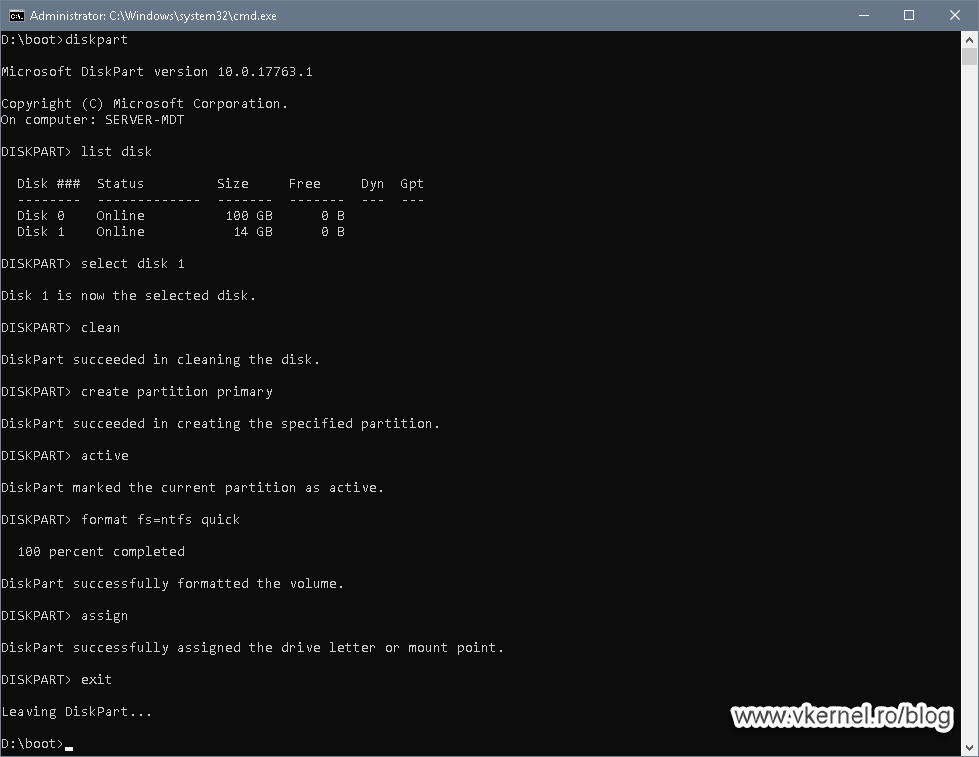
diskpart
list disk (identify your USB disk number from the list)
select disk X: (where X: is your USB disk number identified from the above command)
clean
create partition primary
active
format fs=ntfs quick
assign
exit
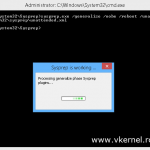
Before we go any further, let’s not forget about updating our media so we get the latest modifications in the ISO image. Open the MDT Deployment Workbanch, right-click the media object and choose Update Media Content.

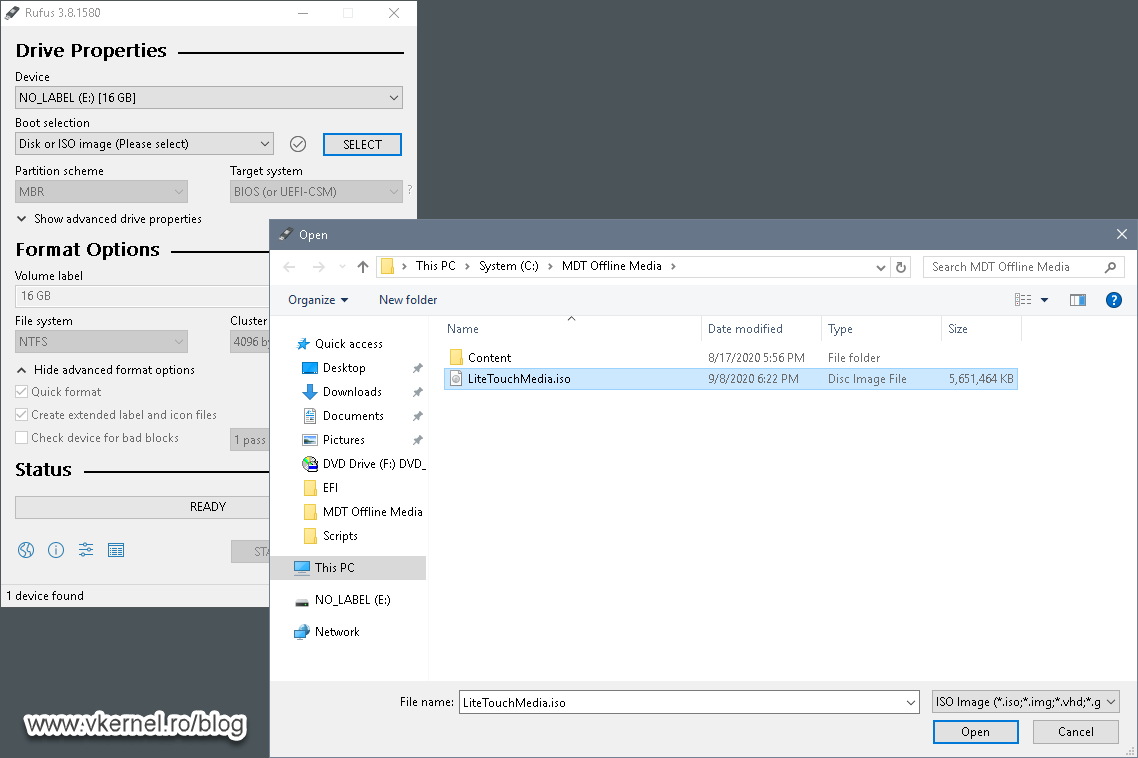
Now mount the LiteTouchMedia.iso image and copy it’s entire content on the USB drive.

Depending on the speed of your USB drive this can take some time to complete.

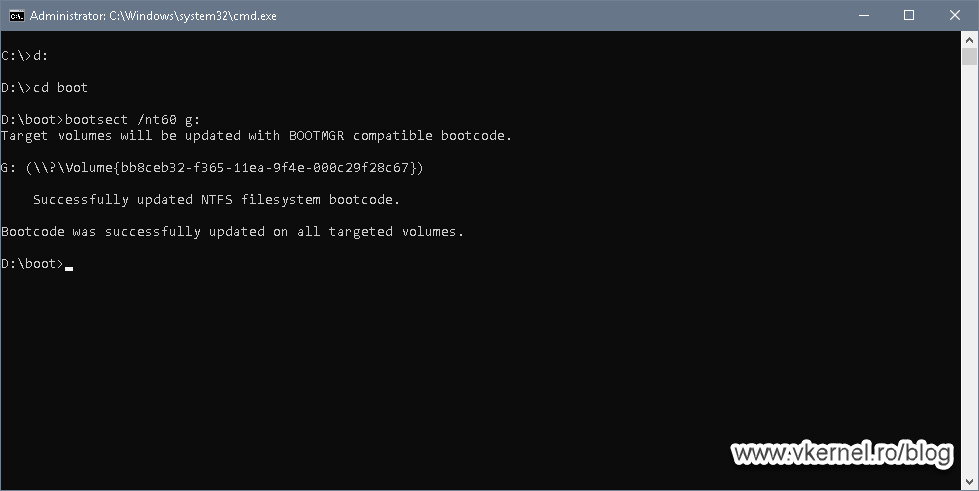
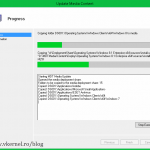
After all files and folders have been copied, as a last thing we need to do is build a boot record on the USB drive. For this, we need a Windows 10 or Windows Server 2012 and above ISO image mounted in the PC where the USB drive is present. Once we have that taken care of, open the Command Prompt again and issue the bellow commands.
D: (where D: is you Windows 10 or Windows Server mounted ISO letter)
cd boot
bootsect /nt60 g: (where G: is your USB drive letter)
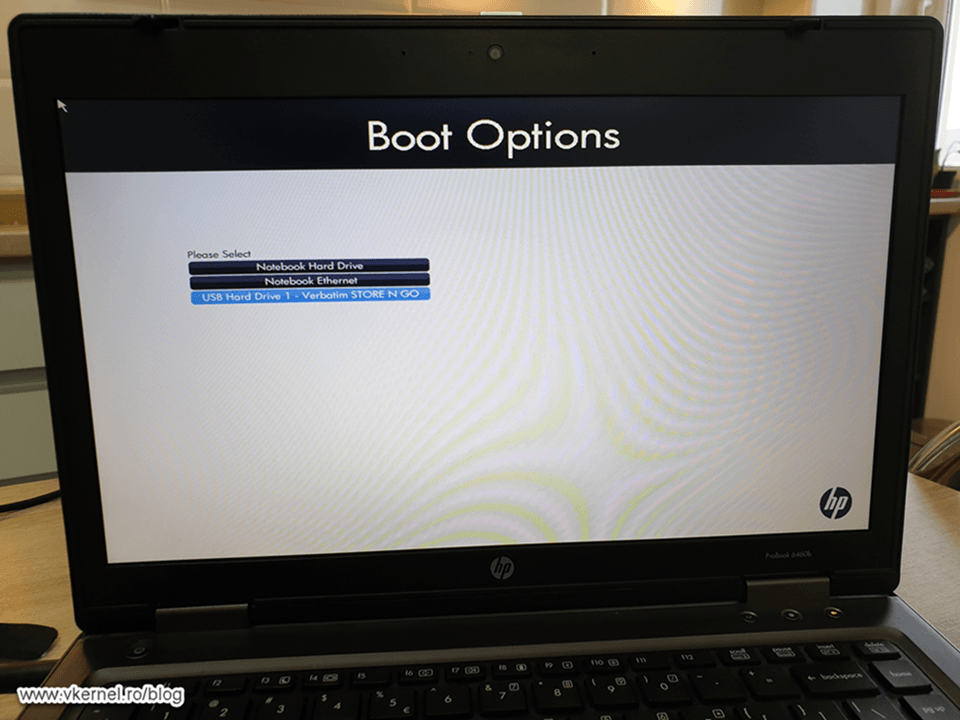
And that’s it! All we need to do now is test it and see if it actually works. Connect the USB drive to one of the PCs you want to deploy and boot from it.
It will take a moment for the WinPE environment to load up in the memory, but eventually the MDT environment should be displayed.
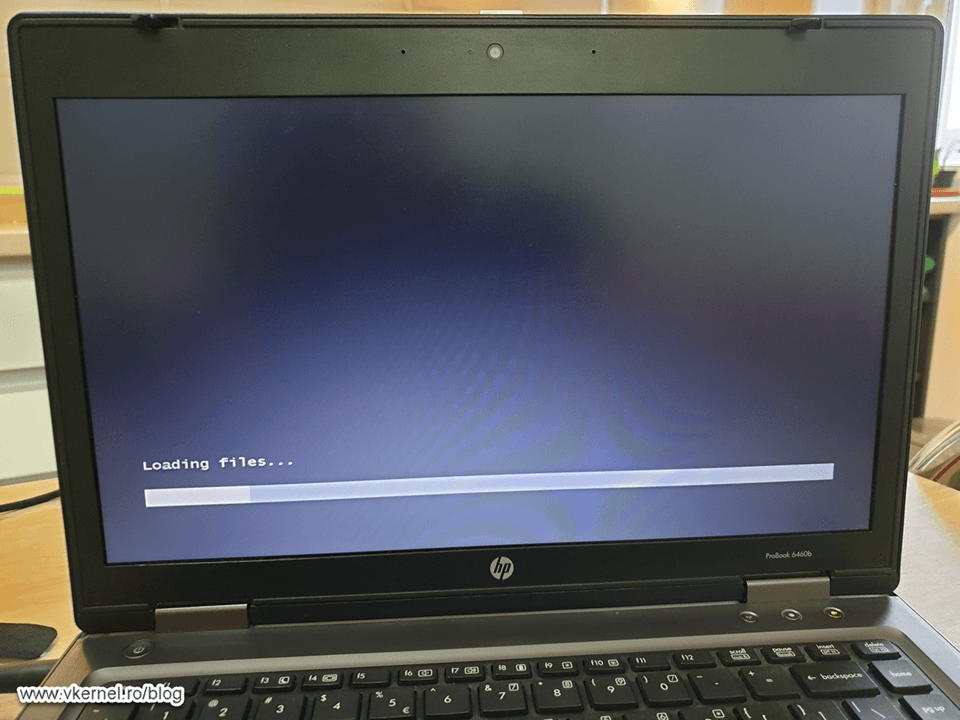
In case you configured the deployment credentials in the Bootstrap.ini, you won’t see this screen, and if you automated all this with the MDT rules, it might go along and not ask you anything. It will just deploy the OS.

2. Building USB offline MDT media using Rufus
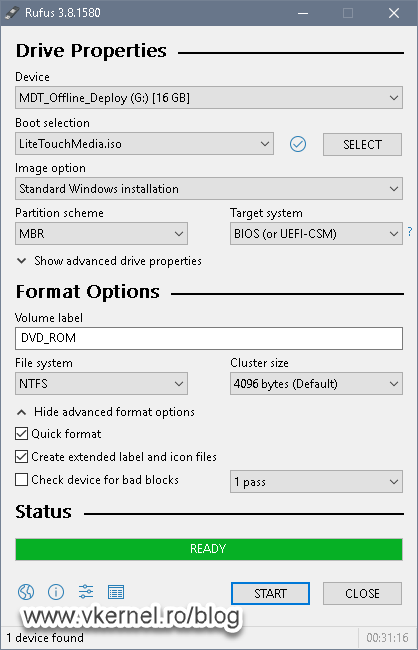
Rufus it’s a third party application that I like very much and I’m using it every time I need to make some USB drive bootable. Not only can you make Windows USB bootable drives with this application, but Linux also. It is simple to use and it does the job very well, plus it is free. Go ahead download it then launch it.
Right from the start we have a lot of options and from the first drop-down box we need to select our USB drive. Moving to the Boot selection option, once we click the SELECT button we are give the option to choose our ISO image that we want to put on the USB drive. In our case it is the LiteTouchMedia.iso file.
The next option that we need to configure is the Partition scheme, and here it all depends if your machines support UEFI or legacy BIOS. Moving to the Volume label filed we can name our USB drive just so we know what this device carries.
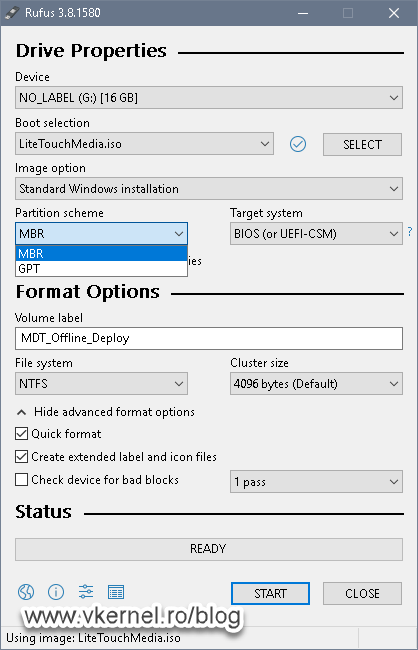
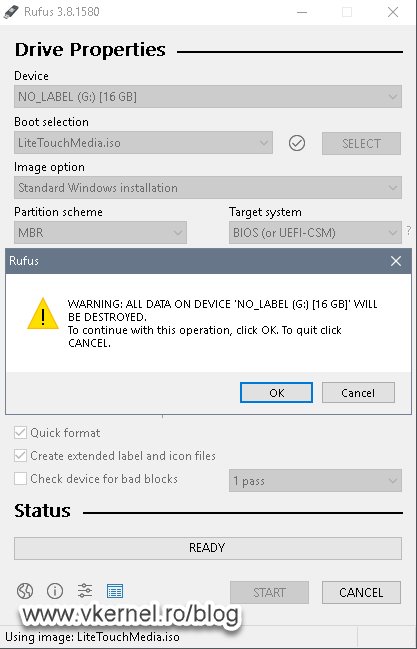
Leave the rest of the settings as they are and click the Start button. A message will pop-up informing us that our USB drive will be erased and all data will be lost. I’m guessing you saved everything and if you are good to go then hit OK to continue.
No go ahead, take your launch, because this will take some time, and once it is done we get the READY message on the green field at the bottom of the program. The only thing last to do is start deploying, so connect the USB drive to one of your PCs, test it and see how it works.
Summary
As you can see the process of creating a USB offline MDT Media is fairly simple but very helpful. I like using Rufus because doing so I don’t need to have with me a Windows ISO in order to make the USB drive bootable, the software does all the work and has everything it needs to make it work. If you are using other methods, let the community know in the comments area bellow.
Want content like this delivered right to your
email inbox?
More similar articles
 System Center Configuration Manager (SCCM) Installation Guide
- Installing and Configuring MDT with Windows 10 ADK
- Configuring DHCP and Firewalls for PXE booting with WDS
- Customizing the Default Local User Profile before imaging
- Integrating DaRT (8.x) with MDT (2013) and enable DaRT Remote Control
- Creating an Offline MDT Deployment Media
Hello,
This is the problem what I have, when I created offline media and after booting to install it it reboot withtou winishing the installation that is why I come here to ped a rescue.
Never had this issue. Maybe with the newer builds of Windows 10? I will have to build up a lab and test it.
Do you have any error messages? What Windows build are you trying to install?
So ntfs formatted usb’s do not appear as bootable in UEFI on every HP and Dell model of workstation and laptop I have tried it on. They work fine in legacy bios mode, but you have to boot with UEFI to deploy a UEFI bootable system. Without it the OS deployment is not secure. On my media deployment I used fat32 and a split wim to accomplish this task. I wish I could use NTFS.
Hi Tom,
Take a look at this article on how to create the USB bootable media.
Agreed with the point about fat32, i still prefer to use fat32 instead of ntfs