Creating and configuring Windows Domain Service Accounts
In almost every environment we need service accounts. You know, those accounts that we use to run our services in order to have a better security, integration and control over that service. In a Microsoft world these are usually domain service accounts, if the there is an Active Directory environment present. We can also have local service accounts, but in this article I am going to threat the domain ones since they are more popular and need some extra configurations, but first, we need to create our first service account.
1. Creating the domain service account
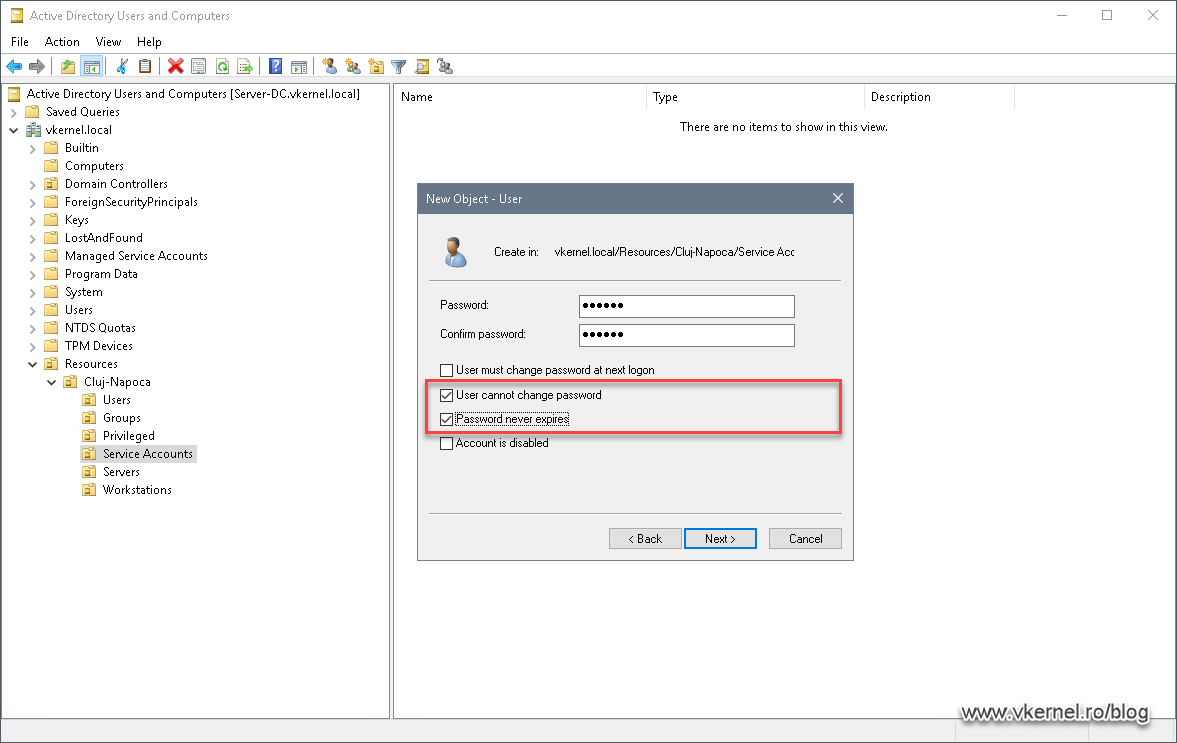
On one of the domain controllers, open the Active Directory Users and Computers (ADUC) console, and create a new OU where all the service accounts will be sitting. I really don’t like having them in the default AD containers, but this is just a matter of preference. Once you know where the service account will be created, right-click the OU and choose New > User.

Once the New Object wizard opens, provide a descriptive name for the user so you know for what it is being used just by looking at its name. Moving down at the User logon name box, we need to type a logon name for our service account. These type of accounts usually start with svc in front of the logon name to denote a service account. I recommend you keep this format, because in the long run, it’s a saver. In large environments a new attribute is also set for the service accounts for better filtering/scripting. Click Next once all the boxes are completed.

In the next wizard screen we need to provide a password for the account. I recommend setting a complex one with at least 25 characters and changing it once or twice a year. Yes, you still have to change the password for security measures, and for audit, if you company is being audited. Once the password was set, tick the User cannot change password and Password never expires boxes then click Next and Finish to create the account.
Now that our service account object is created, it is recommended to add it to a security group for better security and Group Policy management. As you will see later in the article, we will create a GPO that will change some security settings on the destination servers where the service accounts are needed. It is better to have security groups and add them to the GPO because once we have a new service account, all we need to do is add it to the proper security group. This way we ease our work by not needing to edit the GPO every time a new service account is created.
Right-click our service account and choose Properties. From the Member of tab, click the Add button.
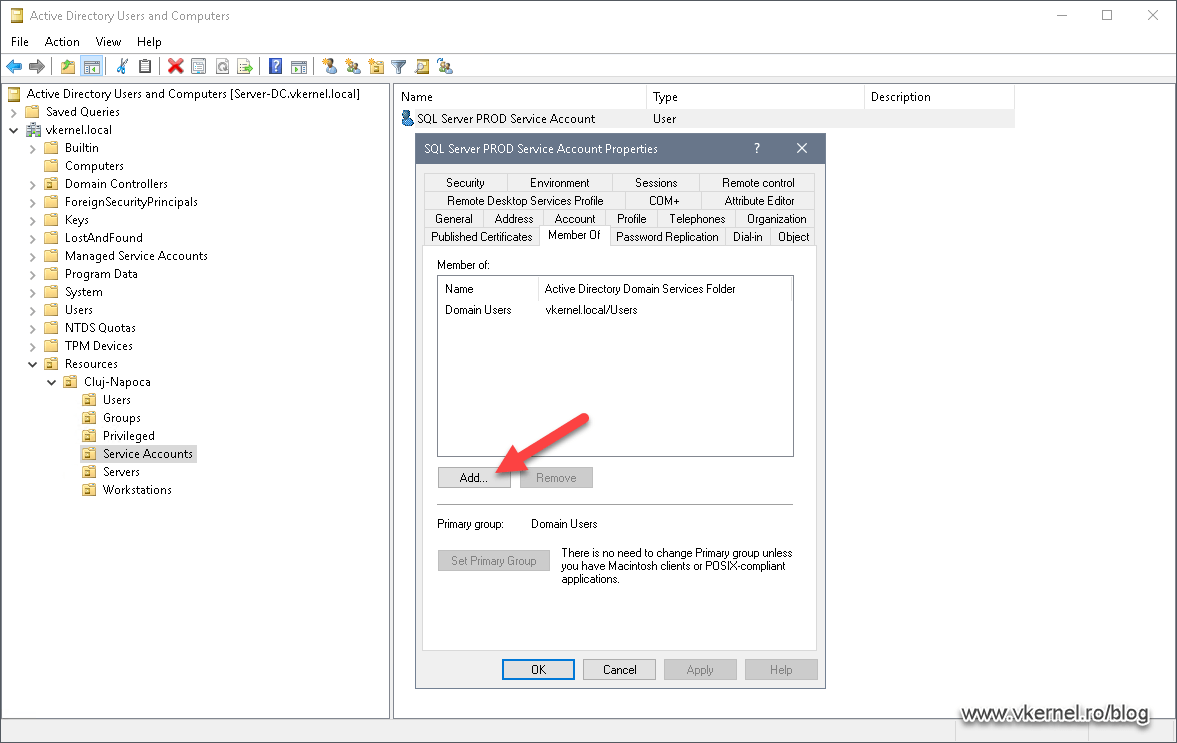
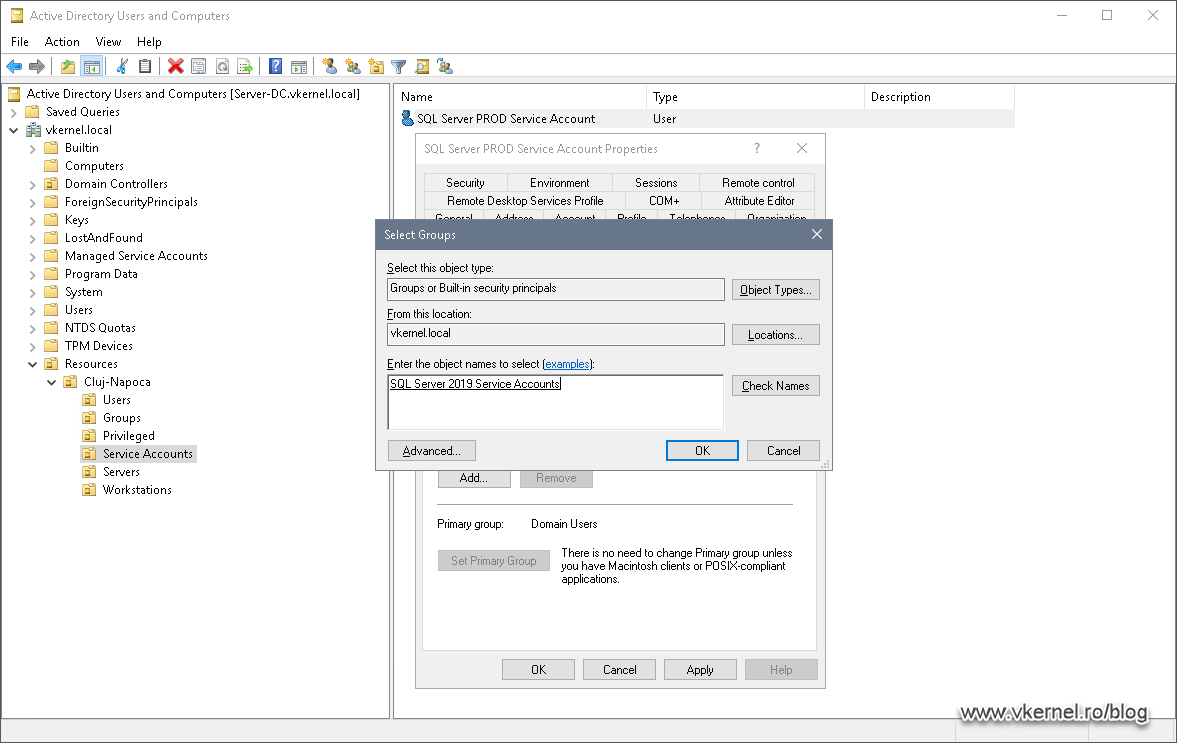
In the search window that pops-up, add your group -created beforehand- then click OK.
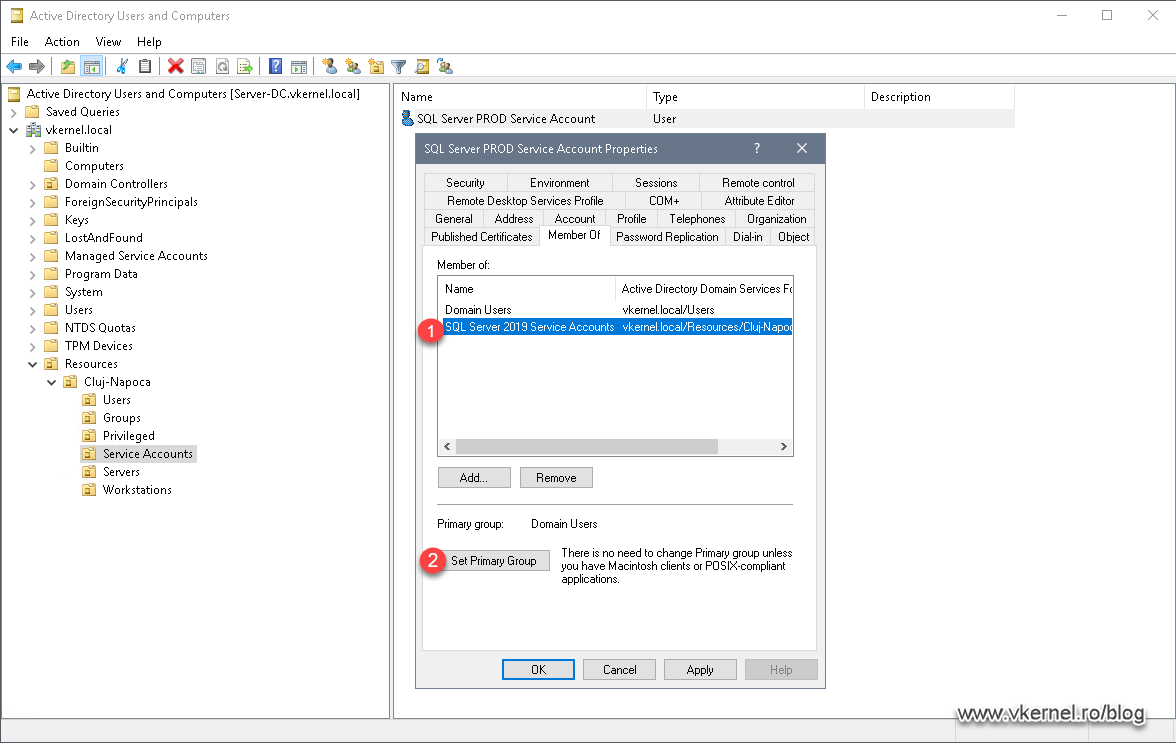
Right from this tab we can implement some type of security for the the environment by removing the Domain Users group. Think about it, Domain Users have read access on almost anything in domain. By removing the service account from this group, the service account will have practically no rights anywhere in the environment, except where we allow it from now on. We need to restrict as much as possible our service accounts since they are more vulnerable that normal user accounts.
From the list, select our group that we just added then click the Set Primary Group button.
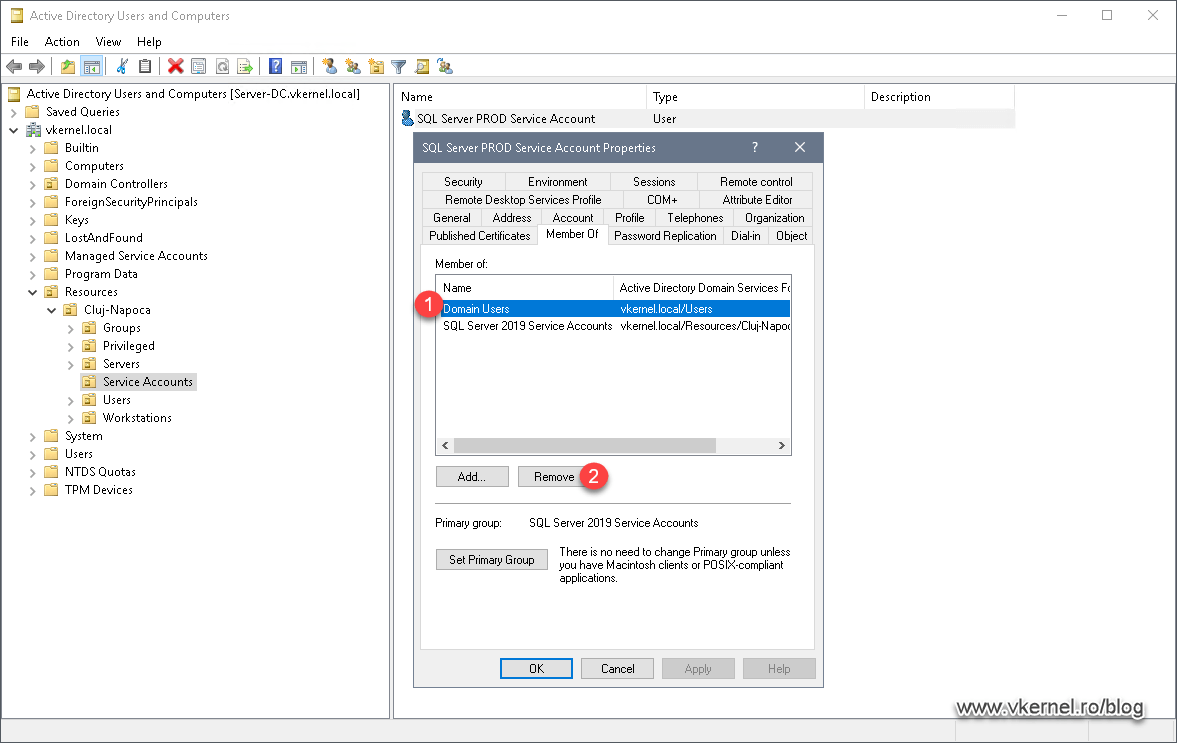
Now select the Domain Users group and click the Remove button. Hit OK when done.
2. Creating and configuring the GPO
Since we are in an Active Directory domain environment, it is better and actually easier to use GPOs to set some security settings for the environment just in case one of our service accounts becomes compromised. The following are just some security guide lines that are most often use for setting up service accounts and you will have to do your own research about what permissions your application needs in order to run properly under a service account.
I see environments where for simplicity the service account is added to the local Administrators group on the destination server(s), or even the Domain Admins group, because it’s easier and faster to configure. Right from the start this breaks all the security guidelines but it is also a major security breach since an attacker that has access to this service account, has access to the entire environment/server. That’s why for service accounts it is always best to apply the principle of last privilege. In translation, only give the right amount of access it needs to do the job it is meant to do, and nothing more.
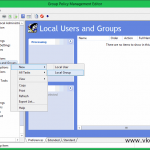
Still on our domain controller, open the Group Policy Management console, right-click the OU where the servers that need to run the service account are located and choose Create a GPO in this domain, and Link it here. Name the GPO something descriptive then right-click again and choose Edit.

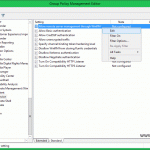
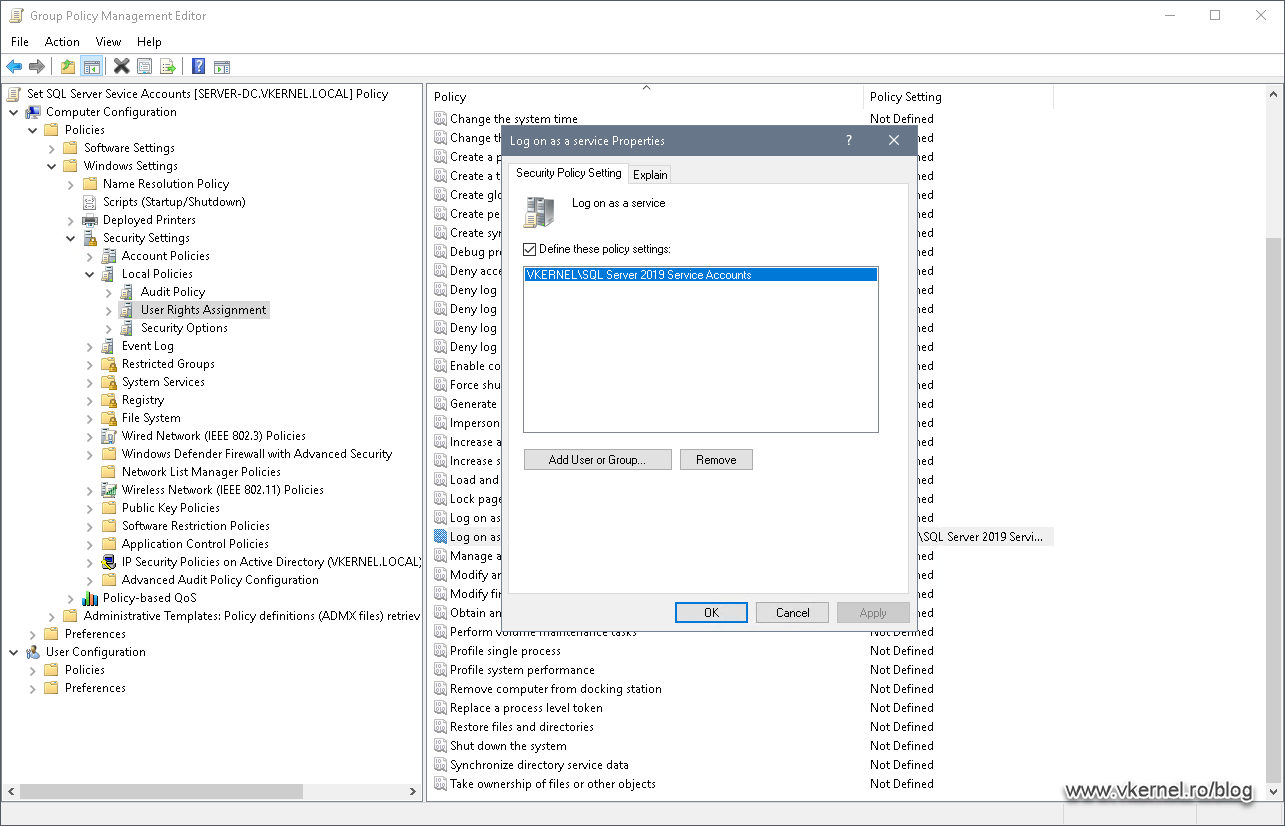
Right after the Group Policy Management Editor console opens, expand Computer Configuration > Policies > Windows Settings > Security Settings > Local Policies > User Rights Assignments. Here we need to add our security group that holds our service account(s) to a few policies. To configure the first one, double click the Logon as a service policy to open its properties. Once the Properties window opens, tick the box Define this policy settings the click the Add User or Group button. This will allow our service account to run as a service on the destination server(s).
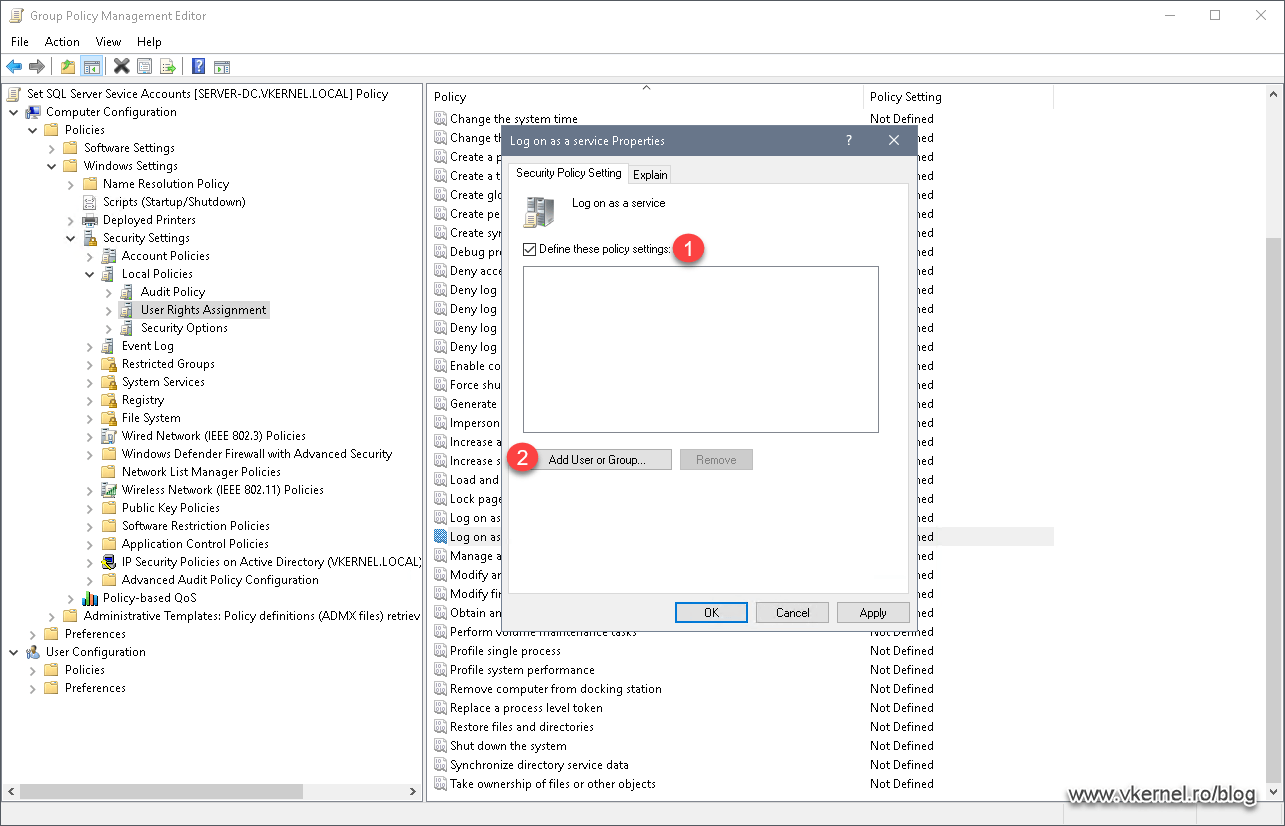
Search the group or service account using the Browse button then click OK to add it to the list. If you need to, you can add multiple groups at once or by using the Add User or Group button again.
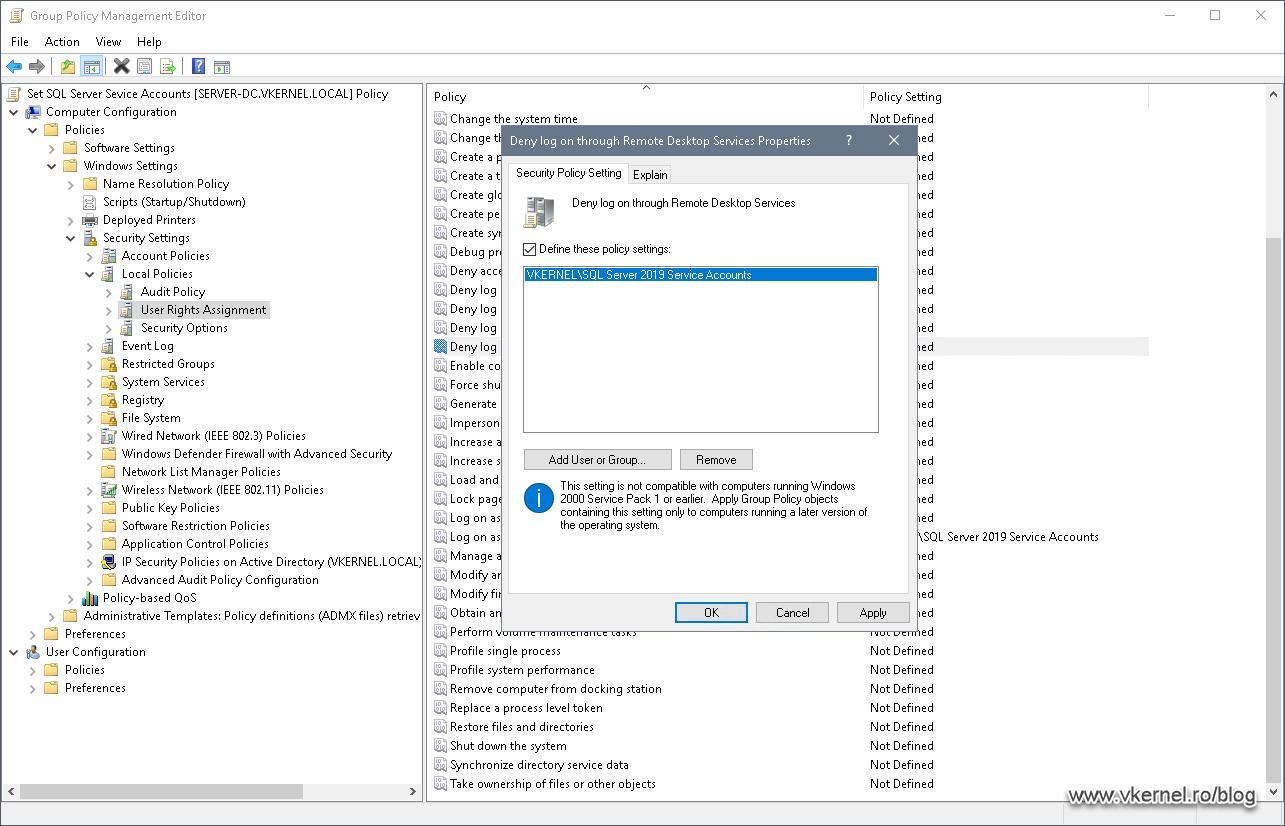
The next policy that we need to configure is Deny log on through Remote Desktop Services. Open it’s properties like we did on the first one and add our security group. This way we prohibit anyone who might know the password to do a remote desktop connection on the server(s).
The third policy that will be part of our GPO is Deny log on locally. As the name implies, all service accounts that are part of the security group added to the policy will be denied to log on to the server(s).

In the end you might have to filter the GPO so it does not apply to all the computers in the OU where is linked, just the ones where the service accounts are needed.
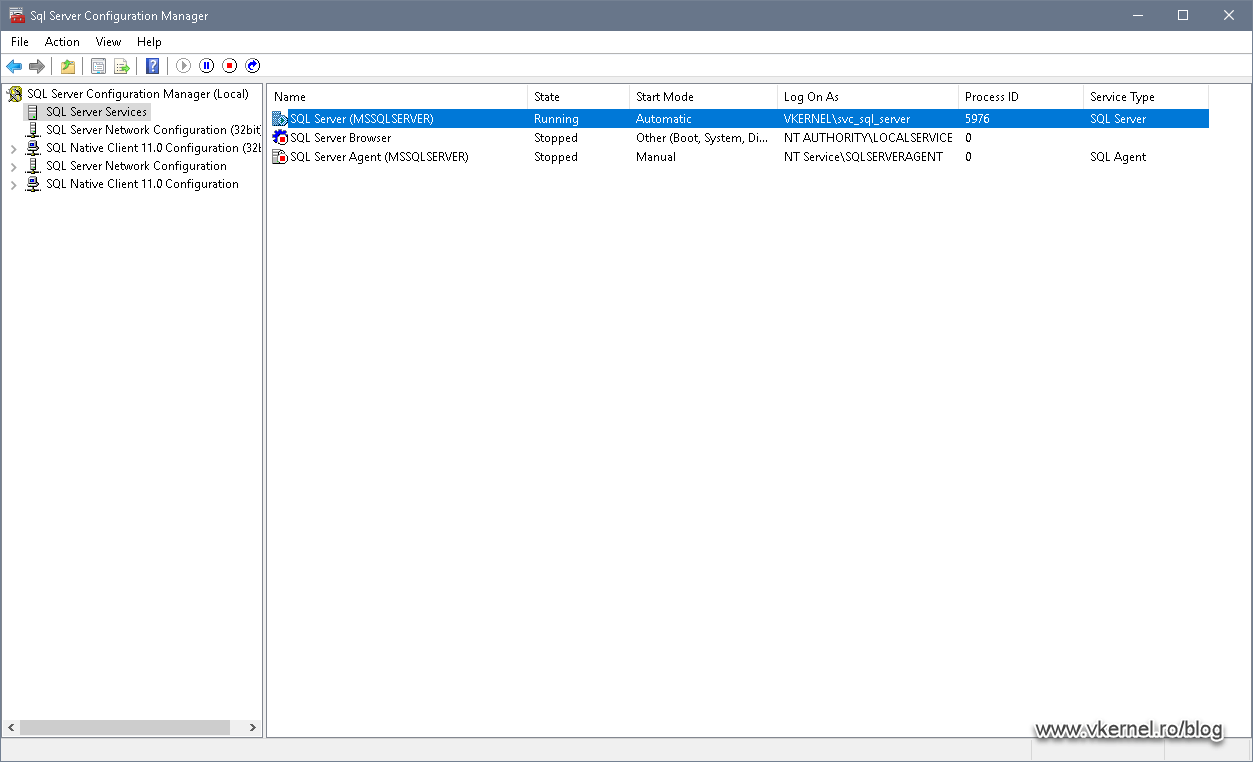
Finally to see if it works I set it up on a SQL Server instance, and it has no problem running even with the tight security shown above.
Summary
Having a domain service account instead of the default one that the application is using/creating brings quite the advantages especially on the security side of things. Also, sooner or later you will still have to use them as the environment grows because there are applications that only work if a domain service account is present. Keeping this in mind will prepare you for the change.
Want content like this delivered right to your
email inbox?
More similar articles
 Blocking Remote Access for Local Accounts by Group Policy
- Migrating from FRS to DFSR
- Building a three-tier Windows Certification Authority Hierarchy
- How to reset forgotten Active Directory Domain Administrator password
- How to enable WinRM (HTTP) via Group Policy
- Add Domain Users to Local Groups using Group Policy Preferences