How to deploy VMware VCSA 6.5 in VMware Workstation 14
Looks like VMware Workstation got to version 14, and starting with this version we get a new neat feature, and that’s support for the VMware vCenter Server Appliance (VCSA). Previous to this, if we wanted to run VCSA in VMware Workstation we had to import the appliance from the .OVA template, then edit the virtual machine .VMX configuration file in order to make it work. I am not complaining here, because it was not a hard thing to do, but now it’s even easier than before since it’s natively supported.
The bad news is that if we want to deploy a VCSA bellow version 6.0 it’s not going to work. To deploy those legacy versions of the VCSA inside VMware Workstation we will have to use the old method and edit the .VMX file. For this article however we are going to use the latest versions of both (at the time of this writing), the VCSA and VMware Workstation. I don’t have to tell you that this type of deployment should only be used in a lab environment. Do not ever think to put this in production because it can become very unstable.
Preparing the environment
Before we import the VM from the .OVA template, we have to take care of DNS which is a very important service not only in a production environment but in a lab also. If this part is not handled, the auto-configuration of the VCSA virtual machine will fail. All we have to do here is create an A and PTR record for our VCSA appliance.
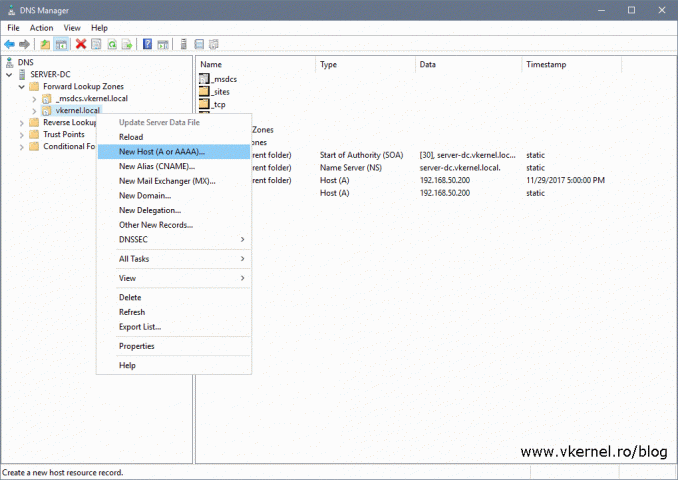
Open the DNS Manager console, go to your internal DNS zone, right-click it and choose New Host (A or AAA).
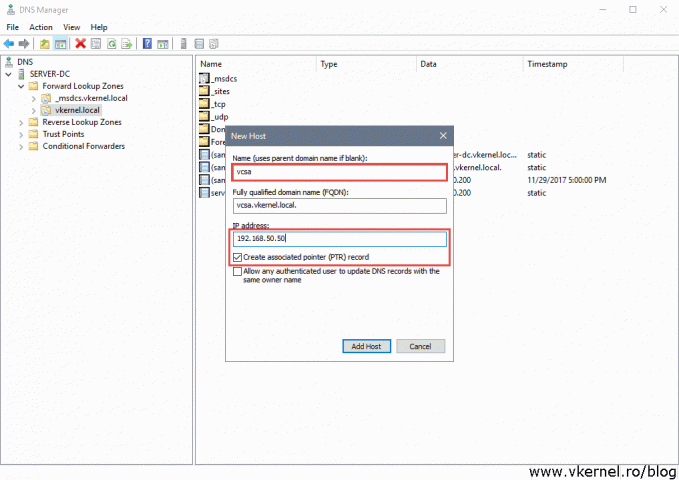
Type in the desired name and IP address that you will assign to the VCSA VM. Also, check the Create associated pointer (PTR) record box to create the PTR record using this one operation. Click Add Host.
Deploying VCSA 6.5 in VMware Workstation 14
Now that our environment is ready for the VCSA deployment, let’s begin.
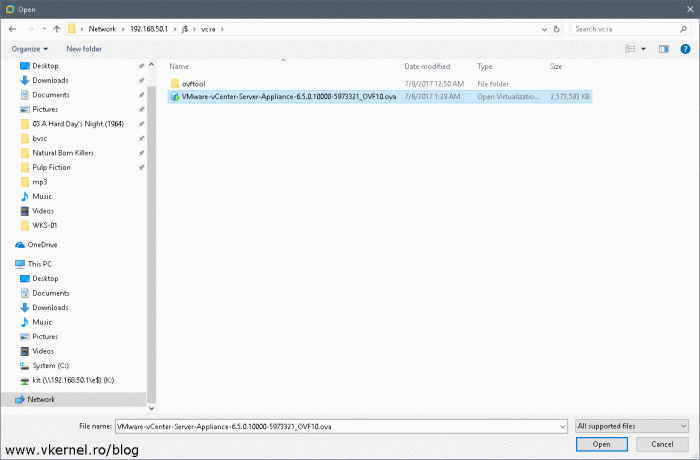
Mount the VCSA 6.5 ISO using an emulation software then open VMware Workstation 14. Go to File > Open and in the root of the mounted media open the vcsa folder. As you can see in this folder we have an .OVA file which is our vCenter Server Appliance. Click the file then hit Open to start the import process.
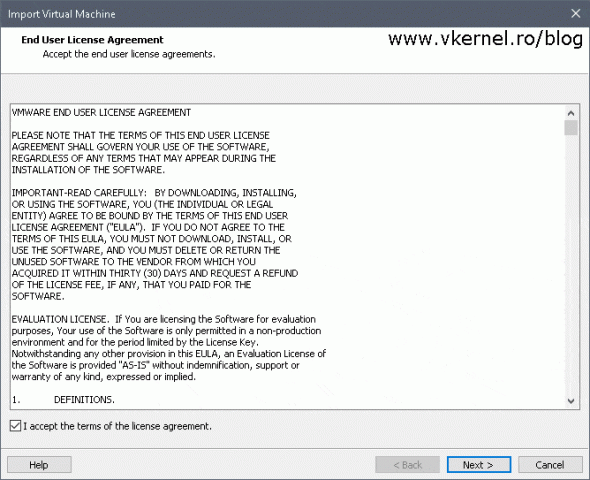
The first screen of the import wizard is the End User License Agreement. Accept it then click Next.
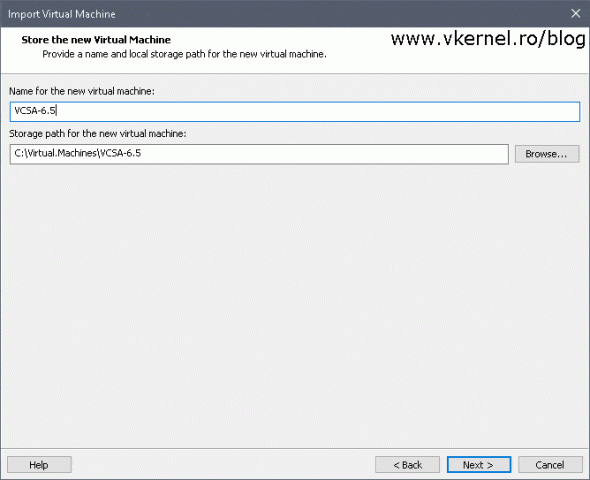
Give the virtual appliance a descriptive name then provide a path where the virtual machine files should be stored. This will be the name that we will see in the VMware Workstation inventory, it’s not the guest name. Click Next when you’re done.
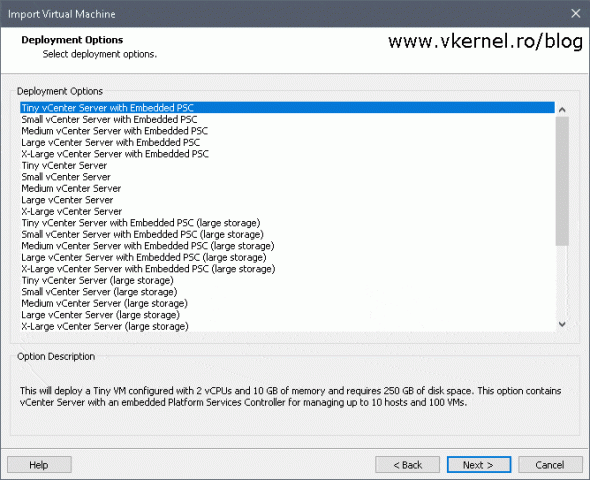
Here we have a multitude of choices of how big the appliance should be. All this depends on how much load the VCSA will need to handle. Since this is a type of deployment that can be used only in labs where resources are sometimes tight, we are going to select the smallest type of appliance that can be deployed, Tiny vCenter Server with Embedded PSC.
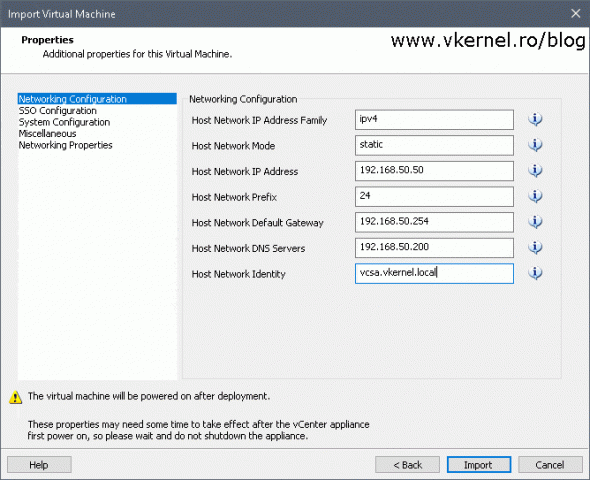
This is the wizard screen, and the last one actually, where we will spend most of our time to configure the VCSA settings. What we put in here will be passed on by VMware Workstation to the guest OS, to configure the appliance.
The first two boxes, Host Network IP Address Family and Host Network Mode are the ones that disappoint me the most. VMware could have done a better job and put some drop down boxes here to select the options we want to use for the deployment, not type them. But it is what it is. Complete the boxes whit your own network settings then click the SSO Configuration menu from the left hand side.
Host Network IP Address Family – This is where we tell the VCSA if we are using an IPv4 address or an IPv6 one.
Host Network Mode – The configuration box where we say if the VCSA should use a DHCP server or a static IP address.
Host Network IP Address – This is the IP address that the VCSA will have after deployment. This should be the IP used when we created the A and PTR records in DNS.
Host Network Prefix – This will be the subnet mask for the VCSA but in a Classless Inter-Domain Routing (CIDR) notation. We can’t just type the subnet mask as we do on a Windows computer, we have to do some subnetting here and just put the prefix. I guess VMware thought it’s way cooler this way.
Host Network Default Gateway – This is where we type the default gateway the appliance will use.
Host Network DNS Servers – The IP address(es) of the DNS server(s) the appliance will use for name resolution. Multiple IP addresses must be separated by comma.
Host Network Identity – This is the FQDN of the appliance. The name needs to match the A record we created earlier in DNS.
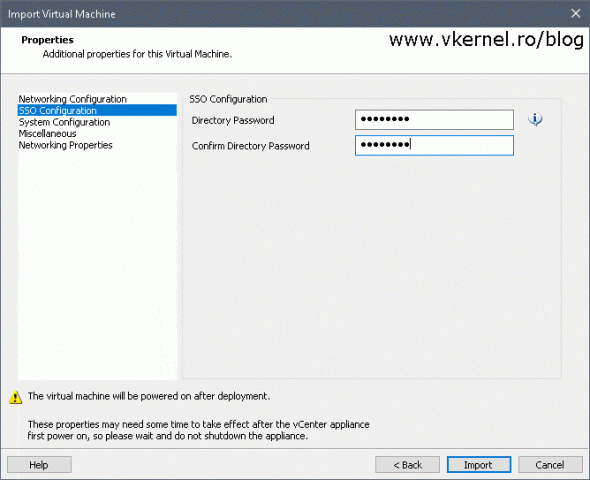
In the SSO Configuration screen, all we need to do is provide the SSO password that we are going to use later on to further configure the appliance, like joining it to a domain, assigning permissions, decide who can and can’t log in to vCenter, etc.Try not to lose the password because every now and then it’s need to change some configurations settings.
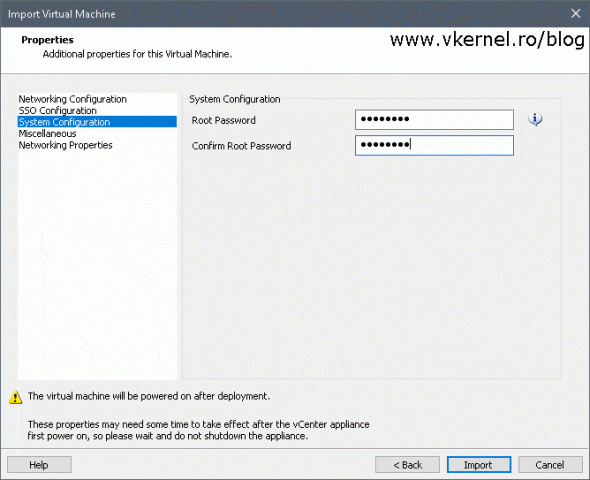
Next, in the System Configuration menu we need to provide another password, but this time the root appliance password. This is needed when connecting to the console’s appliance for troubleshooting or replacing the default self-signed certificate. Try not to loose this one too, because this password it’s like the key to your house.
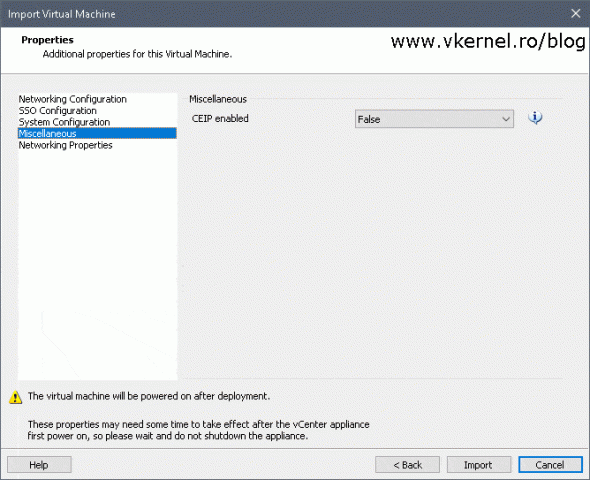
On the Miscellaneous menu, we don’t have to change anything since the default configuration is perfect, but if you want to enroll in the CEIP program, then go ahead and select True from the drop-down-box. This will send technical information about the product and its use to VMware.
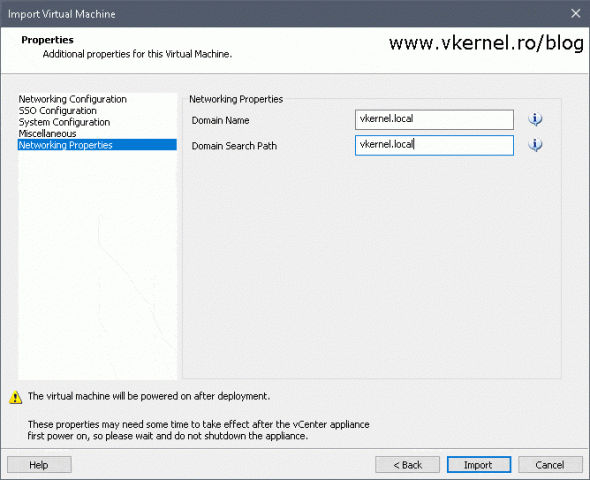
In the Networking Properties screen all we need to provide is our domain name and the domain search path. Once you are done, hit the Import button.
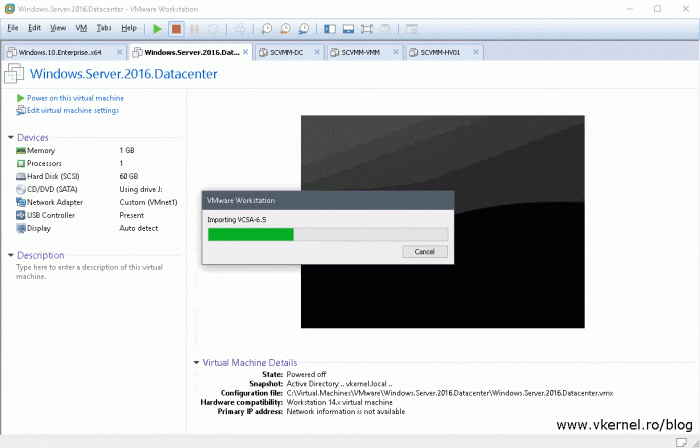
The import operation will take just a few minutes and is not something unusual, you have seen this progress bar before, when you imported your day to day lab VMs.
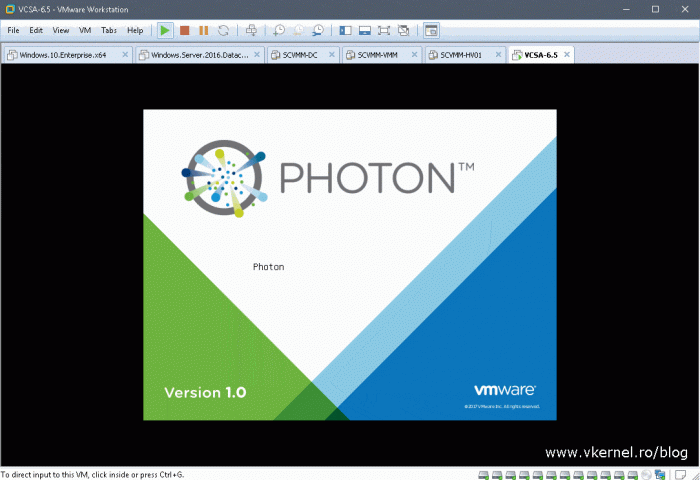
The auto-configuration of the VCSA after it boots up, it is the process that takes the longest. I can’t say how much because it all depends on the speed of the disks you have for your VMware Workstation VMs. I deployed mine on an SSD drive and still took about half an hour.
Just as a site note here, make sure you connect the VM network adapter to the appropriate LAN Segment or network so it has connectivity with the DNS server. If no connectivity to the DNS server is found, the deployment usually fails or throws an error.
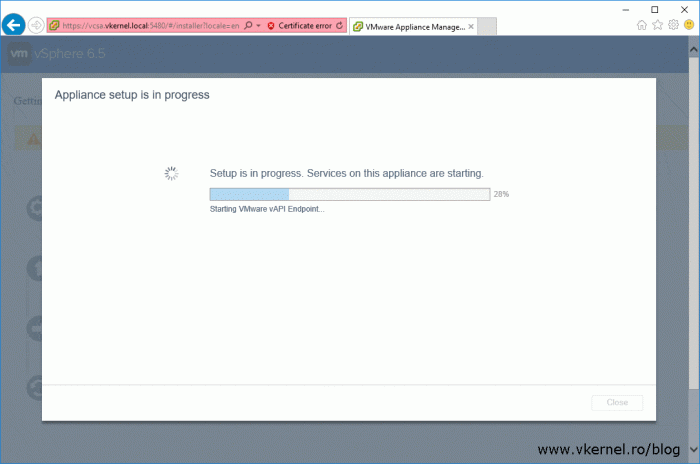
During this auto-config process the VM will reboot a few times until all this is over and we can monitor this process by opening a browser and type the FQDN address of the VCSA followed by port 5480 (https://<VCSA FQDN>:5480).
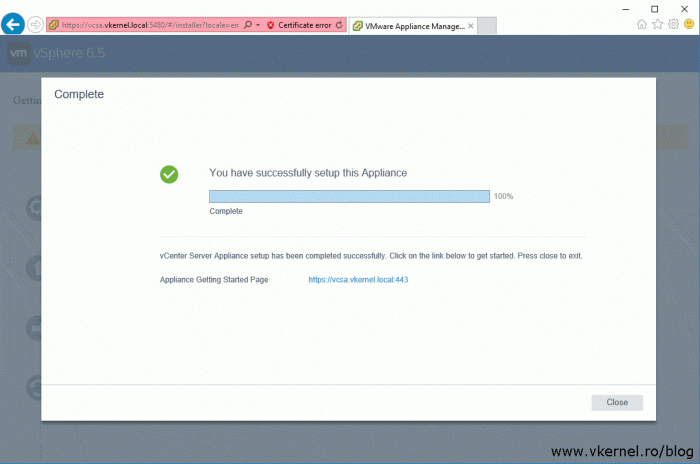
Once it’s done, we will have a Complete message in the web configuration wizard and the console logon screen of the VCSA will show the correct FQDN and IP address; no more localhost.
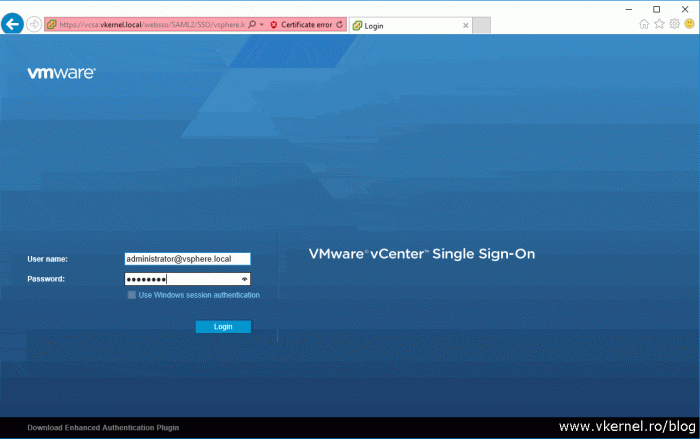
We can now go ahead and log in to our vCenter server that is running in VMware Workstation by using the credentials we provided in the Import Wizard.
The next recommended steps are to join the VCSA to your Active Directory domain and replace the self-signed certificate. Usually this is what I do after a VCSA deployment either it is in a lab environment or a production one.
Summary
To only thing I can say here is that…nice feature. I know most of us struggled to make this work in the past to learn more and practice even more, and now have that opportunity with the new version of VMware Workstation and the VCSA appliance. Go ahead, test it, play with it, and let me know what you think about it in the comments area.
Want content like this delivered right to your
email inbox?
