VMware vCenter Enhanced Linked Mode configuration
If you are the VMware administrator of some large environment or maybe a consultant and need to deploy new vCenter servers in the company’s branch offices, you can do this very elegantly so after you are done, all the vCenter servers can be accessed, managed and configured trough a single interface. Based on VMware’s dictionary, this is called Enhanced Linked Mode (ELM) which allows us to link two or more vCenter servers together for ease of administration. Well…the linking actually happens between the Platform Service Controllers (PSC) where vCenters are connected to as you will see later on. Since the PSCs will be in the same SSO domain, they will replicate permissions, licenses, tags, policies, roles across all linked vCenter Servers. This feature will also allow us to view and search all of the linked vCenters inventories, and manage them trough a single vSphere Web Client session.
Unfortunately, if you are running vCenter Server Foundation or Essentials it is not going to work because Enhanced Linked Mode requires vCenter Server Standard licensing. Enhanced Linked Mode also has some limitations:
- For vCenter Servers deployments with external PSCs (external PSCs were deprecated by VMware starting with vCenter 6.7) we can join up to 10 external PSCs and 15 vCenter Server systems in a single SSO domain.
- For those vCenter Servers with an embedded PSC, we can join up 15 nodes in one SSO domain.
Now that we know the ins and outs, let’s start deploying a new vCenter Server in one of our branch offices and join it to an already existing SSO domain which is running in our headquarters datacenter. If your vCenter servers are already deployed and you want to take advantage of the Enhanced Linked Mode feature, you can do so starting with vCenter Server version 6.5U2 which I am going to discuss in a future article. Right now we are going to concentrate only on new vCenter Server deployments which we want to linked them together.
1. Deploying the vCenter Server Appliance
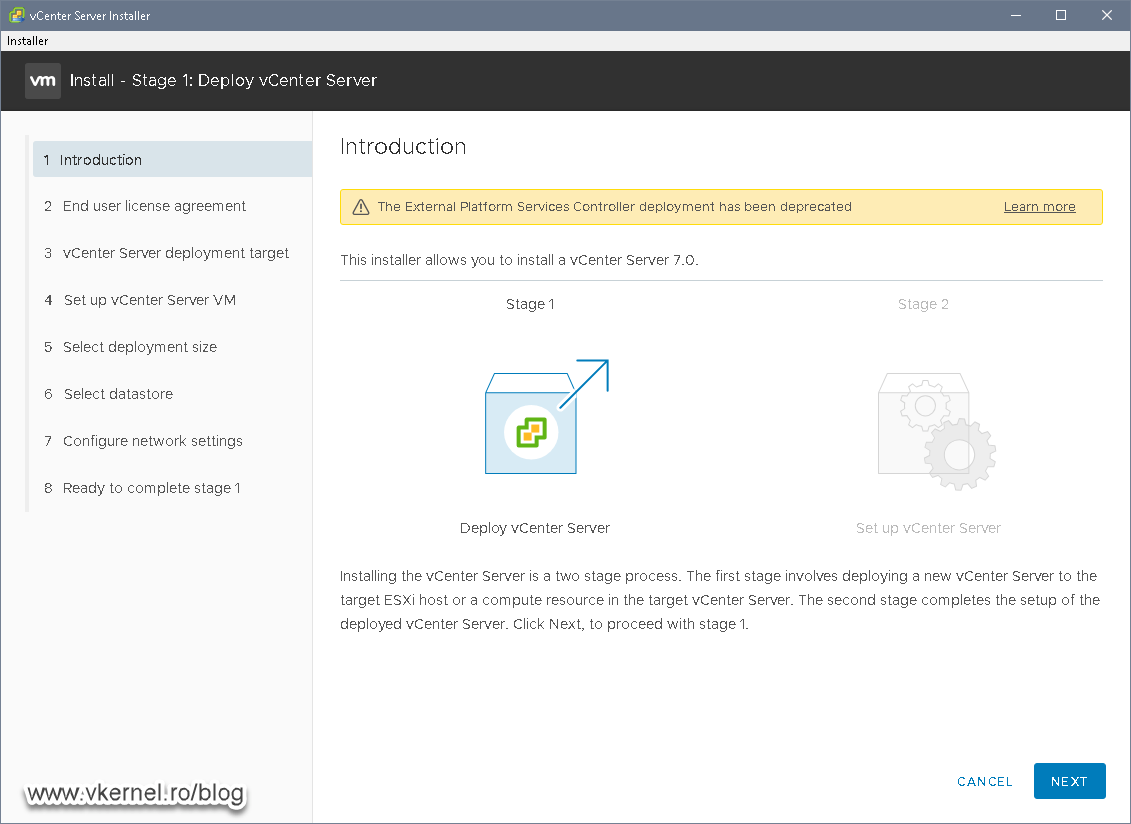
As you probably know, this is also called stage 1 of the deployment which actually just puts the vCenter Server appliance on the ESXi host and assigns an IP address and name. During this process we will not get the option to configure Enhance Linked Mode, that’s for the second stage of the deployment.
Presuming you already have at least one vCenter server up and running with a minim version of 6.0, let’s start the installation wizard of our second one in the branch office. Mount the vCenter Server Appliance (VCSA) ISO and from the vcsa-ui-installer > win32 directory launch the installation wizard.
If there is no vCenter Server running in your environment, follow this guide to install your first one, then continue with the instructions bellow.

In the vCenter Server Installer window that opens up click on Install.

Since there is nothing to do on the Introduction page, click Next to move forward.
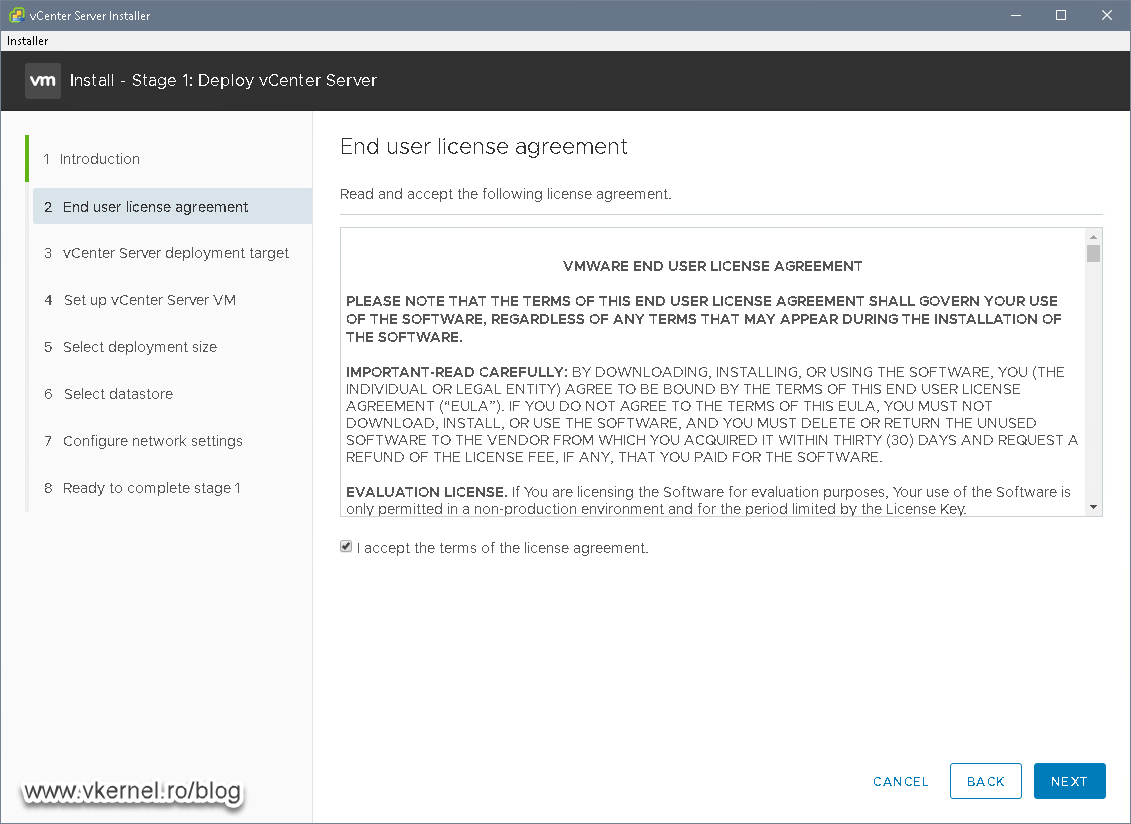
Accept the license agreement and continue the wizard.
On the vCenter Server deployment target page we need to provide an ESXi server with it’s credentials located in our branch office, since this is the branch office vCenter Server deployment. Once you are done completing all the fields click Next.

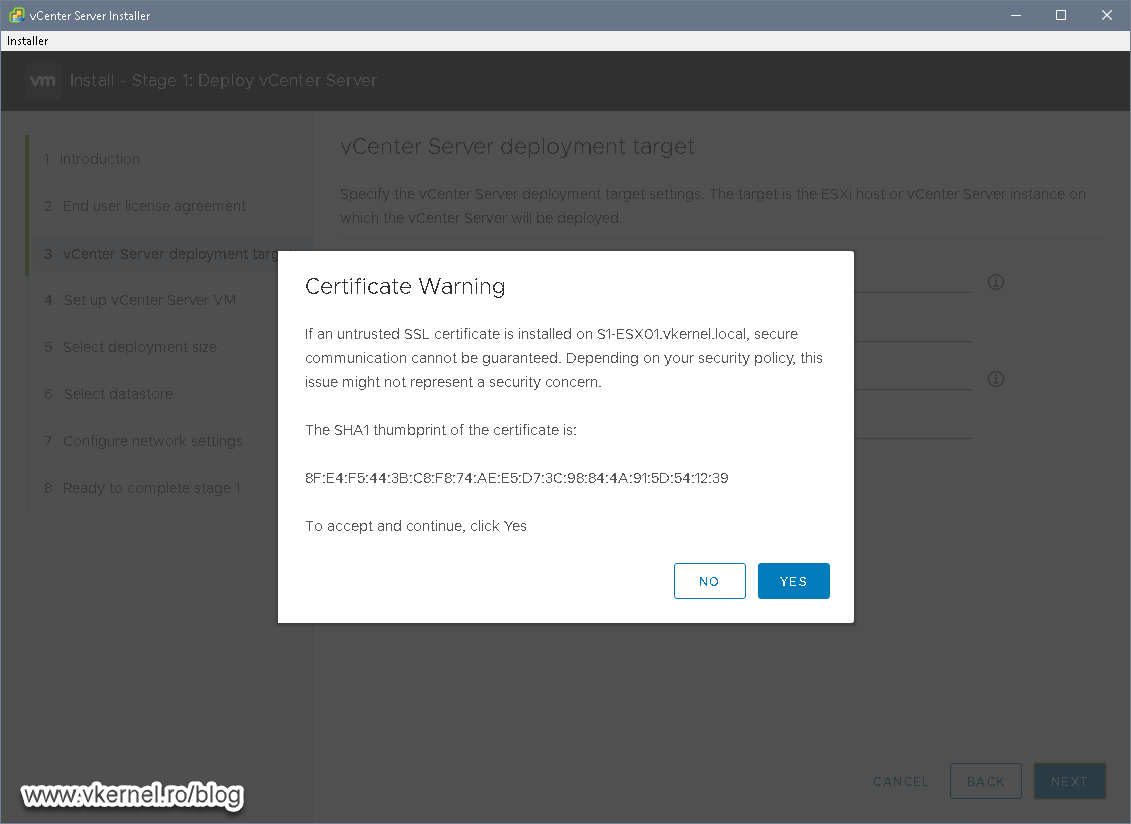
On the Certificate Warning window that pops-up just hit Yes to continue.
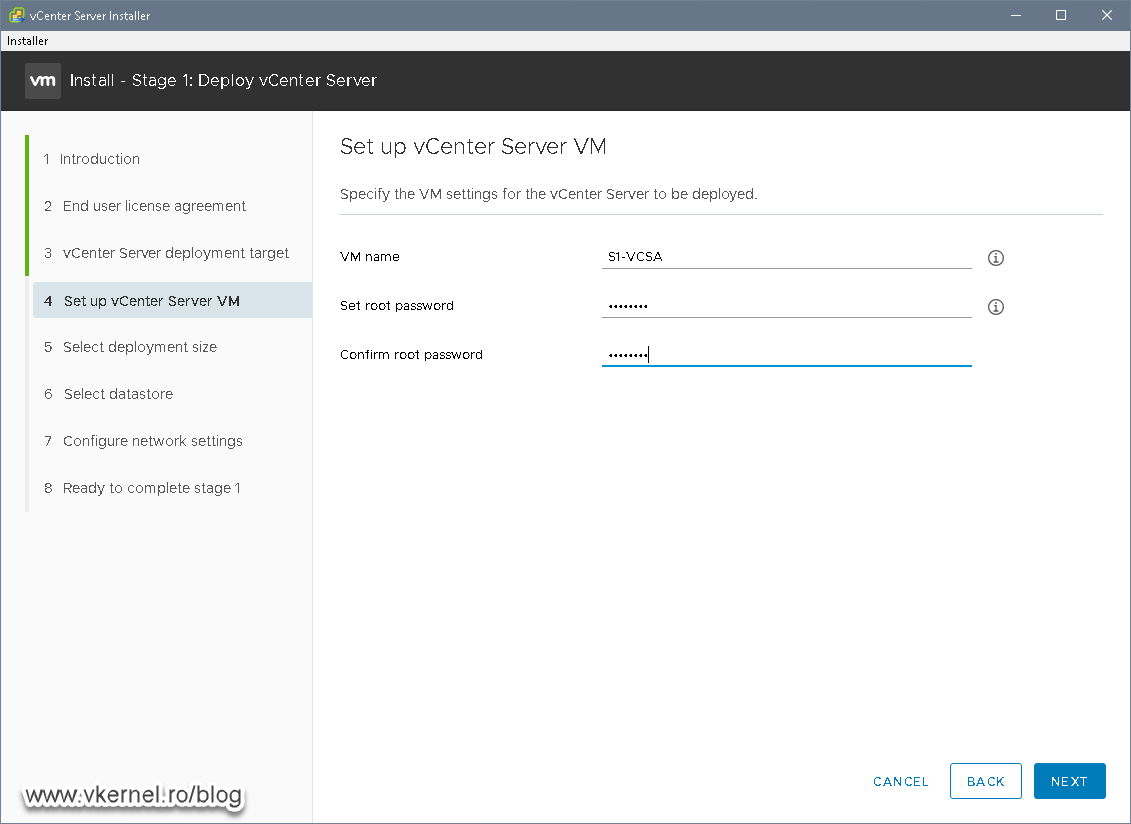
Here, we need to provide a name and password for our virtual appliance. The name we type in the VM name field will appear in the vCenter inventory; it is not the guest name.
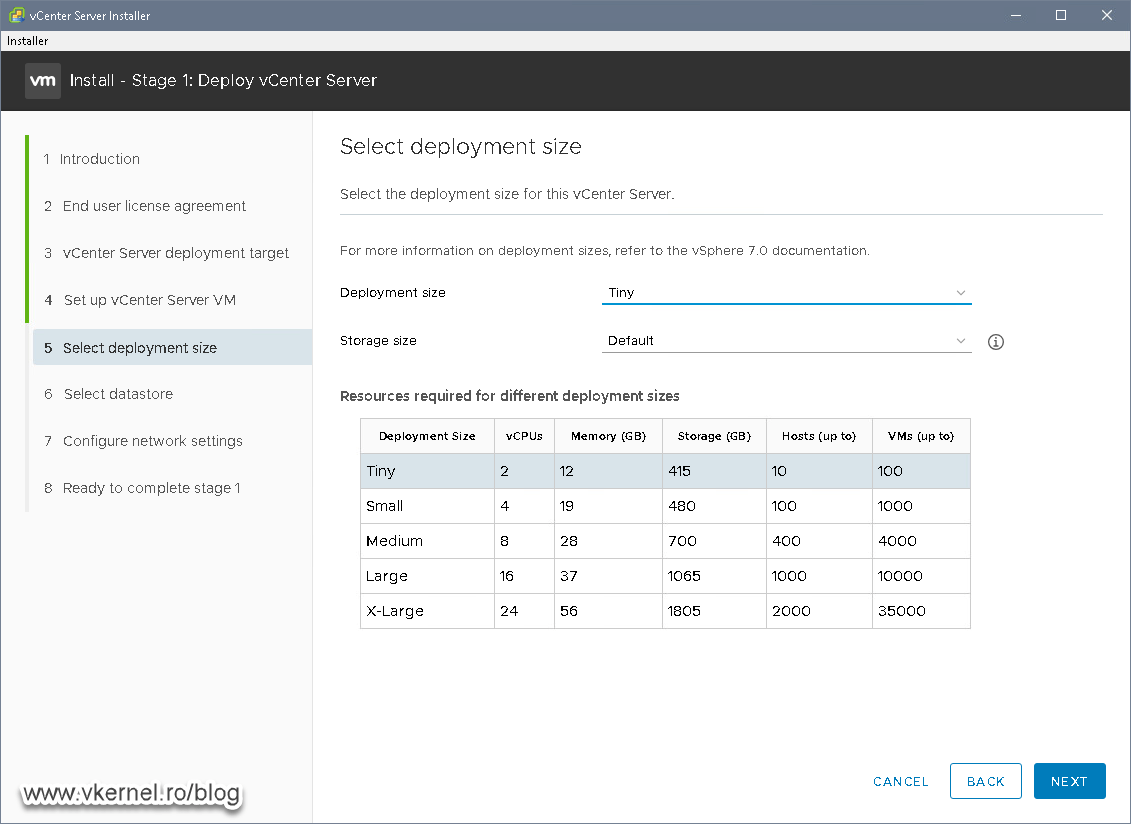
Choose the size of the appliance based on how many ESXi hosts and VMs this vCenter server will manage then click Next.
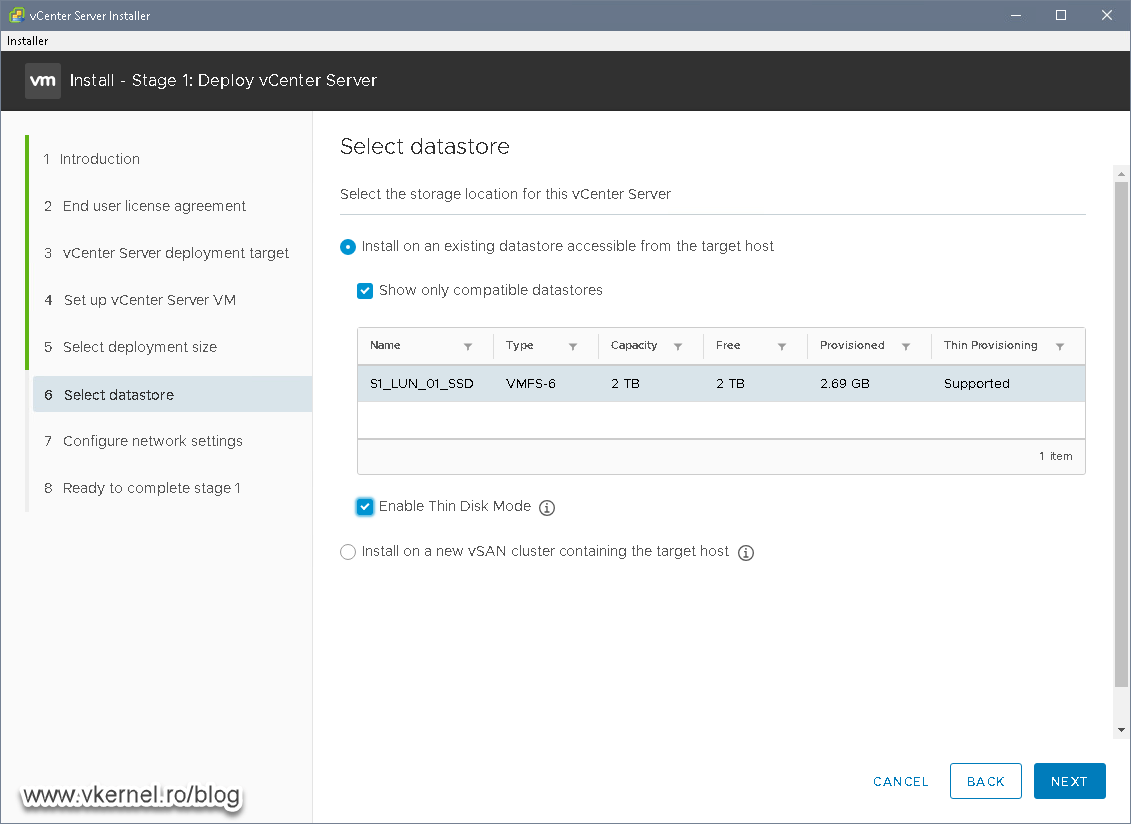
Select the datastore from the target ESXi host where the vCenter Server appliance will sit then continue the wizard. To save storage space, you can enable Thin Disk Mode so the appliance disks will not occupy the entire provisioned space. They will grow as more disk space is required.
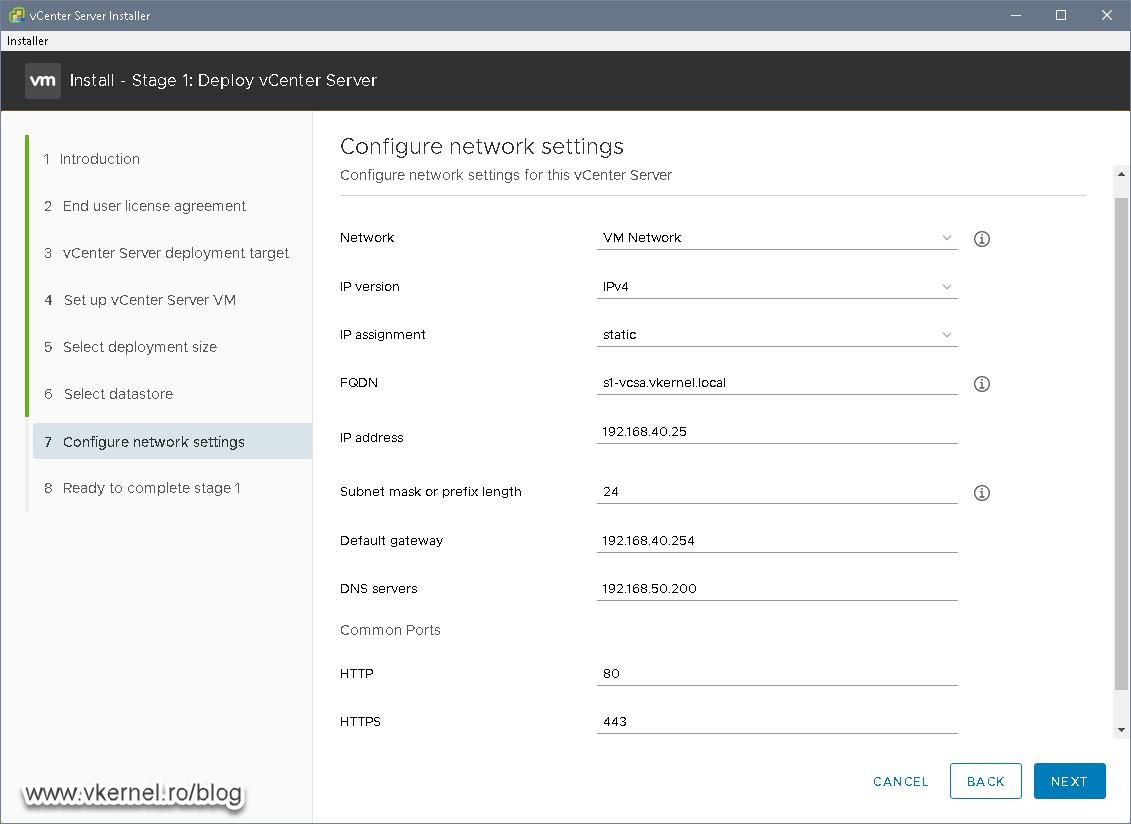
This is where we provide to the wizard the network information for our vCenter Server. Just make sure that before you click Next on this wizard screen you already have an A record created in DNS with the same name as you put in the FQDN filed that points to the IP address you typed in the IP address filed.
If everything looks good in the Review page, click Finish to start the vCenter Server appliance deployment.

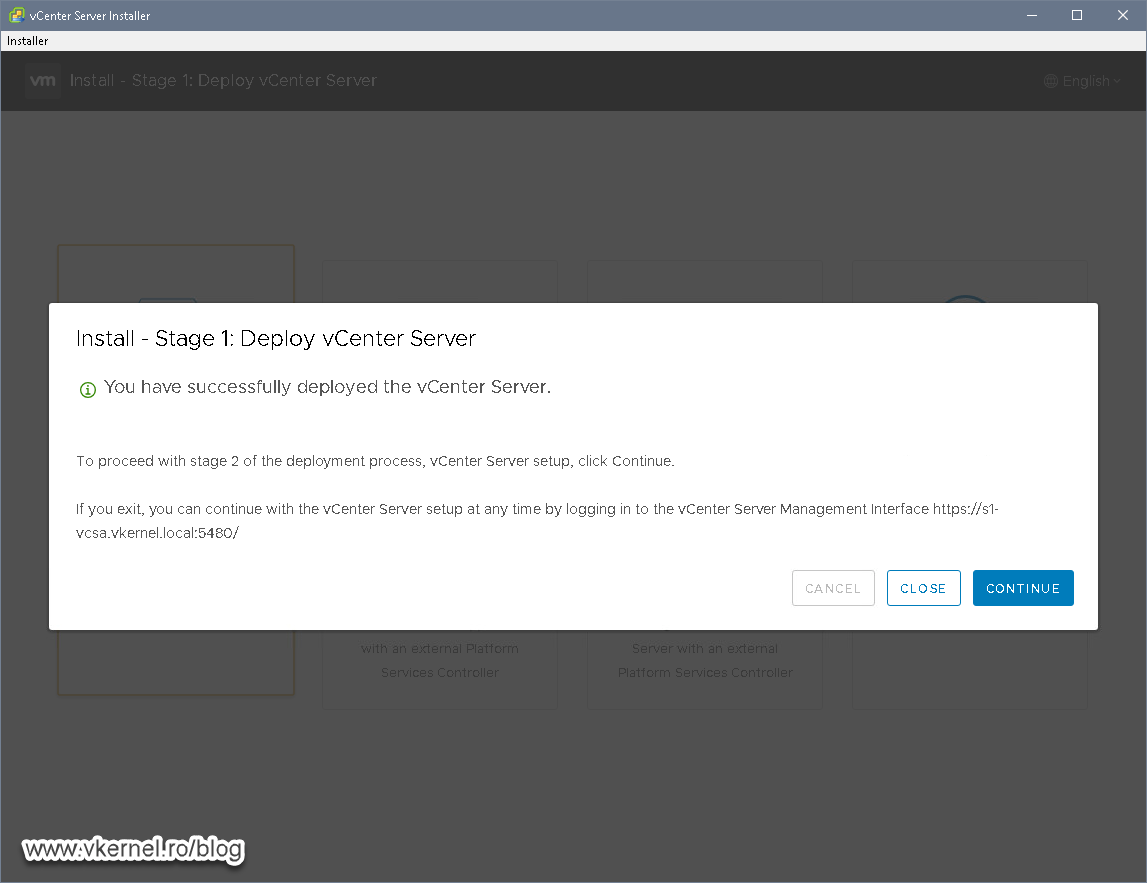
Once this is done, we will have to go trough the second stage of the deployment where we will configure the Enhanced Linked Mode feature.

2. Configuring Enhanced Linked Mode for the vCenter Server appliance
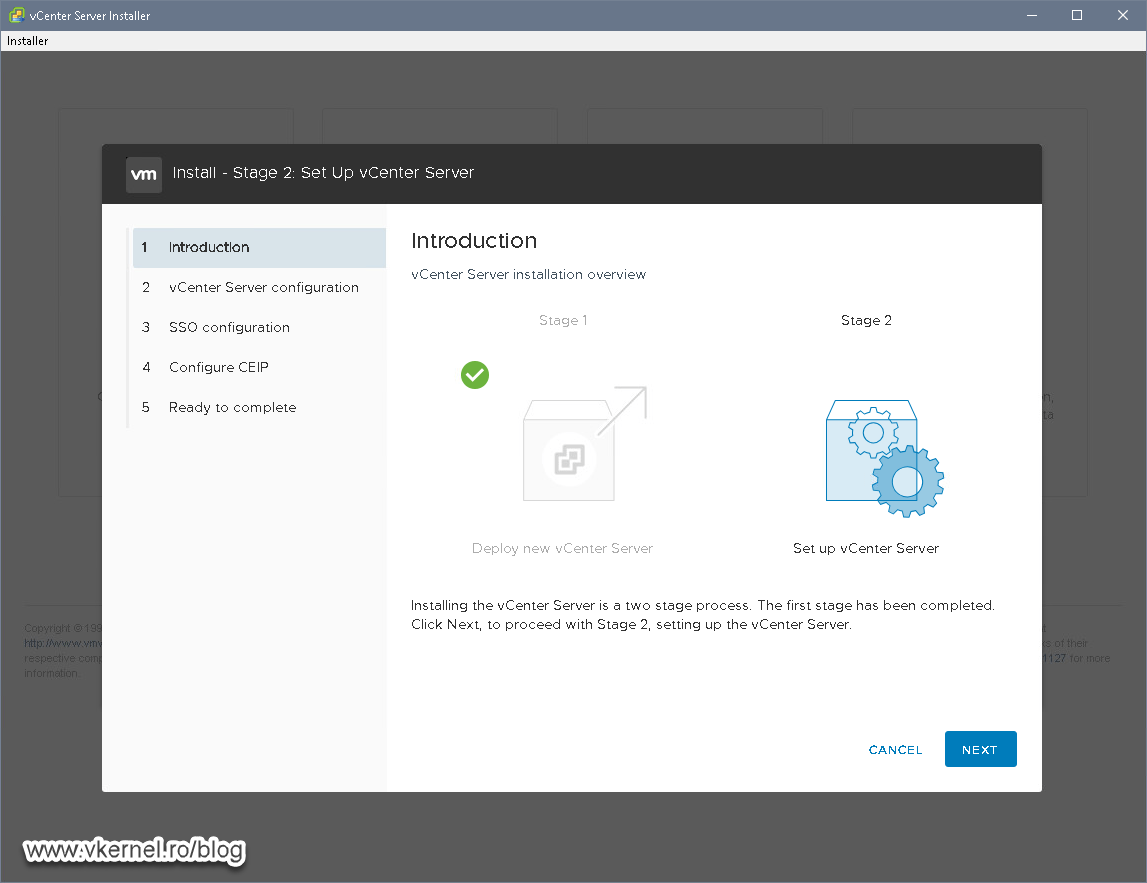
Now that stage 1 of our vCenter Server appliance has finished successfully, it is time configure the second one. This is the part where we point the Platform Service Controller (PSC) of this vCenter appliance to the one in our headquarter site. To begin this process just hit the Continue button in the vCenter Server Deployment Wizard.
If you closed by mistake the wizard window, open a browser and type the FQDN or IP address of the appliance followed by port 5480 (https://<Appliance FQDN:5480>). This will launch the second stage of the deployment.
On the Introduction page of the wizard click Next since there is nothing we can configure here.
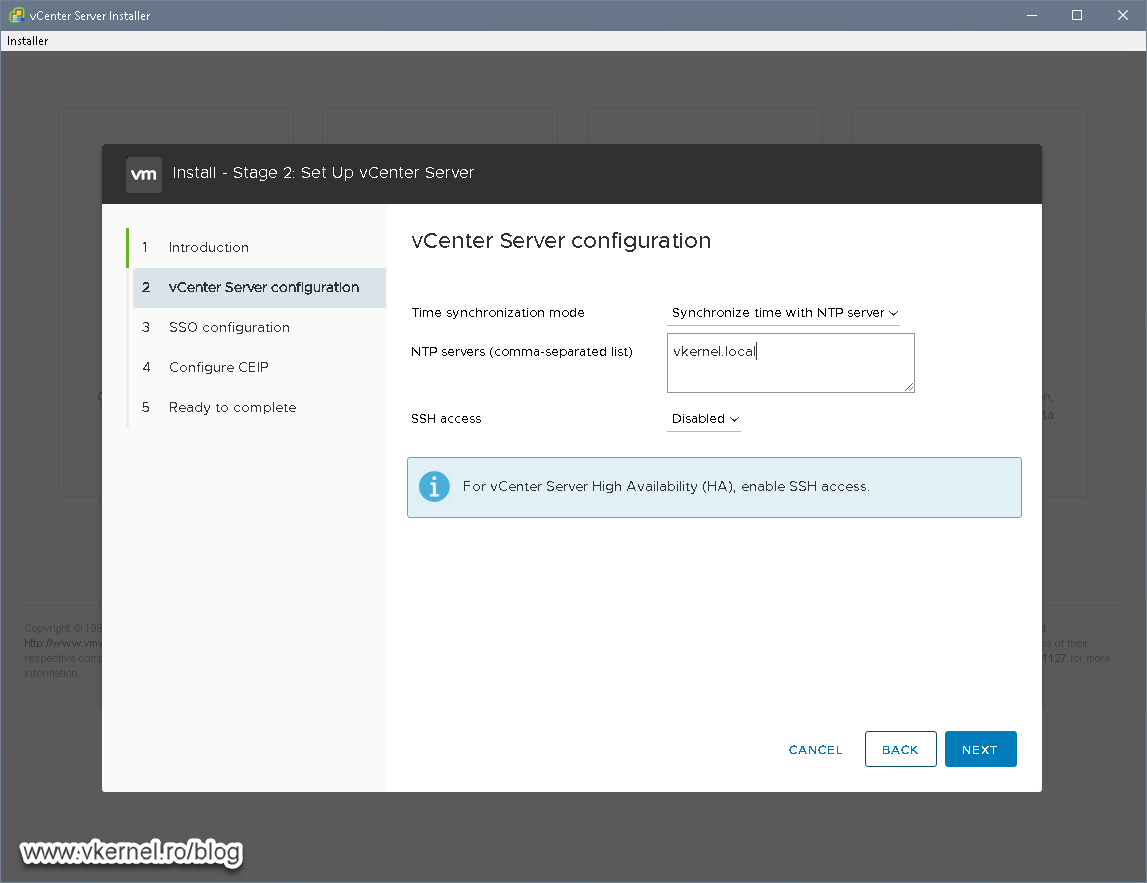
In the second screen of the wizard we are given the option to configure a custom NTP server for our vCenter appliance or go with the default choice which is to synchronize time from the ESXi host it’s sitting on. I encourage you to always provide a time server because this way all your servers and devices will be synchronized.
Believe it or not, but all this work that we did above was for this window only. This is where we link this PSC/vCenter to the one in our headquarters datacenter. In the first field, type the remote vCenter server FQDN or IP address then the SSO domain, username and password. When you are done click Next.

Join or not join the Customer Experience Improvement Program, I will leave this up to you.

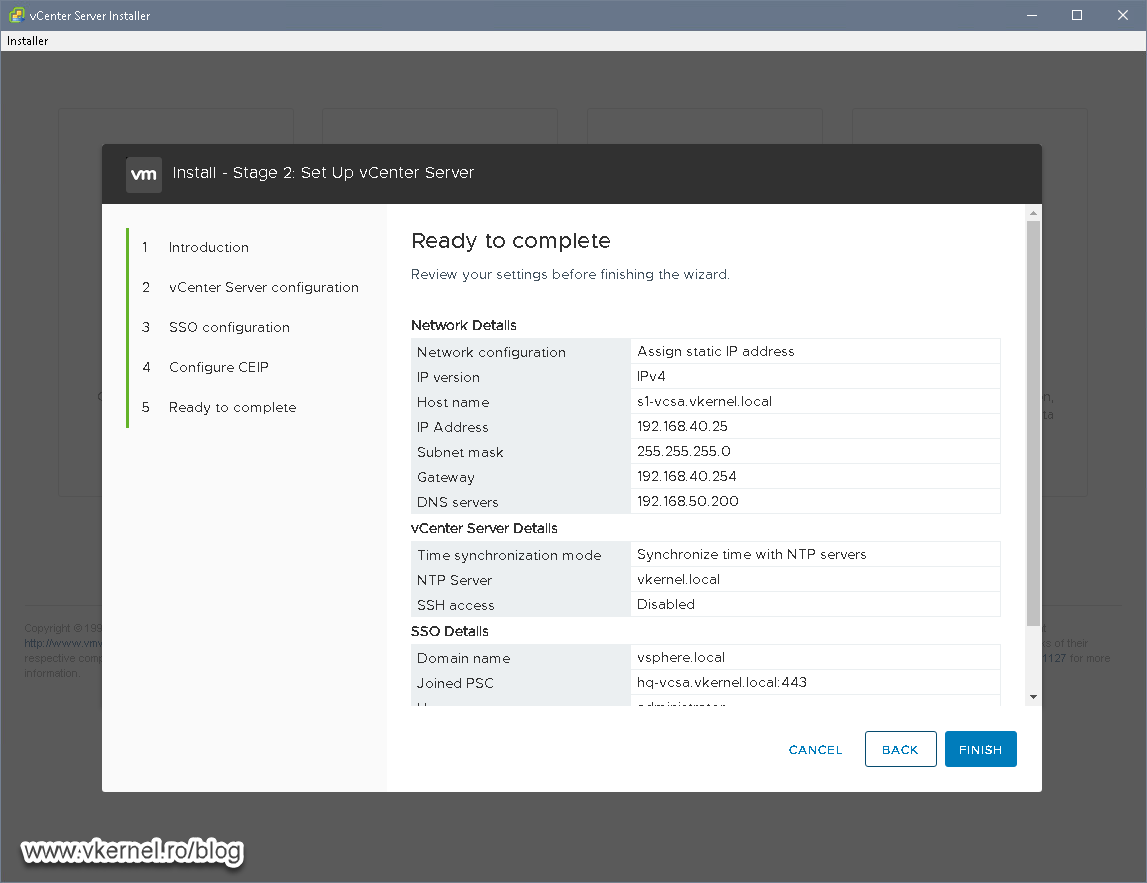
On the Ready to complete page, review the configuration, and if everything is good, click the Finish button to configure this Platform Services Controller (PSC) and link it with the headquarter one.
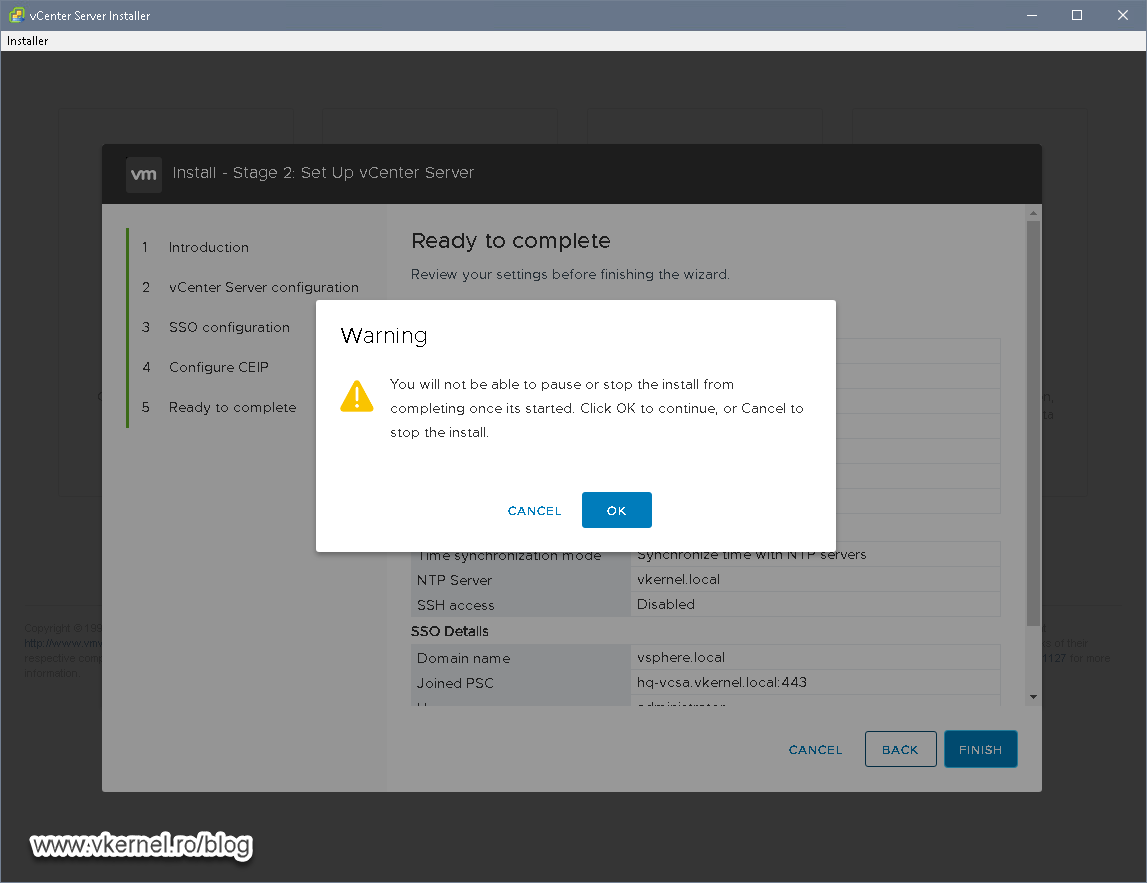
We get a warning before stage two of the deployment starts, informing us that we will not be able to stop or pause the process. We are good, we know what we are doing, so click OK to start the installation.
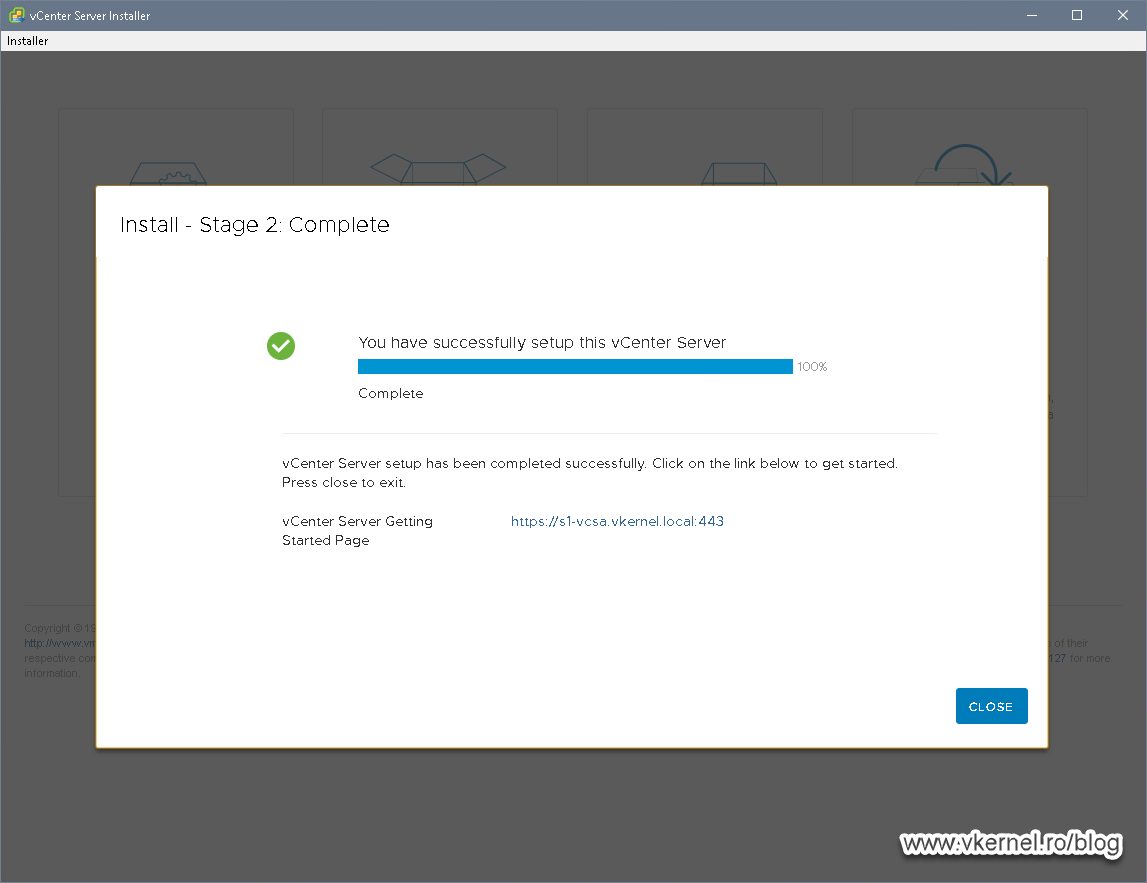
Once the deployment starts, be prepared to wait, because it will take a few dozen minutes to finish.

Once it is done, we are presented with a link that opens the vSphere Web client.
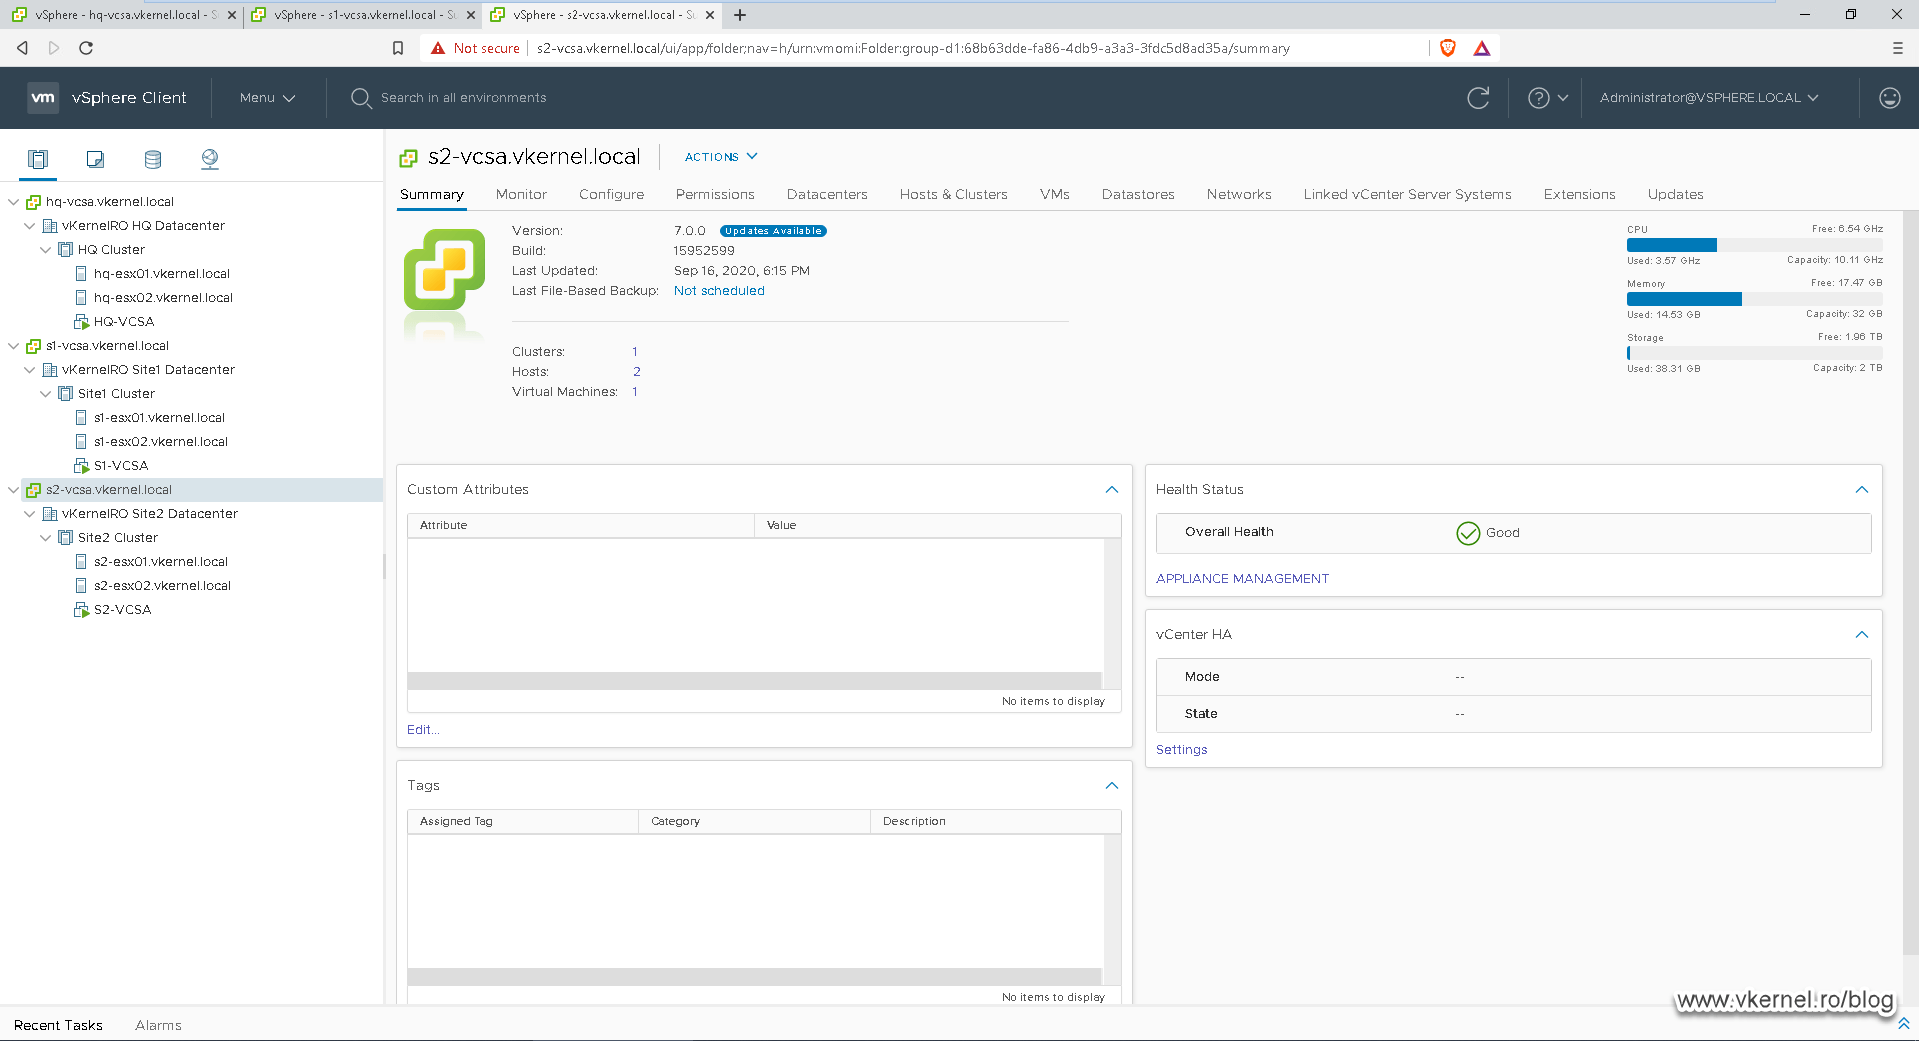
At this point, it does not matter which vCenter Server address we use to access the web interface, because once the vCenters are linked we can see all of them here. Now off course, we can implement some restrictions, but by default, as an admin, we have the option to manage all the linked vCenter Servers from one single point. Pretty cool I might say!
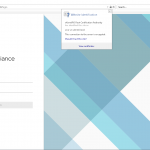
Because of the self-signed certificate, we will get that nasty certificate error page in the browser. Just continue to launch the vSphere Web client, and if you want to get rid of the certificate error, you can replace it with a trusted one from an internal Microsoft PKI or from a public one.
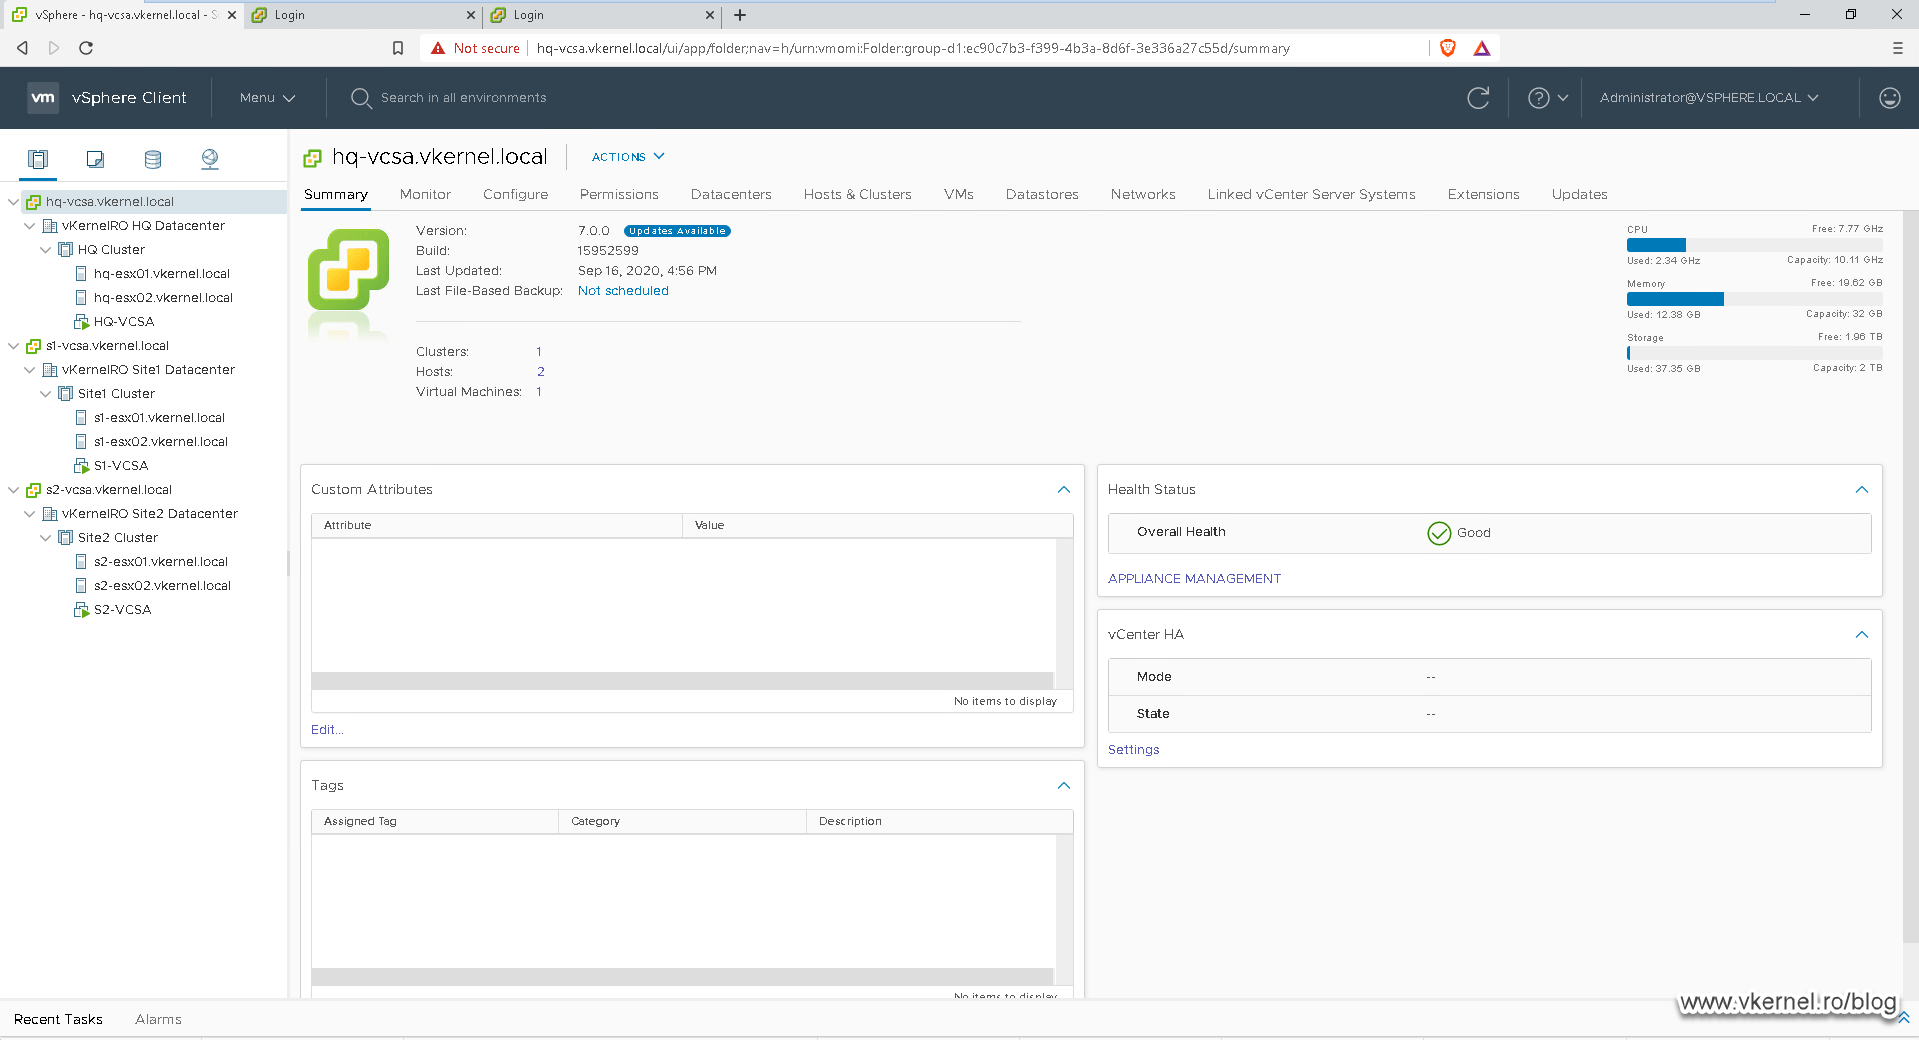
Logging into the second vCenter server we get the same view.
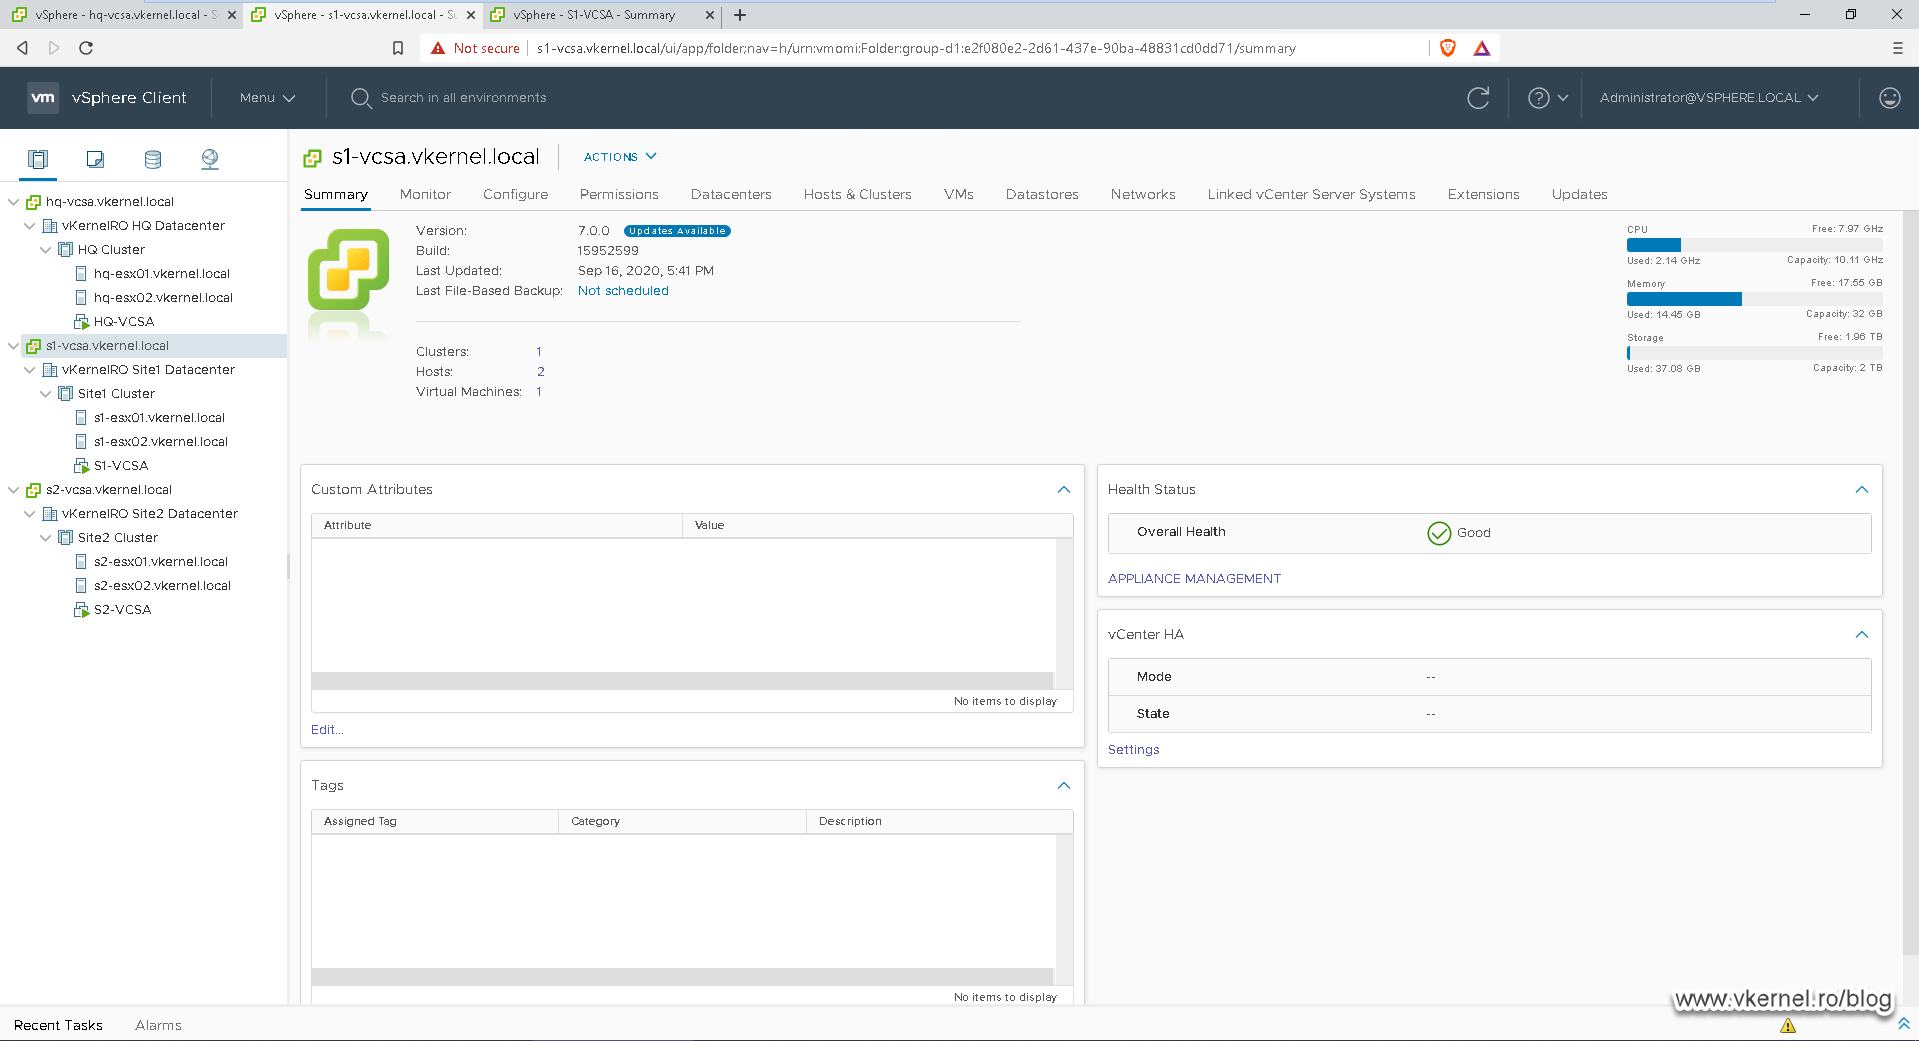
If we have more than two vCenter Servers linked together using ELM, the result should be the same no matter what vCenter we use to log in.
Summary
Since VMware deprecated the External Platform Service Controller starting with vCenter 6.7, the configuration of Enhance Linked Mode has been simplified a lot. As you just saw, implementing this feature not only helps us reduce the complexity of our virtual environment but also making it easy for the rest of the admins. We can create a CNAME record in our DNS and give the name to the rest of the departments that need to use the virtual infrastructure, and that’s it, all they have now is just one FQDN for the entire VMware environment. From here on, all we need to manage are the permissions.
Want content like this delivered right to your
email inbox?
More similar articles
 Patching the vCenter Server and PSC Virtual Appliance
- Removing vCenter or PSC from Linked Mode configuration
- Repointing Embedded vCenter Server to existing SSO domain
- Replace VMware VCSA 6.x Certificates with ADCS Certificates via the GUI
- Build and run Windows Failover Clusters on VMware ESXi
- How to deploy VMware VCSA 6.5 in VMware Workstation 14