Replace VMware VCSA 6.x Certificates with ADCS Certificates via the GUI
Until version 6, every time we wanted to change the default self-signed certificate of our vCenter server we had to SSH into the appliance and use VMware Certificate Manager to do the job. We can still do that even now, but starting with vCenter 6.5 the process has been simplified a lot for us straight from the vSphere Web Console. Now all we have to do, is log into our vCenter server portal and provide the new certificates from our internal PKI or public PKI for that matter and replace the existing ones, the self-signed ones.
Before we get to the part where we install the new certificates in our vCenter and PSC appliance, we first have to configure our CA and issue the proper certificates. Once again, in order to do this you need to run at least VMware vCenter 6.5 because in the older versions this option is not implemented. For the sake of this example I am going to test this with VMware vCenter (VCSA) 6.7 which is the latest version at the time of this writing.
To be able to recover just in case things go south, make sure you have a recent working backup of your vCenter/PSC virtual appliance(s).
Configuring the certificate template on the internal CA
VCSA does not support support elliptic curve keys (ECC), only RSA keys. During my testing I found out that if we try to use ECC keys, we get an error during the certificate replacement, so make sure your certificates are built on RSA keys.
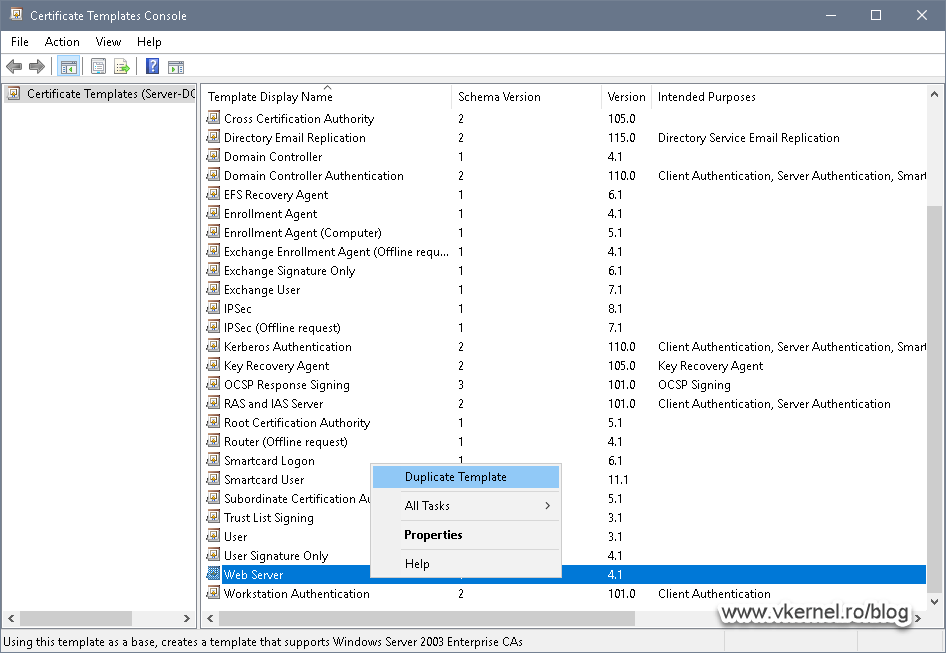
Now open up your Enterprise Issuing CA console, right-click Certificate Templates and choose Manage. Here we will duplicate the Web Server template to create one of our own for use in our VMware Infrastructure. I usually do this in order to have a longer validity period for the certificates than the default one of two years.
To create a new certificate template, right-click the Web Server one and choose Duplicate Template.
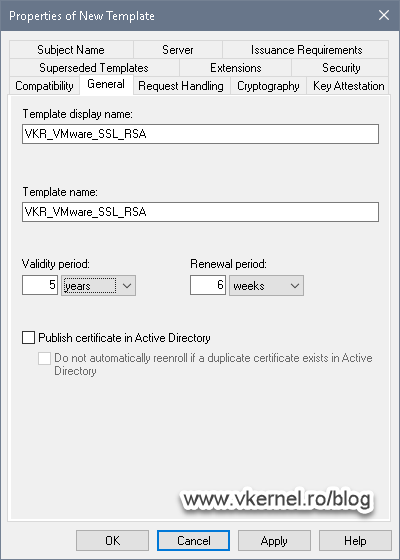
On the General tab, type a name for the new certificate template then set a validity period. I usually go for five years on my VMware Infrastructure.
Don’t forget to set the proper permissions for who can enroll for a certificate based on this template. I put in my CA in the list since I am going to use this server to request the certificates that later on I will set them up in VMware vCenter.
You might have to re-configure your CA in order to issue certificates that have a validity period longer than two years, which is the default. Just use certutil -setreg caValidityPeriodUnits 5 on your CA to set the validity period to a maximum of five years.

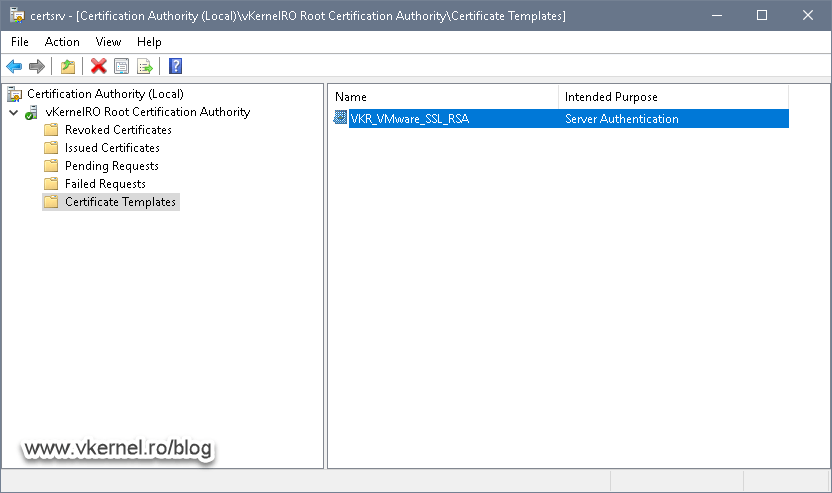
Now make the new template available in your environment by right-clicking the Certificate Templates folder again and choose New > Certificate Template to Issue. In the Enable Certificate Templates window that pops-up select the template we just created and click OK.
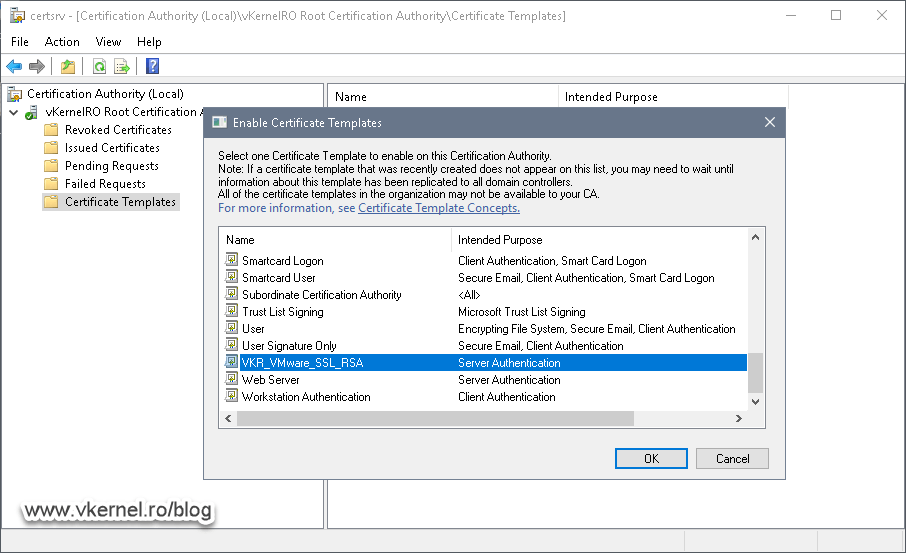
The template is now ready and we can issue certificates based on its configuration.
Request and issue VMware VCSA certificates from the Internal CA
The next step will be to request and issue certificates for our VCSA appliance, but how do you know what Common Name to put in the certificates? In order to answer this question, I will have to skip ahead a little bit in the article in order to show you.
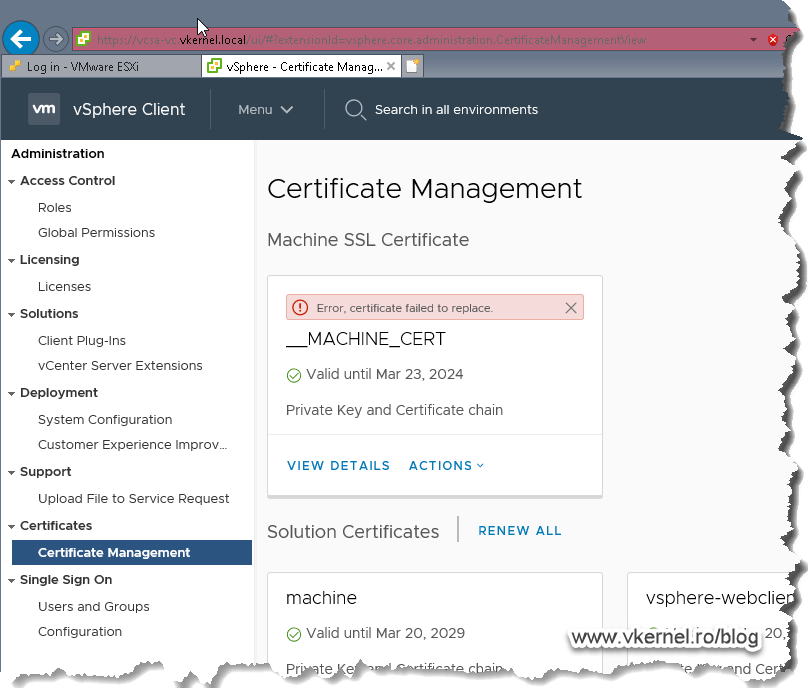
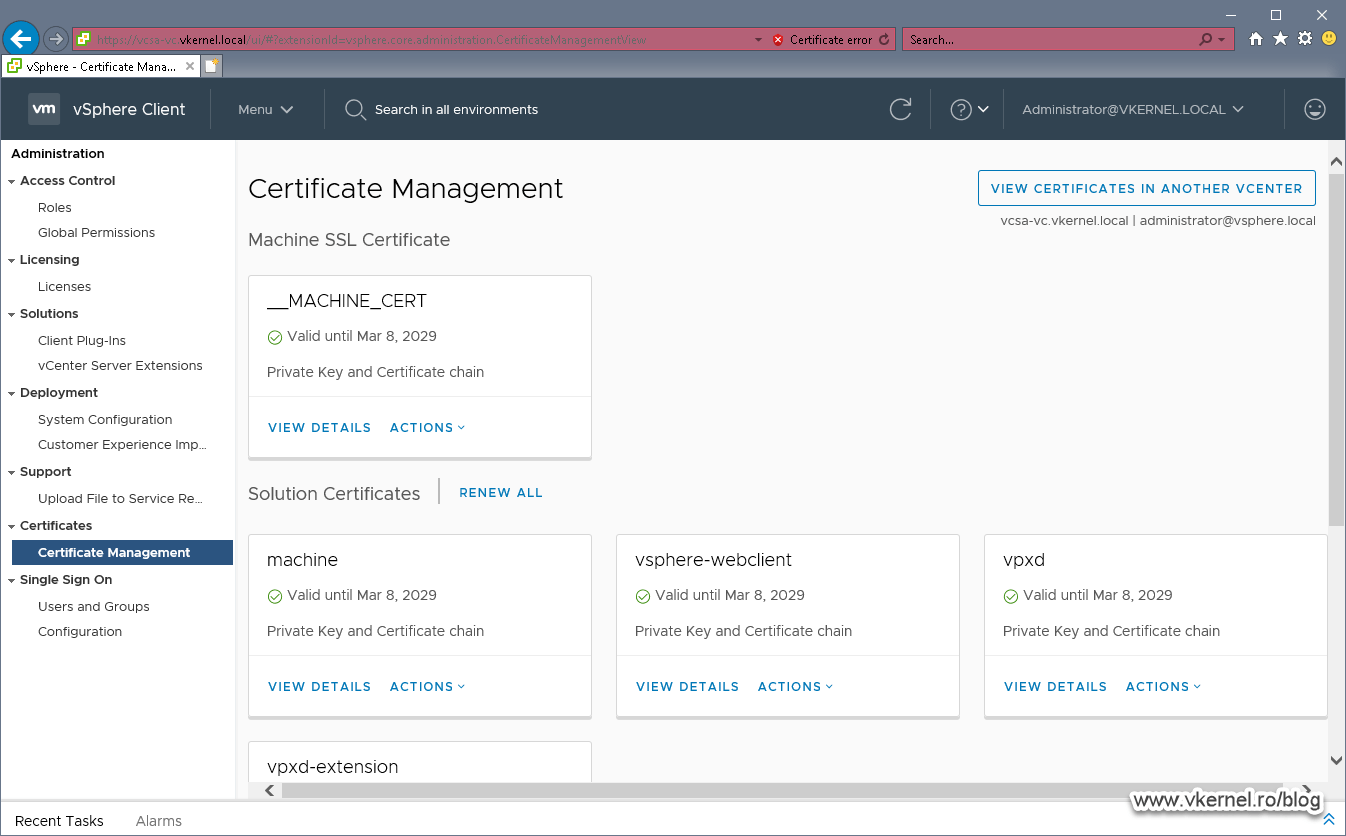
Open your VMware vSphere Web portal and go to Administration > Certificate Management. Here, in the first box, type your vCenter server FQDN then provide the credentials to connect to it. We will have to use the local administrator account (the one we set up when we deployed the appliance), not the domain one.

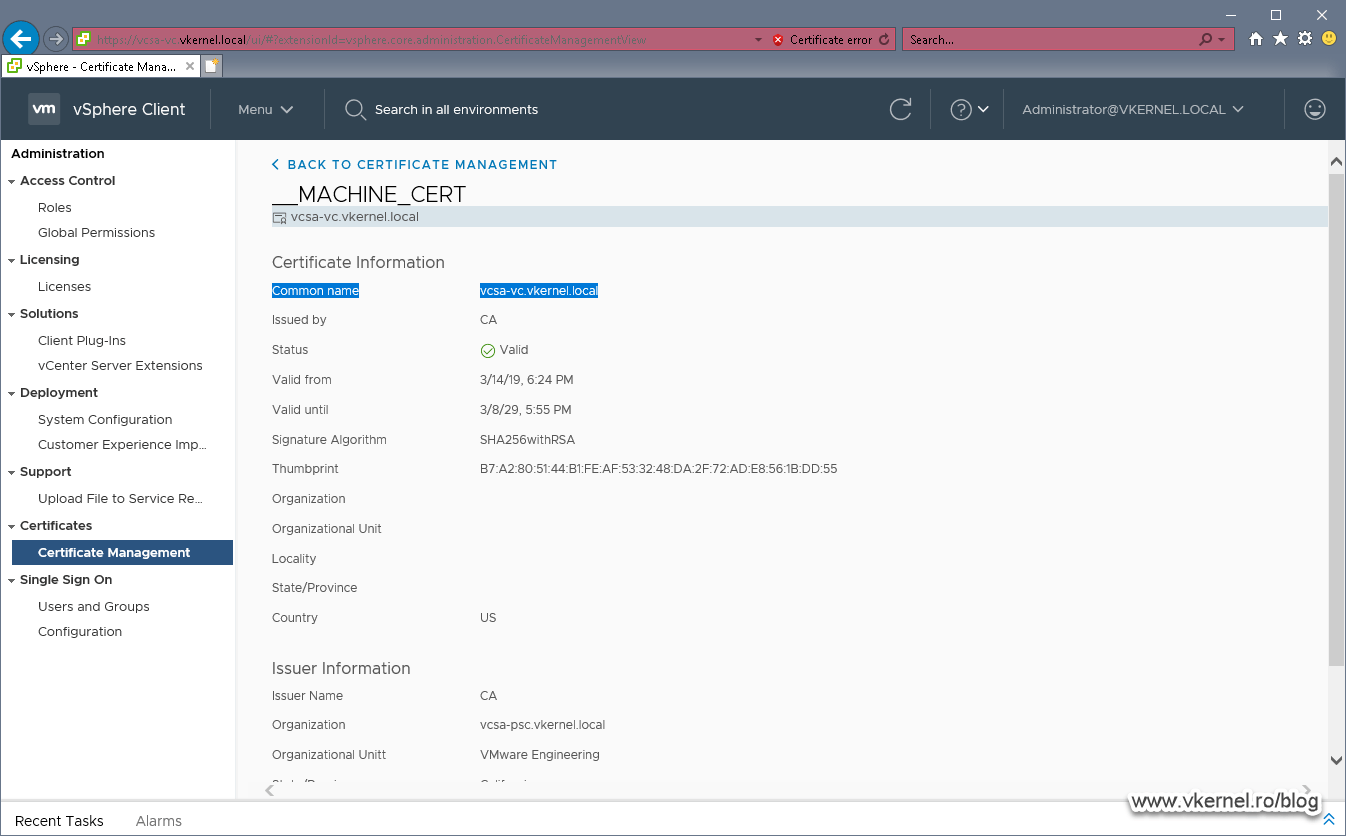
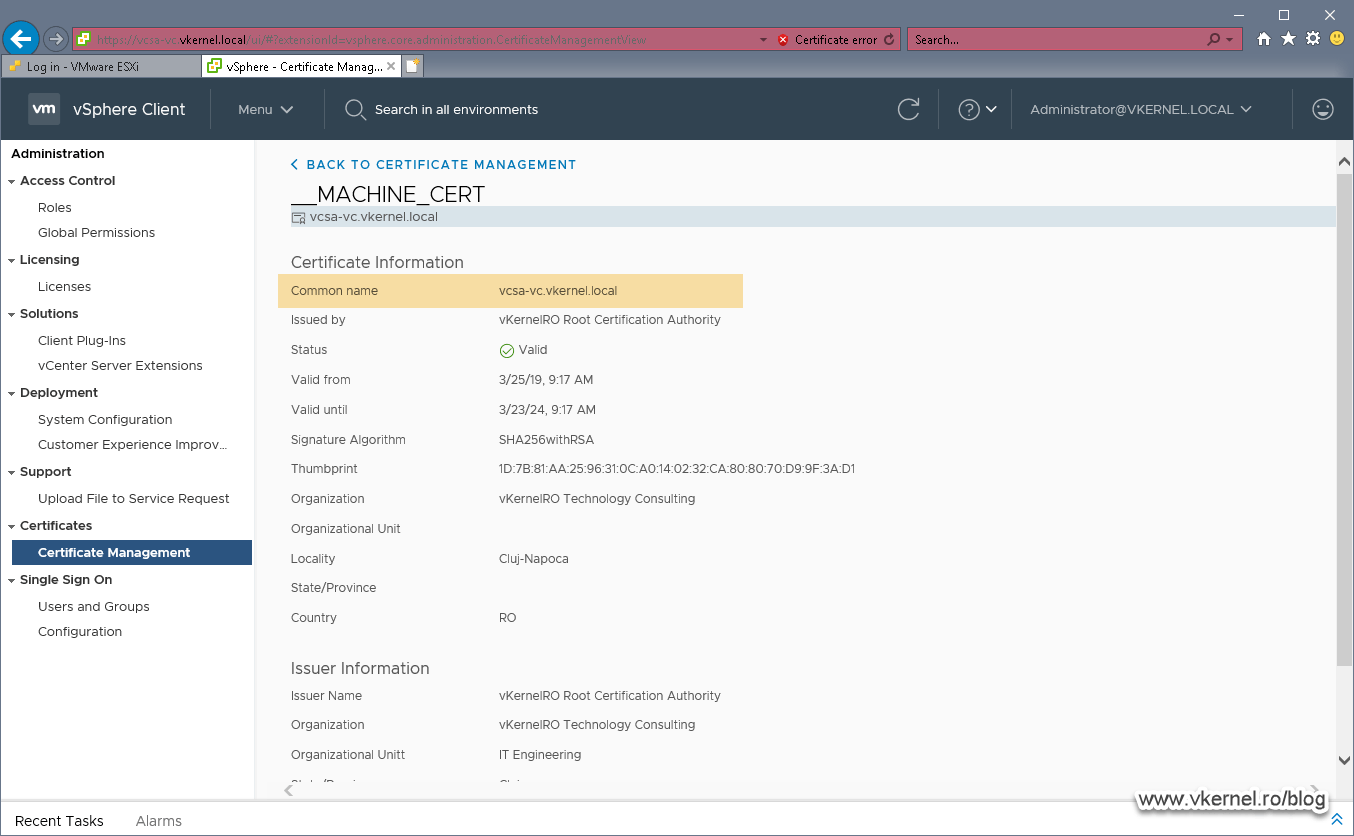
Once logged into the Certificate Management we can click View Details on any of the certificates in order to see all the info about them. What interest us is the first column, the Common name column. The name we see here, it’s the name we also have to use for the new certificate, the one that we are going to issue from our internal CA.
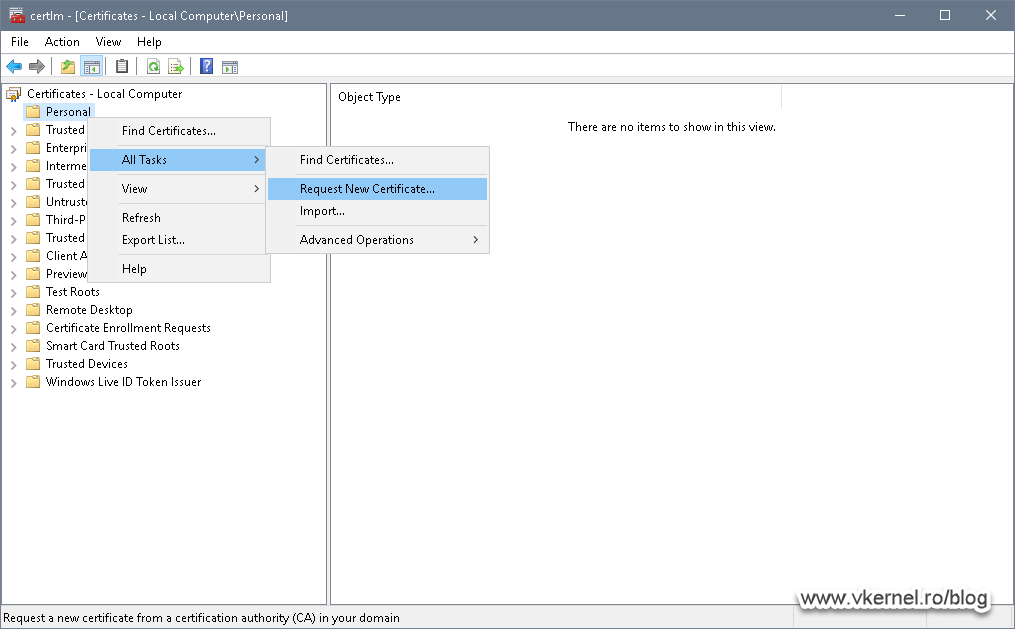
Now let’s issue our first certificate. On a Windows computer, open the Certificates Management console (certlm.msc), right-click Personal and choose All Tasks > Request New Certificate.
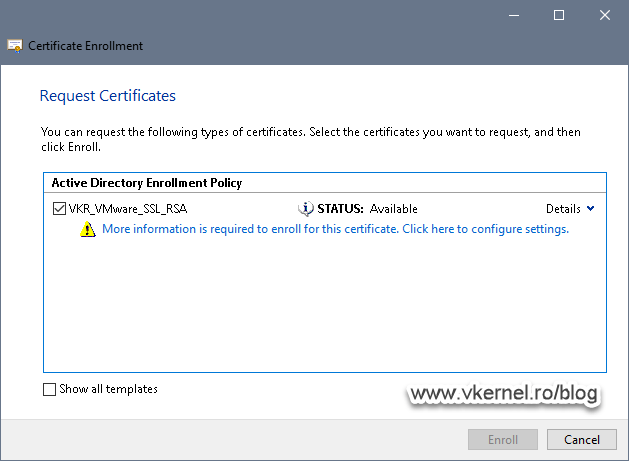
If the certificate template has the proper security permissions set up, you should see it here, in the Request Certificates wizard screen. If not, you will have to go back on your Enterprise Issuing CA server and set the proper permissions.
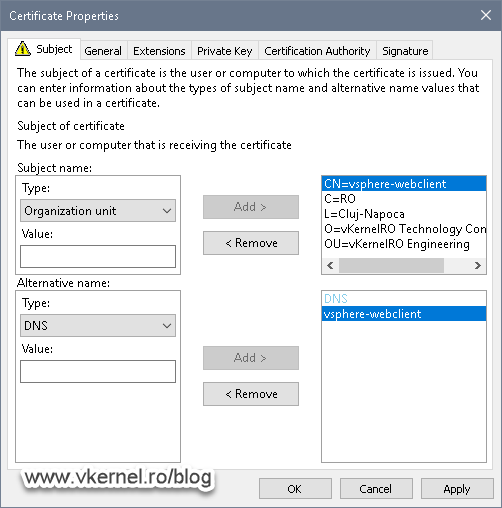
Check the box next to the template then click More information is require to enroll this certificate. Click here to configure settings link.
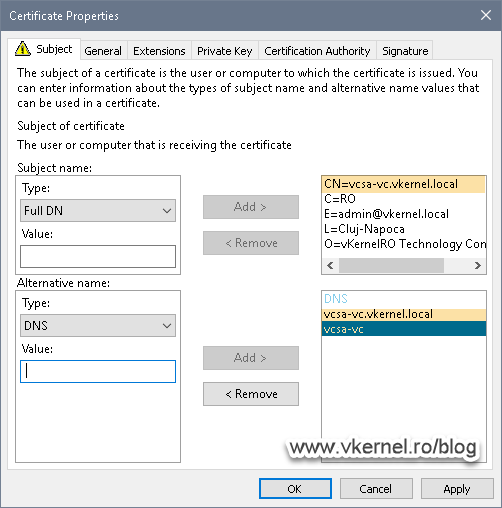
Here are the important settings, the Common Name and DNS ones. Make sure you type the same name you have in the Common Name of the existing certificate, the self-signed one, as we discussed at the begging of this article section. As you can see, I have also put in the NameBIOS name of the vCenter server appliance in the DNS option (aka Subject Alternative Name) just in case someone will type it in the browser without the domain suffix. This way they don’t get the certificate error message.
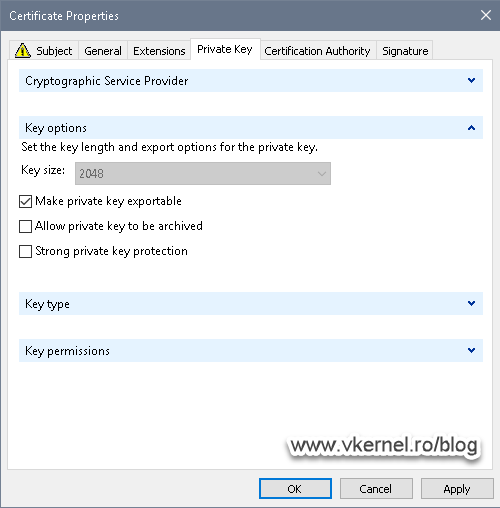
Now let’s make sure our private key for this certificate is exportable. Go to the Private Key tab and expand Key options. Check the Make private key exportable box then hit OK and Enroll.
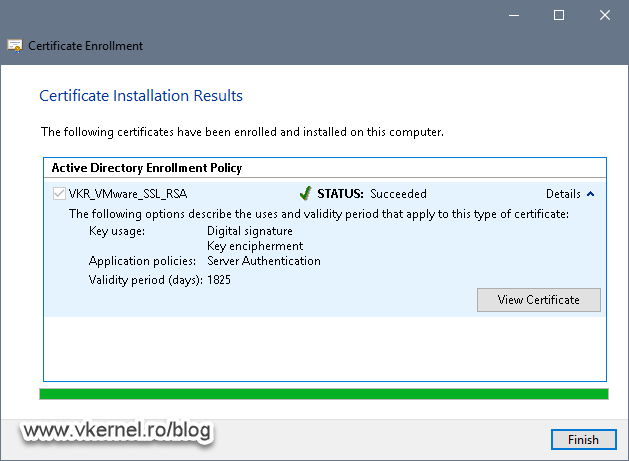
The certificate should be issued with no problems whatsoever.
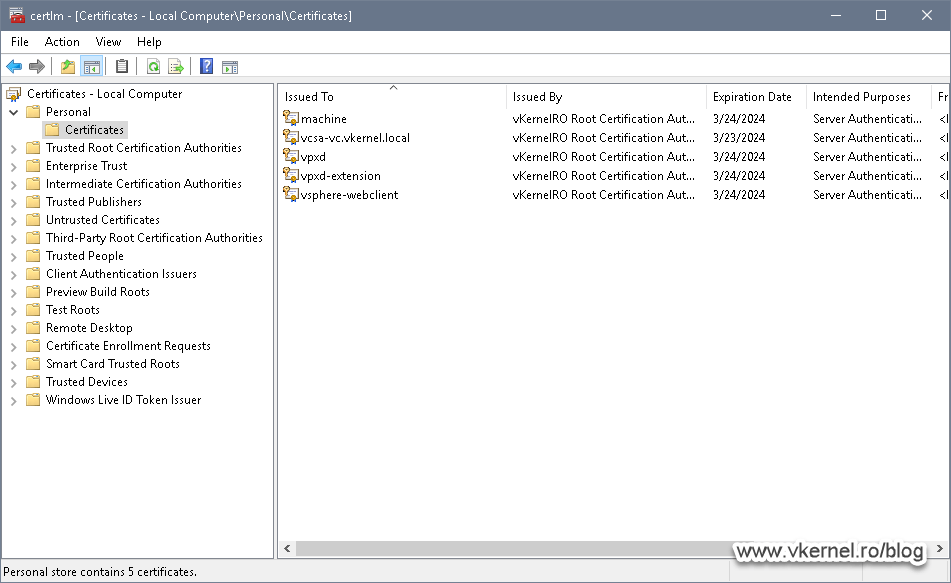
Now repeat this step for the rest of the certificates you see in the VMware Certificate Management portal making sure to use the same common names as the existing ones. These are the machine, vsphere-webclient, vpxd and vpxd-extension certificates.

Once you’re done you should end up with five certificates in the Windows Certificates Store.
Export, extract certificates and private keys
Export the Root certificate
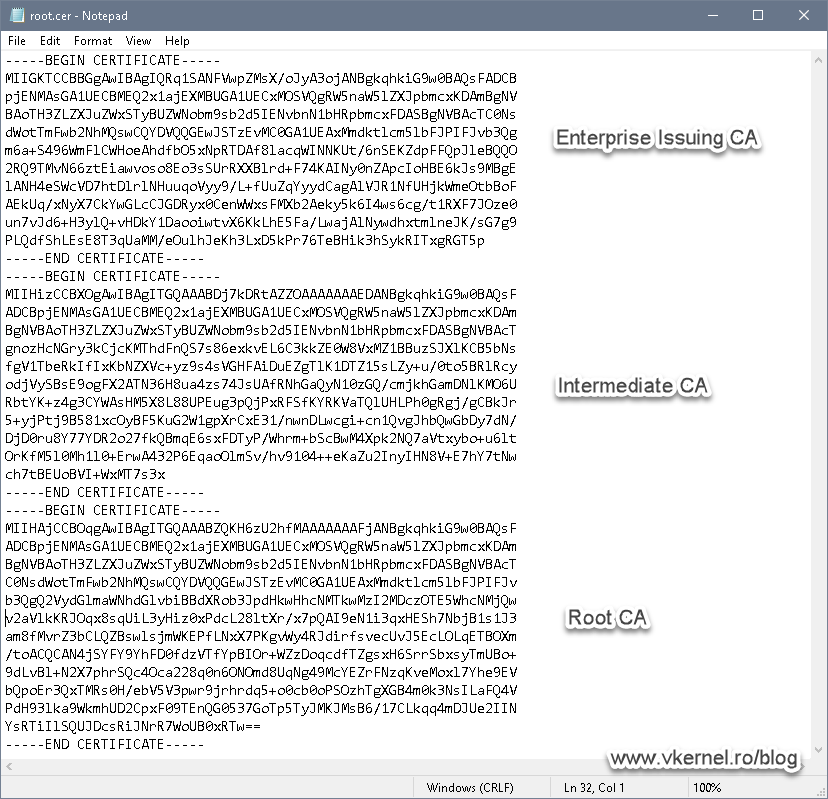
For the chain to be complete we also have to export our root certificate and add it into the virtual appliance. In case you have an environment with multiple CA levels, you will have to export the root, intermediate and the issuer certificates. Once they are exported (in Base64), you will have to build a .pem file where you add the content of every one of these certificates starting with the lowest one at the top of the file and continuing to root at the bottom.
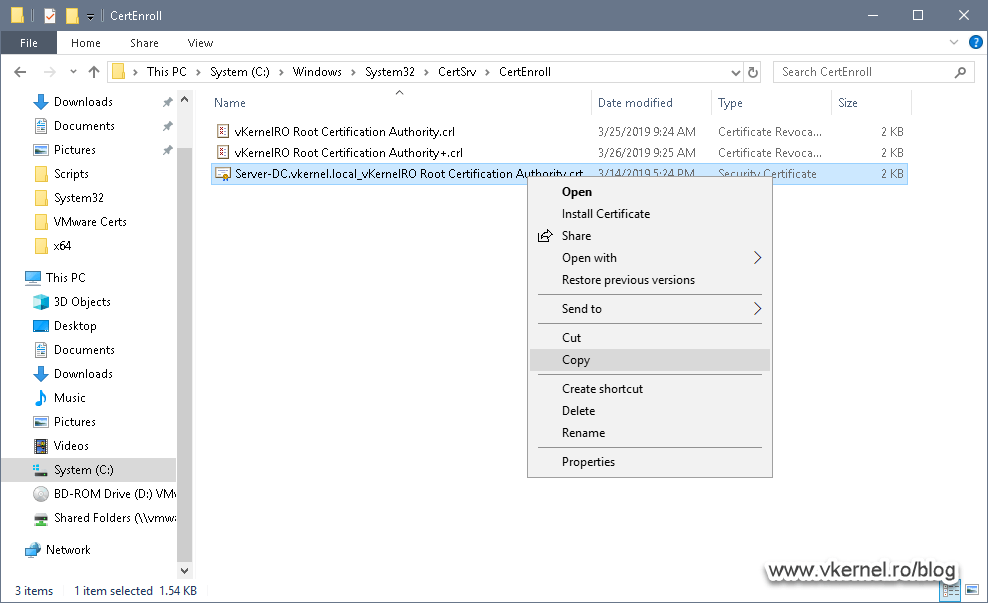
If you have just a single Enterprise CA, the job is easy, just browse to C:WindowsSystem32CerSrvCertEnroll and copy the root certificate from here. Place it in a separate folder somewhere on your drive where you will also keep the rest of the certificates and private keys from the next section.
Export certificates from the Windows Certificates Store
Now that we have issued our certificates, it is time to export them and from the resulted .pfx files extract the certificates and their private keys. Why? Because VMware vCenter does not support .pfx files. The appliance, since is Linux, needs to have the certificate and the private key separated from each other, not bundled together.
To export them, right-click one of the certificates and go to All Tasks > Export.

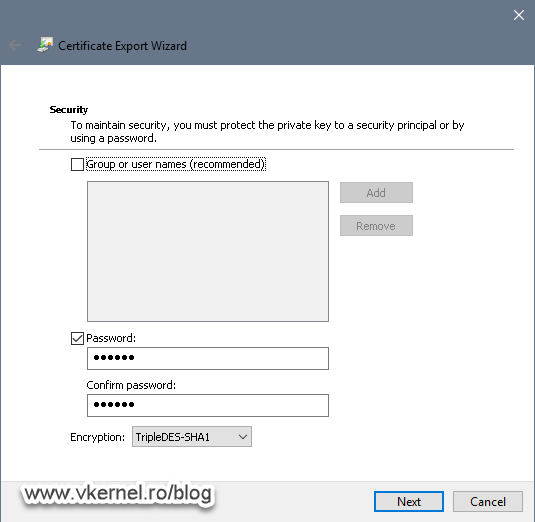
Make sure you select Yes, export the private key option and only then click Next. If the option is grayed-out it is either because the certificate template was build to deny this or you did not checked the Make private key exportable option in the previous section.

Continue the wizard with the default settings, set a password for the .pfx file and at the end you should have a successful export.

Now repeat this operation for the other certificates too.
Extract the certificates and their private keys from the .pfx files
As I have said at the beginning of this section, the certificate and it’s private key need to be extracted from the .pfx file in order to install them on our vCenter virtual appliance, and for this we will need OpenSSL or LibreSSL for Windows.
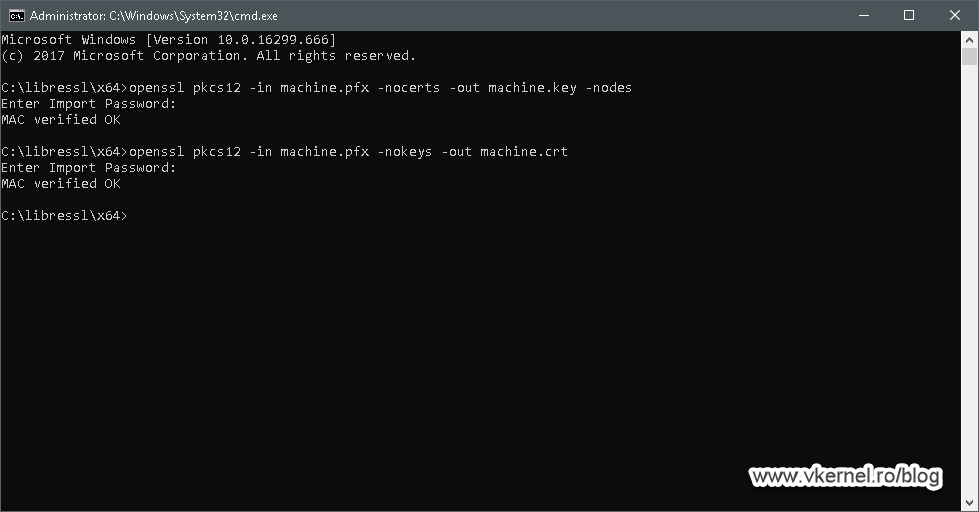
To extract the private key and certificate run the bellow command lines replacing the certificate and key names with your own. When asked, provide the password for the .pfx file you set up during the Certificate Export Wizard.
openssl pkcs12 -in <your pfx certificate>.pfx -nocerts -out <your exported key>.key -nodes
openssl pkcs12 -in <your pfx certificate>.pfx -nokeys -out <your exported certificate>.crt
During the extraction using the above commands, the certificate and private key might have a passphrase in them that needs to be removed. In order to remove it, open them in notepad or any other text editor and delete everything until you reach the line —–BEGIN PRIVATE KEY—– or —–BEGIN CERTIFICATE—–.

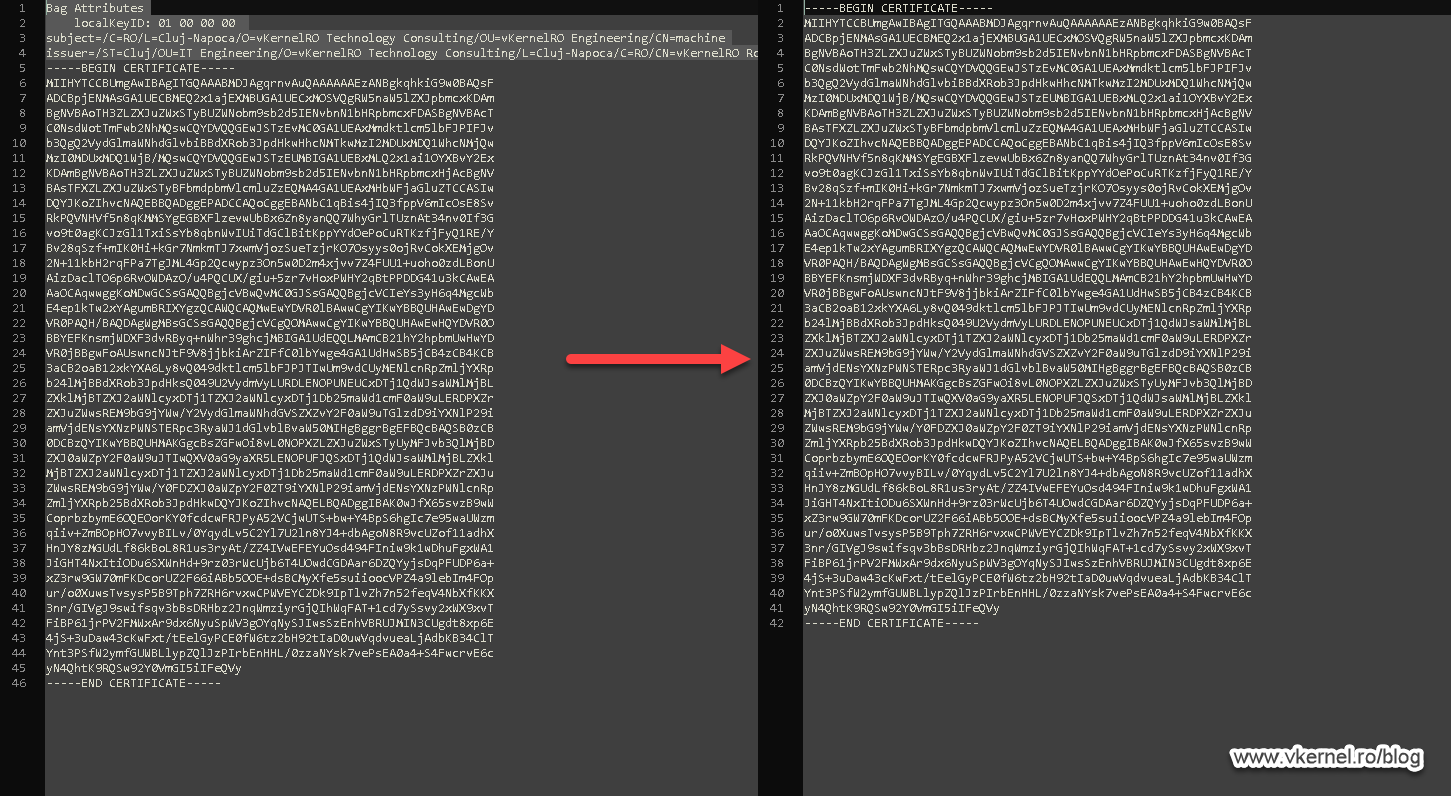
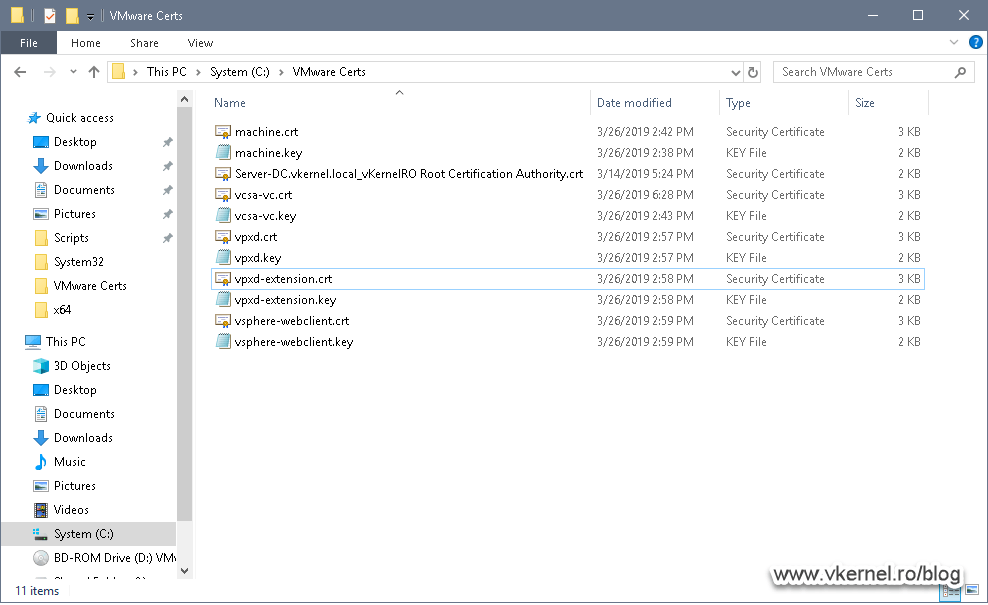
Once done, repeat the process in this section for the rest of the certificates. You should end up with something similar as shown in the bellow image.
Replace vCenter (VCSA) certificates using the vSphere Web Portal
VCSA with an Embedded Platform Service Controller
And finally we got to the point of replacing our VCSA certificates with the ones issued from our internal CA, and the first certificate that we are going to take care of, is the root certificate.
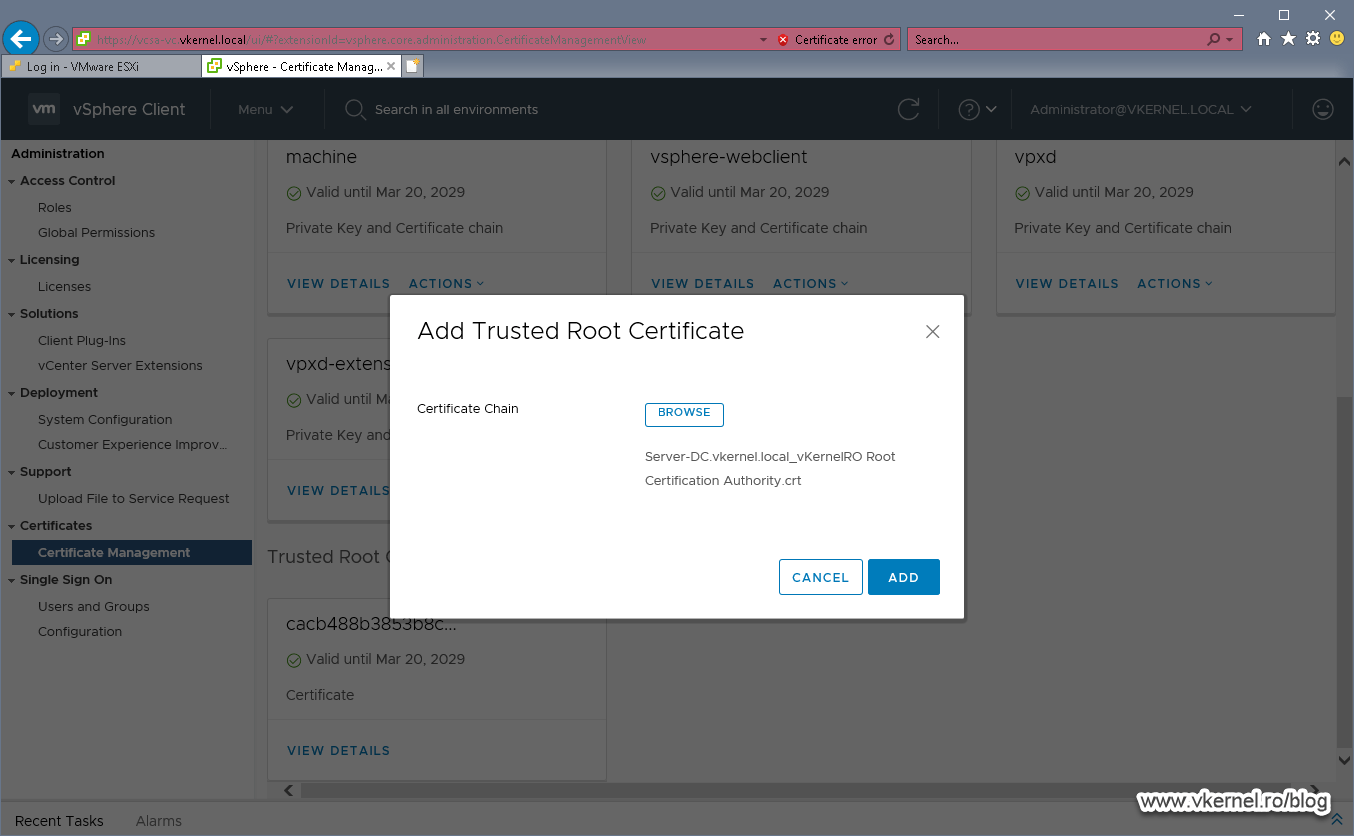
Open the vSphere Web portal and go to Administration > Certificate Manager. Log in using the local administrator account (administrator@vsphere.local), then at the bottom of the page, click the ADD link from the Trusted Root Certificates section.

In the window that pops-up we are asked for the certificate chain, the one I told you about before. Since we have just on CA, we are going to provide the root certificate then click ADD.
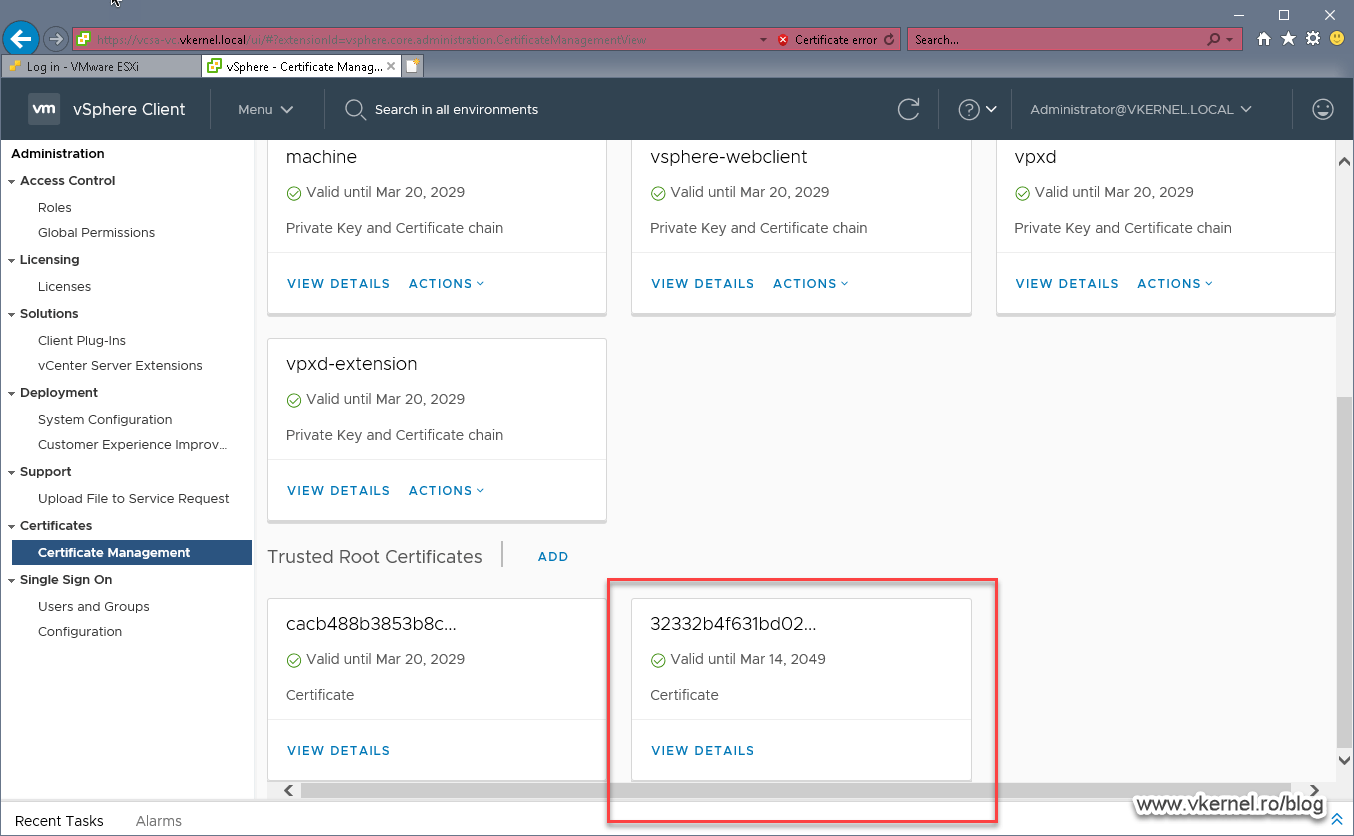
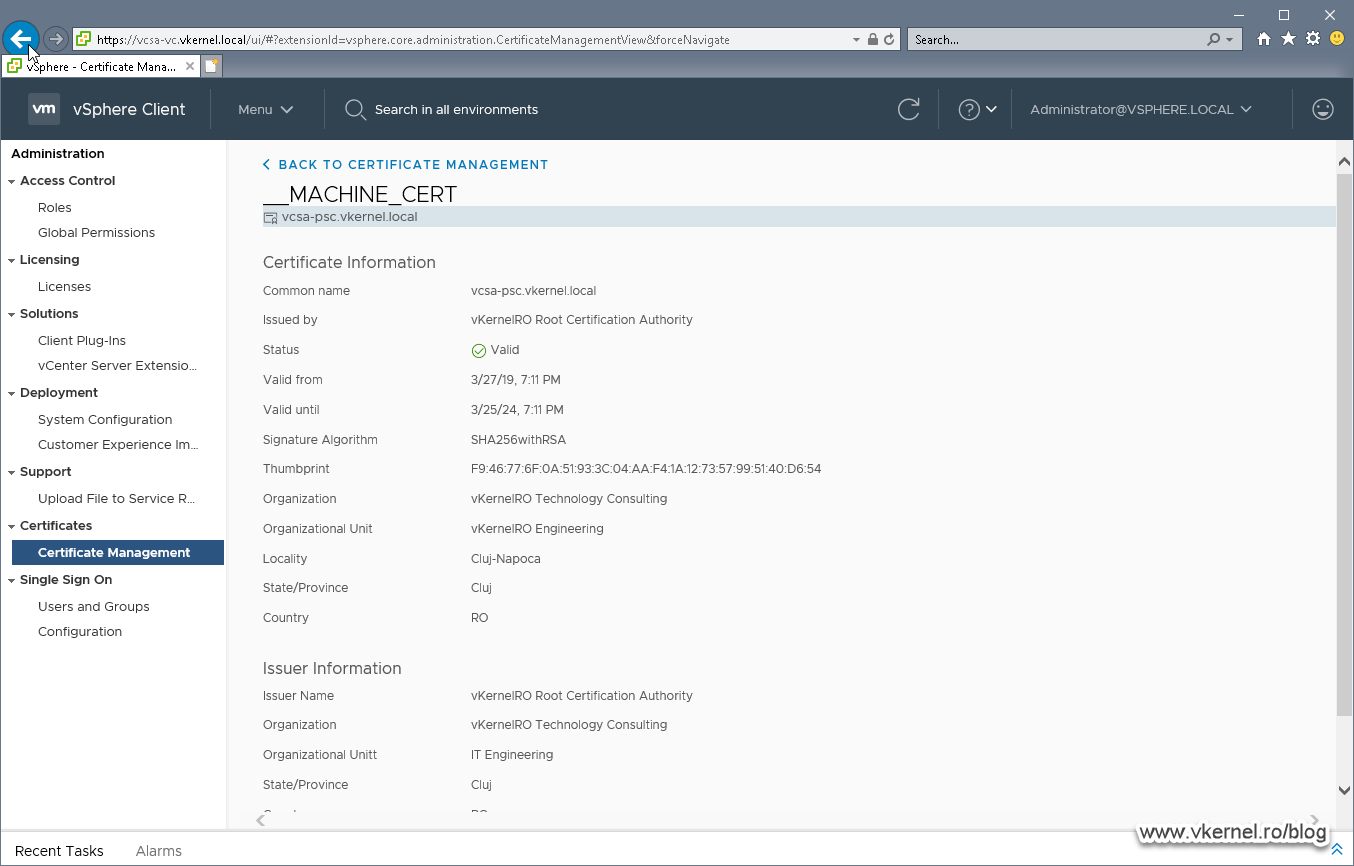
This operation should work with no problems whatsoever. Also, if we click VIEW DETAILS we can see all the information about the certificate we just added.

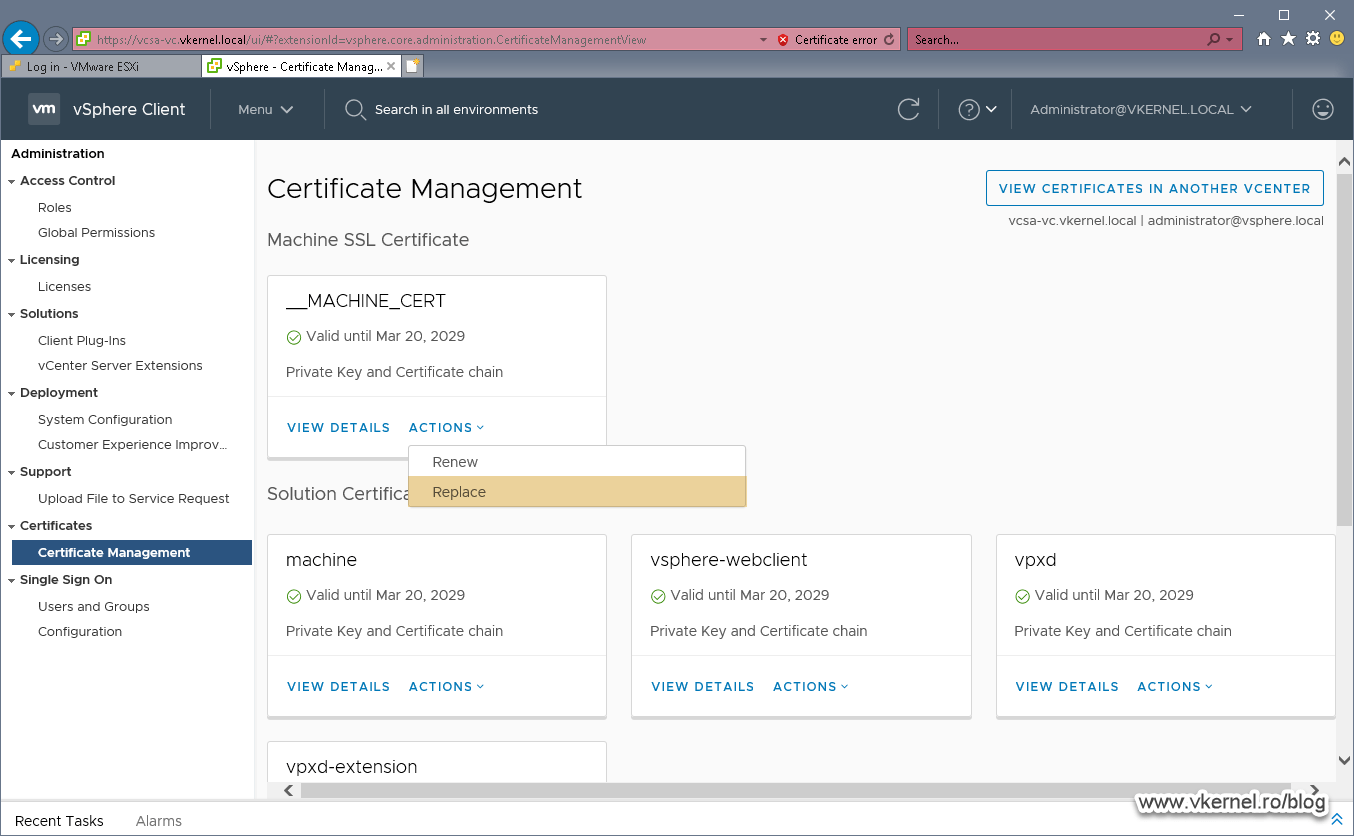
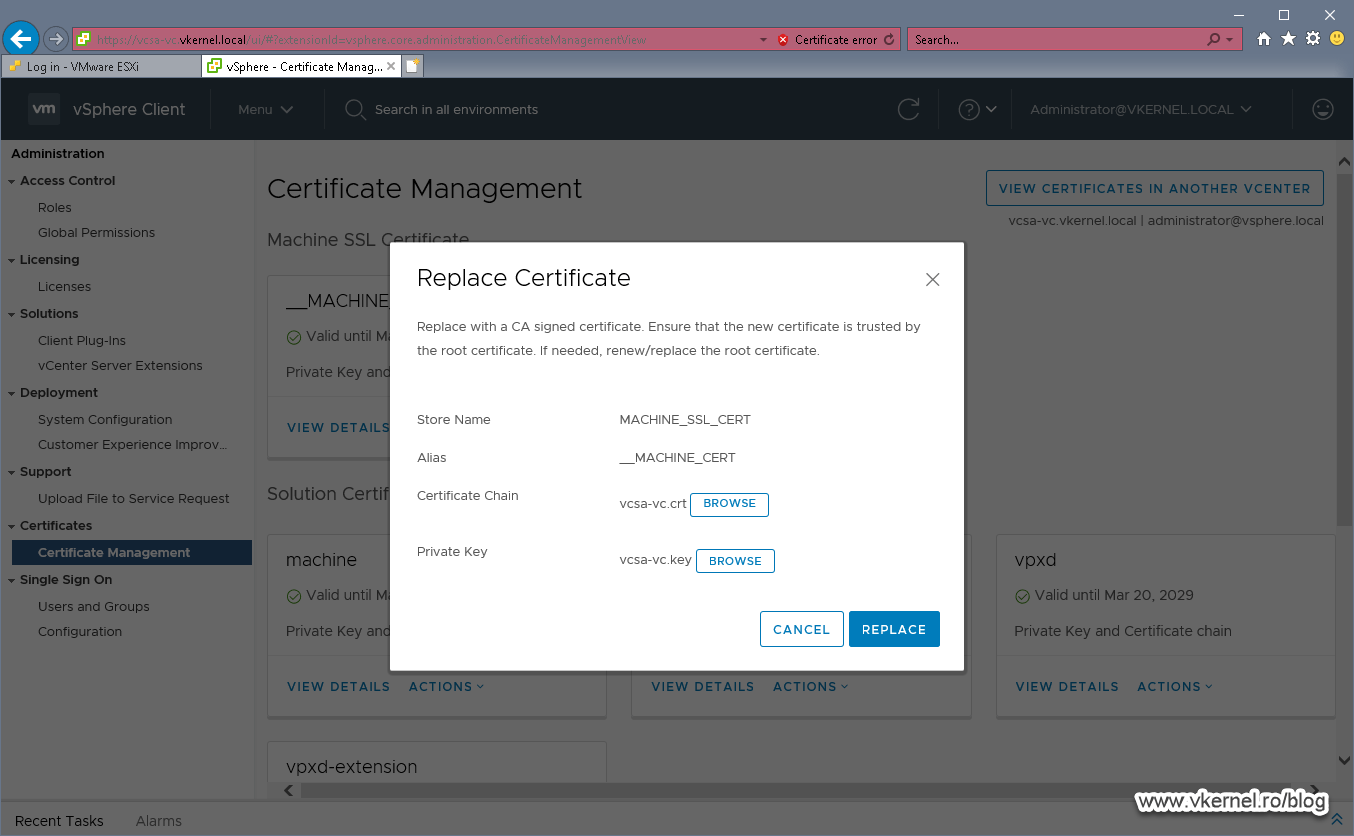
Now let’s replace our VCSA certificates, and we are going to start with the __MACHINE_CERT one. Click on ACTIONS then choose Replace.
In the window that pops-up provide the certificate file and its associated private key that we issued from our internal CA then extracted from the .pfx file and click REPLACE.
Make sure you choose the certificate that has the same Common Name as the existing/self-signed one, or you will have troubles (service will stop working) later on, after the reboot.
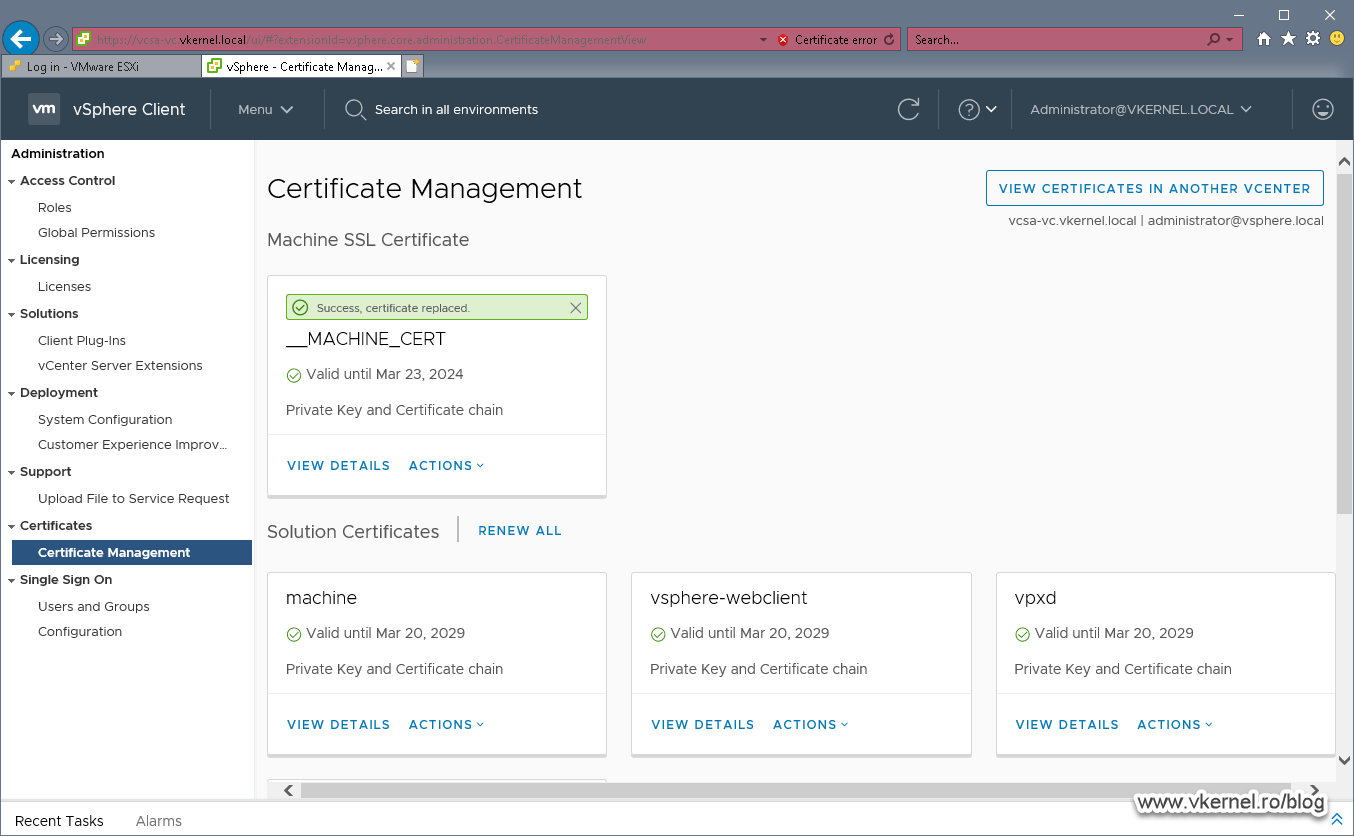
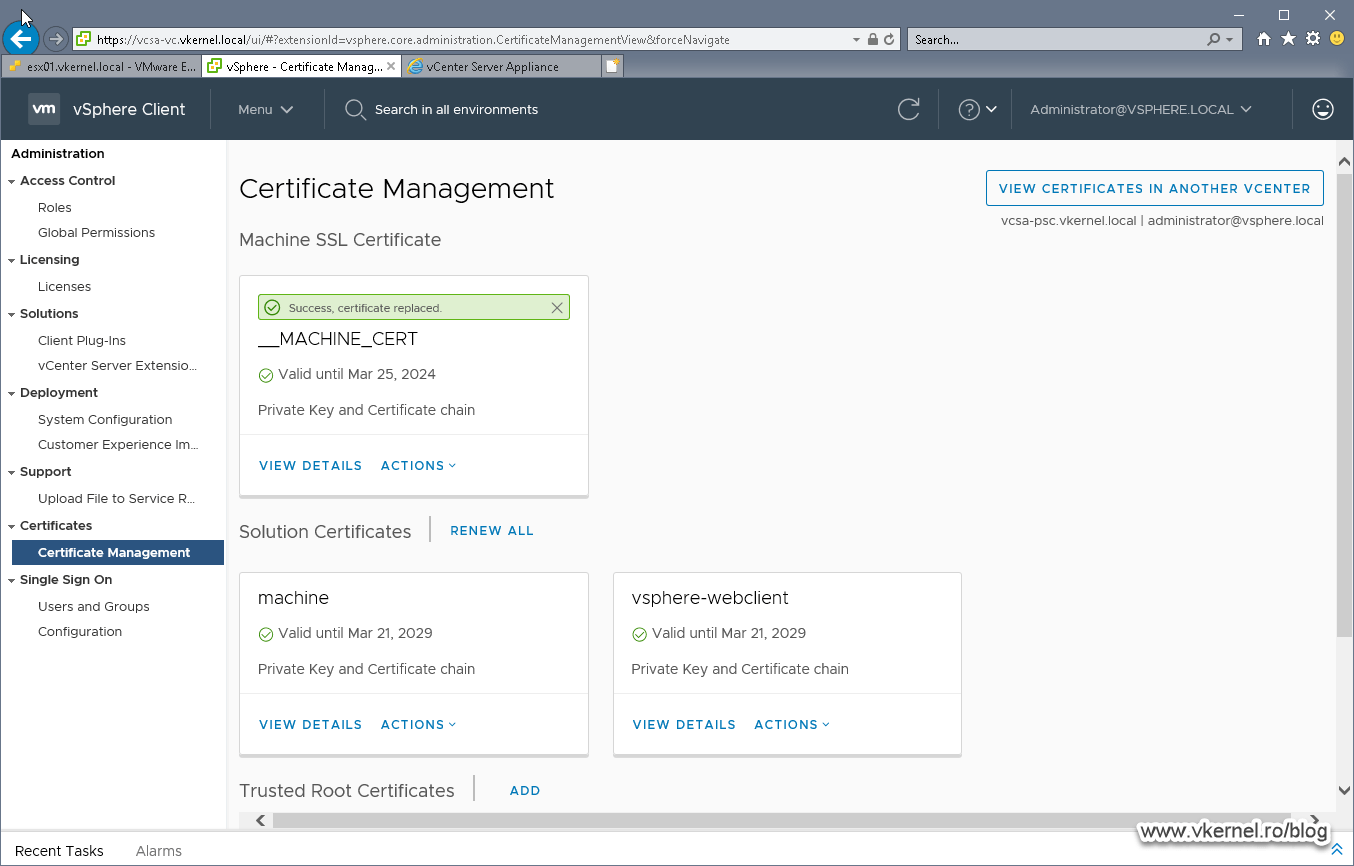
After a few seconds we should have a green bar above the certificate informing us that the replacement succeeded. More certificate information can be revealed by clicking the VIEW DETAILS link.
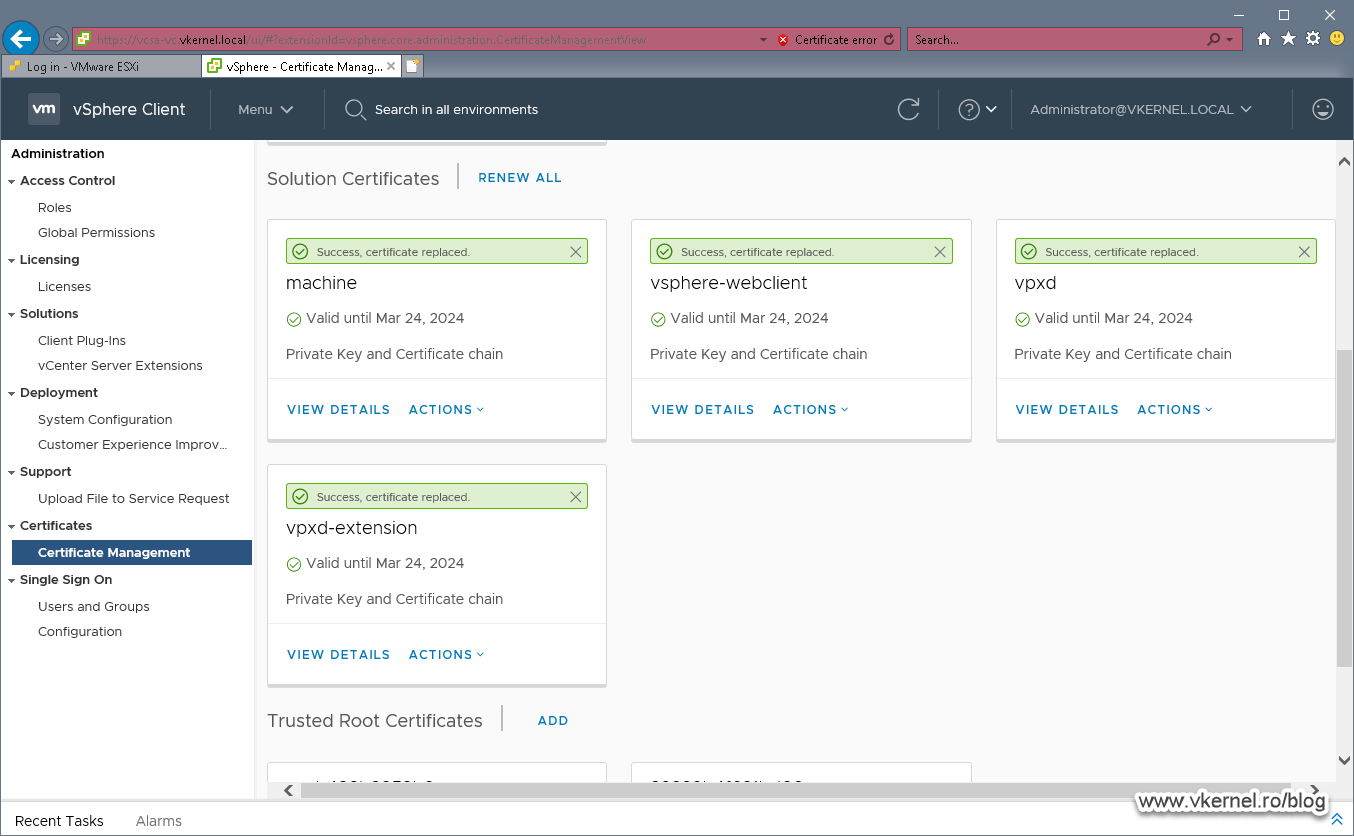
All that is left now, is to replace the rest of the remaining certificates. Again, I cannot stress this enough, make sure you choose the right certificate, the one that has the same Common Name as the self-signed one.

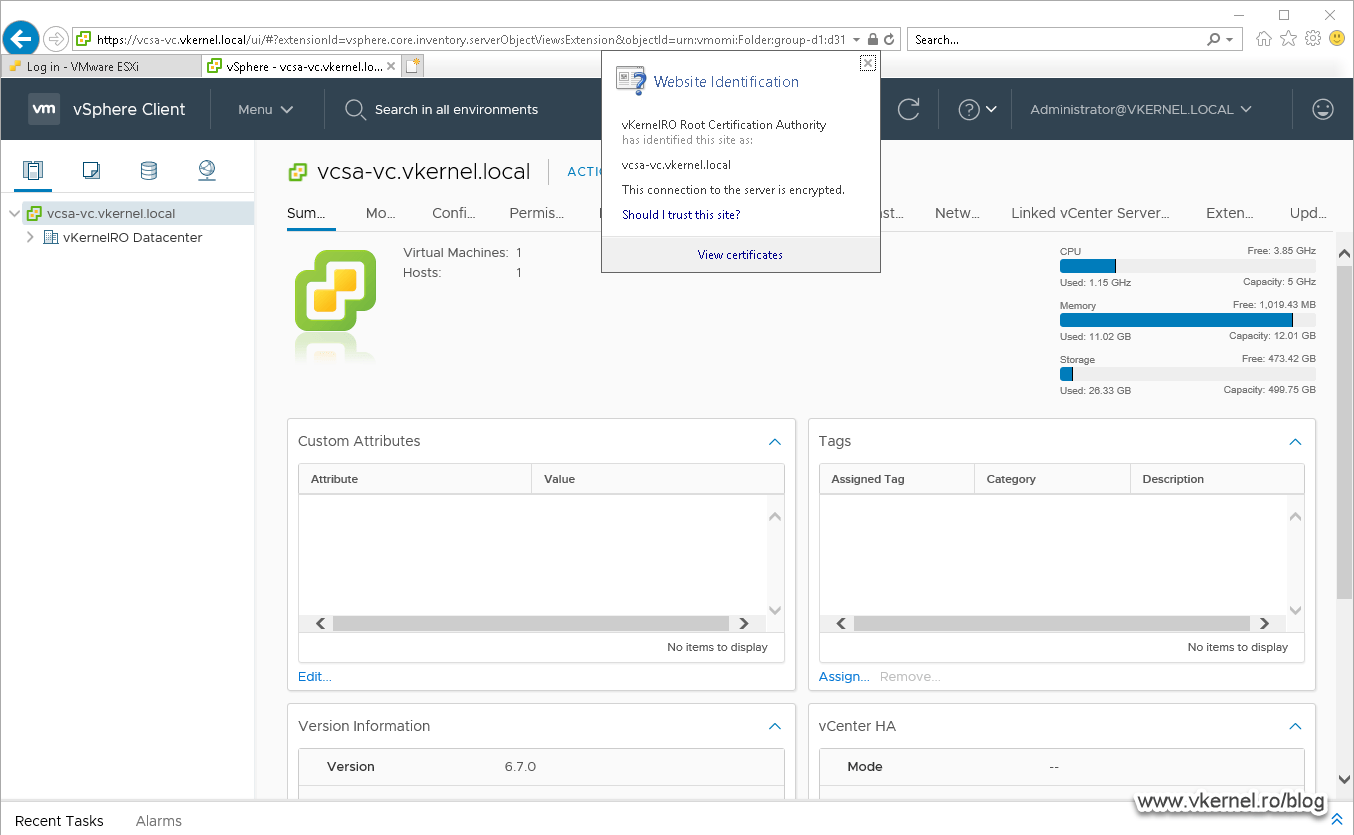
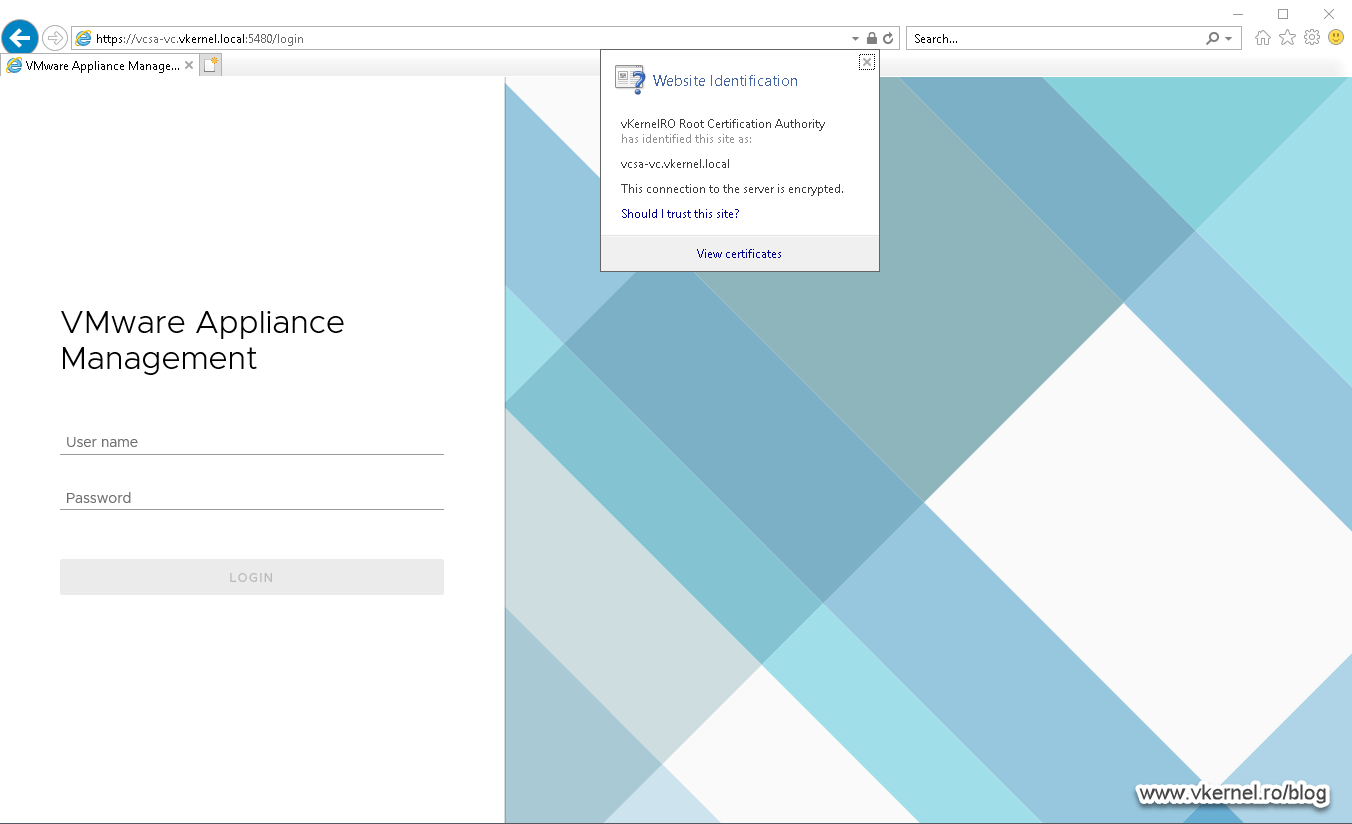
Now reboot the VCSA virtual appliance. After reboot we should have a trusted certificate in the browser and between the appliance services.
VCSA with an External Platform Service Controller
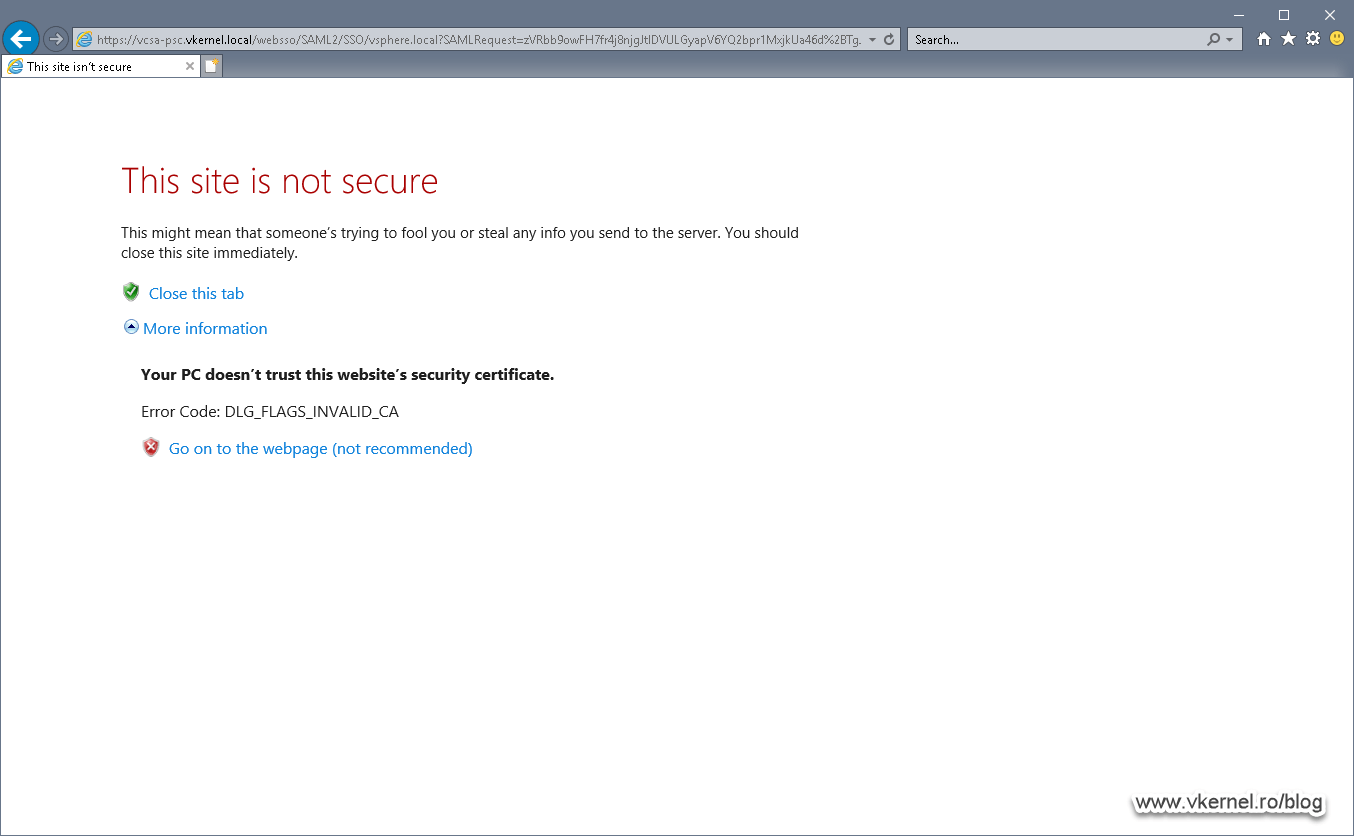
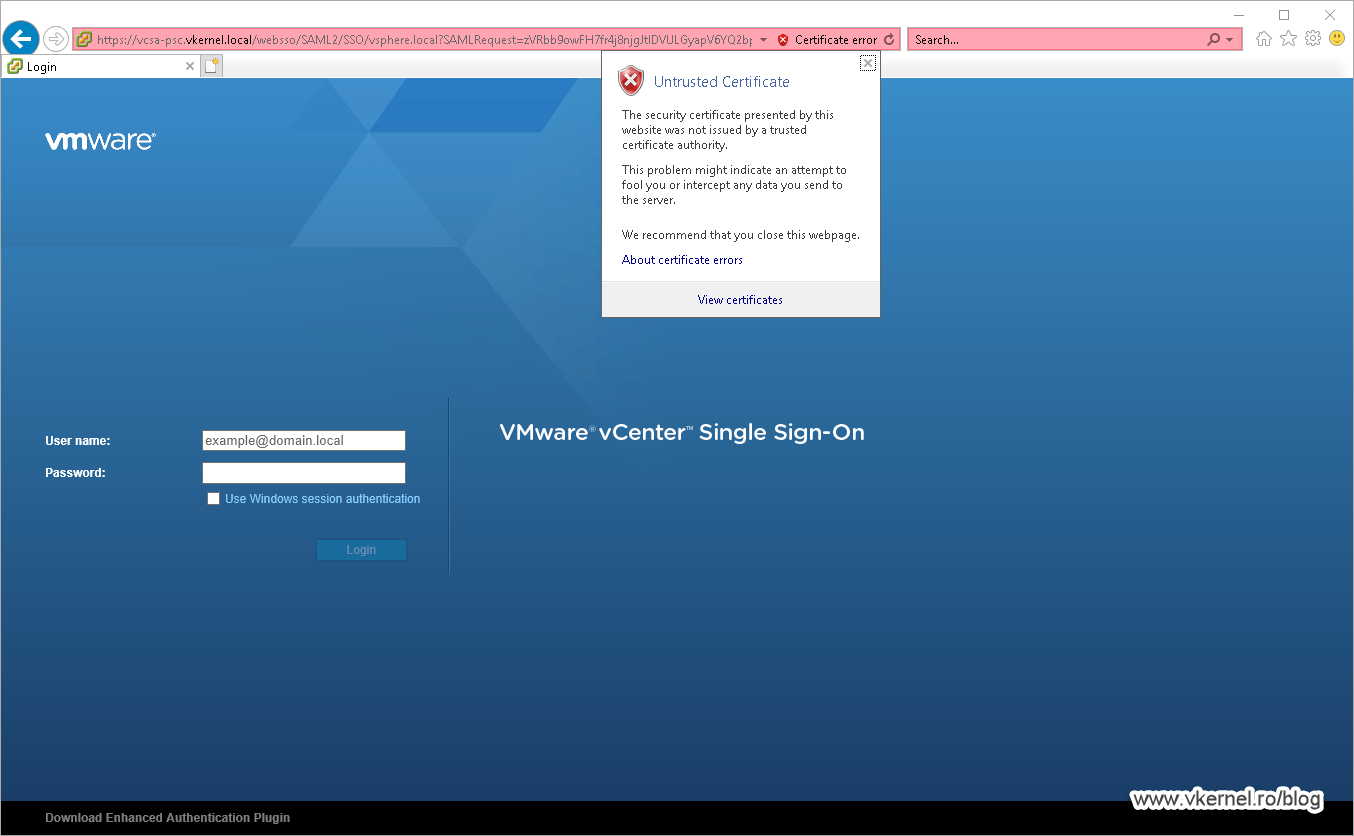
Those of you that have a vCenter deployment with an External Platform Service Controller (PSC), will need to issue and replace a few more certificates in order for everything to be working. Without this change, you will get an error during vCenter log in, as showed in the bellow images. This is because the browser is redirecting the page to the PSC which does the Single Sign On (SSO), and the PSC does not have a proper/trusted certificate.
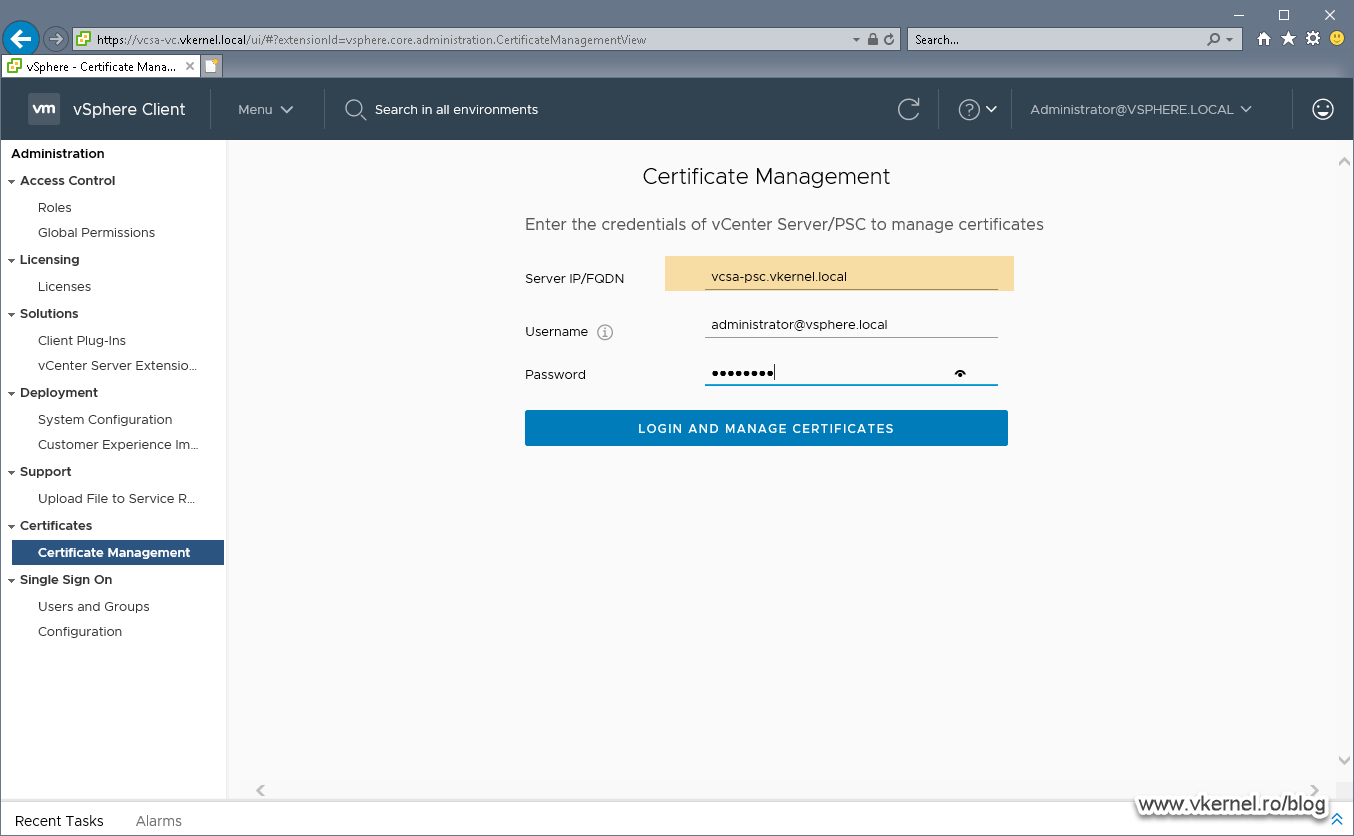
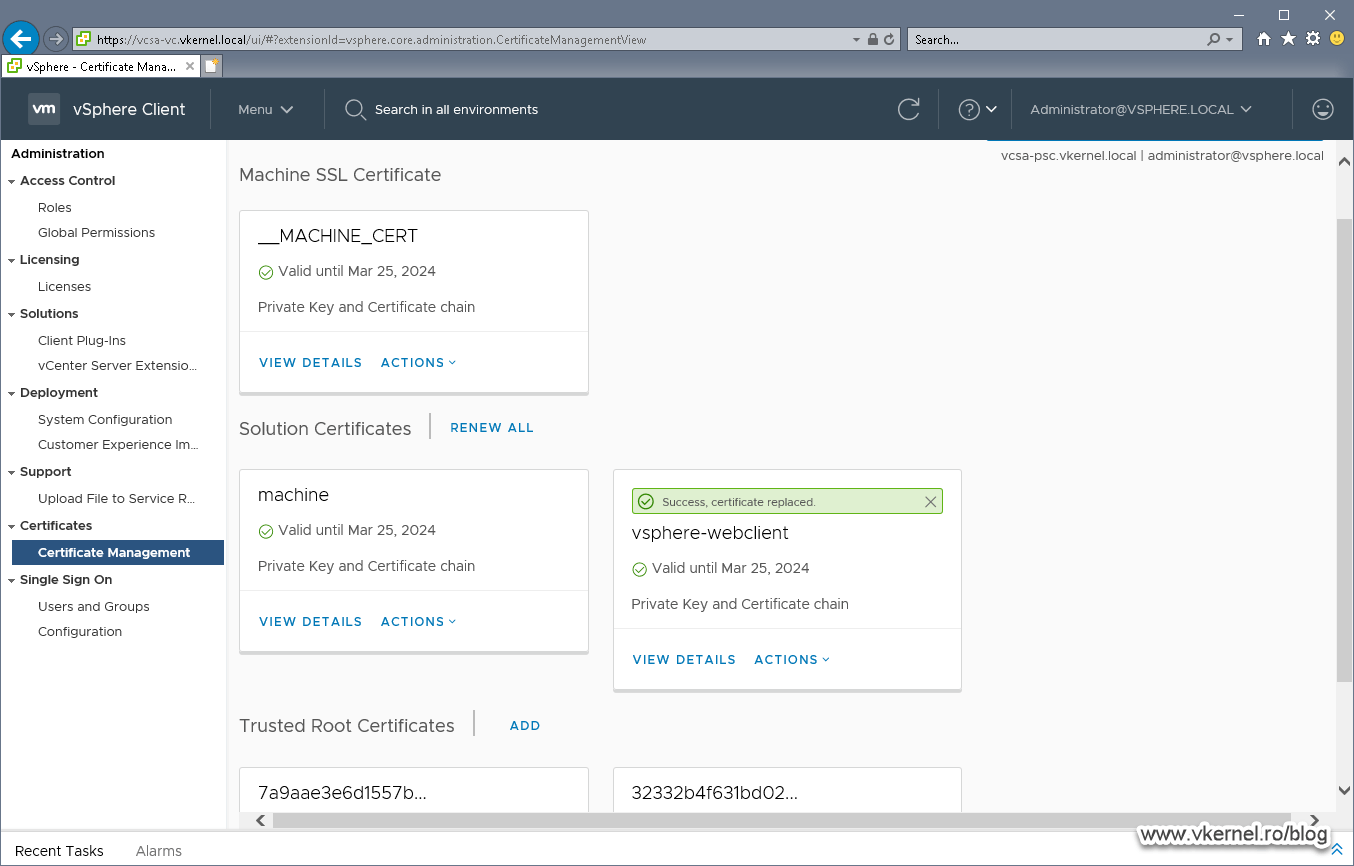
In order to replace the PSC certificates, open the vSphere Web portal and go to Administration > Certificate Manager. This time we have to log in on our PSC appliance, so in the first box, type the FQDN of the PSC then provide the credentials for authentication.
At first glance, we can see that the number of certificates is much lower than we saw in the vCenter appliance. Now all we have to do is issue our certificates from our internal CA, export the certificates in .pfx format, extract the certificates and private keys from our .pfx files, then replace the PSC self-signed certificates. We don’t have to worry about the root certificate, it is already there from the previous section.
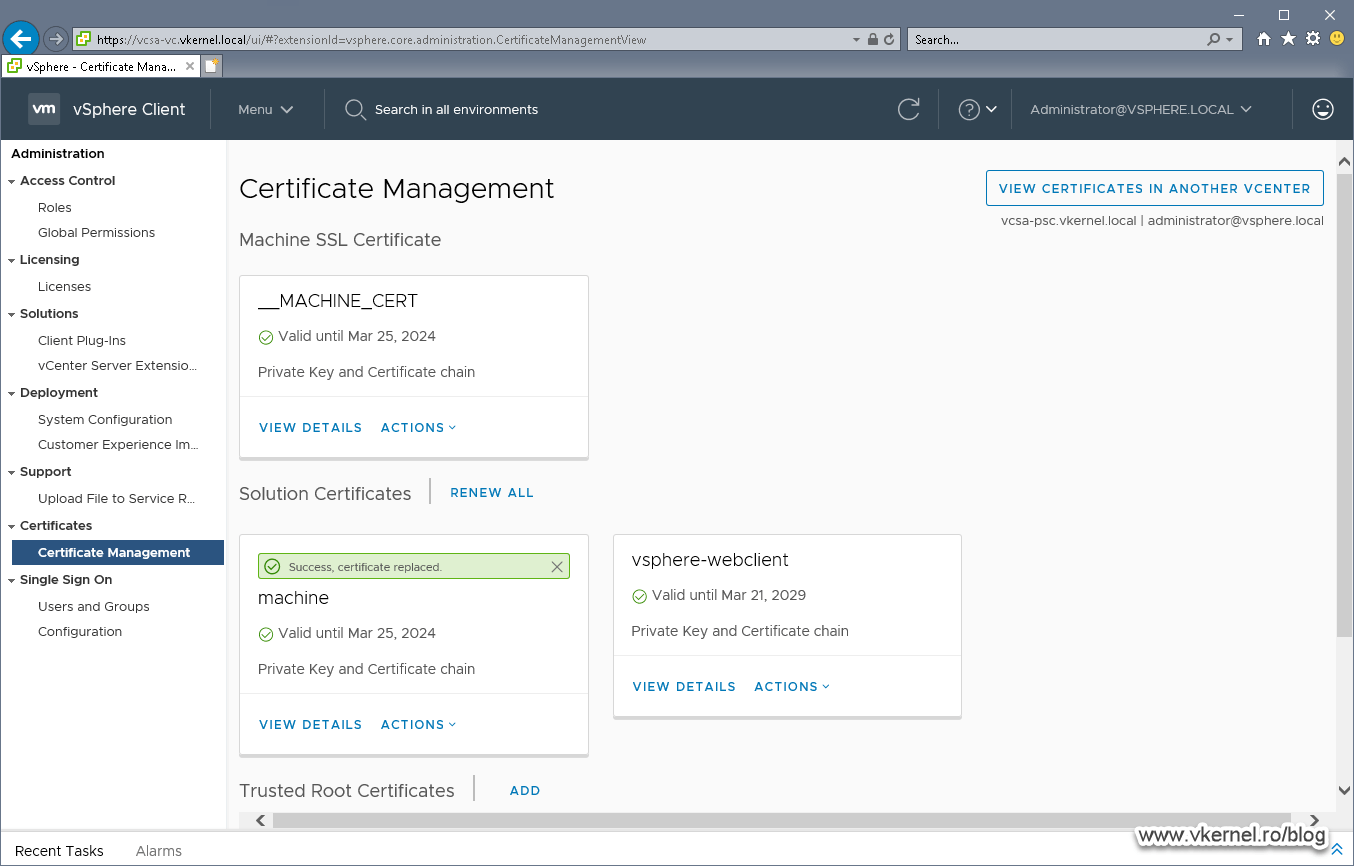
During the replacement of the machine and the vsphere-webclient certificates I encountered a bit of difficulty by always getting an error during the replacement, and off course, the operation failed. What I did to make it work, is I rebooted the PSC appliance after every certificate replacement and that seem to do the job.
One thing that I want to mention here is that we cannot use the same certificates that we also used for the vCenter appliance even tough they have the same Common Name. I am talking here about the machine and the vsphere-webclient ones. They need to have different keys or you will not be able to replace them.
Summary
Pfff, this was a long way to go, but we got to the finish line! I have to say, VMware has done a good job with the Certificate Manager, because I was getting tired of using the console one. At first you will get into some problems and get some errors, but once you understand the process, you will make it. Don’t forget to backup the appliance(s), even if you tested in a lab and it worked there, because I can tell you that is not going to be the same in production. In case you get some wired behavior, let me know in the comments area and I will do my best to help out.
Want content like this delivered right to your
email inbox?
More similar articles
 Patching the vCenter Server and PSC Virtual Appliance
- Removing vCenter or PSC from Linked Mode configuration
- Repointing Embedded vCenter Server to existing SSO domain
- VMware vCenter Enhanced Linked Mode configuration
- Build and run Windows Failover Clusters on VMware ESXi
- How to deploy VMware VCSA 6.5 in VMware Workstation 14