Repointing Embedded vCenter Server to existing SSO domain
As you probably know, starting with VMware vCenter 6.5U2 we can join multiple Platform Service Controller (PSC) nodes into an Enhanced Linked Mode configuration (ELM) so we can access and manage all our virtual infrastructure from a single console/vSphere Web client. Since the PSCs will be in the same SSO domain, they will replicate permissions, licenses, tags, policies, roles across all linked vCenter Servers. This feature will also allow us to view and search all of the linked vCenters inventories, and manage them trough a single vSphere Web Client session.
That is nice, but most of the environments out there are already built up, so we need an option to join our existing vCenter servers together because a redeployment is out of the question. Such option exist, but only starting with vCenter 6.7U1, so if you are not there yet, you will have to upgrade. Since I have mentioned the upgrade word, we need to make sure it will be with an Embedded PSC because the external PSC was deprecated starting with vCenter 6.7.
Unfortunately, if you are running vCenter Server Foundation or Essentials it is not going to work because Enhanced Linked Mode requires vCenter Server Standard licensing. Enhanced Linked Mode also has some limitations:
- For vCenter Servers deployments with external PSCs (external PSCs were deprecated by VMware starting with vCenter 6.7) we can join up to 10 external PSCs and 15 vCenter Server systems in a single SSO domain.
- For those vCenter Servers with an embedded PSC, we can join up 15 nodes in one SSO domain.
Now that we had some theory, let’s do some practice.
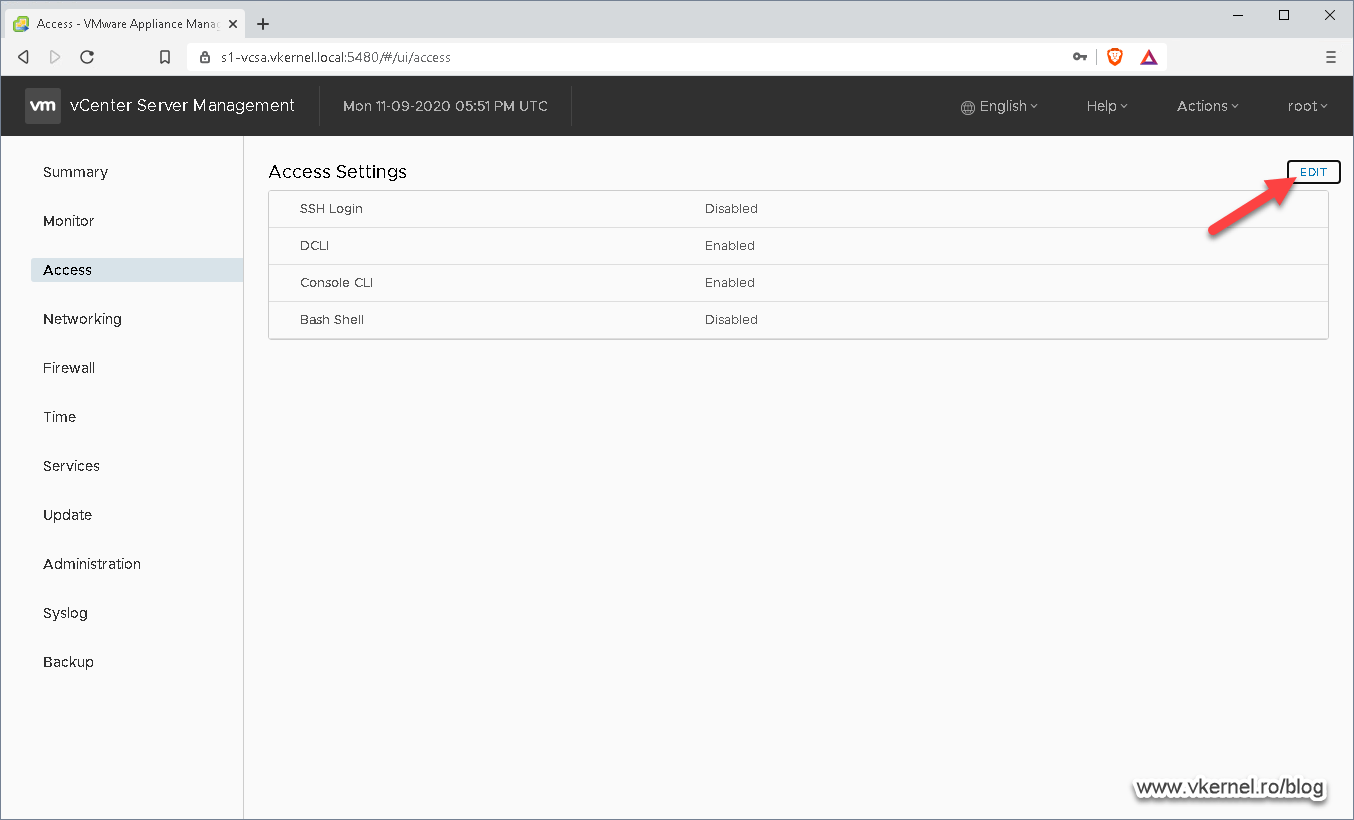
1. Enable SSH and Bash shell on the vCenter server appliance(s)
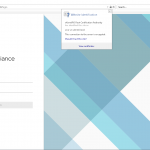
Since there is not GUI option to do this, the only way possible is trough the command line and for that we need to enable SSH on the nodes so we can connect to them. Open the VMware vCenter Server Management portal –https://<vCenter FQDN>:5480– and from the Access menu click on the Edit button -from the upper right corner-.
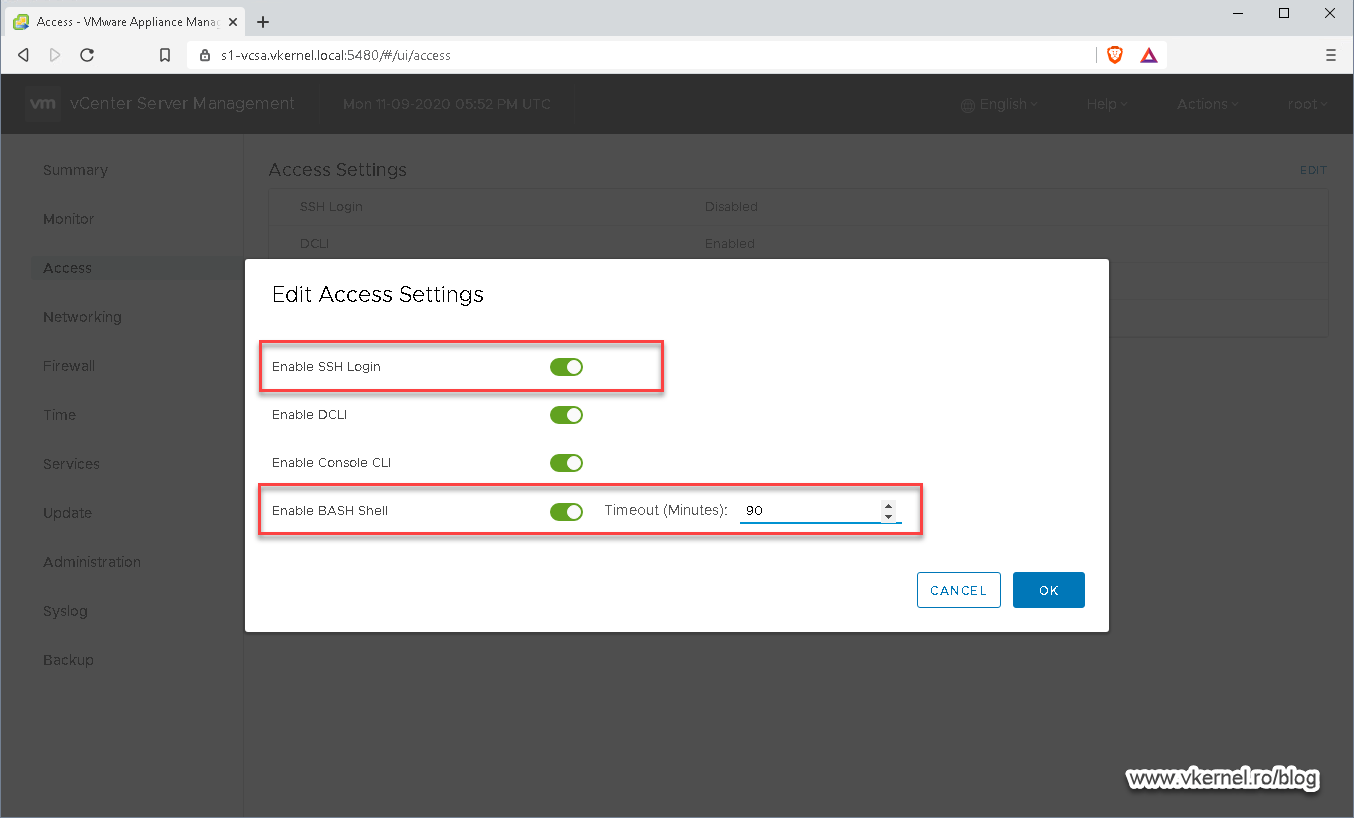
In the Edit Access Settings window that opens up, click the button next to Enable SSH login and Enable Bash Shell then set a timeout for the shell. Click OK when done.
2. Repointing vCenter to an existing SSO domain
2.1. Verifying vCenter state before repointing
Before we get to the actual repointing process we need to make sure that our source and destination vCenter servers are working properly and no conflicts exist that will brake the process.
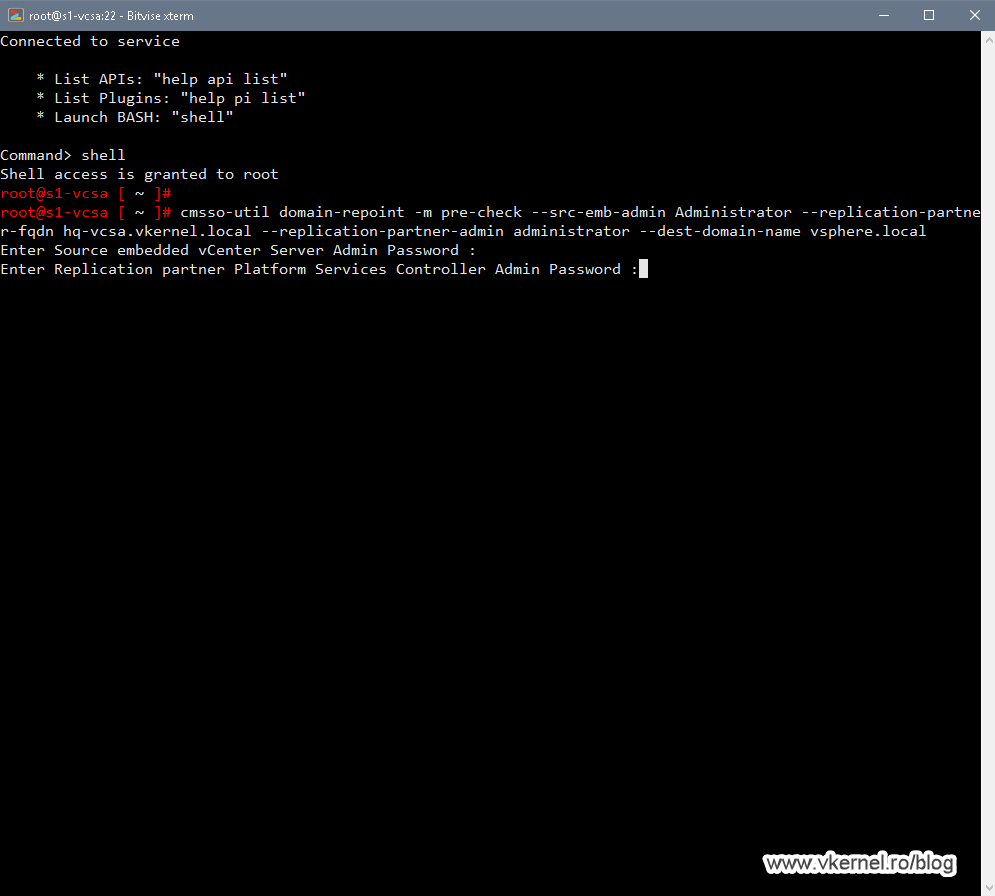
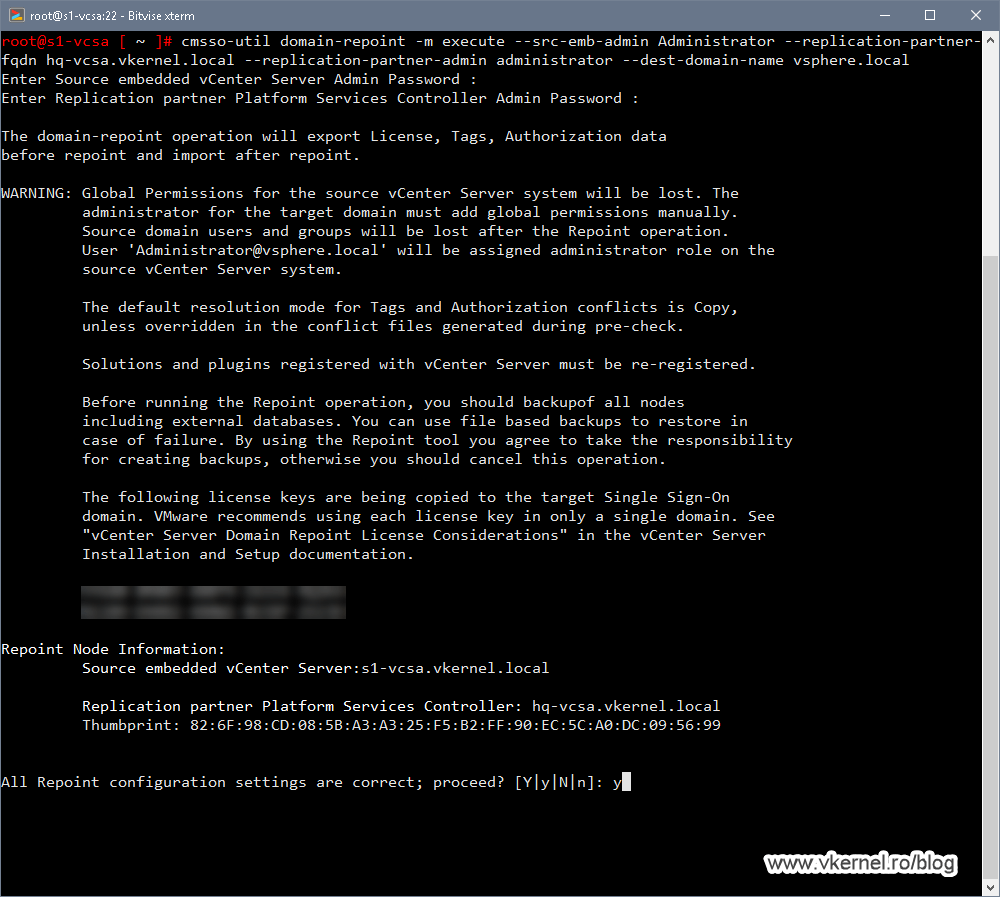
Connect to the source vCenter server using Putty -or any other secure shell utility that you prefer- and issue the bellow command line. Once we press Enter, we are required to provide the source and destination SSO administrator passwords.
The –src-emb-admin is the SSO administrator of our source vCenter server that we set up during the appliance deployment. The same goes for the –replication-partner-admin which is the destination vCenter server SSO administrator. If you have different usernames, make sure you change them in the command line. Another option that needs to be changed with the one matching your environment is the –replication-partner-fqdn which is actually the destination vCenter server/PSC. The last one is –dest-domain-name where we provide the destination PSC domain name that our source vCenter server will join to. This is usually vsphere.local but if you have a different one, no problem, vCenter servers can be joined together even if the domain names are not the same.
cmsso-util domain-repoint -m pre-check --src-emb-admin <PSC admin of source node> --replication-partner-fqdn <destination node FQDN> --replication-partner-admin <PSC admin of destination node> --dest-domain-name <destination PSC domain>
Once we connect to the destination vCenter server we will get a waning about the security permissions we are going to lose on the source vCenter and how licenses are going to be transferred. We already know what’s happening after two or more vCenter servers are joined together, so type Y and press Enter to continue.
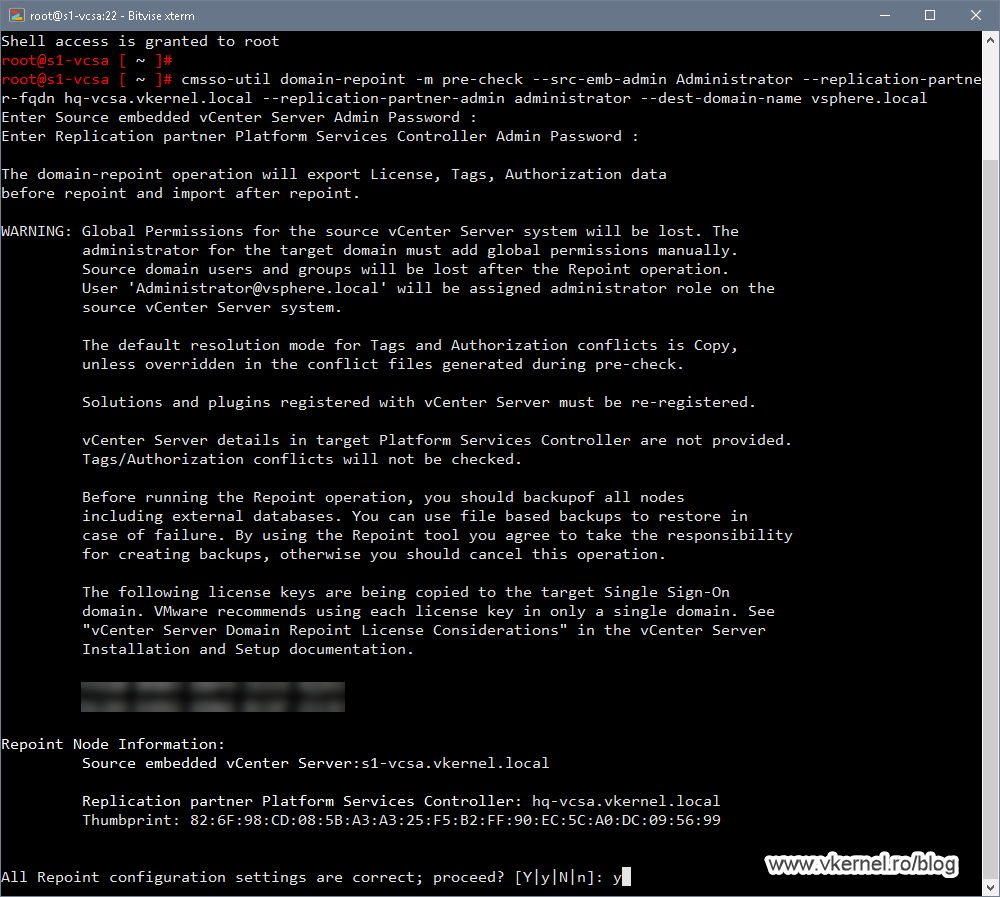
The pre-check process will take up to a minute or two and once it is done we should have the Pre-checks successful message. If you have some warnings or errors, make sure you threat them first, then continue with the repointing process.
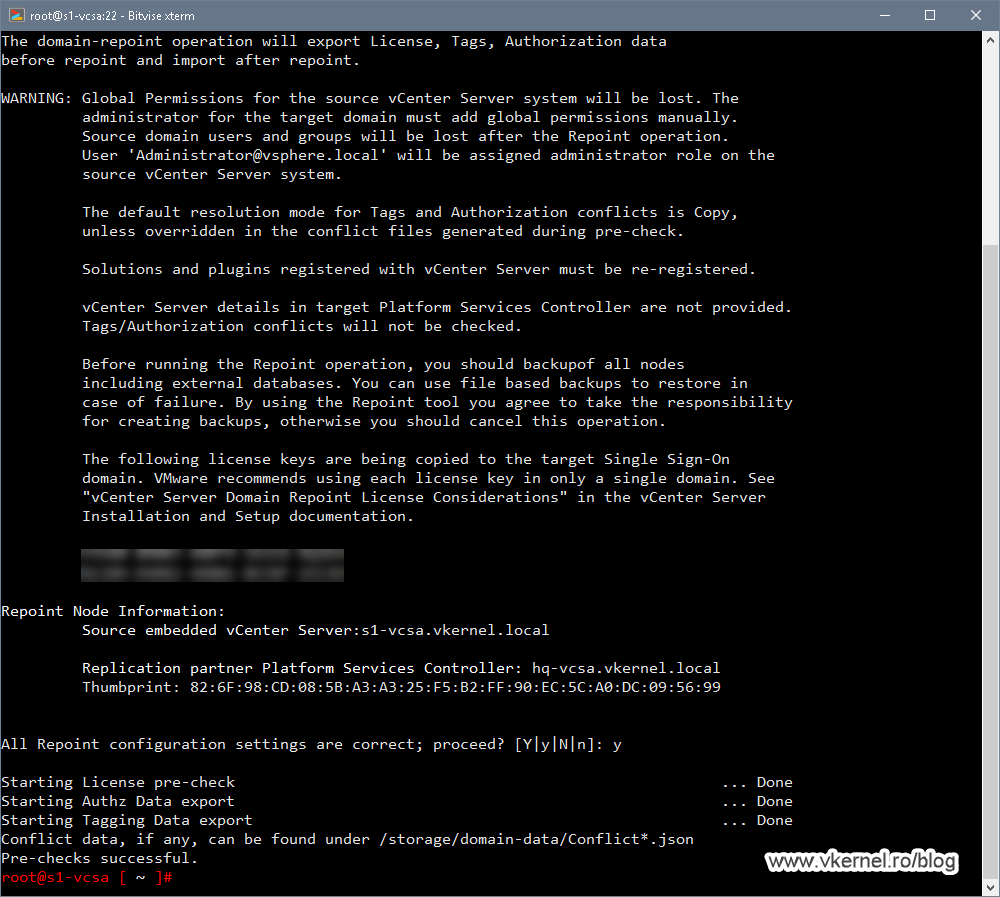
One other thing that we can see in the terminal is the path to the .json files for further investigation of any conflicts or warnings. Now in my case the Conflict_Roles.json file was not created since I don’t have any conflicts between the two vCenter/PSC nodes, but if you do, make sure you check it out.

2.2. Repointing source vCenter to existing SSO domain
If everything looks good after the pre-check, issue the bellow command line to start the repointing process. The command is pretty much the same, and the only thing that differs is the -m execute option which replaces the -m pre-check one.
Before executing the repoint command bellow, make sure you have a vCenter server backup for the source and the destination nodes, just in case something goes wrong.
Also, plan for some downtime because you will not be able to do any management activity since the repointed vCenter server will restart.
cmsso-util domain-repoint -m execute --src-emb-admin <PSC admin of source node> --replication-partner-fqdn <destination node FQDN> --replication-partner-admin <PSC admin of destination node> --dest-domain-name <destination PSC domain>
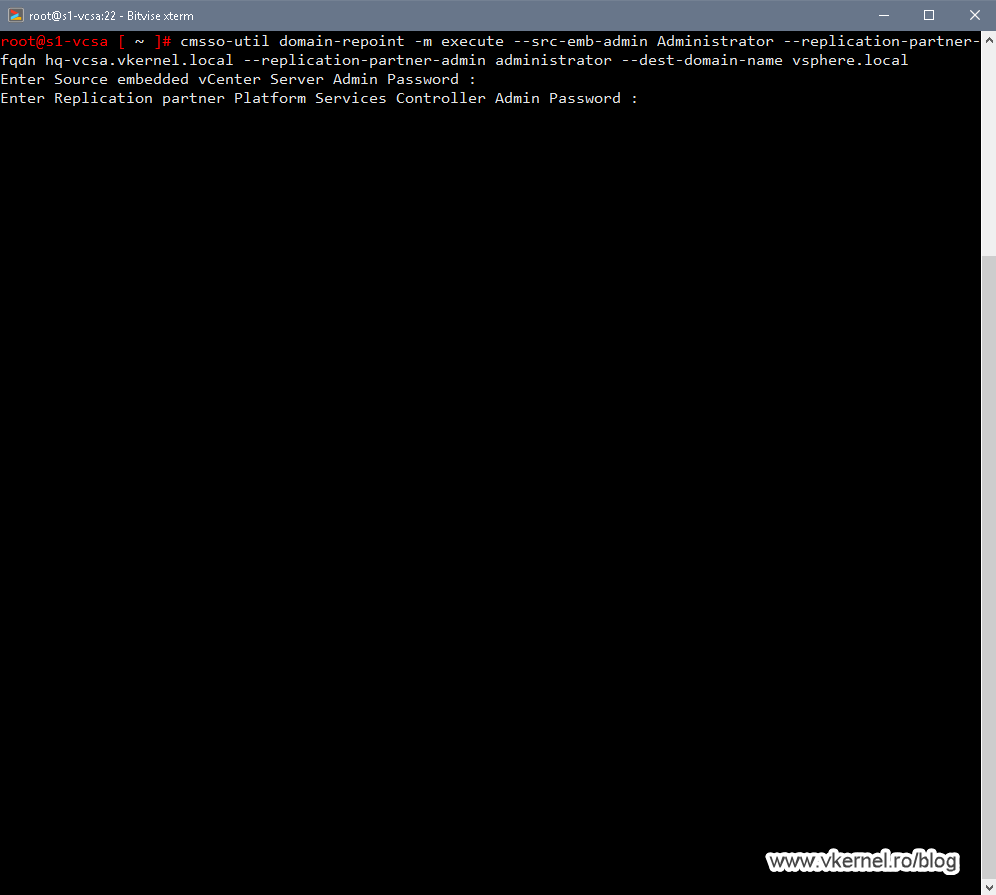
And again, we have the same warning message that we had in the pre-check section. Type Y and press Enter to continue.
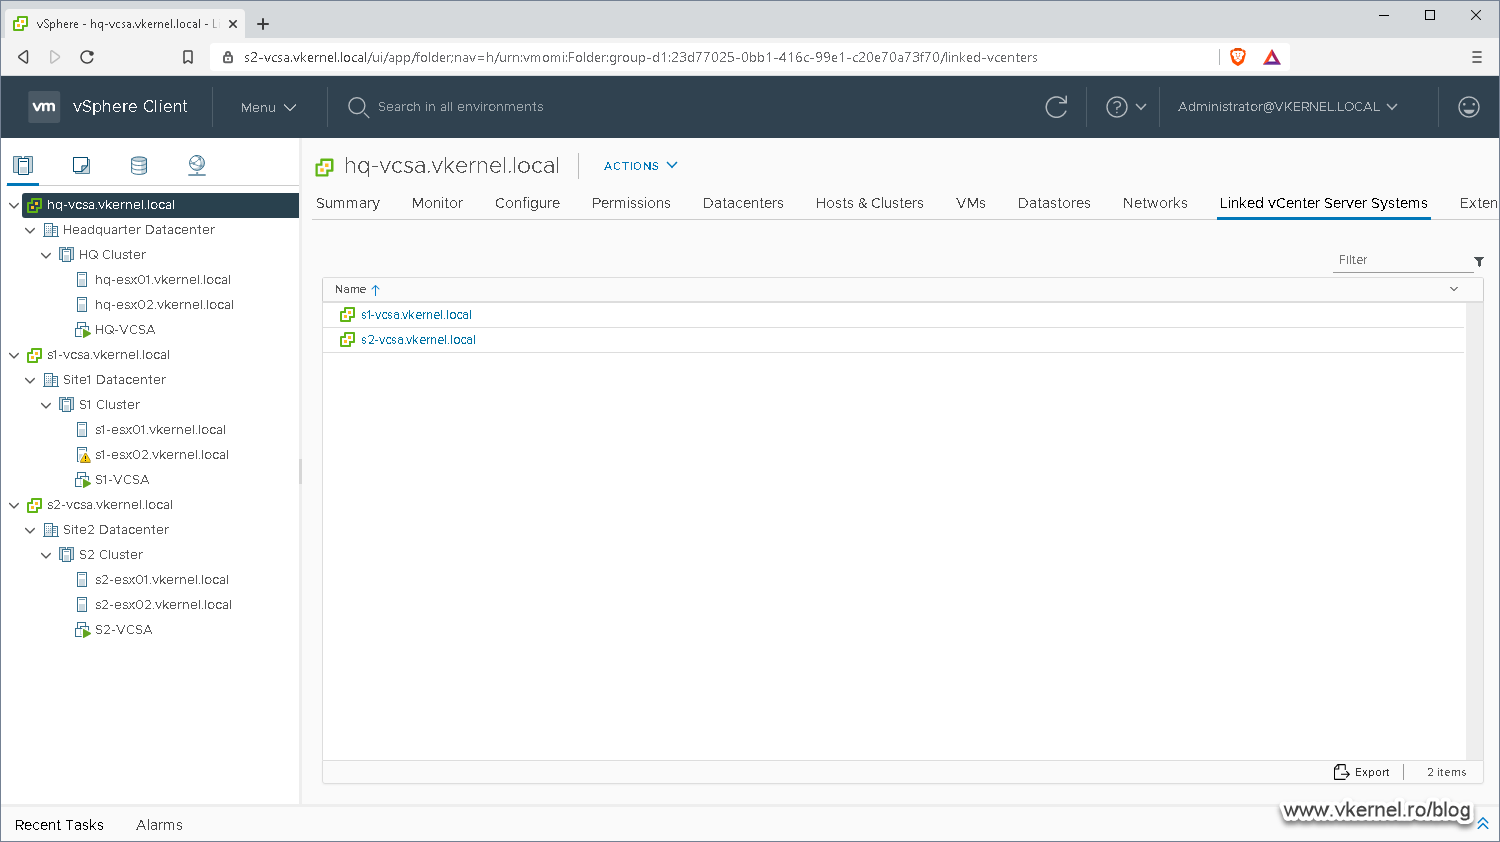
The repointing process will take quite some time to finish and once it is done, we get a nice message at the bottom saying Repoint successful.

The only thing left is to check that it actually worked, and by opening the vSphere Web Client we can see all of our repointed vCenter servers in a single pane.
Summary
I think VMware did a pretty great job by putting this feature into the vCenter server appliance because it makes everything very easy since we don’t have to re-deploy our vCenter servers in order to benefit from Enhanced Linked Mode. Every now and then it will happen for the joining process to fail, and that’s why it is important to have a backup. I will just replicate the environment and test this in a lab before actually going into production, just to be safe.
Want content like this delivered right to your
email inbox?
More similar articles
 Patching the vCenter Server and PSC Virtual Appliance
- Removing vCenter or PSC from Linked Mode configuration
- VMware vCenter Enhanced Linked Mode configuration
- Replace VMware VCSA 6.x Certificates with ADCS Certificates via the GUI
- Build and run Windows Failover Clusters on VMware ESXi
- How to deploy VMware VCSA 6.5 in VMware Workstation 14