Join VCSA 6.x to an Active Directory Domain
We started deploying our VMware vCenter Server Appliance (VCSA) either with an embedded PSC or an external one, and once the deployment was finished we noticed that we can’t use our Active Directory domain credentials to log in into vCenter. The only way we can get in is by using the SSO administrator password that we defined during the deployment wizard. This is by design, and to fix it we need to configure some post-installation settings like joining the vCenter server to our Active Directory domain, setting up global permissions, default domain etc.
By joining our vCenter server to an Active Directory domain we maintain a single set of users and passwords that are already managed in a single database, the Active Directory database. We also strengthen security on the environment and make our life easier when we need to assign permissions to our domain users/admins into vCenter so they can do just what they need to do and nothing more.
Before moving to the configuration part, I want to mention a few things that need to be in place in order for this work successfully because if they are not, you will start getting wired error messages when trying to log in or join the appliance to the domain.
- The first one, and the most important one will be DNS. This service needs to work at 100% because vCenter must be able to resolve DNS queries, A records and PTR records.
- Clock synchronization. If the vCenter server or PSC clocks are not synchronized with the ESXi hosts or your domain, a lot of login problems will arise.
- Firewall. Make sure the required ports are opened between your vCenter/PSC appliance and your domain controllers. For a list of ports please see this VMware document.
Joining the vCenter/PSC appliance to Active Directory
This is the first of out tasks, and to accomplish it launch the vSphere Web Client and log in with your SSO username and password that you defined when you deployed the appliance.

Go to Administration > System Configuration.

Click on Nodes. If you have a deployment with an embedded PSC only the name of your vCenter server will appear under the Nodes section, and if you have a deployment with an external PSC, like in the bellow image, you will see the PSC node and the vCenter server one. Click on the node then go to Manage > Settings > Active Directory. From the right hand side, hit the Join button.

The Join Active Directory window will pop-up. In the Domain box type your domain suffix then continue with the credentials to authenticate to the domain. The account we type here needs to be in a User Principal Name (UPN) format (user@domain.local) in order to work. Click OK when you’re done.
If the account you are using here does not have the rights to create and modify computer objects in Active Directory, you will have to pre-stage the computer account.
Optionally, you can specify under which OU -by typing the Distinguished Name (DN) (OU=Cluj-Napoca,OU=Servers,DC=vkernel,DC=local)- the computer account for the vCenter Server is created. If the Organizational Unit field is left blank, the computer account is created inside the Computers container in Active Directory.

Once you click the OK button no message or action is displayed in the vSphere portal that the operation succeeded. The good news is that an error message is displayed if it doesn’t. Now go ahead and reboot the PSC or vCenter appliance (depending on the deployment type you have) by right-clicking it and choosing Reboot.

If the operation was successful, after the appliance reboots, the domain name will be displayed in the Active Directory section and the the Join button will be grayed-out. The computer object was also created automatically in Active Directory since my account had the proper permissions to do this.


And we successfully joined our vCenter server to our Active Directory domain, but the domain authentication it’s still not working. If you log off from the vSphere portal and try to log in using your domain user account, you will still not be able to authenticate. There are a few more things that need to be covered in order to work.
Adding an SSO Identity Source
An identity source is a connection to a directory service, Active Directory in our case, and to configure it we need to go to Administration > Configuration. The SSO Configuration page will open. Click the Identity Source tab then hit the green plus button.
We can register more than one identity source, but for this example one that connects to our Active Directory domain will suffice.

In the Add Identity Source window that pops-up, we will concentrate on the first two options from the many that we see here because this two are the most popular ones.
Since we joined our vCenter/PSC appliance to our Active Directory domain, select the first option, Active Directory (Integrated Windows Authentication). This option works with both, Windows-based vCenter Server and vCenter Server Appliance, but the underlying system has to be a member of the Active Directory domain. Click OK when done.

If the vCenter Server/PSC is not joined to a domain, we will have to go with the second option, Active Directory as an LDAP Server and fill in the boxes as per bellow image, replacing the values with your own. Once you are done click the Test Connection button to verify the connection to the Directory Service.


Back on the Identity Sources tab, select the identity source we just created then click the Set as default domain icon. This will let us authenticate into vCenter by using just our domain credentials without typing the domain name.


Now that we took care of the PSC integration with our Active Directory domain, let’s move on the last step into making this work, and that’s setting up permissions.
Configure vCenter Global Permissions
Until now we have joined and configured our vCenter/PSC appliance with our Active Directory domain, but now we need to set up who can log in and what they can do in vCenter; and this is done using Global Permissions. Make sure you verify twice who you give access to here because the permissions span across the all vSphere infrastructure.
Go to Administration > Global Permissions and click the Add permission icon.

Once the Add Permission window pops-up, click the Add button. From the Domain drop-down box select your Active Directory domain then search for the users or groups you want to assign permissions to in vCenter. Click the Add button then hit OK when done.

The last thing to do here is to assign a role to the selected group(s) or user(s). This is where we configure what they can do in vCenter after they log in. From the Assigned Role drop down-box select a per-defined access role then click OK.

The newly defined permissions will appear in vCenter, and as you can see we can edit them or delete them if that’s the case.

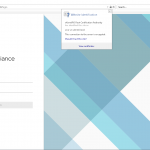
We can now log out from vCenter and try to log in using our domain account and see if it works. Since we configured our Active Directory domain to be the default domain we only have to type the account name without the domain suffix. Once we click the Login button we should be able get access into our vCenter server.


Summary
VMware has simplified a lot the process of joining vCenter to an Active Directory domain, and it’s a good thing since medium to large business depend on it. It would be very hard to manage such environments by having two sets of credentials, and not mention the security hole that it can create. Use it if you have possibility of doing so, and you will see how it will ease your job and make some users happy.
Want content like this delivered right to your
email inbox?
More similar articles
 Patching the vCenter Server and PSC Virtual Appliance
- Removing vCenter or PSC from Linked Mode configuration
- Repointing Embedded vCenter Server to existing SSO domain
- VMware vCenter Enhanced Linked Mode configuration
- Replace VMware VCSA 6.x Certificates with ADCS Certificates via the GUI
- Build and run Windows Failover Clusters on VMware ESXi