How to install and configure a Windows Server 2008 R2 DHCP Server
DHCP or Dynamic Host Configuration Protocol is a service that provides IP, DNS and other information to clients or devices. I guess every network now has a DHCP server, since administrators don’t have to go any more to clients and open the network adapter properties to configure the IP, gateway and DNS settings. With DHCP all this is handled automatically, plus you don’t have those IP address conflicts any more. Installing and configuring DHCP on a Windows 2008 R2 server is easy and straight forward. DHCP can run without problems on a Domain Controller in small environments, but for this guide I will use a separate server joined to a domain.
To start, open Server Manager, right-click Roles and choose Add Roles.

On the Select Server Roles page check the box next to DHCP Server then click Next.

On the Network Connection Bindings page select the adapter that DHCP will use to listen for clients request. In this case I have only one network adapter so I’ll just continue the wizard.

Type the name of your domain in the Parent Domain box, then complete the preferred and alternate DNS boxes with your own DNS servers IP addresses. If you press the Validate button(s), the wizard will check if those DNS servers are valid.

I don’t know who is using WINS any more but if you do, select the second option and type the IP address of your WINS server. For this example I will just skip it.

Click the Add button to create our first scope. A scope is a range of IP addresses and gateway configuration that DHCP will provide to clients. Give the scope a name, provide the IP rage addresses and gateway information, then click OK. If you leave (and I recommend) the Activate this scope option enabled, DHCP will automatically activate with Active Directory. A Windows DHCP server to function needs to be authorized with AD, or will not provide IP addresses to clients.


For this example I will not configure DHCPv6 stateless mode for this server.

If the account that you are using now to install the DHCP role doesn’t have enough rights to authorize this server in AD you can use the Alternate Credentials option and provide the account and password. Since I’m using the domain admin account I’m good to go here.

On the Confirmation screen click Install.


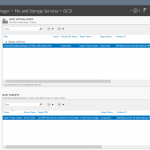
Now you can either user the DHCP snap-in from Server Manager or open the DHCP stand alone console from Administrative Tools.

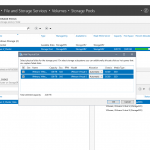
If you click on the Address Pool object you can see the IP address range we configured during the wizard. Sometimes you want to exclude some IP addresses, so the DHCP server will not issue them to clients. For that just right-click the Address Pool object and choose New Exclusion Range. I will exclude my gateway and DNS servers.


If you click the Address Leases object you can see what IP addresses were leased to clients, and the clients details.

On the Reservations object you can add or see the reserved IP addresses. These addresses will never expire, and clients will always have the same IP address.

In the Scope Option you can see and change other settings like DNS servers, gateway etc.

Now if I go at my client and do an ipconfig /all I will see all this settings that are configured on this scope.

Want content like this delivered right to your
email inbox?
More similar articles
 Step-by-step Hyper-V Storage Live Migration
- Creating and configuring Windows Domain Service Accounts
- Deploying and configuring the Remote Desktop Gateway Server Role
- Setting up a Windows Server as an iSCSI Target Server
- Working with Storage Spaces in Microsoft Windows Server
- Blocking Remote Access for Local Accounts by Group Policy