Deploying and configuring the Remote Desktop Gateway Server Role
Having a Remote Desktop Services infrastructure is kind of useless if users can’t connect from the outside world to launch their applications and do their job. In order to extend our RDS VDI solution to our remote users we will need to deploy a special role called Remote Desktop Gateway (RDG), which will allow in a secure meter access to the internal applications or desktops, published in our Remote Desktop Services (RDS) environment.
All that we need for the Remote Desktop Gateway server to be accessible by the outside world, is open port 443 in our firewall and an SSL certificate, then we are good to go. The certificate it’s needed, so the traffic can be encrypted and it must be issued by a trusted Certification Authority (CA) or users will have difficulty connecting, as you will see later on. The RD Gateway server does not need to be joined to an Active Directory domain for the sole purpose to sit in the DMZ. I will however recommend joining it to an Active Directory domain since it will be way easier not to maintain separate usernames and passwords for incoming Internet clients. Noways, expanding your Active Directory domain in your DMZ is not that difficult since you can place an Read-Only Domain Controller there and secure it with your firewall.
In this article we are going to deploy the RD Gateway server inside our network, since a DMZ is for those big boys, the large environments.
1. Installing the Remote Desktop Gateway Role
Presuming you already have the rest of the Remote Desktop Services roles installed and working in your infrastructure, it is time to deploy a new server or VM, join it to your Active Directory domain then open Server Manager on one of the existing RDS servers and add the RD Gateway host to the Server Pool list.
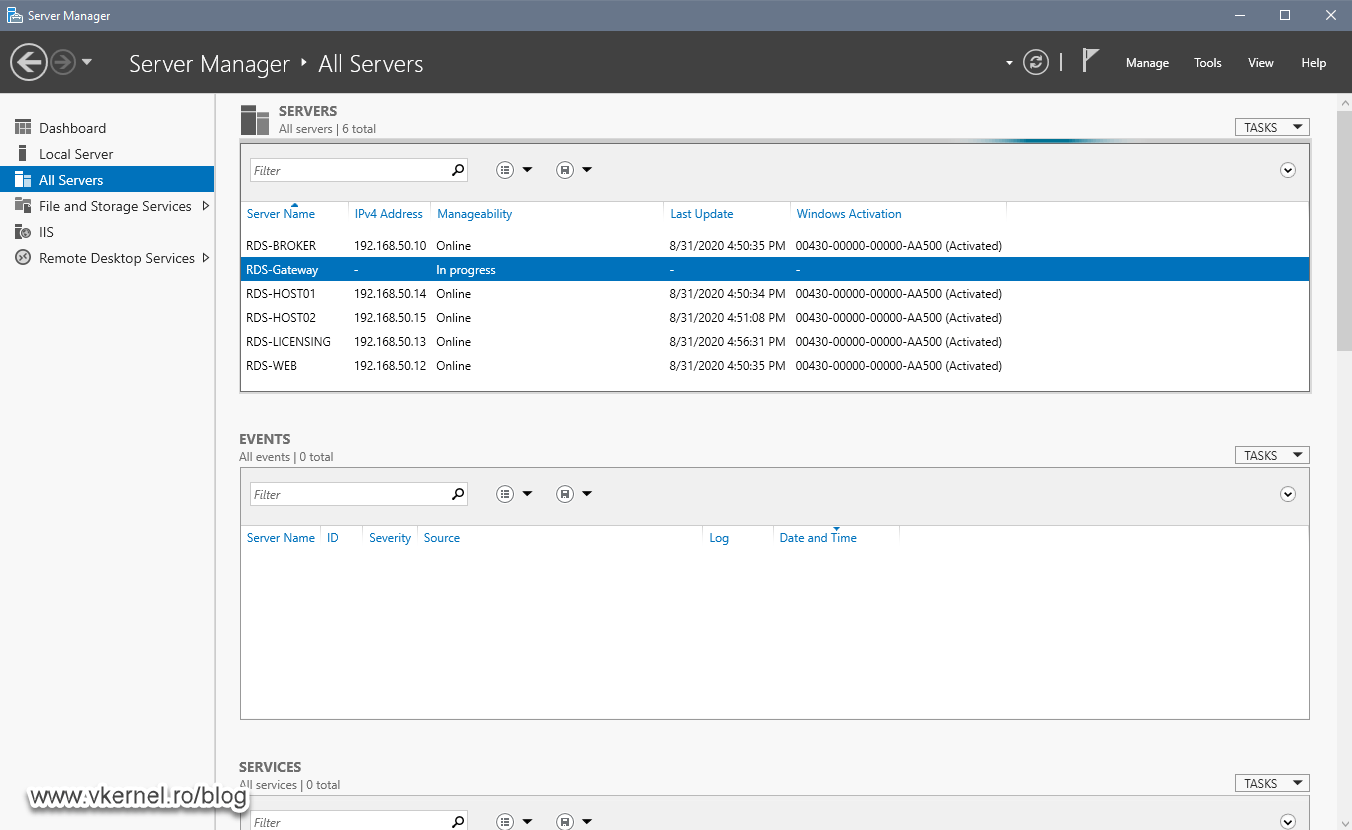
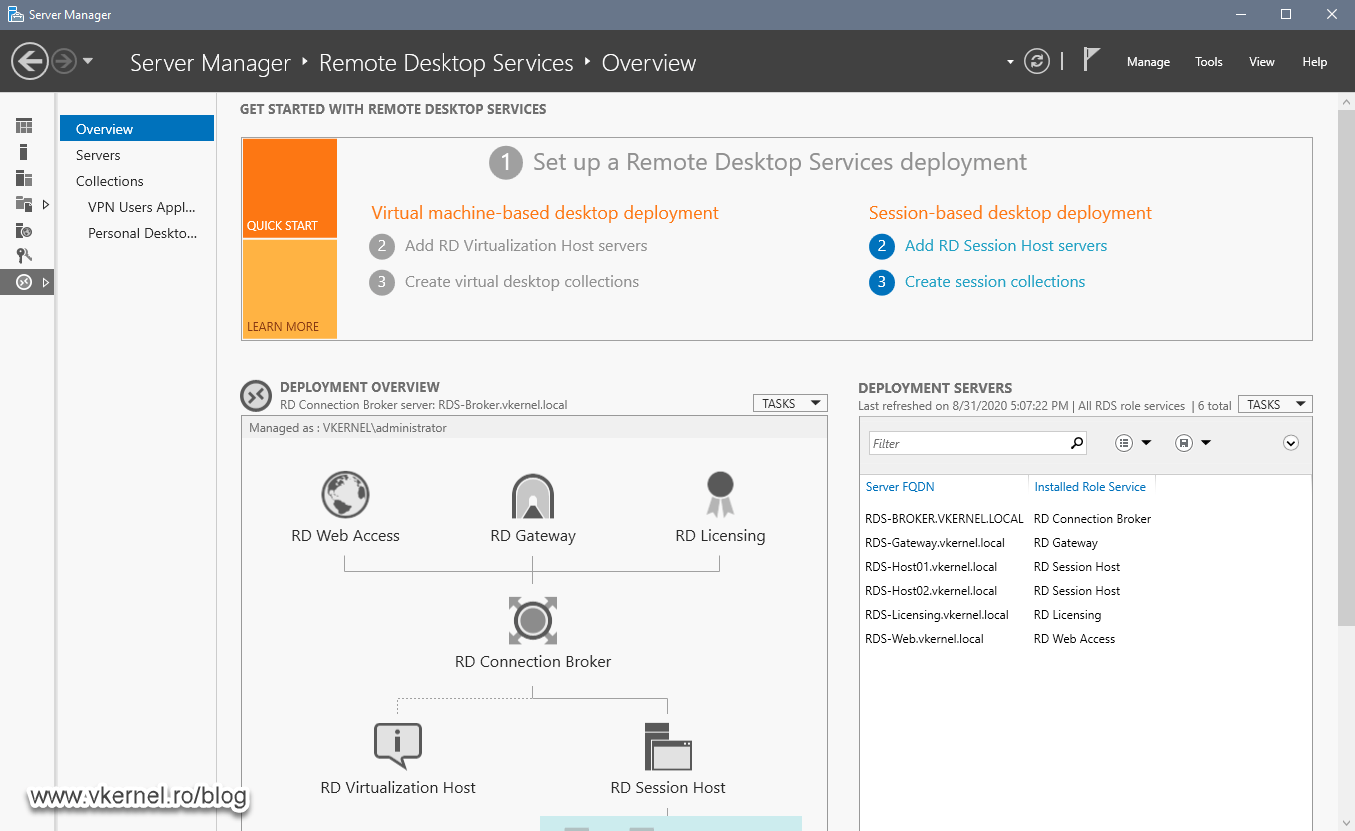
Once the server was added to the Server Pool and shows as Online, go to Remote Desktop Service Overview > Deployment Overview. Here, click the RD Gateway green cross icon.

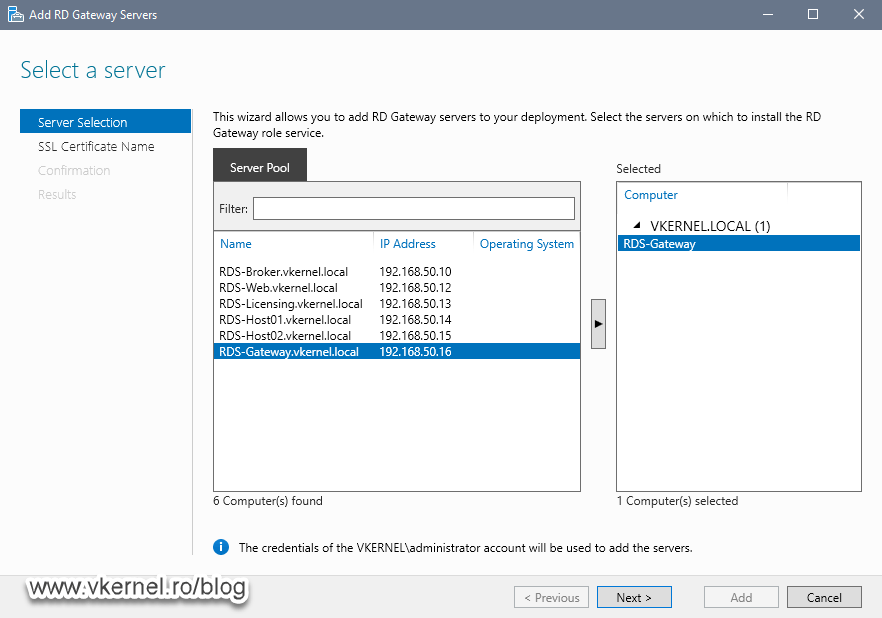
The Add RD Gateway Servers wizard opens. From the Server Selection screen choose the server we just deployed and added to the domain so the wizard can install the RD Gateway role on it. Just highlight it then click the arrow from the right hand side to add the server to the Selected area. Once you are done, click Next.
If the target server is not showing up in the list, it’s because you did not add it to the Server Pool list.
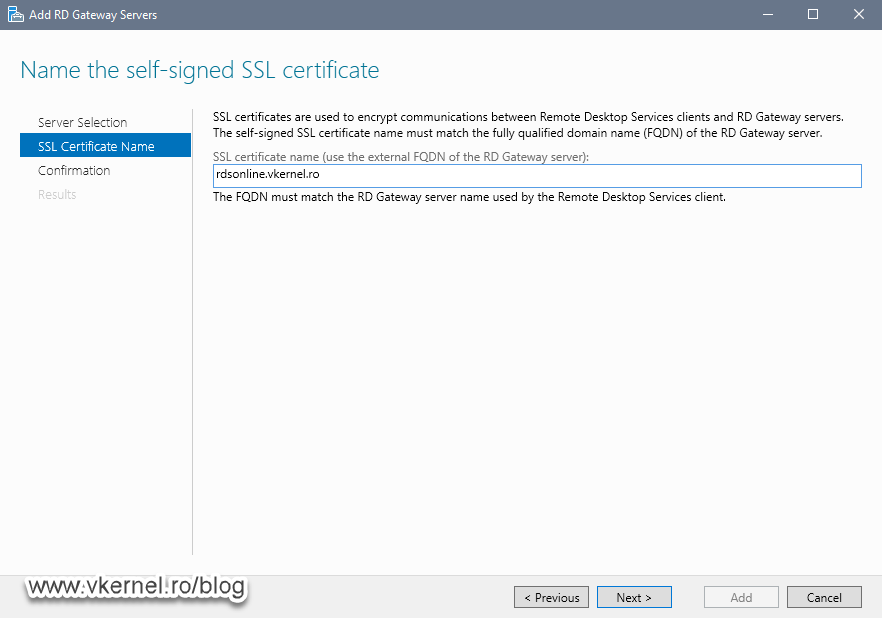
In the second screen of the wizard we need to type the FQDN of the RD Gateway server that users and published applications will use from the outside network. Later on we will have to log in to our public DNS hosting provider and create a new A record with the same name as we type in this box.
The name we provide here will also be put in a self-signed certificate (with the same name) by the wizard, but we are going to change this later on with a trusted certificated issued by our internal PKI. Those external users will trust this Certification Authority since they are joined to the same AD domain. If that’s not the case, then you will need to use a commercial certificate from a trusted authority like Digicert, Sectigo etc…
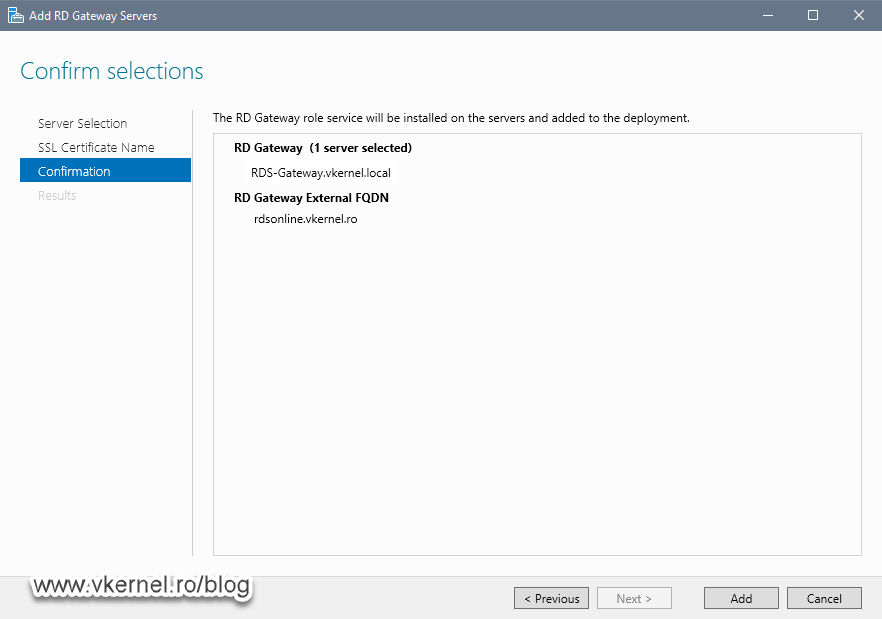
On the Confirmation screen hit the Add button to start deploying and configuring the RD Gateway role on the remote server.
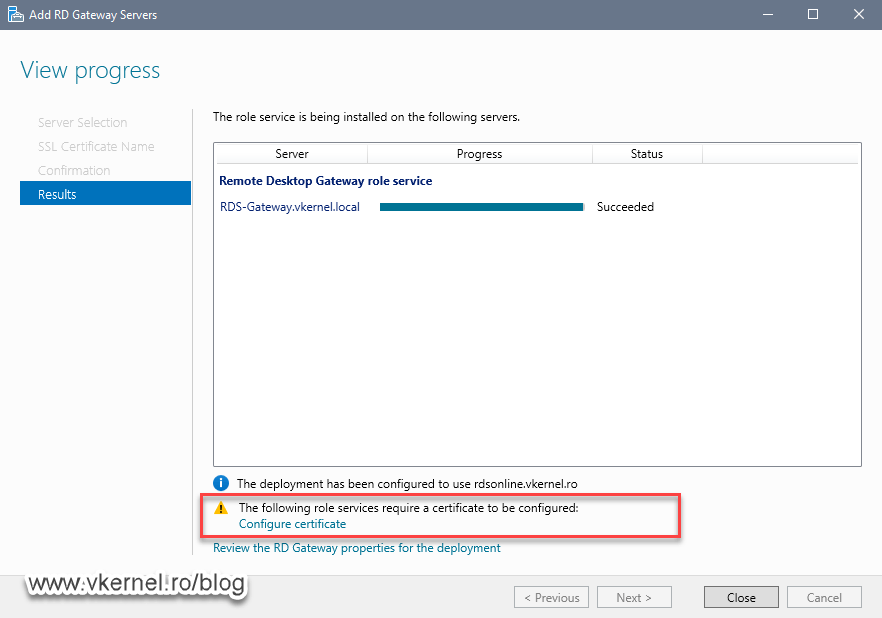
The deployment should take just a few minutes and if everything works out great we get a Success message status at the end. Right from the wizard screen we also get the option to configure the certificate for the role service, which I am going to threat next, so click Close here.
We should now have a nice grey icon for our RD Gateway in the Deployment Overview section in Server Manager.
2. Configuring the SSL certificate for the RD Gateway role service
Without a proper certificate, when external clients connect to our internal RDS environment they might get the bellow error message and the connection will be closed. This is one of the reasons why we need to replace the self-signed certificate of our RD Gateway role with one from a trusted Certification Authority and in this case our internal Microsoft PKI. I will go briefly on this subject since I already have an article that goes into details on how to configure certificates for a RDS environment.
This computer can’t verify the identity of the RD Gateway “…”. It’s not safe to connect to servers that can’t be identified. Contact your network administrator for assistance.

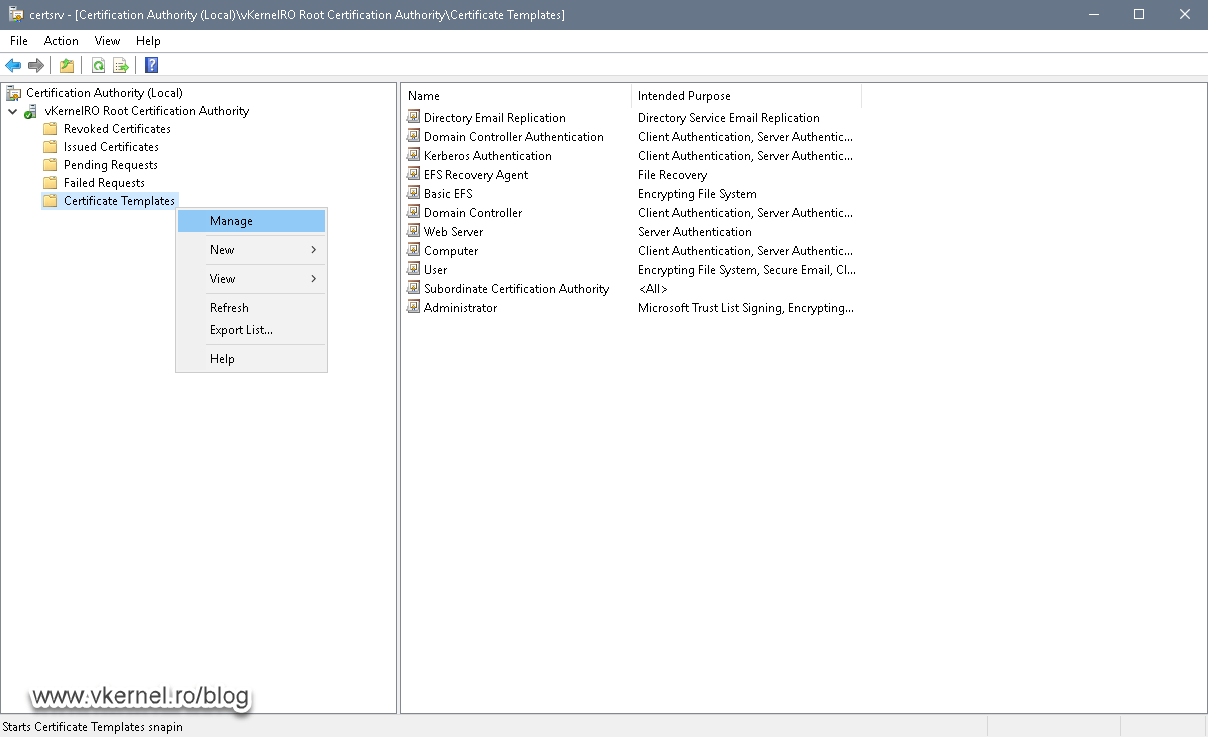
Before we can request a certificate, first we need to prepare the certificate template on our Certification Authority server. For this, open it’s console then right-click Certificate Templates and choose Manage.
In the Certificate Templates Console that opens, search for the Web Server template and double-click it to open it’s properties. Here, go to the Security tab and add the Domain Computers group to the Access Control List (ACL) and give it the Enroll permission. Click OK to save the changes.
Now off course, you can always duplicate this template and create your own with different configurations, so I will leave this up to you since this is a story for another time.

On one of the RDS servers (preferably the Broker server), open the local certificates store (certlm.msc), then right-click Personal and choose All Tasks > Request New Certificate.

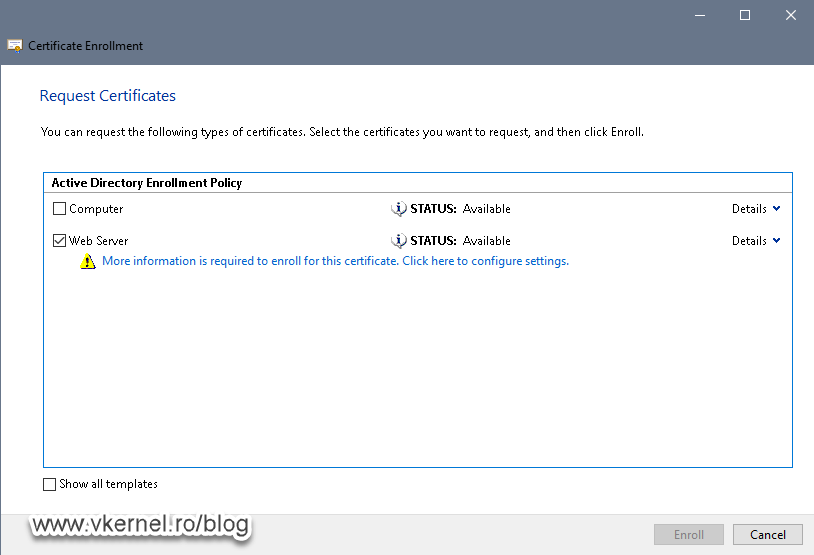
Once we get to the certificate templates screen in the wizard that opens up, tick the Web Server template box then click on the bellow link –More information is required to enroll this certificate. Click here to configure settings.– to configure the Common Name and other properties of the certificate.
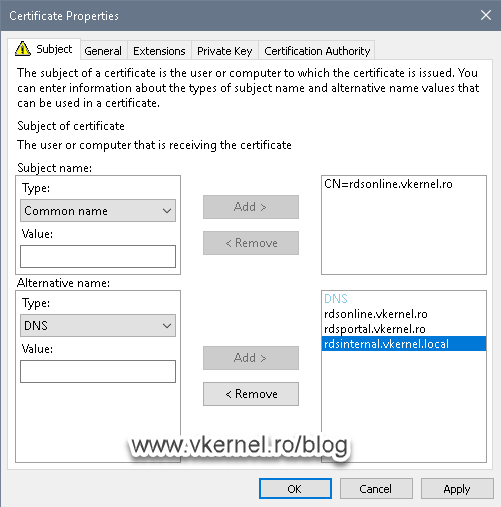
The first thing that we need to configure is the Common name of the certificate, so select this option from the Subject Name > Type drop-down box then provide the external FQDN. This FQDN needs to mach the one we configured on the RD Gateway wizard during the installation of the service role.
The next item we need to configure is the Subject Alternative Name (SAN). Without this, users will get a certificate error when connecting to internal resources trough our RD Gateway server. Select DNS from the Alternative Name > Type box then provide the same external FQDN you typed above, in the Common Name box.
If your RD Web Access server role is sitting on the same server as the RD Gateway role, you can put in the SAN extension the external FQDN that internet users will type to access the web portal. Also, you can provide the internal FQDN for your office users.
The last thing that we need to do here is to make the private key of the certificate exportable. Click the Private Key tab then expand Key options. Check the box next to Make private key exportable then click OK.

Back on the Certificate Enrollment wizard, click the Enroll button. After a few seconds we should have our certificate issued and ready to be installed on our RDS infrastructure.
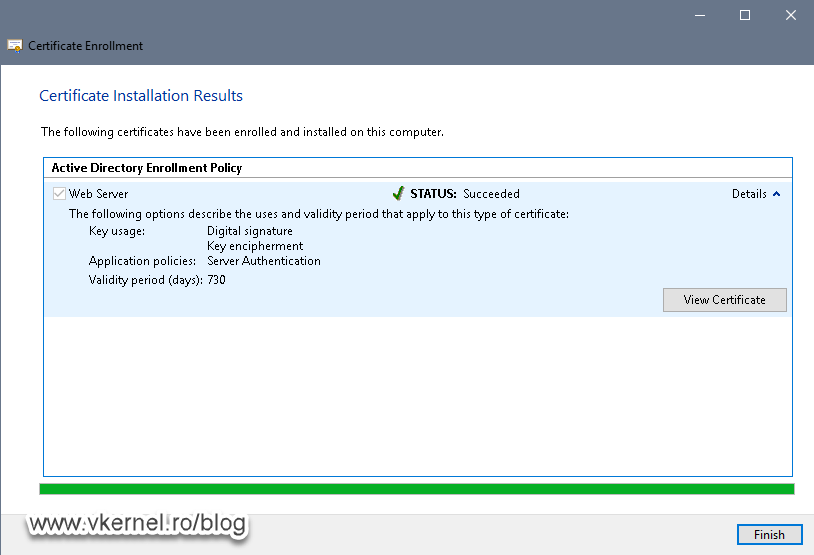
Export the certificate with it’s private key then open Server Manager on one of the RDS servers, and go to Remote Desktop Service Overview > Deployment Overview. Here, in the Deployment Overview section click the TASKS drop-down menu and choose Edit Deployment Properties.

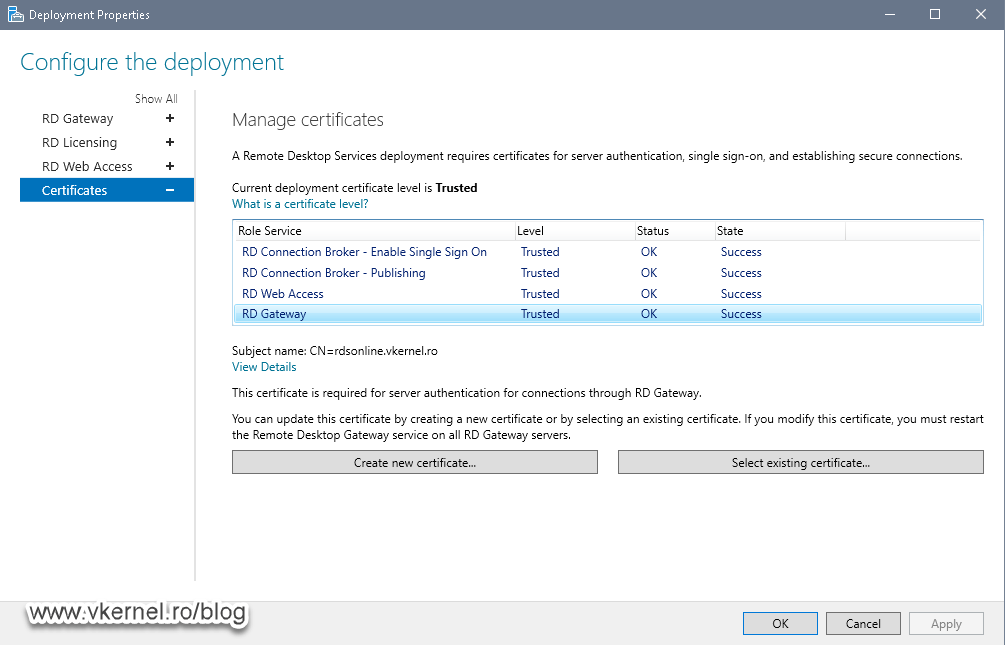
After the Deployment Properties window opens, click on the Certificates item. Install the certificate for the RD Gateway role or for all the roles, if you don’t have one then click OK. In case you need help on this, please read my previous article where I go in detail about the certificate installation process for a Remote Desktop Services infrastructure. In the end we should have a trusted certificate installed for all the RDS roles.
3. Configuring records in the public DNS
The DNS names we put in the A records bellow need to match the ones we just put in our certificate or users will get a certificate error and connection will be dropped.
3.1. RD Web Access and RD Gateway roles on separate servers and separate public IPs
Usually with this type of deployment the organization has two public IP addresses assigned by the ISP for the RDS infrastructure. One of the IPs will be used for the RD Web Access role so internet users can access the web portal and launch their applications, and the other IP address will be used for the RD Gateway role. As you can imagine we will need to create two A records in our public DNS that point to these public IPs.
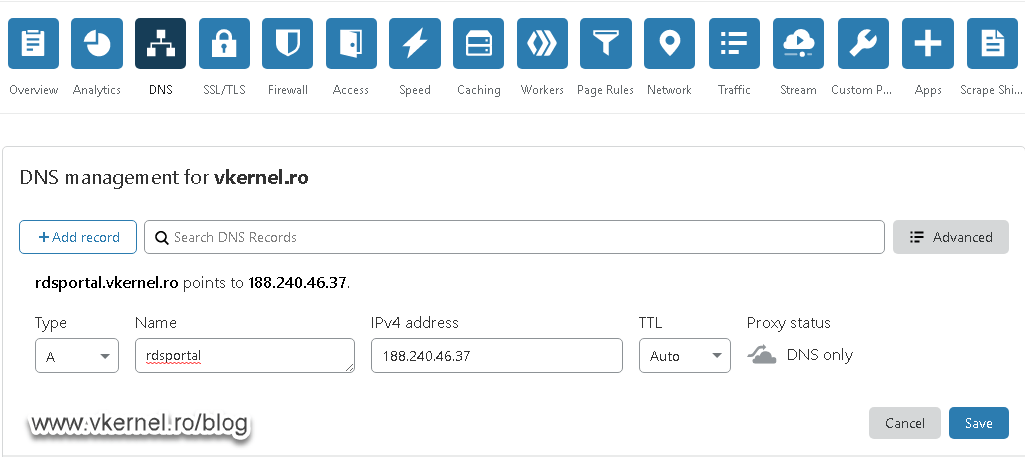
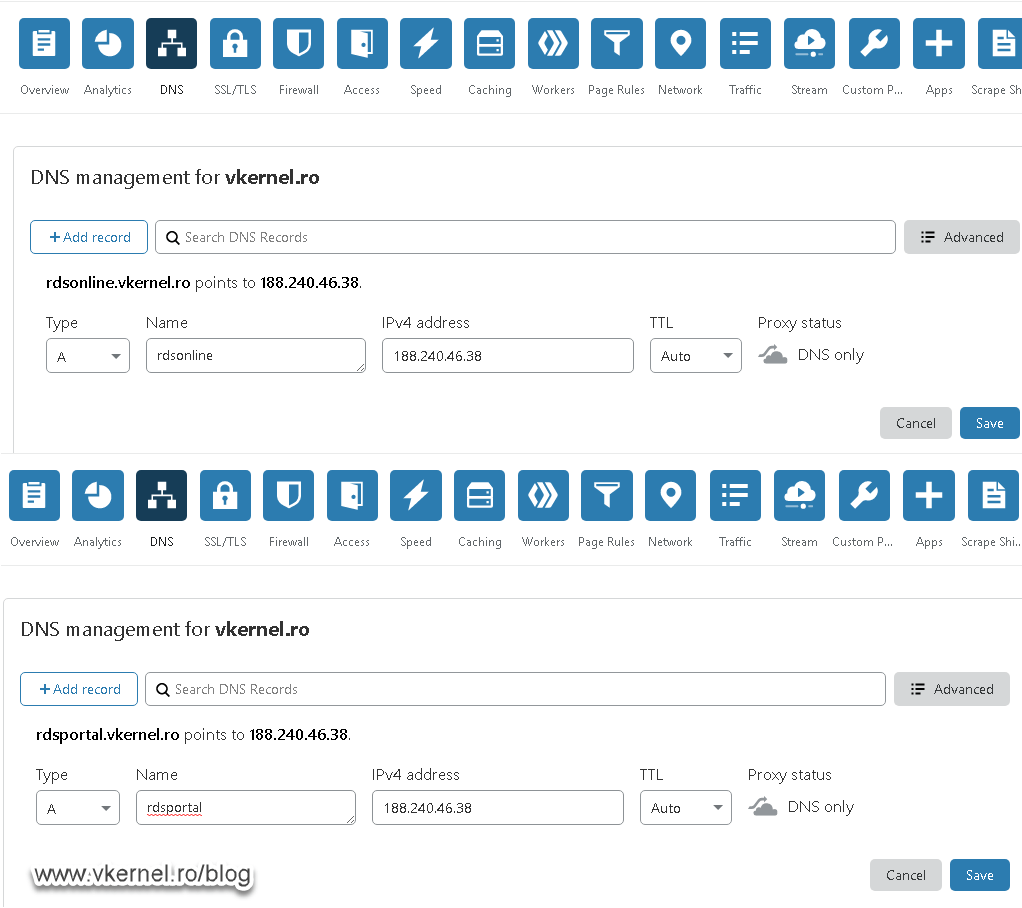
Open your public DNS dashboard and create a new A record that points to the IP address you want to assign to the RD Web Access role.
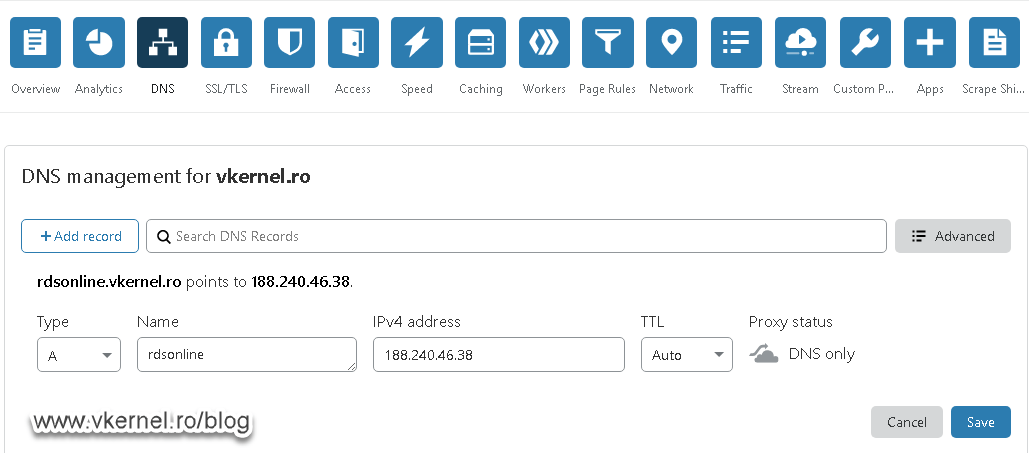
Once you are done with that, repeat the operation for the second IP which will point to your RD Gateway server.
3.2. RD Web Access and RD Gateway roles on same server with one public IP
This type of deployment is found in small environments and most of the time only one public IP address is used for the RDS infrastructure. All that we need here is to direct the FQDN to our public IP sitting on the external interface of our firewall.
3.3. RD Web Access and RD Gateway roles on separate servers and one public IP
With this type of deployment we will have to create two DNS entries that point to the same public IP address. You will see in the Firewall Port Forwarding section why we need this.
4. Firewall Port Forwarding
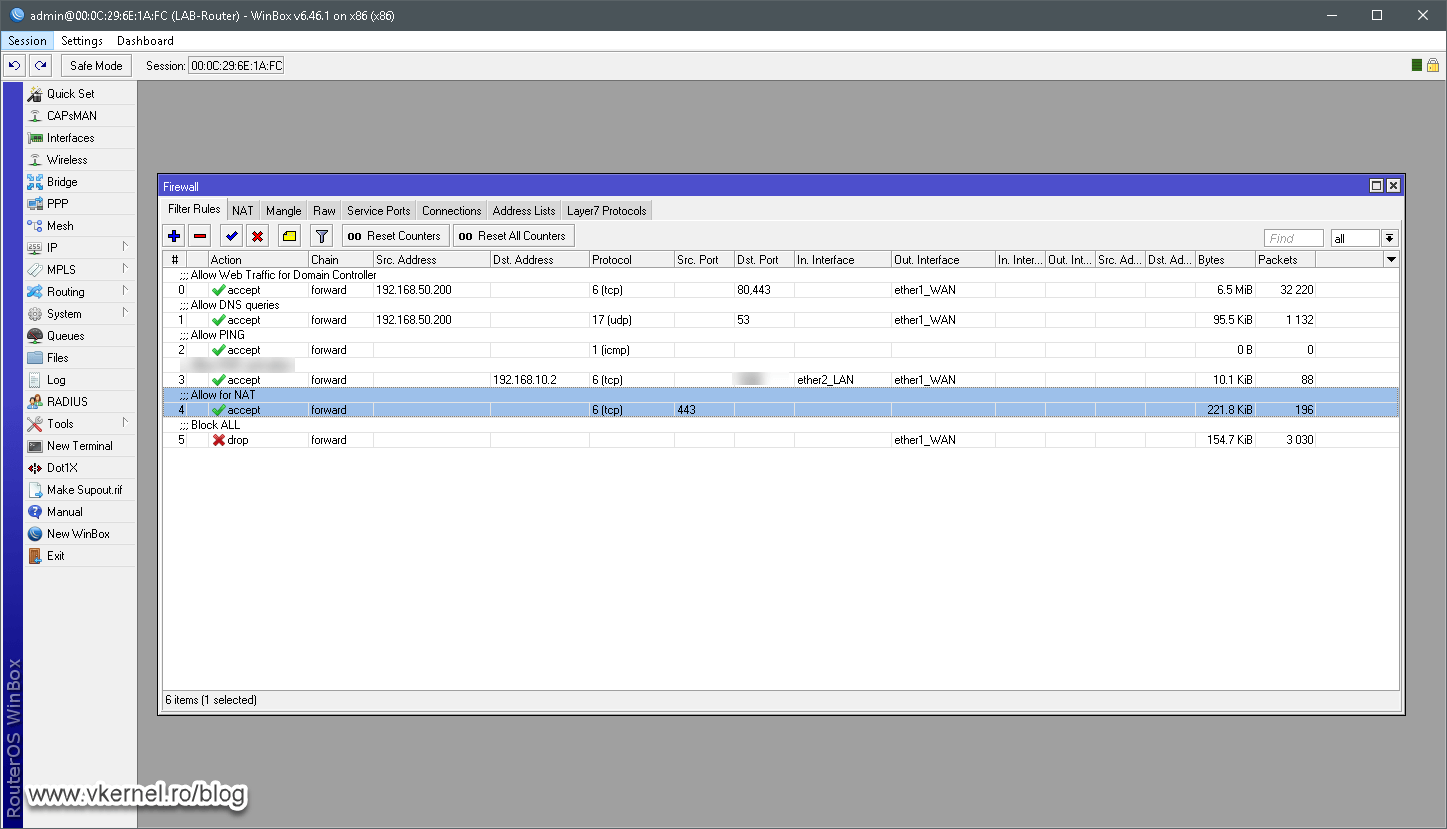
As you can imagine, I cannot put the configuration for all of the firewall models out there, but I will give you a basic idea of how this is done and you should be able to configure it on your own security hardware/appliance. And again, we have three scenarios like we had in the DNS management section, but first let’s open the ports in our firewall which will allow everyone to connect to the RDS services. You can filter this so only clients from specific IP addresses will be able to connect, but in our case we presume that our mobile users will go and connect from hotels, airports or coffee shops. We should filter anyway based on port number. As you can see in my bellow example I allow connections from everywhere but only those destined for port 443.
4.1. RD Web Access and RD Gateway roles on separate servers and separate public IPs
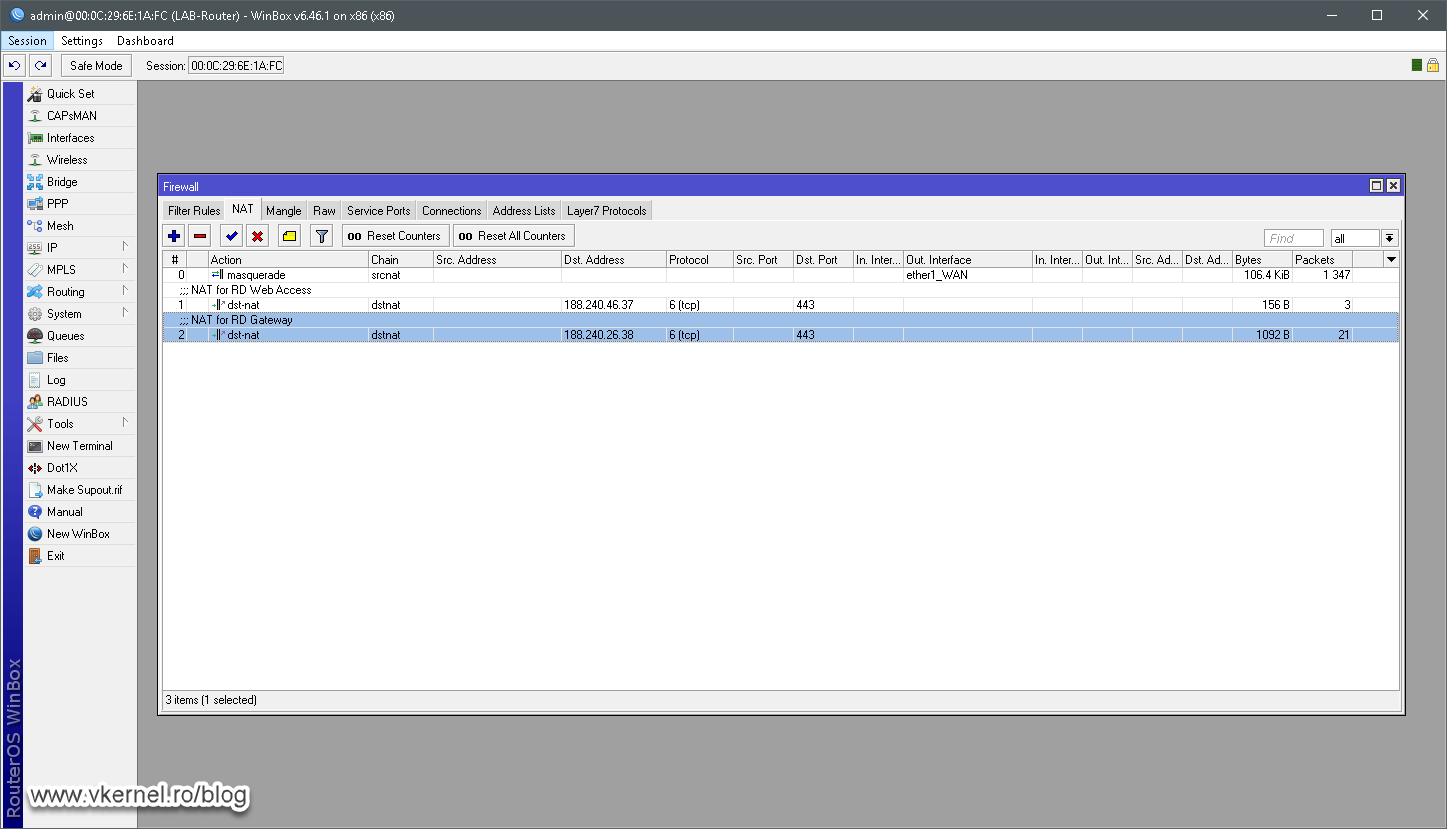
This one is very easy since all we need are two simple port forwarding rules in our firewall. The first rule will be for the traffic that comes on the first IP address, which will be forwarded to the RD Web Access server role .

The second port forwarding rule will be for traffic that hits the second public IP address which will be redirected to our RD Gateway server.
4.2. RD Web Access and RD Gateway roles on same server with one public IP
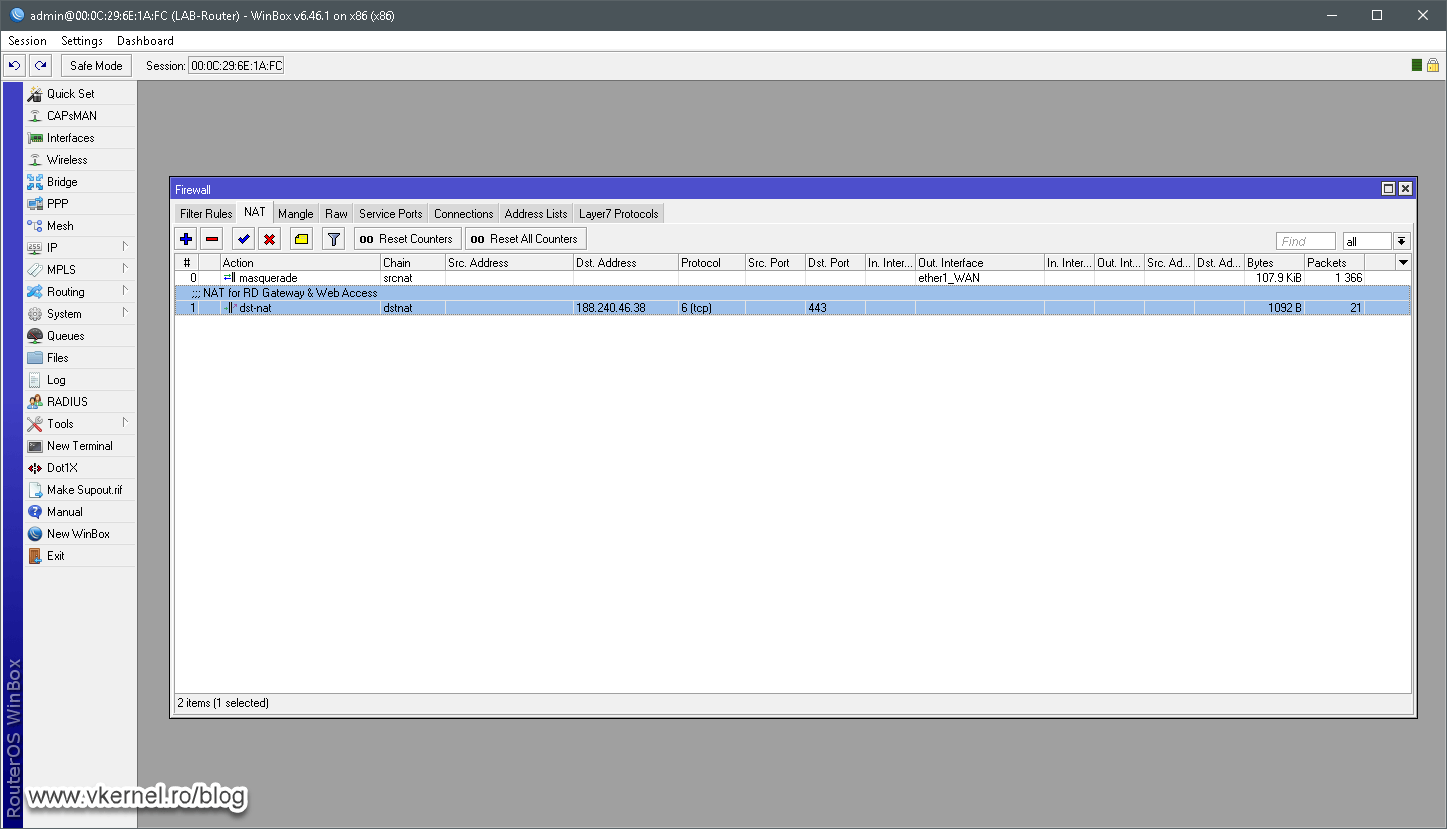
This one is even easier that the first scenario because we only need to have one port forwarding rule created that points to our internal RDS host where the RD Gateway and RD Web Access roles are running.
4.3. RD Web Access and RD Gateway roles on separate servers and one public IP
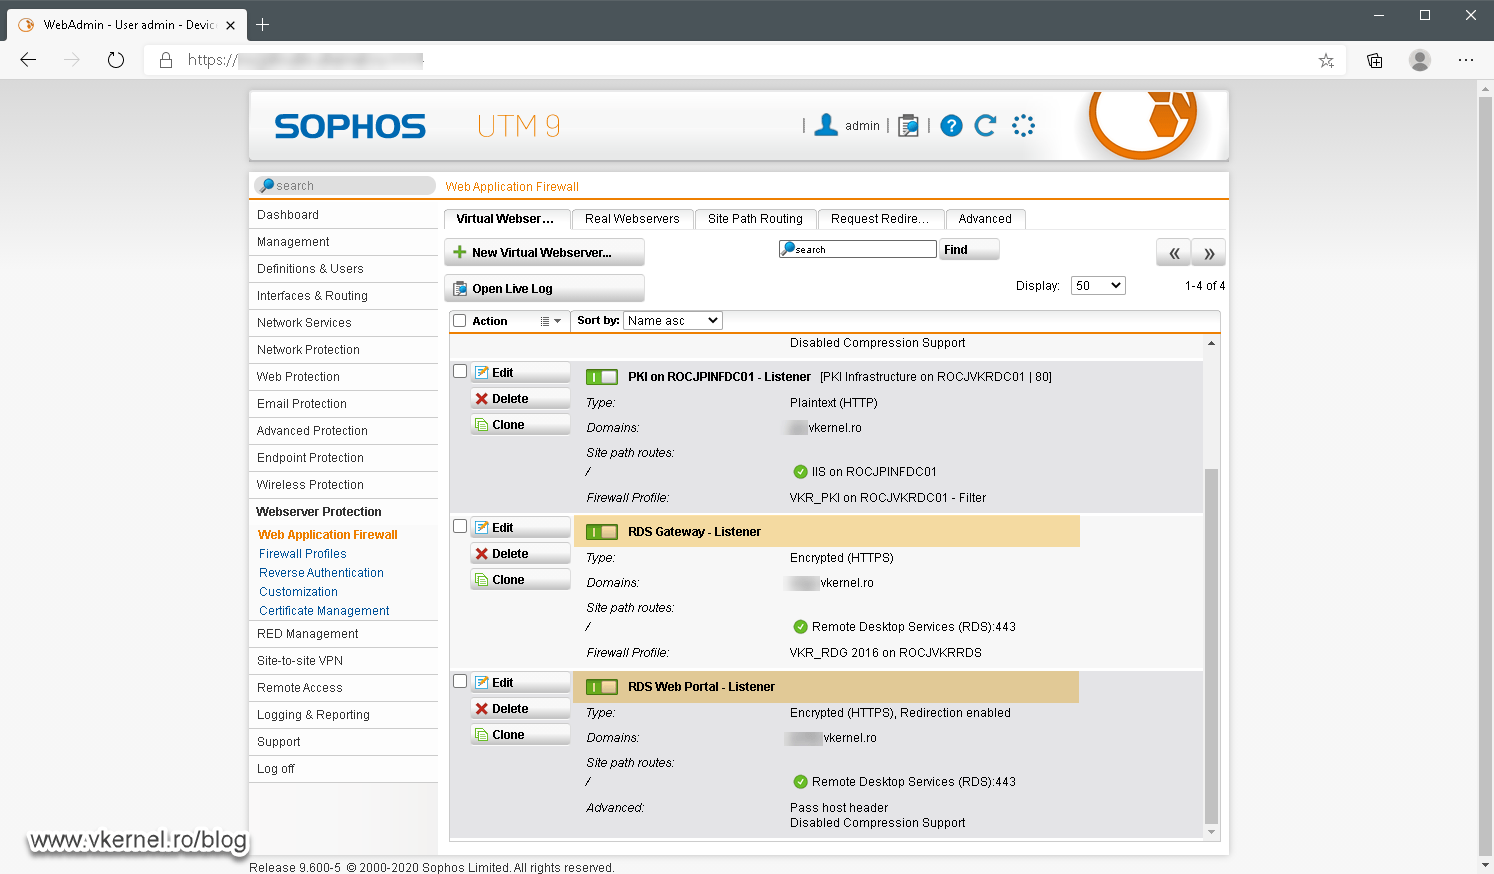
This type of deployment is the most problematic because we have just one public IP address which needs to be used by two or more internal hosts on the same port. As you can imagine this brings up some complications if both roles are to be published out on the internet because they both use port 443. If buying another public IP address from your ISP is out of the question, the only way to make it work on the same port number is to use Server Name Indication (SNI). This is actually a proxy server that sits in front of our RD Gateway and Web Access hosts and redirects traffic to them based on the URL it receives. You can find on the internet plenty of these proxy servers, but me personally I prefer Nginx and Sophos UTM.
This is done by forwarding port 443 to the proxy server from the outside world.
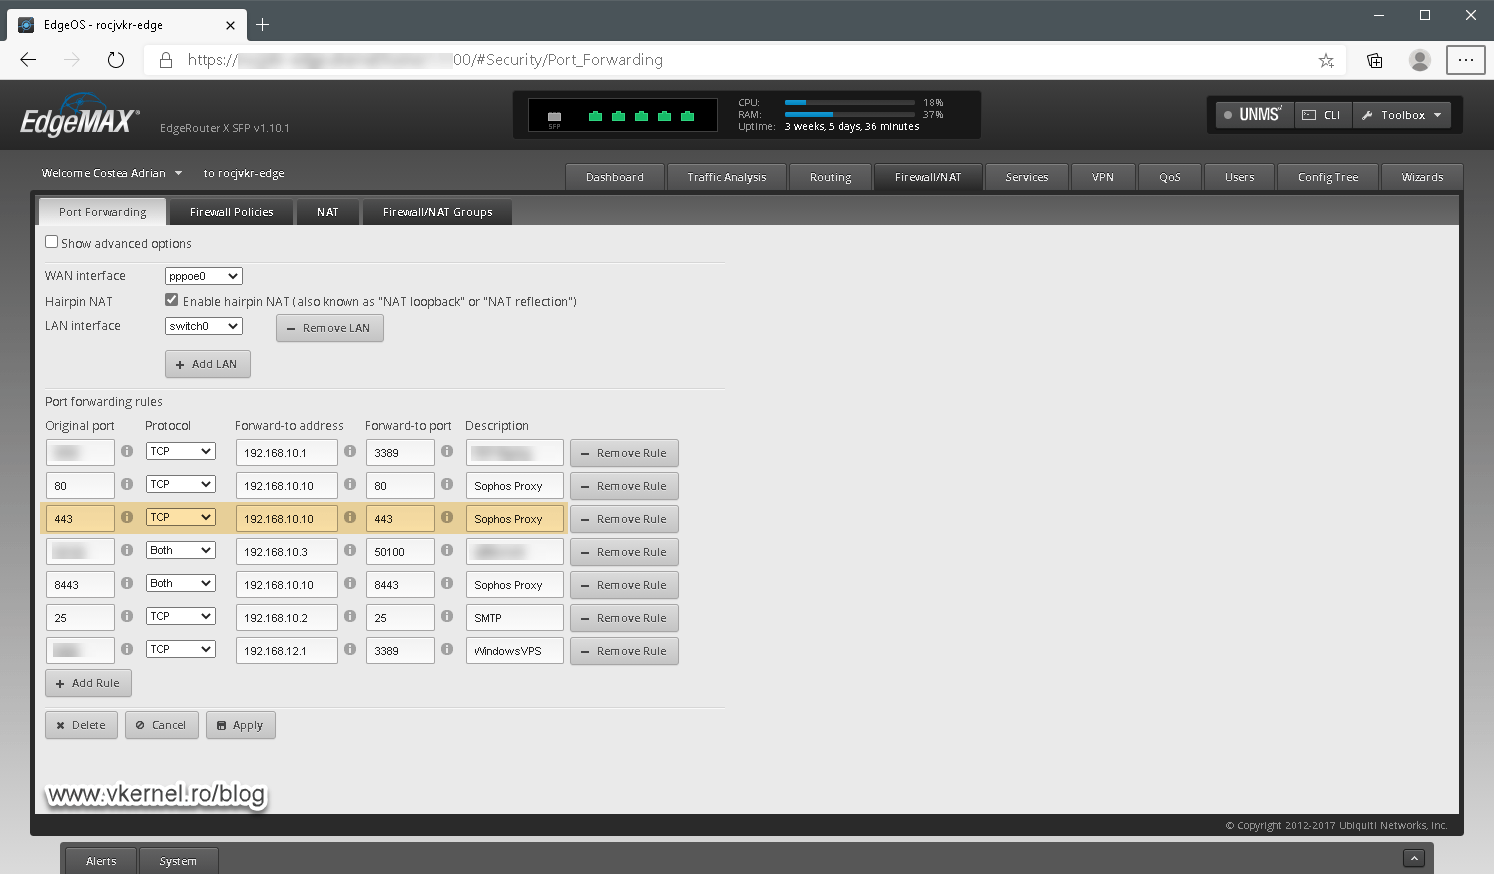
Once the traffic hits the proxy server, based on the URL it receives it will forward the traffic to the configured internal server.
5. RD Gateway Policies
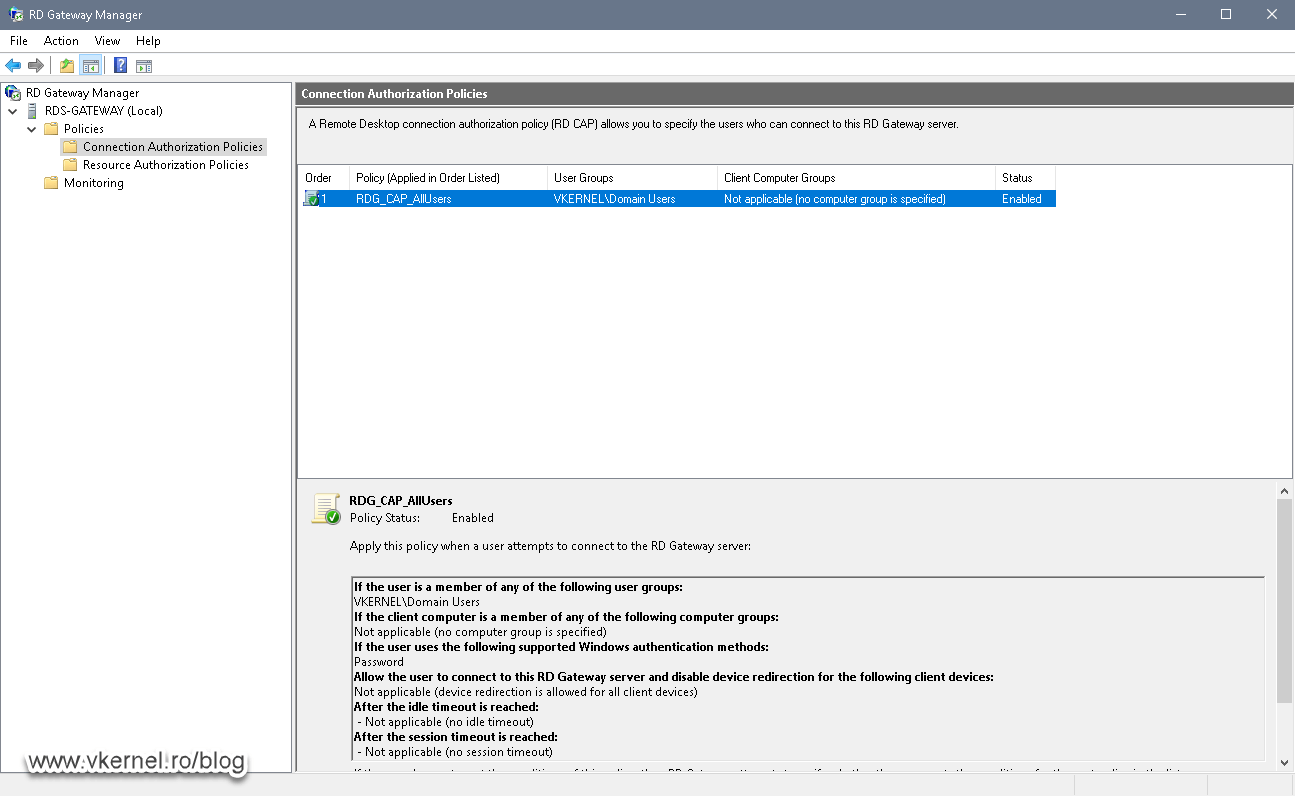
There are some useful advance settings for our RD Gateway server where we can configure which users and computers can access our internal VDI infrastructure. These can be found on the server itself by opening the Remote Desktop Gateway Manager console from Administrative Tools > Remote Desktop Services. Once the console is opened, if we expand the Policies folder, we can see two other subfolders that are part of it.
The first subfolder, Connection Authorization Policies, contains the policies that control who can connect to the RD Gateway itself, and by default we get one policy -that was created during the RD Gateway role installation- which allows all domain users.
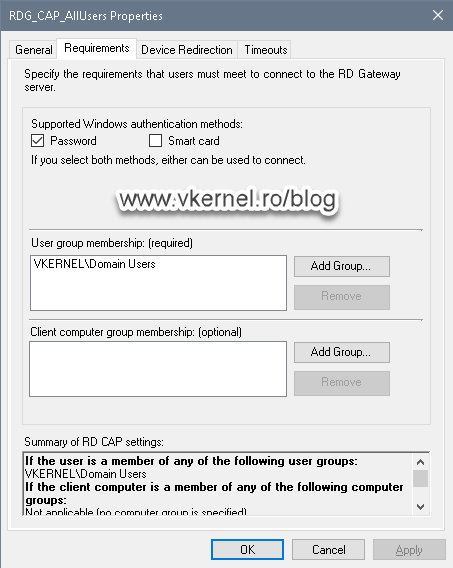
If we open the policy and go to the Requirements tab, we can force the type of authentication an internet user should use in order to access the RD Gateway. We can also provide the users or groups that are allowed to access the server.
On the Device Redirection tab we get the options to allow or disallow the type of device that can be mapped from the client computer to the remote one.

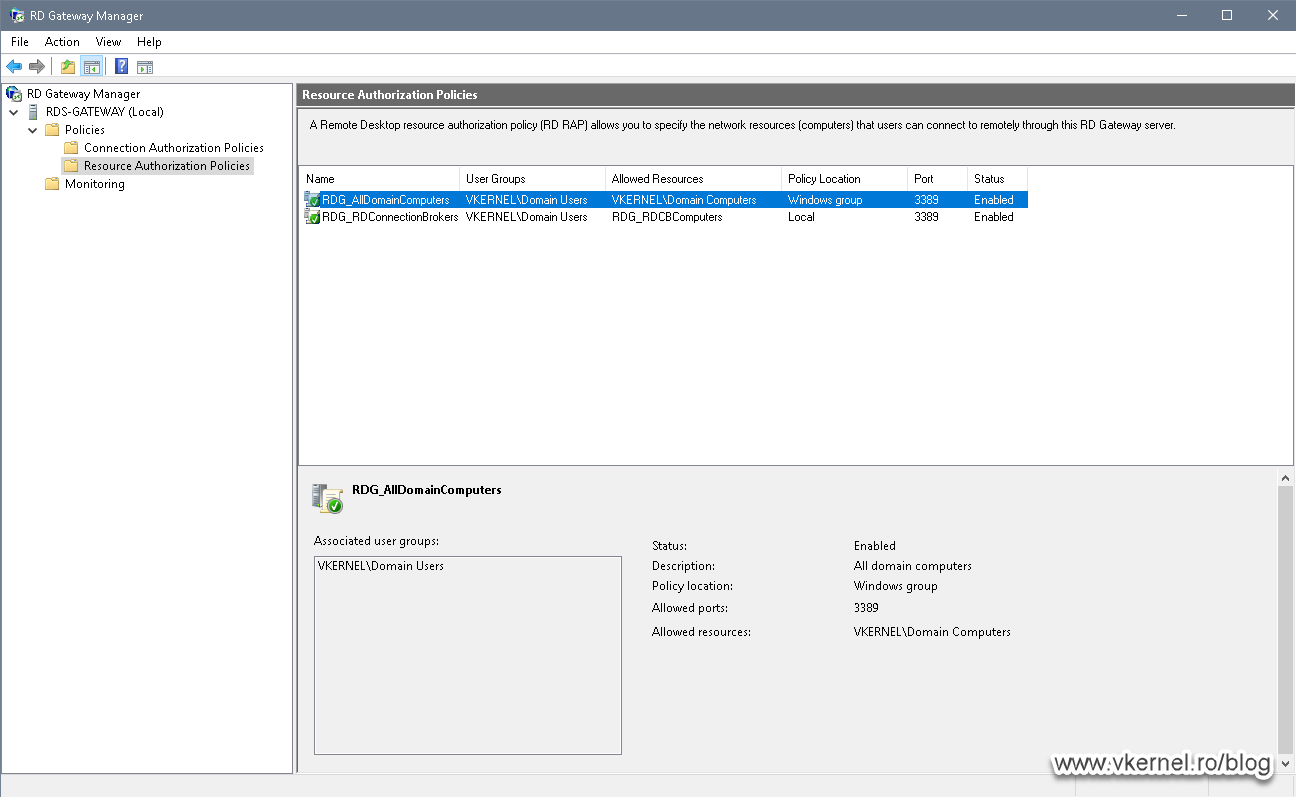
If we click on the second subfolder, Resource Authorization Policies, we can restrict or allow what users can access the internal VDI trough the RD Gateway server. So if they pass the Connection Authorization Policy rule, they now need to be validate by one of the policies present in the second subfolder to get access to the internal machines.
By default we have two policies:
RDG_AllDomainComputers – tells the RD Gateway what internal computer(s) the internet users are allowed to access.
RDG_RDConnectionBrokers – tells the RD Gateway to always allow connections from the RD Connection Broker(s) server(s) present in the infrastructure. This policy should not be modified or tempered with so the RD Gateway and RD Connection Broker roles can communicate without restrictions.
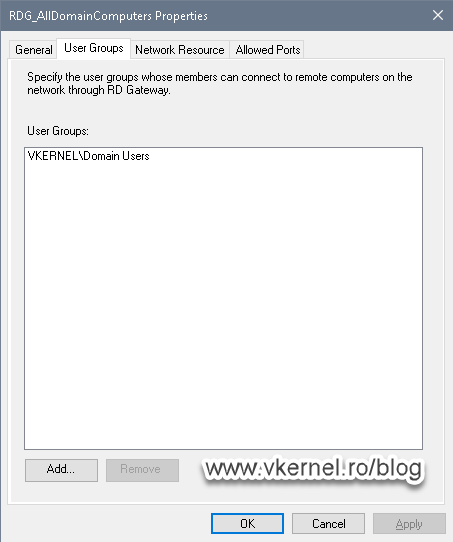
If we open the first policy and go to the User Groups tab we can add or remove a user group that is allowed to access internal machines trough our RD Gateway server.
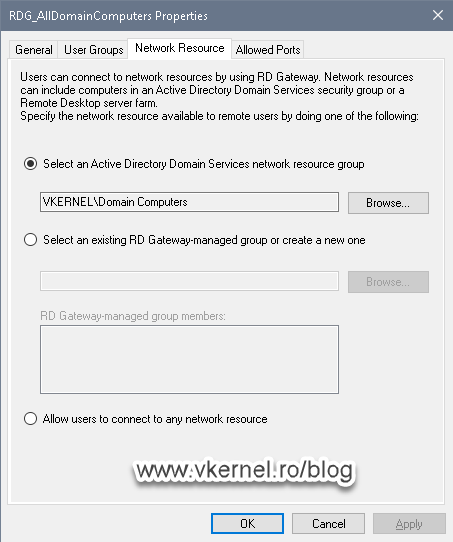
On the Network Resource tab we can increase security even more by telling the RD Gateway service to what internal computers the users (part of the User Groups tab) can connect to.
If you have a very tight security requirement for your VDI infrastructure, you will have to modify or create new policies here, but for the most part, the default ones are just fine.
6. Testing connections
If you followed along, by now your internet users should be able to open the RD Web Access portal using a secure and trusted connection.

Once they click a published application, the connection should succeed even if they sit behind a tight firewall.
Once the profile is created or loaded, depending on the case if the user ever logged in before, the application will launch successfully.

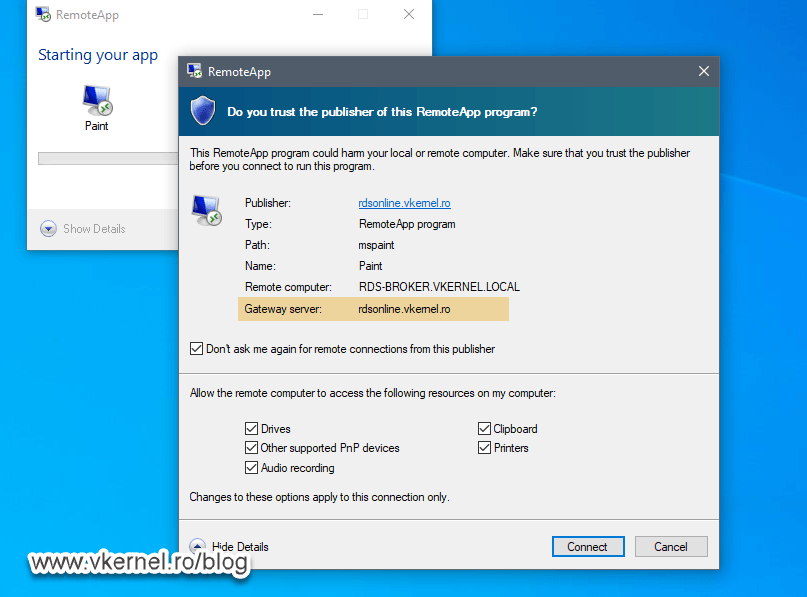
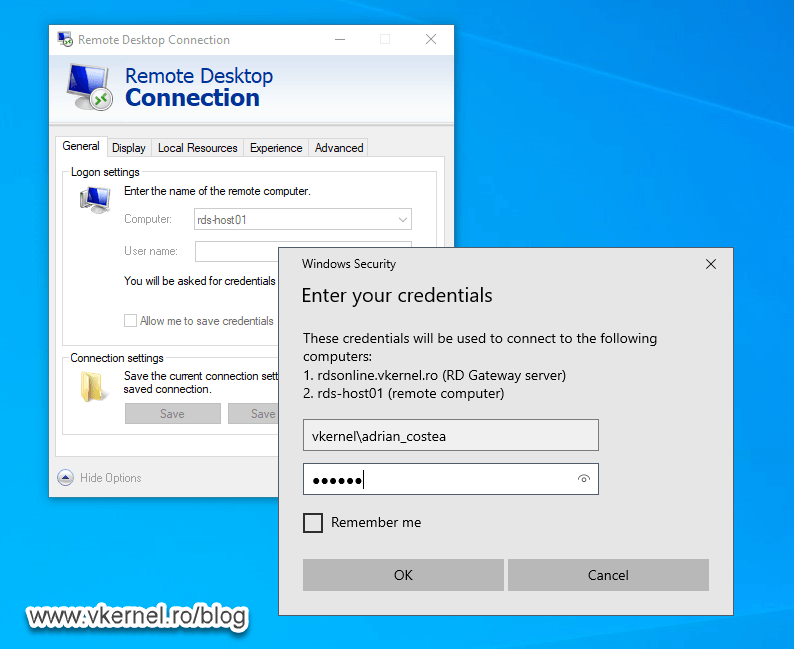
If some of the users are more comfortable using a direct connection to the VDI machine(s), they can do so using the Remote Desktop client. All that you need to provide to them is the FQDN of the RD Gateway. This is where the RD Gateway policies should be used since they can connect to every internal machine if no restriction is in place.

After they provide the authentication credentials, the connection will be established with the internal host.
Summary
In my opinion, the RD Gateway role it’s must in a Microsoft VDI environment. Not only because it secures the connection from start to end, but also because it makes it easier for you as an admin to allow access to internal resources. Without this role, you will have a lot of ports opened in your firewall -making your network vulnerable- so internet users can connect to the internal VDI . Go ahead, I encourage you to try it and let me know in the comments area your opinion and experience with this technology.
Want content like this delivered right to your
email inbox?
More similar articles
 Deploying VDI using Windows Server 2012/R2
- Installing Remote Desktop Services (RDS) in Windows Server 2012/R2
- Activating a 2008 R2 Remote Desktop License Server
- Configuring Windows Server 2008 R2 RD Gateway for external access
- Replacing the default (self signed) certificate on a RD Session Host server
- Step-by-step Hyper-V Storage Live Migration