Creating and configuring the MDT Database
Things are easy if you are deploying systems using MDT, and all systems need to have the same software installed. The ugly part is when you need to deploy those systems and some of them don’t need Office, for example, or you need to install features or applications according to the computer’s hardware. Ohh, and let’s not forget about computer naming. If you are in this situation and want to perform such tasks/deployments, you can accomplish this pretty easy by configuring the MDT database. This is done by installing an instance of Microsoft SQL server, then creating and configuring the MDT database which will be the central repository for storing the configuration settings used to deploy multiple systems. It can be done by either using a full SQL server or the Express edition. No matter what version you choose the configurations are the same, but for this guide however, I’m going with the full edition of SQL server 2012.
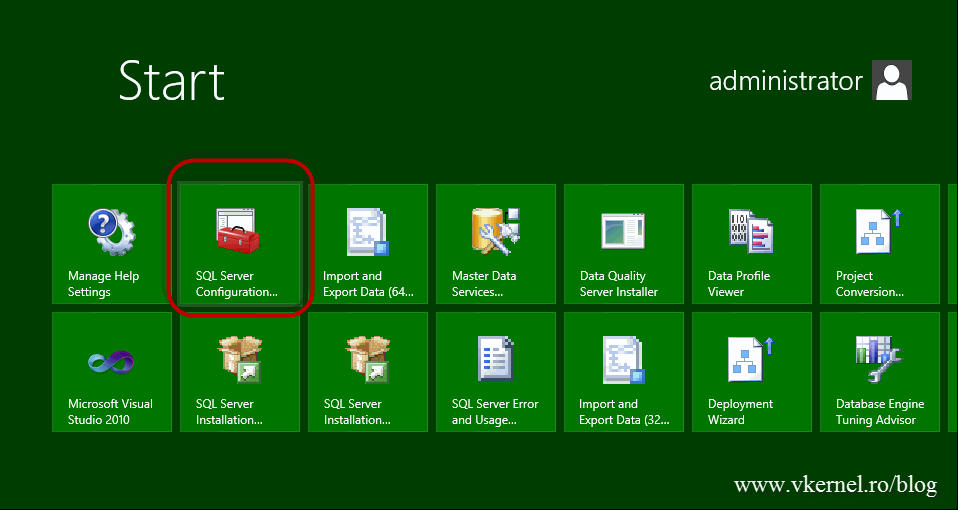
Now log in on the SQL server and open the SQL Server Configuration Manager.
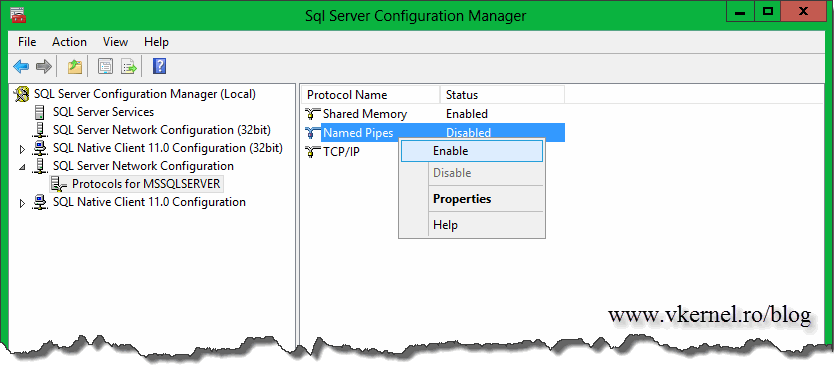
Expand SQL Server Network Configuration > Protocols for MSSQLSERVER. Here we need to enable the Named Pipes protocol, so right-click it and choose Enable.
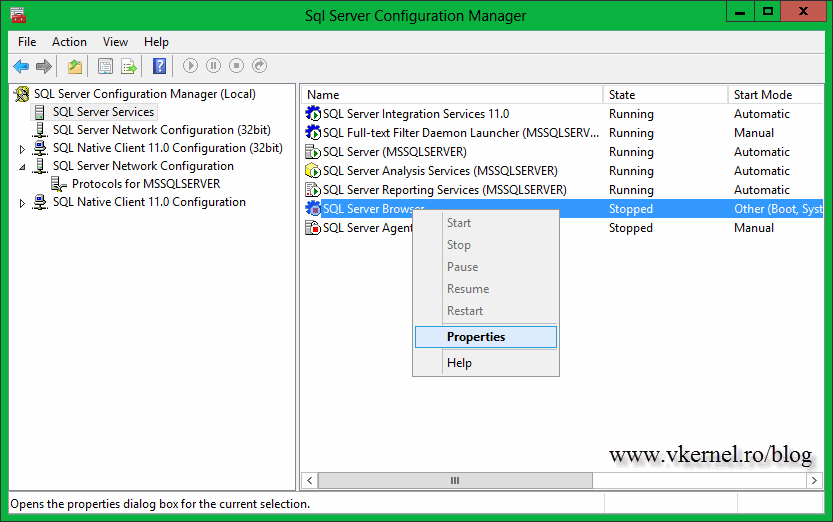
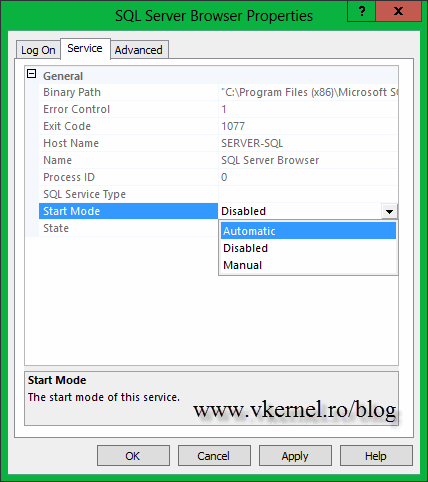
Don’t close the window yet. Go to SQL Server Services, right-click SQL Server Browser and choose Properties. On the Service tab, select Automatic from the Start Mode box, then hit Apply. To start this service you can either click the Start button from the Log On tab or right-click the service name and choose Start.
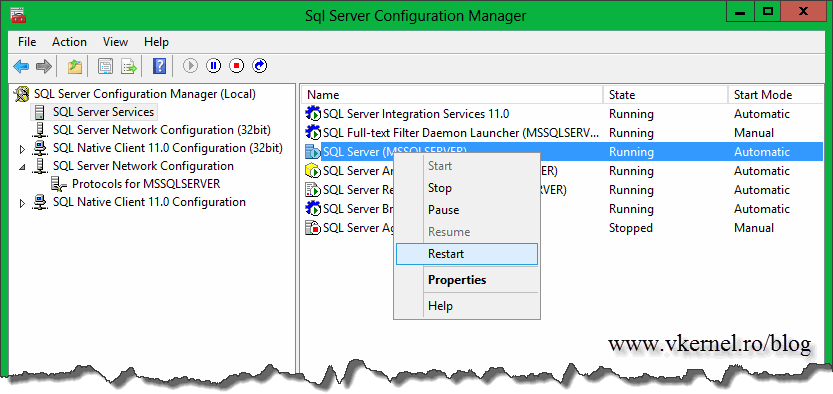
After all this, the SQL server service needs to be restarted, so right-click SQL Server and choose Restart.
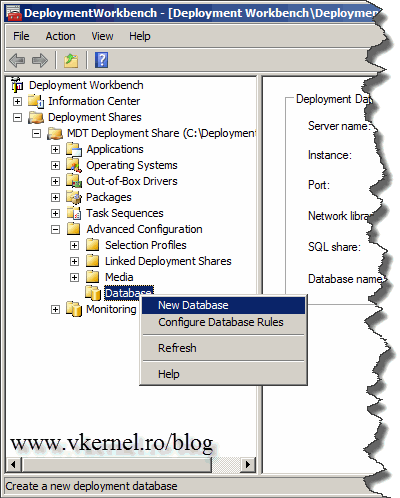
Log in on the server where MDT is installed, open the Deployment Workbench and expand your Deployment Share > Advanced Configuration. Right-click the Database object and choose New Database.
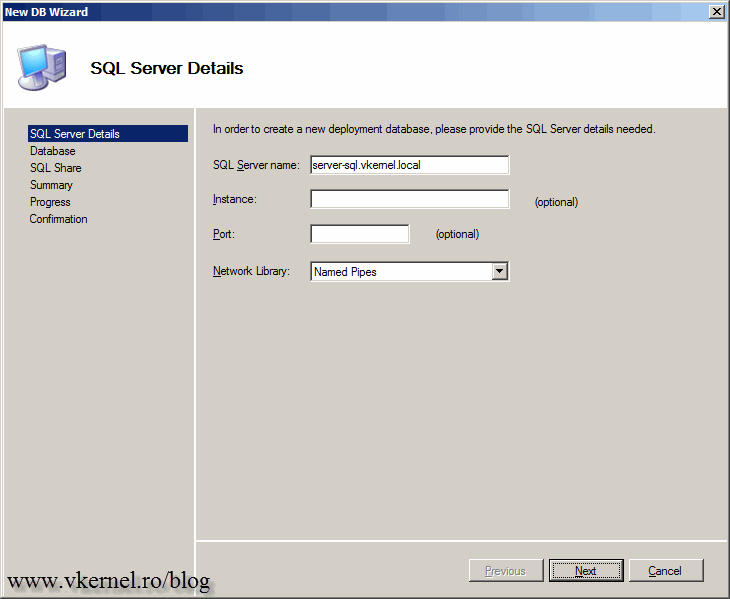
On the wizard that opened, type your SQL server name, instance if other than default, and port number, again only if is different from the default one. On the Network Library box choose Named Pipes; don’t go with TCP/IP Sockets because you might have deployment problems using this protocol.
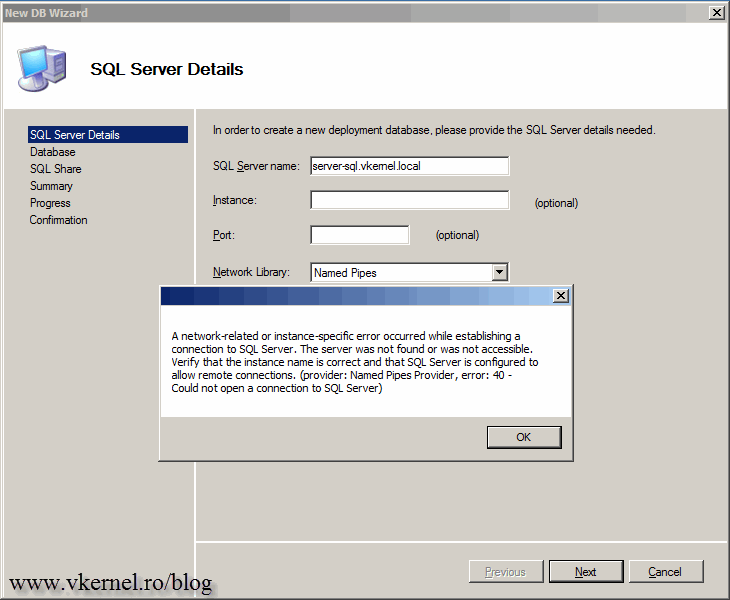
If you get the error message “A network-related or instance-specific error occurred while establishing a connection to SQL Server. The server was not found or not accessible…” verify that Named Pipes protocol is enabled on the SQL server.
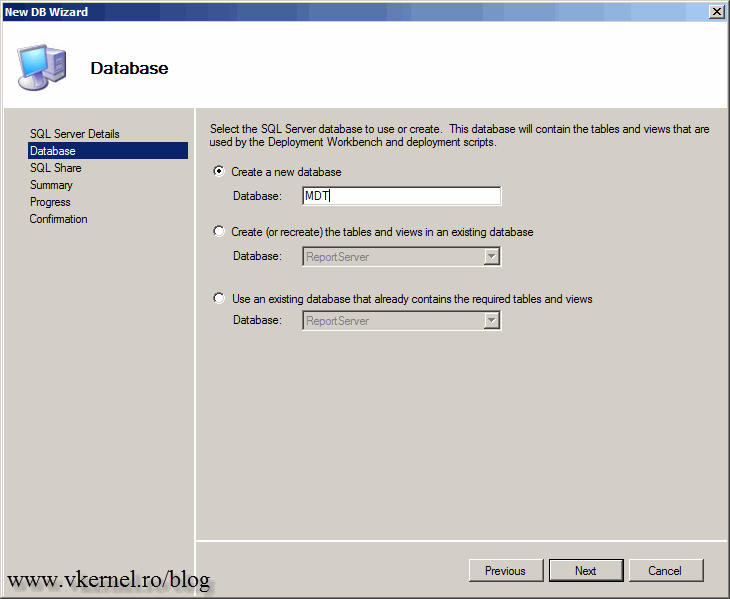
Since we have no database for MDT, we need to create one. Type a name for the database and click Next to continue.
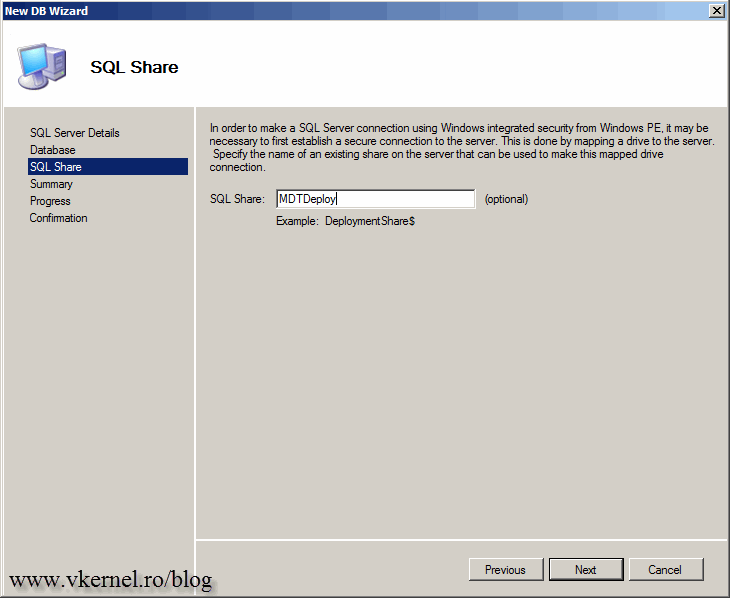
For the WinPE in order make a connection to the SQL server it first needs to establish a secure connection with this server by mapping a drive. To connect and to map that drive a share needs to be available, and this is where it gets tricky. You have to type a share name that sits on the SQL server NOT on the MDT server. Well…yeah if you are using SQL Server Express and this is installed on the MDT server, go ahead and user the DeploymentShare$ folder, but if your SQL instance is on a different server, like in this example, you will have to use a share from here. I usually share an empty folder with full permissions, just to be sure.
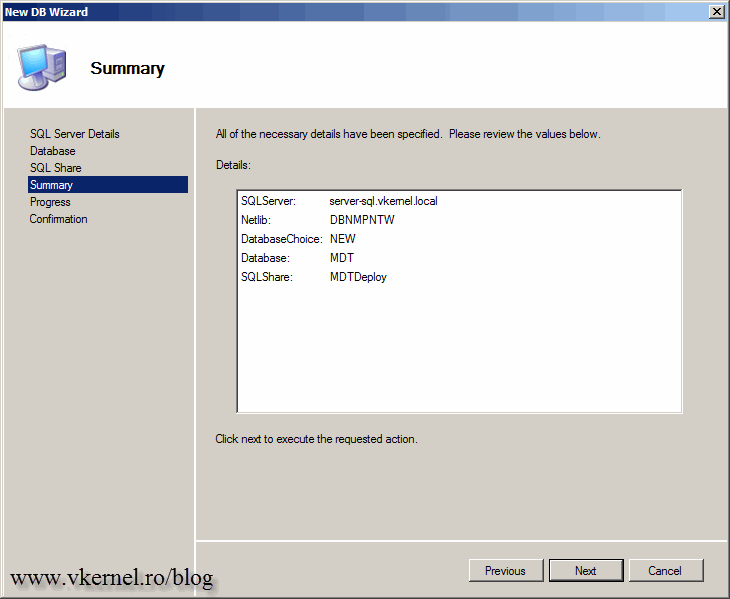
All you have to do here is click Next to create the database.
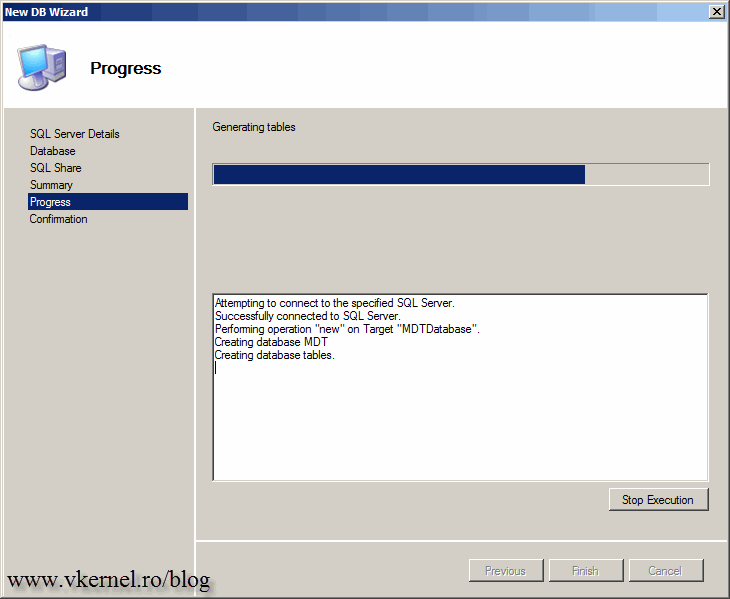
It will take a few seconds to create it, and at the end just hit the Finish button to close the wizard.
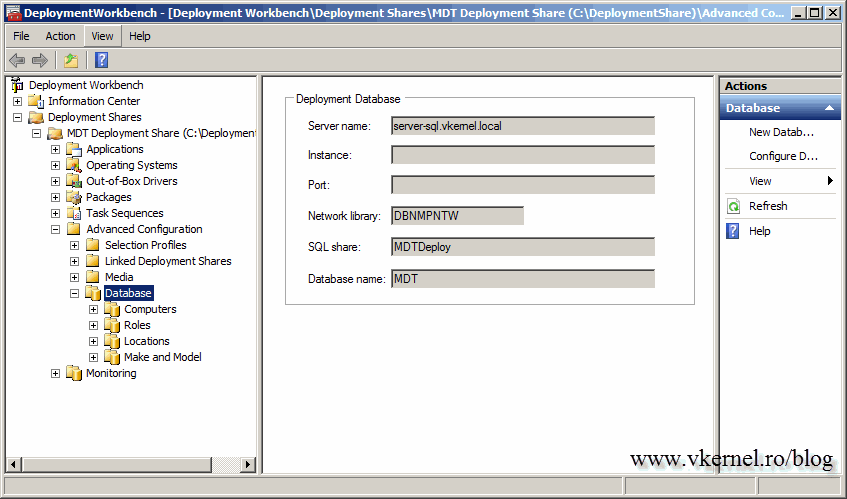
Now when you click the Database object from Deployment Workbench, you can see information about the database connection.
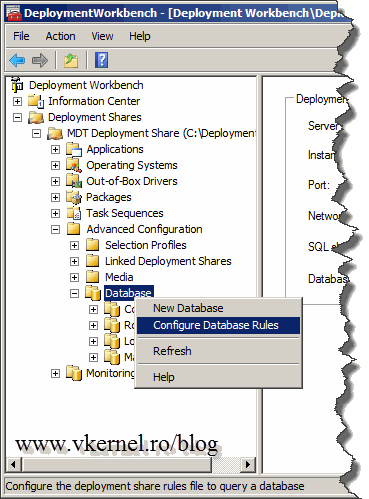
Before the MDT database can be used, the CustomSettings.ini file needs to be configured, because right now all it has are the rules for deploying OS’s. To configure it right-click Database and choose Configure Database Rules.
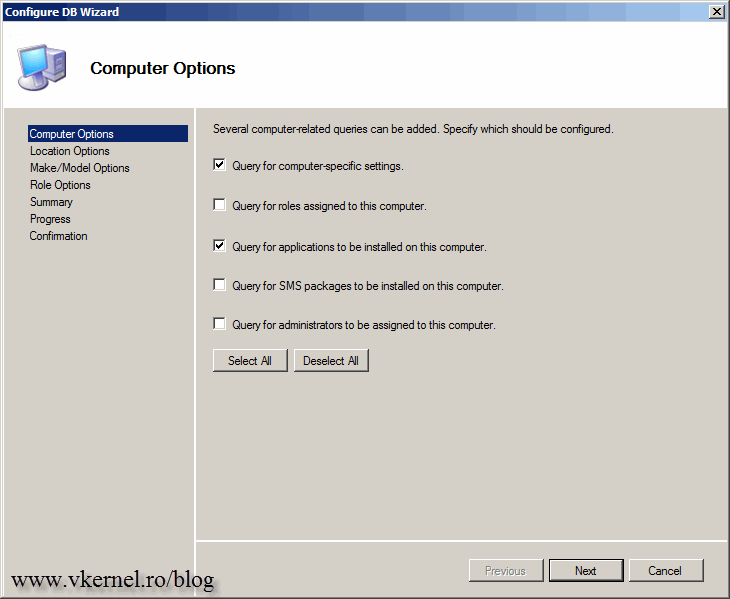
The first screen of the wizard, will query the MDT database for specific configurations like: computer-specific settings, roles, applications, packages and administrators assigned to the computers. The more options you select, the longer will take to perform the deployment.
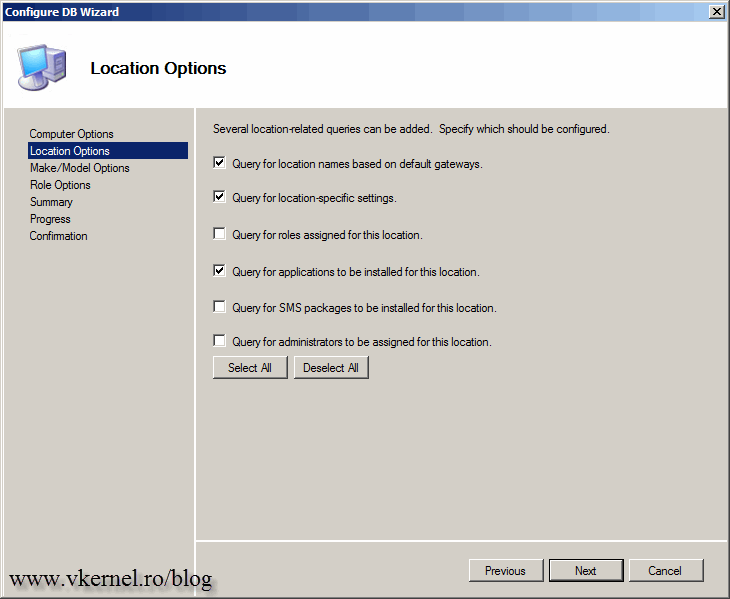
The Location Options screen will query the database for location names based on default gateways, roles, applications, packages and administrators assigned to the location. Select the ones you need and continue the wizard.
This page of the wizard will query the database for model-specific settings, roles, applications, packages and administrators based on specific make and model.
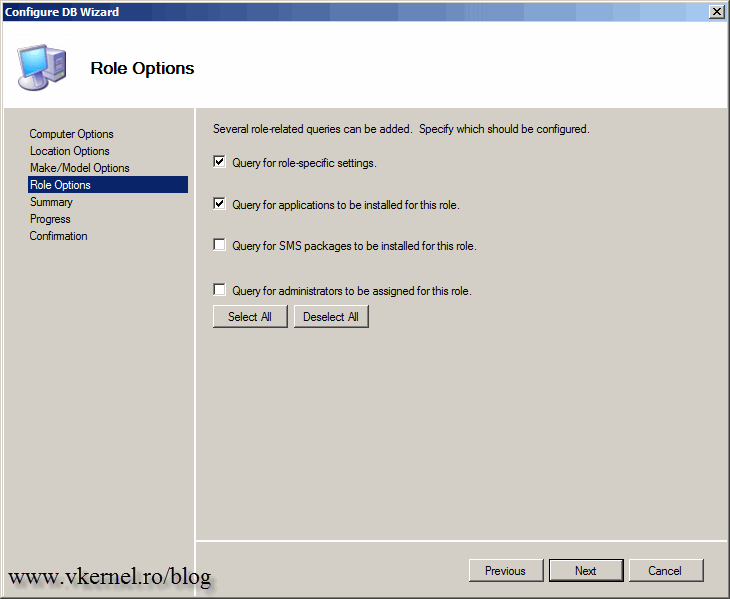
The last configuration page will query the database for role-specific settings, applications, packages and administrators assigned to the role.
On the Summary screen you can see the details about each selections you’ve made trough the wizard. Click the Next button to write these changes on the CustomSettings.ini file. If the process completed successfully click the Finish button to close the wizard.
Again, if you enable a lot of rules during the wizard, it will take a very long time until the WinPE environment actually starts deploying the systems. I’ve made a test with all those rules enabled and it took about 30-40 min to process them, which is a lot in my opinion.
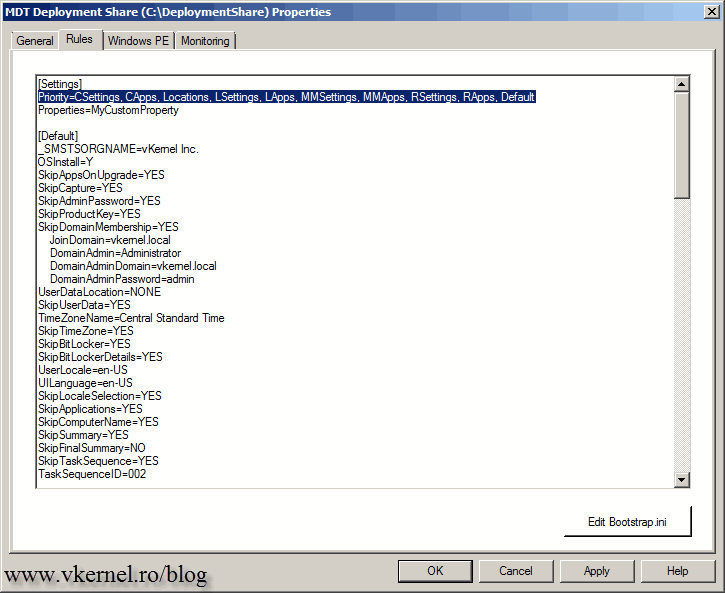
If you now take a look at the CustomSettings.ini file you will see some big changes. Just right-click your Deployment Share, go to Properties then hit the Rules tab. The settings you selected during the database rules configuration are put in an exact order to be processed on the Priority line. If you scroll down you can see details about each of these options.
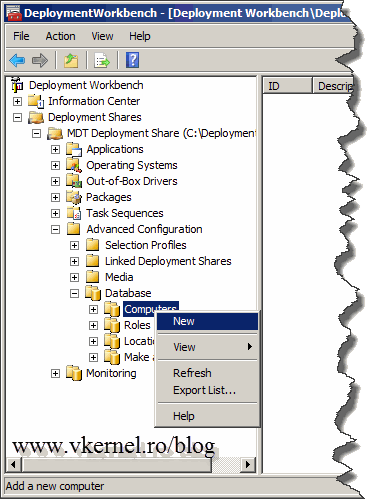
All that is left now is to customize your deployment, and let me show you an example here. We are going to configure a client to have a specific name, based on his MAC address. Right-click Computers and choose New.
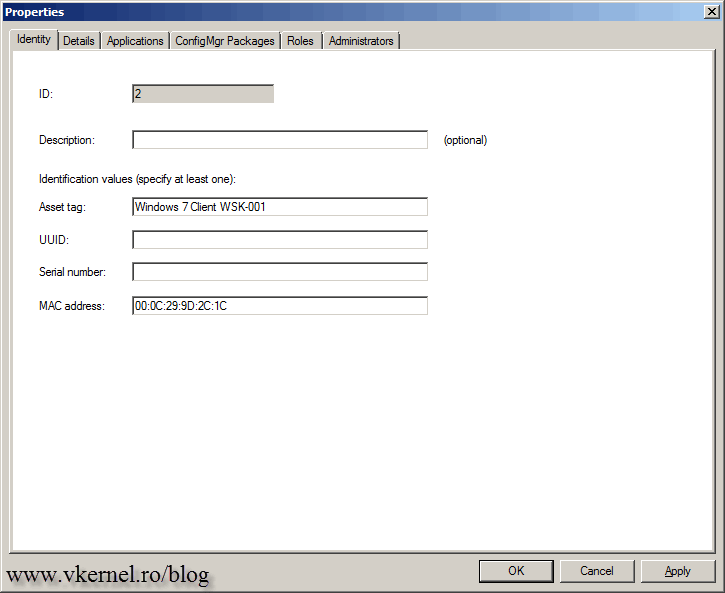
In the Asset Tag box type a short description, then put the MAC address of the client in the last box. The letters in the MAC address needs to be capital letters, or it is not going to work. The correct format is this XX:XX:XX:XX:XX:XX. As you can see, you can also deploy based on the UUID of the machine, but using a MAC address is easier and has the same results.
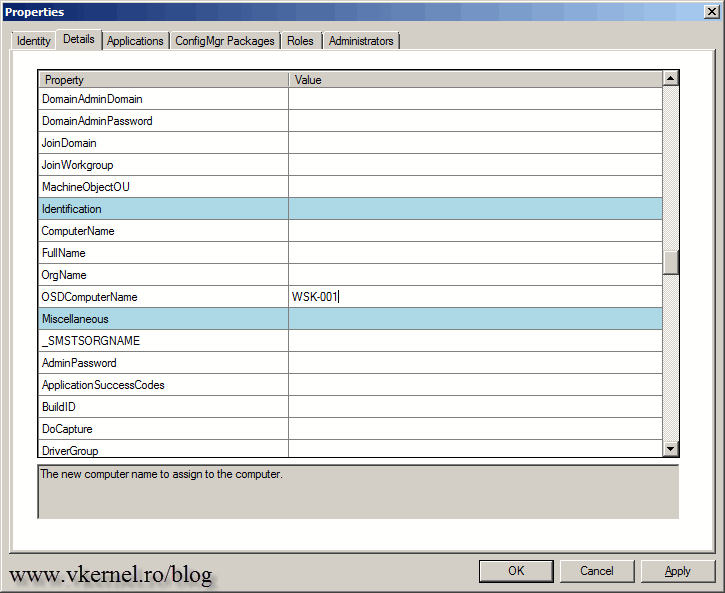
On the Details tab, type a name in the OSDComputerName Property. This is going to be the name this client will have after the deployment is finished. If you want to configure other options, just set the ones you need, and off course, test them before you deploy in a production environment.
Want content like this delivered right to your
email inbox?
