Install Exchange 2010 with SP1 using PowerShell
I’m a big fan of Exchange, and I’m a bigger fan of PowerShell, so I taught hack…why not create a post that includes both. And here it is. I know some of you don’t like scripting, and command shells, and neither do I, but PowerShell…man ohh man it’s great. Ok enough about PowerShell, because this is about Exchange, so let’s get started.
My environment is like this:
• One Windows 2008 R2 with SP1 server acting as a DC
• Single forest/domain named vkernel.local
• One Windows2008 R2 with SP1 on witch we are going to install Exchange Server 2010 with SP1(named Ex2K10)
• All Exchange roles are on the same box
• Both servers are in the same site
• IP communication is working between servers
• Ex2K10 already joined to the domain
• Servers are up-to date
If you are using virtualization products like VMware Workstation or Hyper-V be shure this servers have different SIDs; this can happen when VMs are cloned, and in this situation you have to sysprep them.
Before with proceed with the Exchange installation, prerequisites are needed. Log on to Ex2K10 as an administrator and open a PowerShell window (just click Start and type powershell in the Search Programs box).
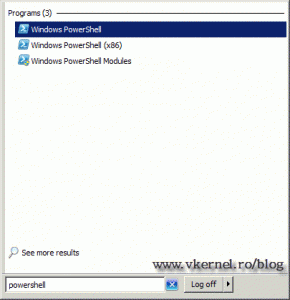 In the PowerShell console type
Import-Module Servermanager
and hit ENTER. Next paste this line to install the necessary server and features roles. Your server will restart after the command is done installing the prerequisites.
Add-WindowsFeature NET-Framework,RSAT-ADDS,Web-Server,Web-Basic-Auth,Web-Windows-Auth,Web-Metabase,Web-Net-Ext,Web-Lgcy-Mgmt-Console,WAS-Process-Model,RSAT-Web-Server,Web-ISAPI-Ext,Web-Digest-Auth,Web-Dyn-Compression,NET-HTTP-Activation,RPC-Over-HTTP-Proxy -Restart
Until the server restarts go to this link and download the package FilterPack64bit.exe. After download completes install the package. Before we start installing Exchange two more things needs to be done:
1. Set the Net. TCP Port Sharing Service service to automatic. For this open a PowerShell console and put the command:
Set-service NetTcpPortSharing -startuptype automatic
then hit ENTER.
Close the Services console.
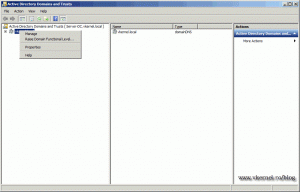
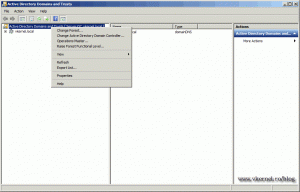
2. Raise the domain and forest functional level to Windows 2003. Log on to your DC and go to Start > Administrative Tools > Active Directory Domain and Trusts. Here right click your domain and choose Raise Domain Functional Level.
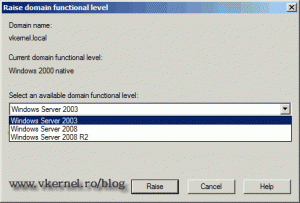
Choose Windows Server 2003 and click the Raise button. A couple of messages appear informing the user that this changers will be replicated to all DCs in the domain, and they are irreversible. Just click OK ’till the end.
Don’t close the console yet because we need to raise the forest functional level too. Right click the Active Directory Domains and Trust and choose Raise Forest Functional Level.
Again select Windows Server 2003 and click Raise, and OK a couple of times.
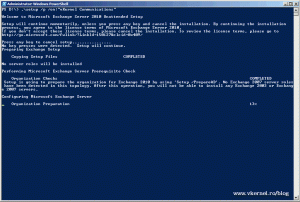
Now we can start working on the Exchange installation. Insert your Exchange installation media in the DVD drive, or mount the ISO if you are working with virtualization products, witch I hope you are. Switch to the PowerShell console and change the path to you optical drive (usually D:), because the forest and domain needs to be prepared for Exchange to function. Put the command:
.setup /p /on:"vKernel Communications"
Do not type setup.exe because is setup.com actually. The other parameters are /p witch come from Prepare Active Directory. This parameter is preparing both, the forest and the domain. The /on parameter comes from Organization. Every Exchange organization need to have a name, and in my case is vKernel Communications. For more help type
./setup /?
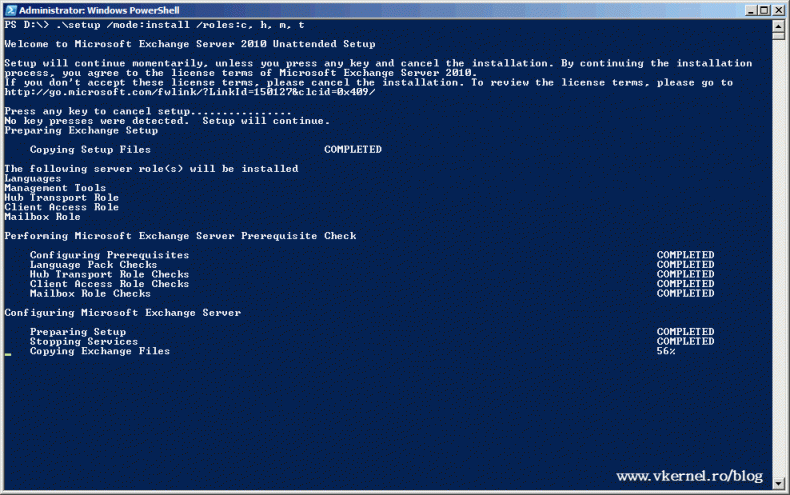
Now we can begin with the actual installation of Exchange server. On PowerShell put this command:
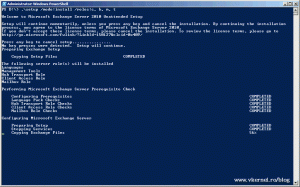
.setup /mode:install /roles:c, h, m, t
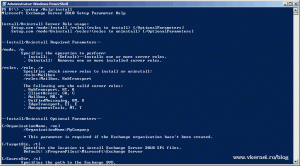
The parameters are like this: we tell setup to “jump” in the installation mode, the we tell what roles to install. In this case we are installing the Client Access Server Role, Hub Server Role, Mailbox Server Role and the Management tools. If you need more help with this you can issue the command:
.setup /help:install
then press ENTER
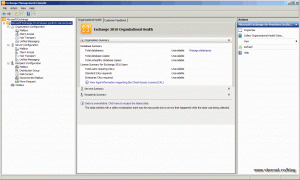
After installation do a restart. To verify if the installation succeeded just open the Exchange Management Console. Go to Start > All Programs > Microsoft Exchange Server 2010 > Exchange Management Console.
Want content like this delivered right to your
email inbox?



can i install exchange 2010 like above in vm with just ( Ram=4 Gb) , (cpu= 2cpu, 1 core) , HDD=100GB
Hi,
Yes you can, but do not use the server for heavy mail traffic. You just don’t have enough RAM and storage.
Thanks for your answer, this is some food for thought and pointing me to the right direction. I was able to configure outbound internet mail, of course it bounced because of my provider denying mail relay. But basically the server did what I wanted to accomplish as first step. Receiving mail will be next step.
I have imported MS 20-341 training lab, but instead of checking this advanced config,
I think it is best to start from scratch again with a new install based on W2012R2 & EX 2013 using your great tutorials.
However I still did not understand which internal ADDS name to choose – I would still prefer something like location.company.com. It will be feasible without problems to have exchange mailboxes @company.com instead @location.company.com then?
My ISP is providing dynamic IP, but it usually stays the same like 3-4 months or so.
I’ll ask them about providing a fixed IP. I’m already satisified if my exchange lab can send / receive for a day 🙂
And internal mail is already fantastic for my practice.
I’ll let you know if I encounter any problems, which is likely to happen 😉
Might take some days though, I ordered 2 new SSDs to speed things up.
Thanks a lot !
Just great. Let me know how its going.
Dear Adrian,
I have setup Exchange Server 2010 SP3 in my HyperV Lab and registered domain “company.com” on the internet.
I have created subdomain mail.company.com and SAN Cert, and managed to access my OWA from an outside client.
I know I will still have to do a lot of studying and reading and am confused big time, but maybe you can help
me with the basic config of Exchange.
AD Lab Environment is configured as following:(Is this ok?)
dc01.location.company.com: (IP 192.168.1.250/24, GW 192.168.1.254, DNS 127.0.0.1)
ex01.location.company.com: (IP 192.168.1.240/24, GW 192.168.1.254, DNS 192.168.1.250)
The router (192.168.1.254/24) is configured as a forwarder in DC01 DNS.
I understand internal mailbox users can send themselves email by default with user@location.company.com now.
Am I still able to change this to user@company.com? (Accepted Domains?)
I have dynamic IP and understand I need to use a Smarthost (SMTP server address of Domain Provider?)
How do I have to set up the send / receive connector so my users would be able to successfully send and receive messages
from the Internet?
Any help would be greatly appreciated. Thanks in advance!
Hi,
First of all you created a CNAME or an A record of company.com named mail.company.com, not a subdomain. Its a big difference.
Second, I don’t know why you created a forwarder on the router to DC01 but I don’t know your network and I don’t think it’s a big problem.
The domain you registered needs to be present in Exchange.
An MX record needs to be created on you public DNS that points to your external router IP. Also a SPF record will not hurt to be created.
Port 25 needs to be open on your firewall.
You need to have a static IP even if you are using a smarthost. Think about it, mail hits the smart host, then the smart host needs to send the emails to your Exchange. If the IP changes the smarthost does not know the new IP.
I think that’s a bout it in a big picture. Let me know how it goes.