Configuring VMware ESXi 5
OK, you installed your ESXi host, but some configurations needs to be done before using it in production like IP, host name etc. You could just us it as it is but I don’t recommend for example to assign an IP address from a DHCP server even if you create a reservation for it. What if that DHCP server crashes ? Well…I’ll leave this to you to think what can happen.
To start configuring the ESXi host press F2 from the keyboard then provide the log on credentials. These credentials were set during the installation.

The first section, Configure Password is there if you want to change the root password, the one that you just typed to log in. Press ENTER to change it and in the first field Old Password provide the current password, then type the new password in the New Password and Confirm Password fields. Hit ENTER when you’re done.


If you don’t provide a complex password you will get the error message “The password change operation failed. Please ensure that your password meets the complexity criteria set by your administrator.”

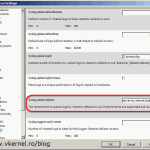
Configure Lockdown Mode forces all operations to be performed through vCenter Server allowing only the vpxuser access to authenticate on the host. No other user can perform operations on the host remotely. This option is grayed out until the ESXi host is added to a vCenter server, but once is part of a vCenter Infrastructure you can configure it.

The Configure Management Network section is where you can configure the network and provide a name for the host. Press ENTER to configure this section.

Network Adapters – by pressing ENTER then the space key you can disconnect and connect the network.

VLAN (optional) – if you need to tag the traffic; only if your organization is using VLANs. For small business usually it’s not the choice.
IP Configuration – here you can configure the ESXi host network with a static IP address or let it use a DHCP server. Most of the times you will configure it with a static IP address. When you’re done with the configuration press ENTER to save the changes.

IPv6 Configuration – the same as the one above only that is for IPv6 addresses.
DNS Configuration – let you set the DNS server the ESXi host will use for name resolution. One other thing to configure is the host FQDN. Once you configure the FQDN you should add an entry for this on your DNS servers.

Custom DNS suffixes – only if have multiples domains and want this ESXi host to resolve the host names from those other domains without typing the FQDN. Not used so often, but who knows…
If you made changes, when you want to exit the Configure Management Network menu you will be asked to either apply the changes or drop them.

Restart Management Network section simply restarts the network services on the host.
Test Management Network will do a quick test by pinging the configured gateway and DNS servers.

Restore Network Settings will simply restore all the network configurations to their defaults. Your adapters will be configured to use a DHCP server. Be careful because all the VMs on the host will be stopped if you go forward with this. The rest of the menu sections are self-explanatory, so I’ll leave them to you to check them out. When you return to the initial screen the network information it’s changed based on your configuration.

Want content like this delivered right to your
email inbox?
More similar articles
 Build and run Windows Failover Clusters on VMware ESXi
- Upgrading from VCSA 5.x to VCSA 6.0 with an Embedded Platform Service Controller (PSC)
- Deploying the VMware vCenter 6.0 Appliance (VCSA) with an Embedded Platform Service Controller (PSC)
- Adding a Raw Device Mapping (RDM) to a Virtual Machine
- Deploying and Configuring VMware vCenter Server Appliance 5.x
- Configure Syslog on ESXi 5.x Hosts