Working with Storage Spaces in Microsoft Windows Server
Starting with Windows Server 2012, Microsoft added Storage Spaces into their Windows Server product, which is a technology similar to RAID just implemented in software. By using Storage Spaces we can create the so called Storage Pools to group two or more drives together in order to protect our data from drive failures. Off course this is not a business solution to use because it cannot replace the dedicated RAID cards -which are quite cheap noways-, but it is a feature for learning or creating labs since it is easy to implement and it does the job. All you need is a server with enough drives to support the storage space for your data and the rest is just following a few wizard screens.
1. Configuring Storage Spaces
1.1. Building storage space for our data
I presume you already have your Windows Server OS deployed, so the next step is to add the hard drives or SSD drives into the storage server, or virtual machine for that matter. Once this is done, you should end up with something similar to the bellow image.
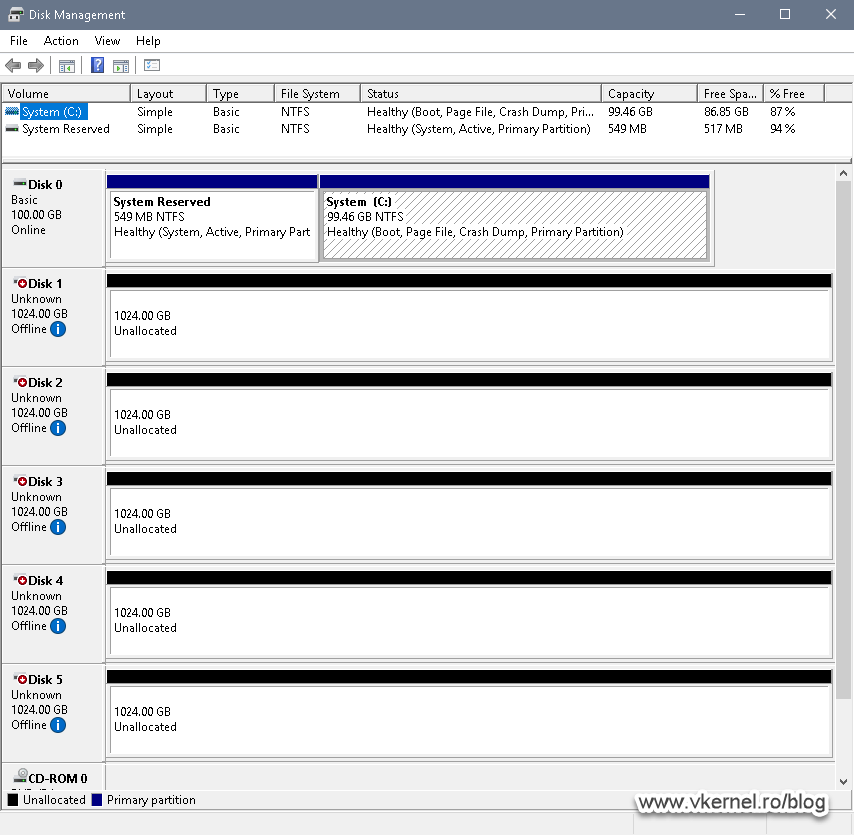
If we now open Server Manager and click File and Storage Services > Storage Pools, we can also see our disk drives in the Physical Disks section, which is what we want.
With our drives showing up in the OS, we can move on at creating our first Storage Pool.
1.2. Creating Storage Pools
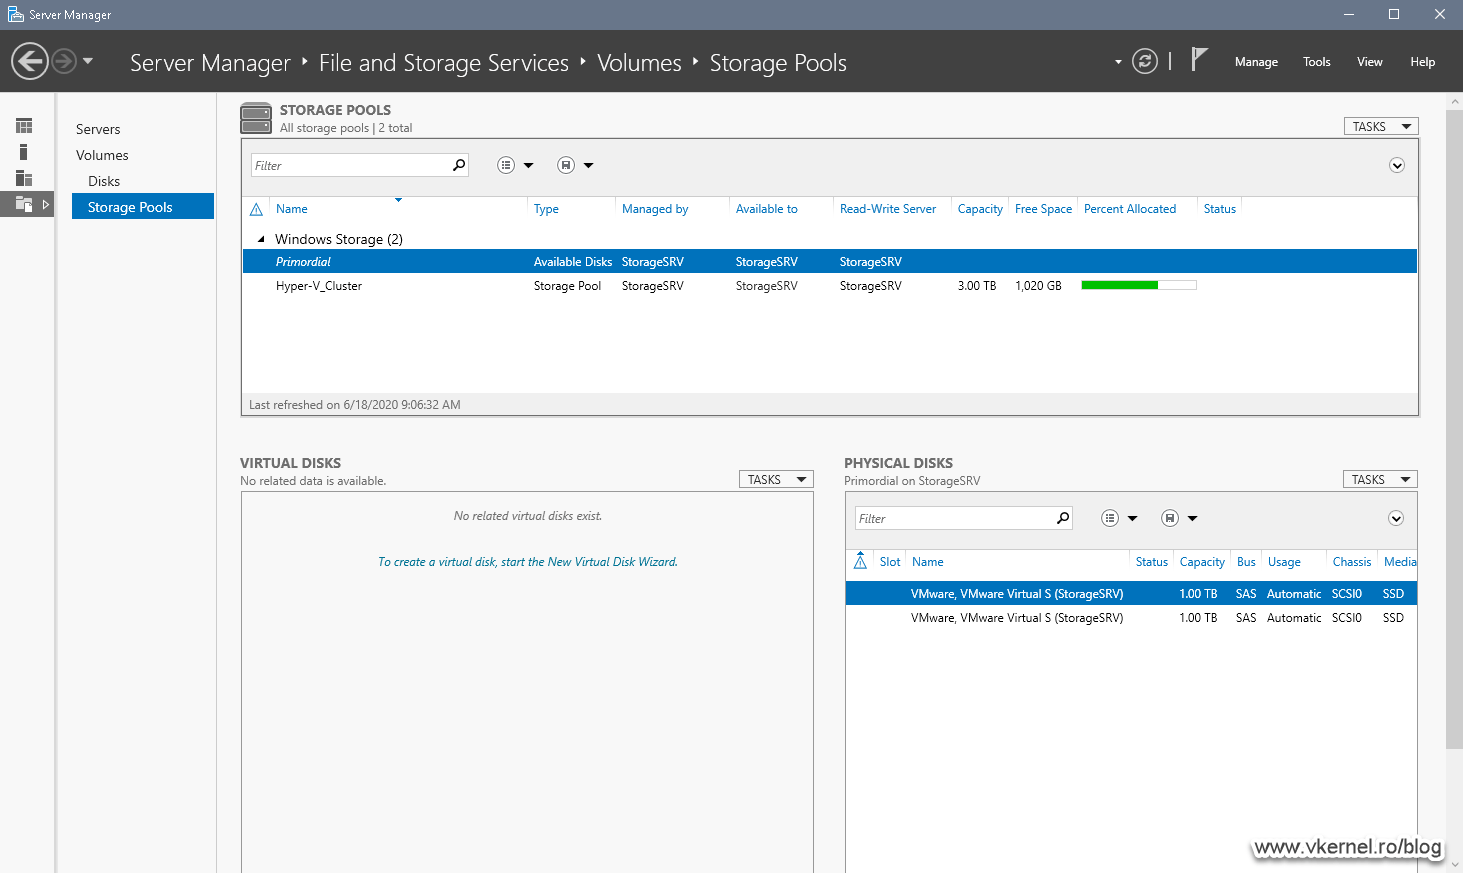
As the name implies, a storage pool is just a gathering of disks that make up the total available storage for us to manage and use, and by default there is an already created storage poll named Primordial. This primordial storage pool contains all the unallocated disks in our server, or put it more simpler, it contains the disks that are not part of any other custom created storage pool. It cannot be renamed, deleted or do any other changes on it. When we create a new storage pool, we will be grabbing disks from the primordial one and assign them to our custom storage pool. This is the first step that we need to do in order to move forward and get to the point of having an actual partition/volume in our system where we can put our data.
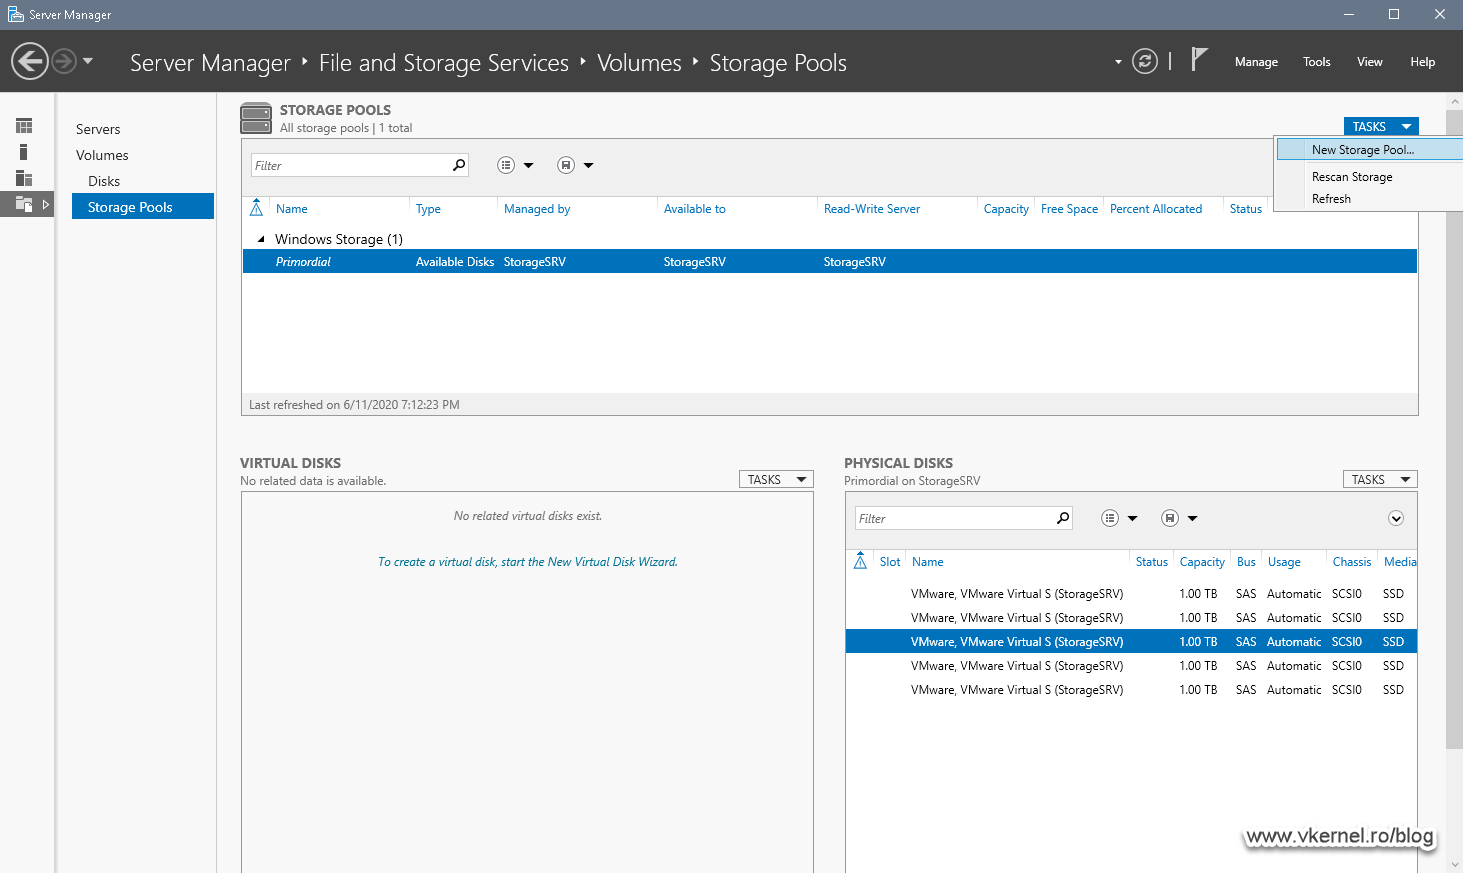
To create a new storage pool all we have to do is open Server Manager and go to File and Storage Services > Storage Pools. Once we get here, we need to click the Tasks drop-down box from the upper right corner and choose New Storage Pool. You can also right-click anywhere in the Storage Pools area to get the option to create a new storage pool.
Once the New Storage Pool Wizard opens, click Next to skip the Before You Begin screen then on the second screen give the storage pool a name and description. Once you are done, continue the wizard.

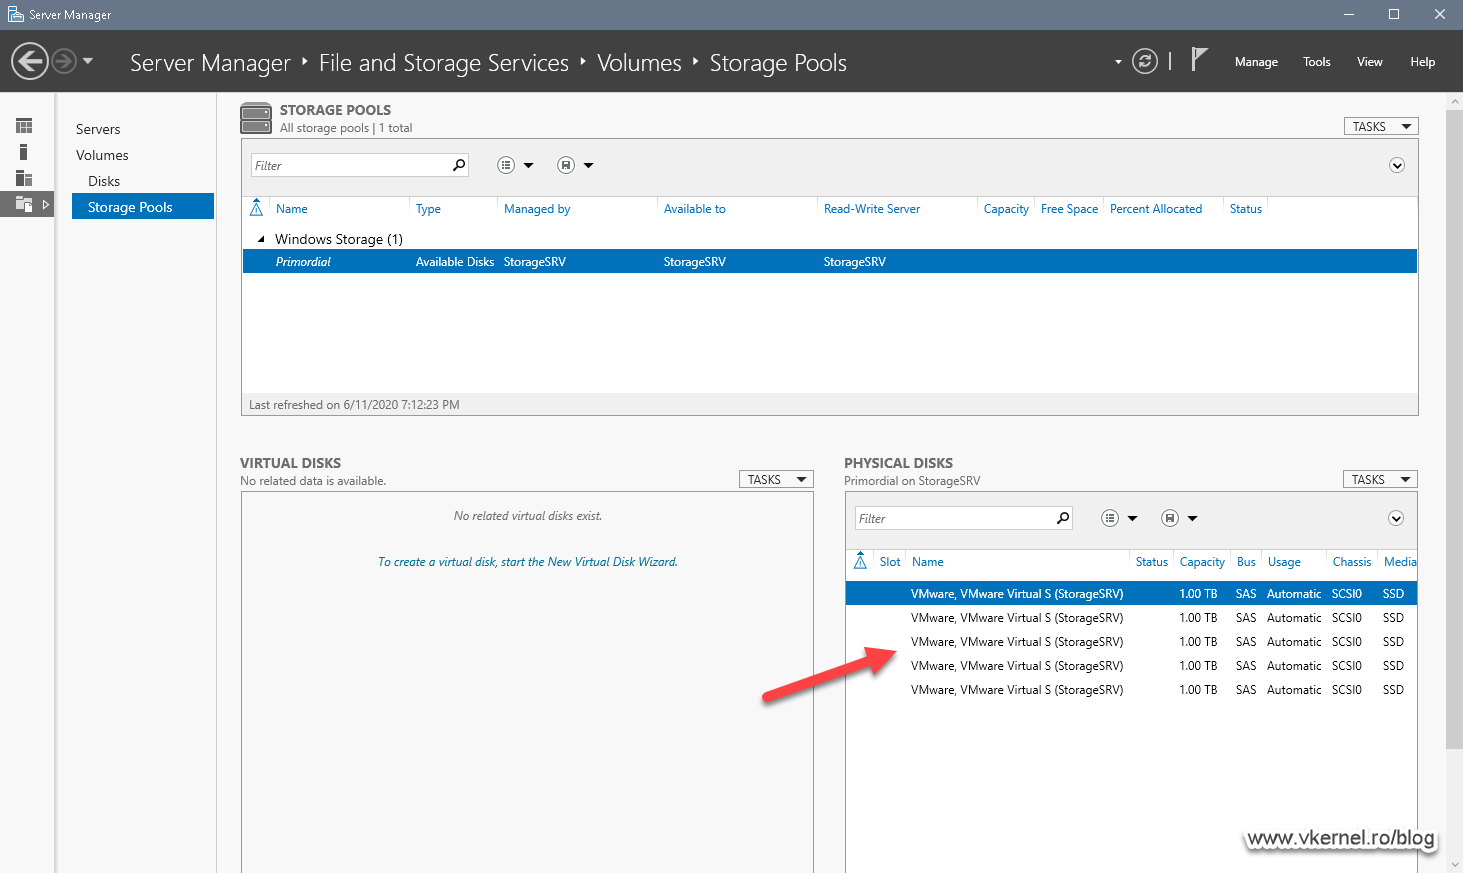
On the Physical Disks screen we get all the available disks that we have in the Primordial storage pool. Depending on how much space we want to have for consuming and how redundant the data should be, it is all about choosing the right number of disks here. You will see what I’m talking about when we get to the next section and create our first virtual disk. The good thing is that we can add or remove disks from a storage pool as we want or need, so right now, don’t worry to much of how many disks you add to this new storage poll because it can be changed later on.
As you can see in the Allocation column we have a drop-down box for every disk in the list. We can choose to make one or more disks as spare disks or to manually configure them. Usually these settings are rarely used so we are going with the recommended option which is Automatic. Select at least one disk from the list then click Next.

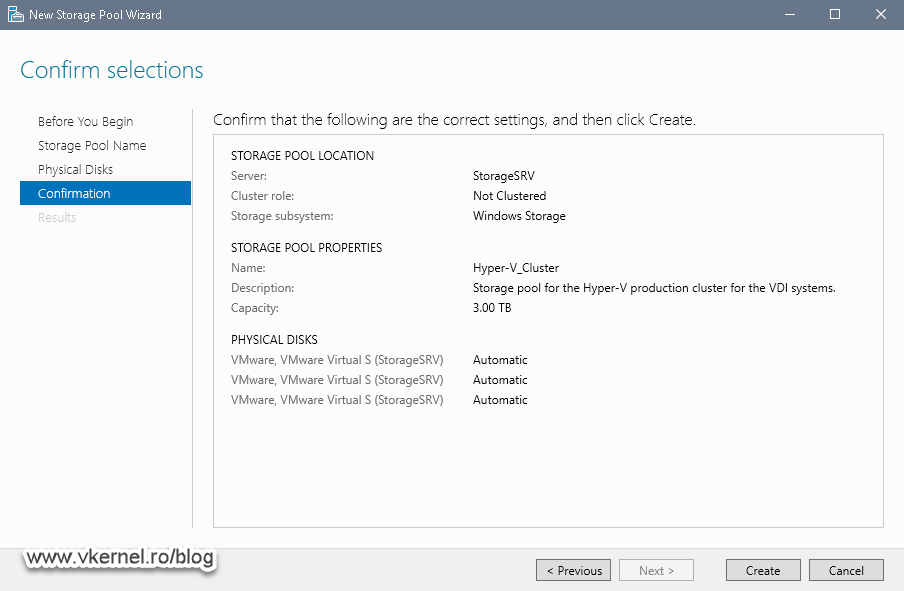
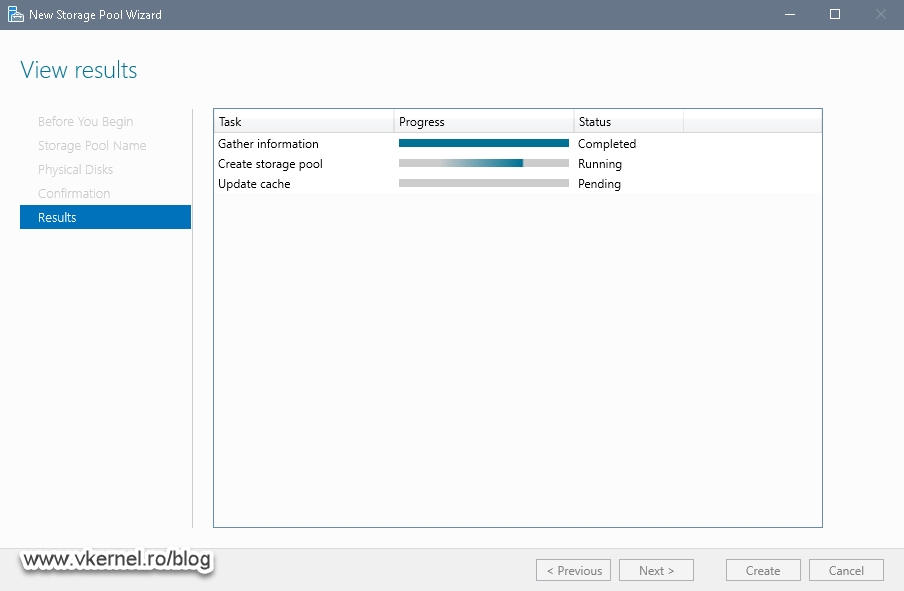
On the Confirmation screen click the Create button to start creating our first storage pool.
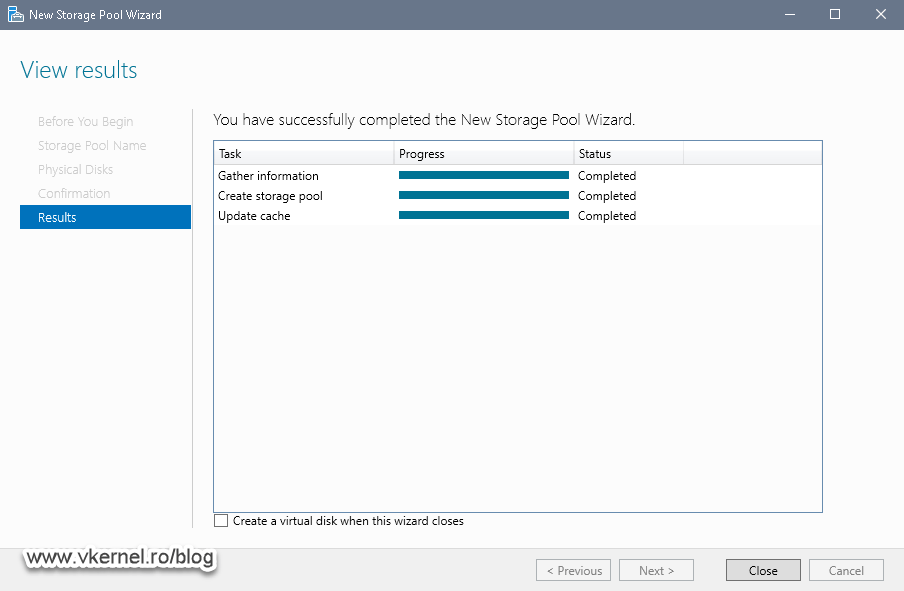
After a few seconds we should have a Completed message in the Results screen of the wizard.
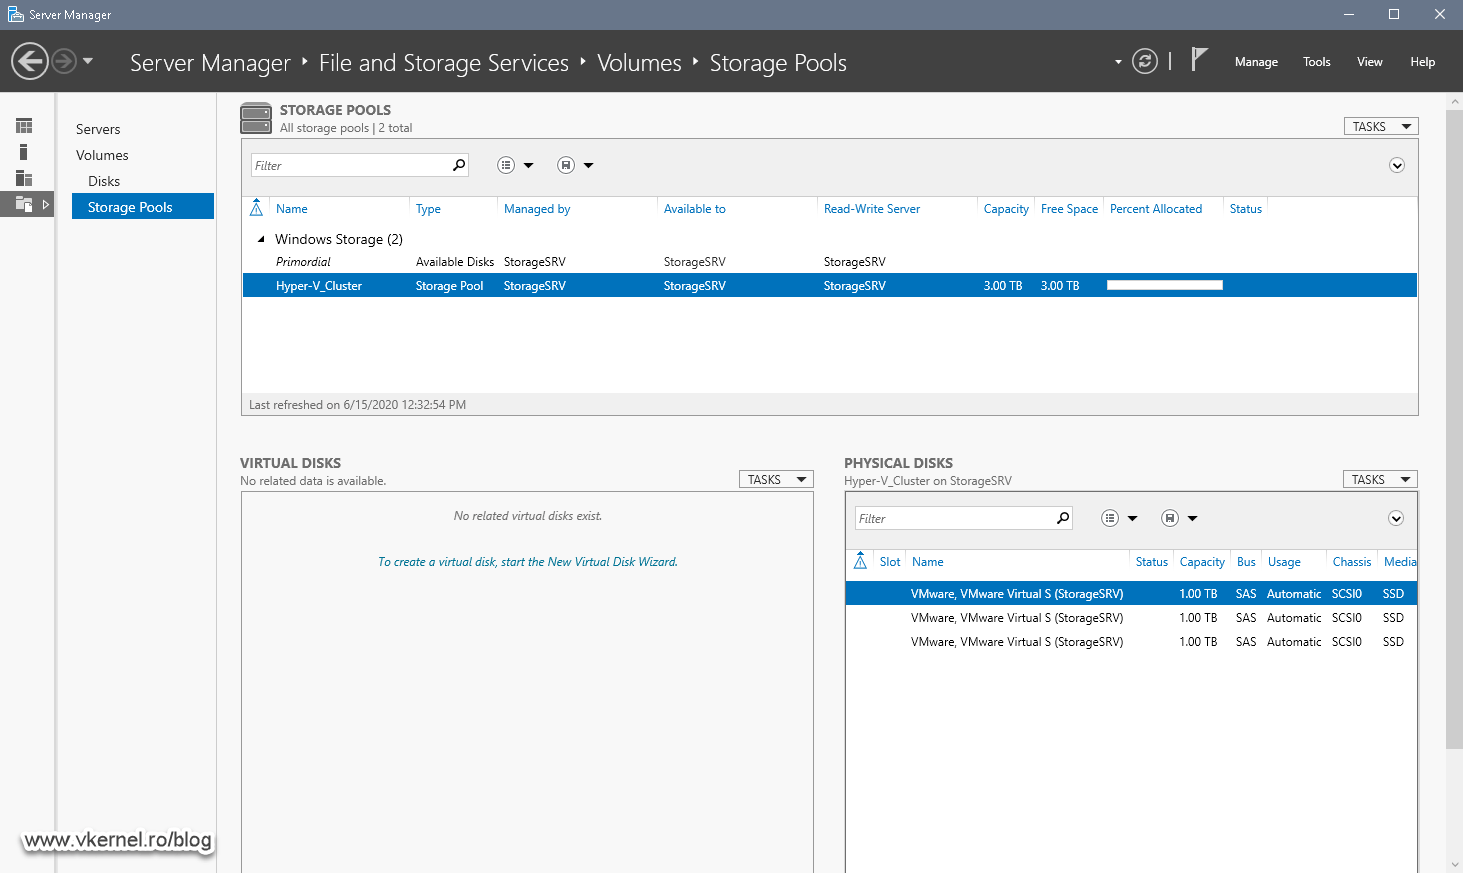
The final view is in the Server’s Manager console where we can see our newly created storage pool. If we take a look in the bottom right corner of the console, we can see the disks that are assigned to this storage pool. These disks are no longer part of the primordial storage pool.
1.3. Creating virtual disks
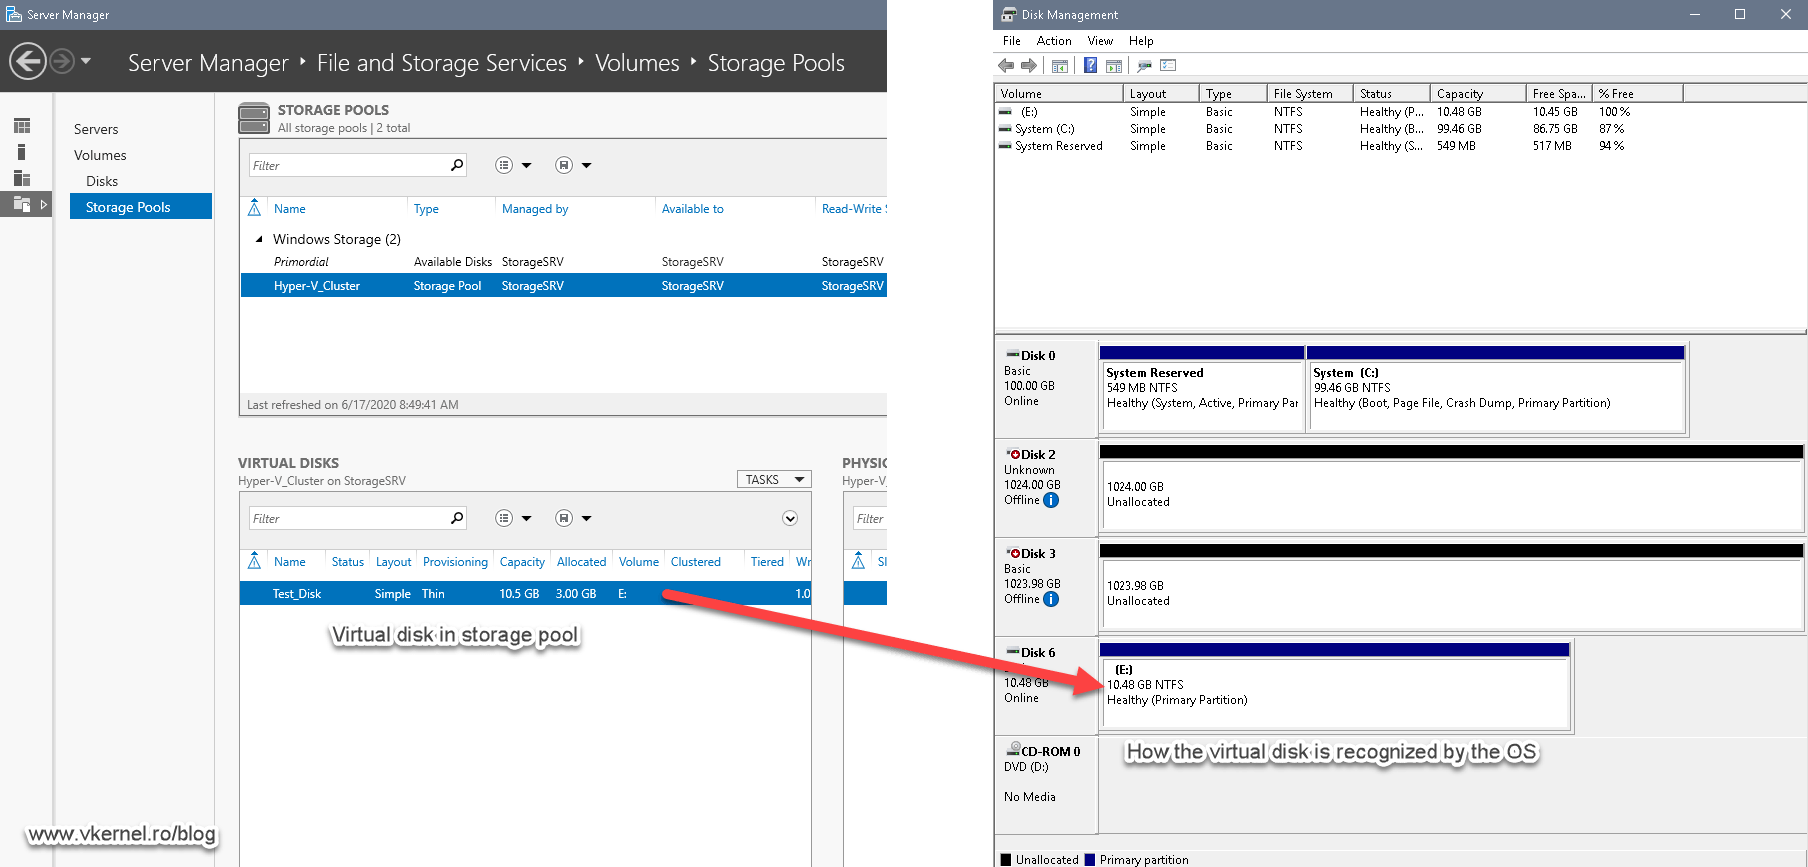
A virtual disk is a file that spreads across one or more physical disks that are part of our Storage Pool. After its creation, the wizard mounts this file and it will be recognized as a physical disk inside the system which we can format and split however we want. We can have multiple virtual disks inside a Storage Pool.
To give you an idea, I have created a virtual disk in my Storage Pool beforehand, and this is how it looks to the Windows operating system. As you can see, it is recognized as a physical disk and the OS has no idea that this is just a file mounted in the system.
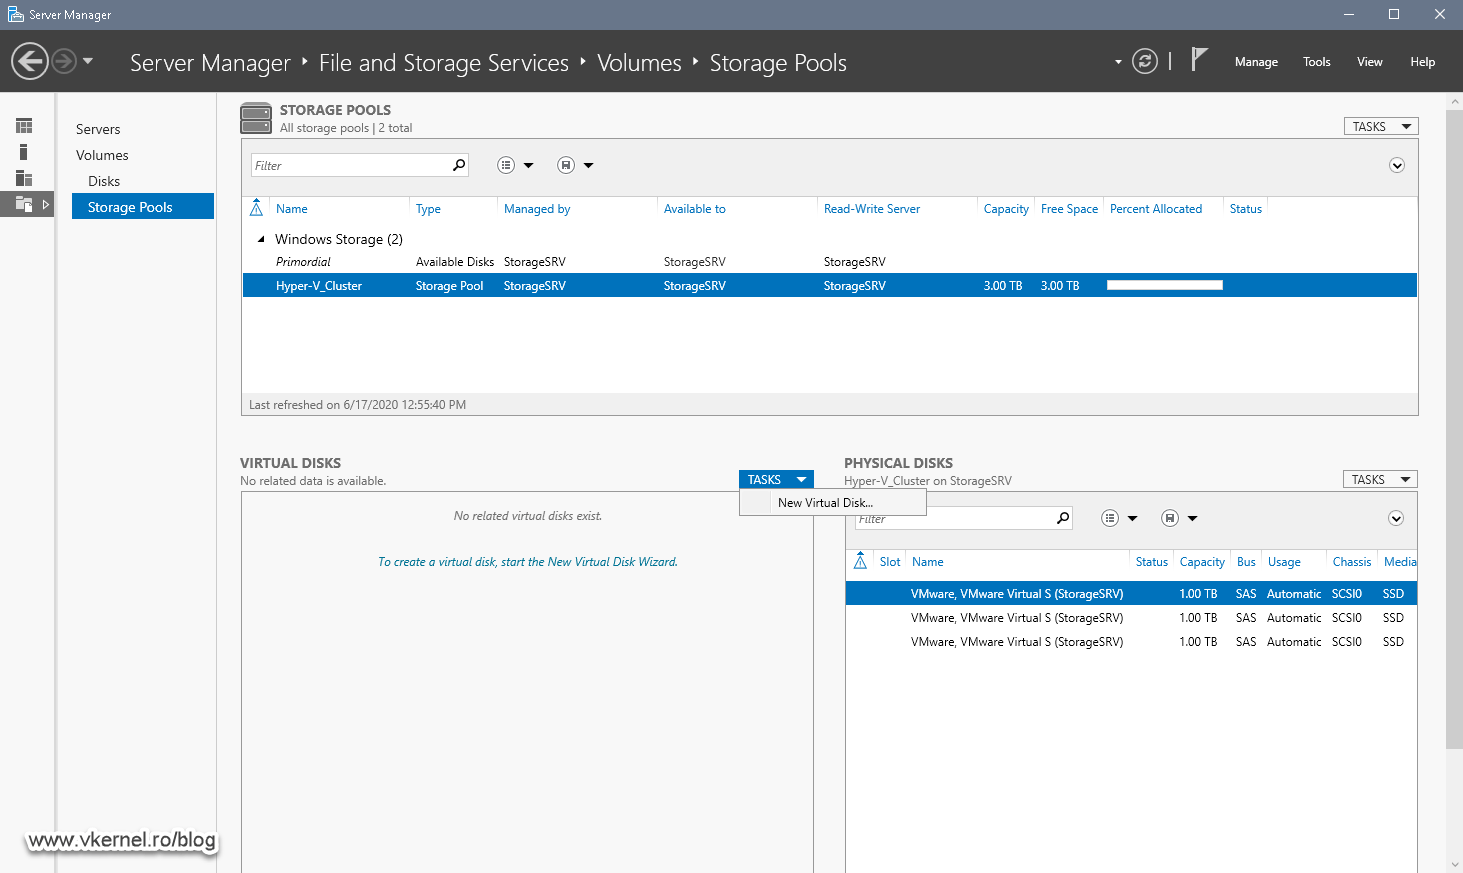
To create a virtual disk in our storage pool, all we have to do is click the Tasks drop-down box and choose New Virtual Disk.
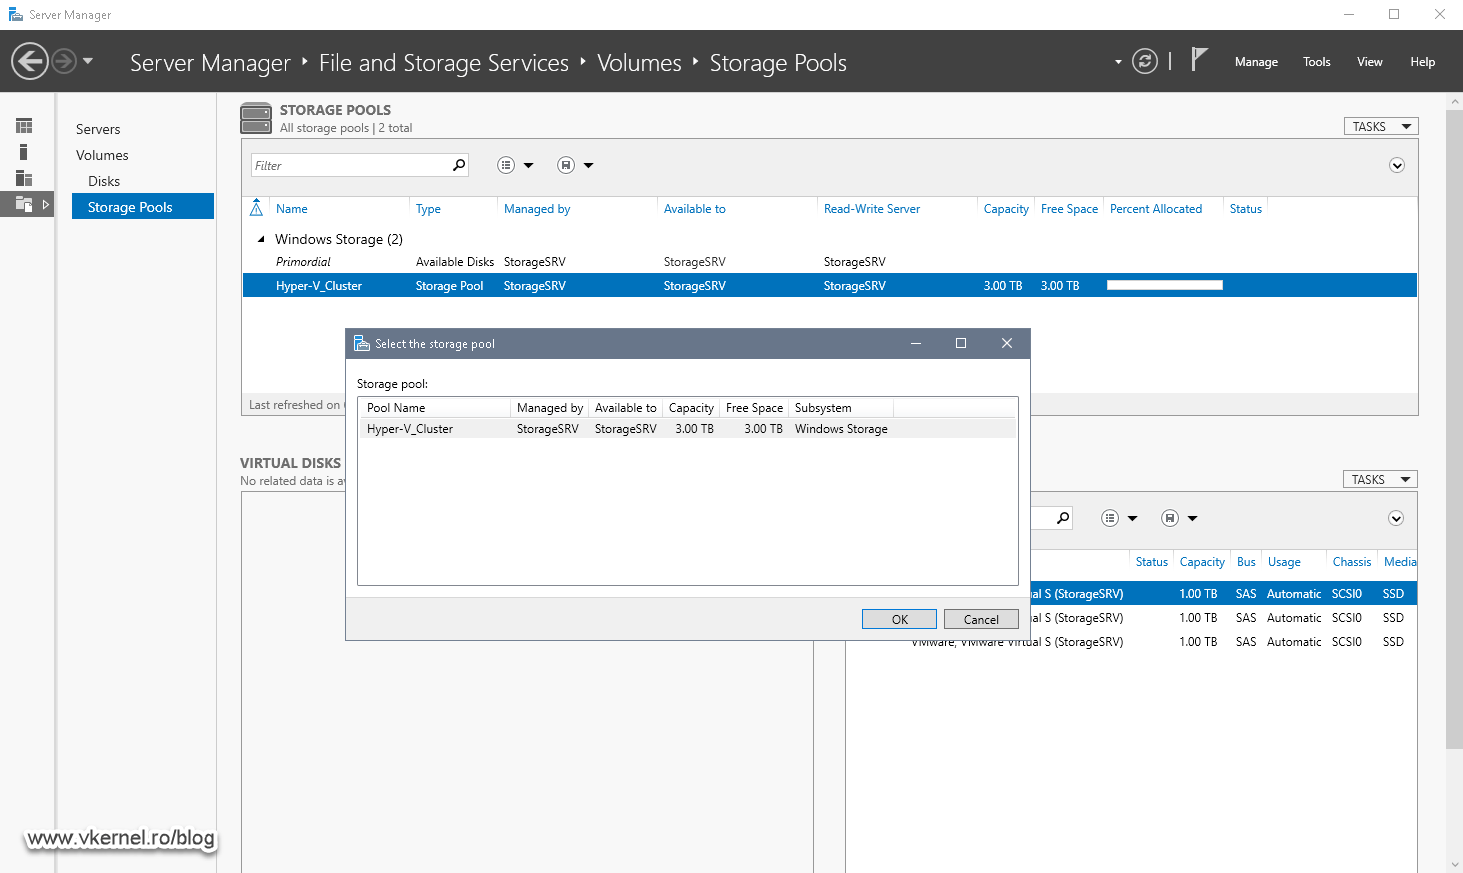
Since we only have one storage pool created, we don’t have to many options here. Select our Storage Pool from the list then hit OK.
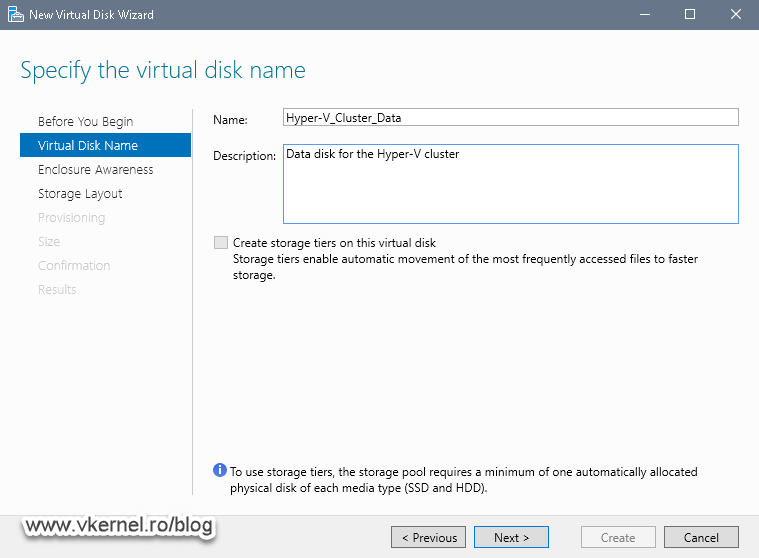
Once the New Virtual Disk Wizard opens, click Next to skip the Before You Begin screen then on the second one, provide a name and description for the virtual disk.
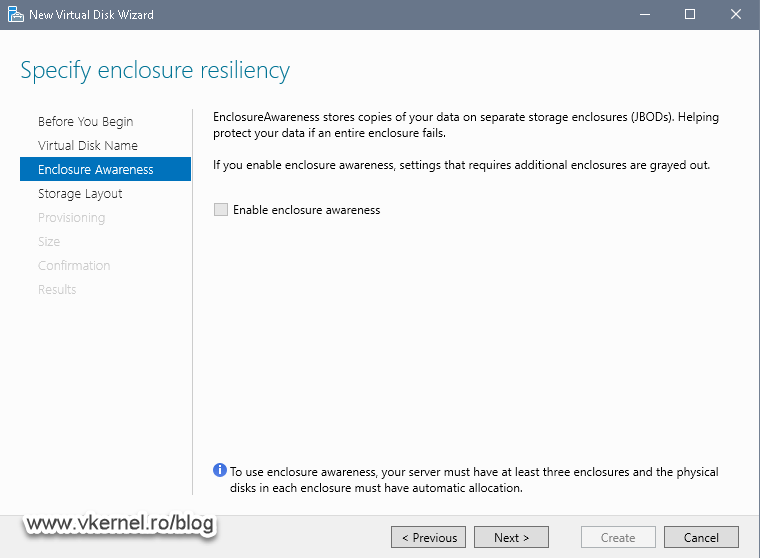
Just in case you want your data to be copied on other drives, you can use the Enclosure Awareness feature. I don’t know if this is something that you want since there are a ton of backup software out there that do replication and have reporting also, but I will leave this up to you, since it also requires extra hardware in order to enable this option.
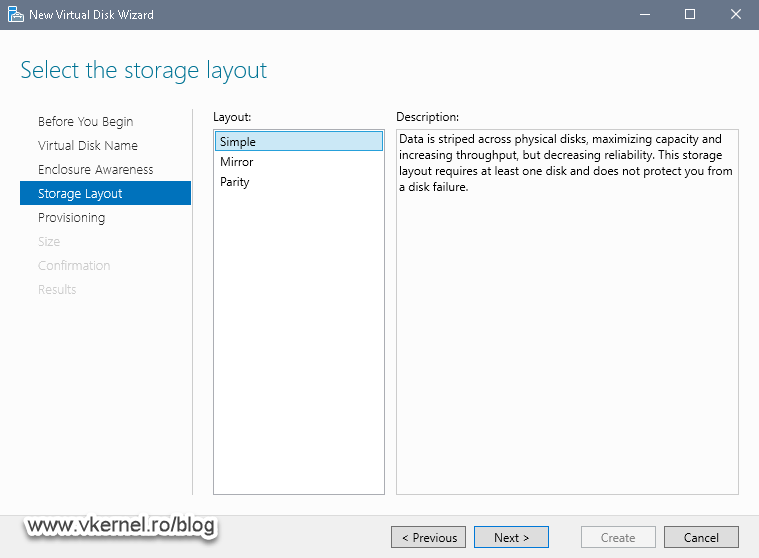
In the Storage Layout screen we have three options:
Simple: If we select Simple, it is like doing RAID 0. It spans the virtual disk(s) on all the physical disks that are part of the storage pool. As you can imagine, with this option we get the maximum amount of space but have no redundancy in case of a physical disk failure. This requires at least one hard drive joined to the storage pool.
Mirror: Selecting this option it is like doing RAID 1. Data that is written on one drive will be duplicated on a second one that is part of the storage pool. This is going to consume the usable space and we only get 50%. The other 50% will be kept for duplicating the data. This option requires at least two hard drives in the storage pool.
Parity: With the Parity option we get the equivalent of RAID 5. This is the most balanced option compared to the other two since it has good speed and also redundancy. It requires at least three hard drives in the storage pool.
Select your option based on your needs then click Next.
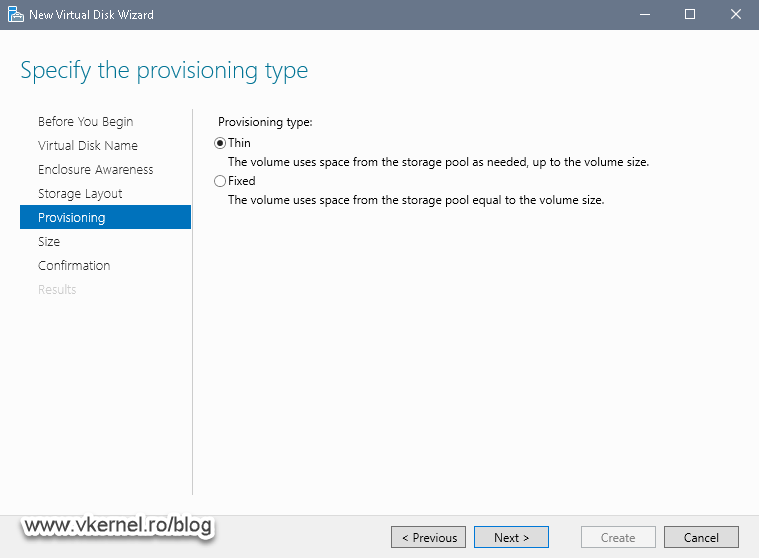
In the Provisioning screen of the wizard we also have some options:
Thin: If we choose this option, out virtual disk will grow as we put data in it until it reaches the size given in the next screen of the wizard.
Fixed: This means that the size of the virtual disk that we are going to set in the next screen of the wizard will be provisioned at it’s maximum size.
Once you choose your option click Next to continue the wizard.
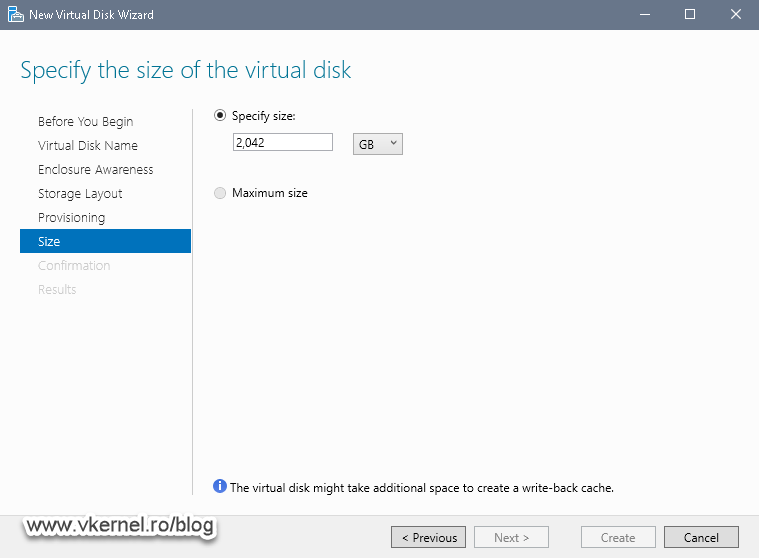
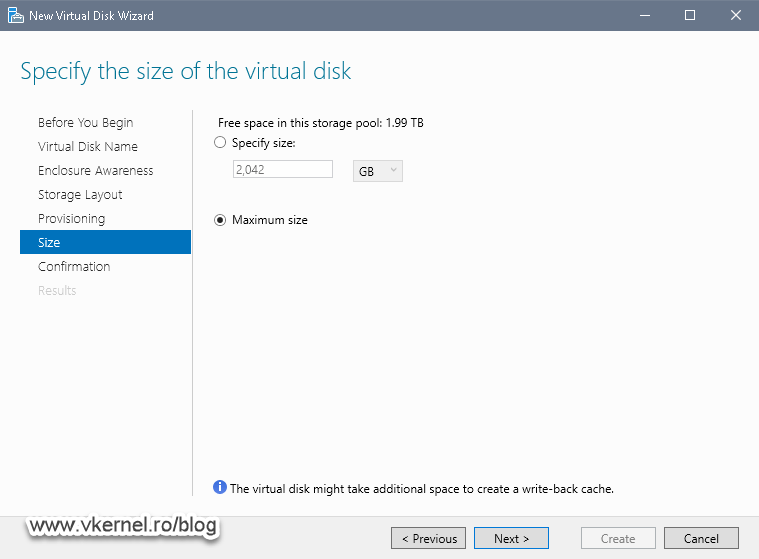
Depending on the selected provisioning type, we can either use the maximum virtual disk size or not. If we go with Thin we don’t have the Maximum size option enabled, so we will have to type a virtual disk size in the above box. We can specify the actual size or a larger one (over-provision). With the Fixed option we get both settings enabled, but this time we cannot create a larger virtual disk that the actual storage pool size.
In the Confirmation screen review your selection then click Create.
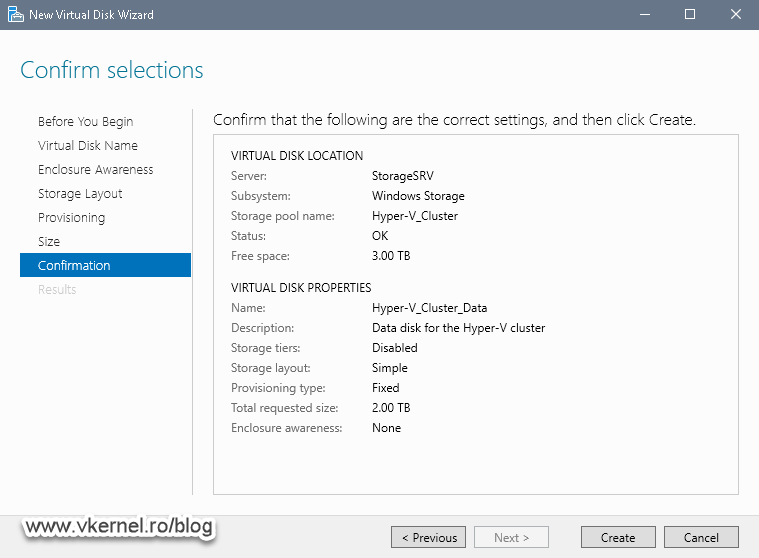
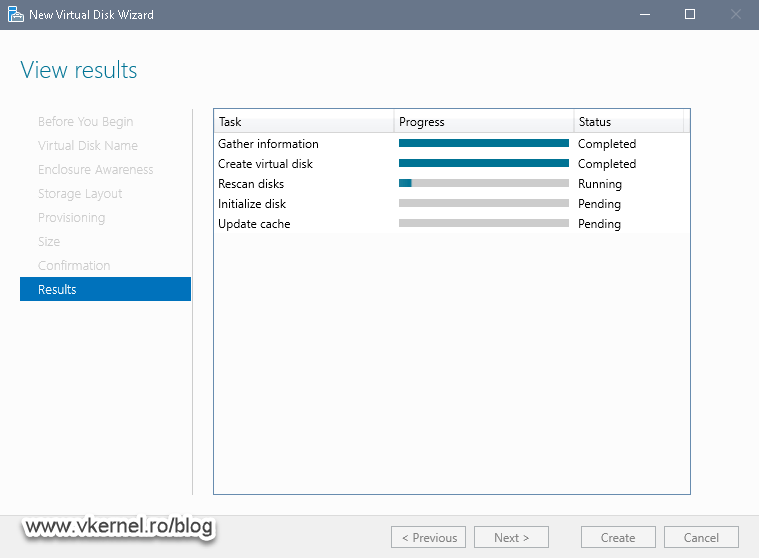
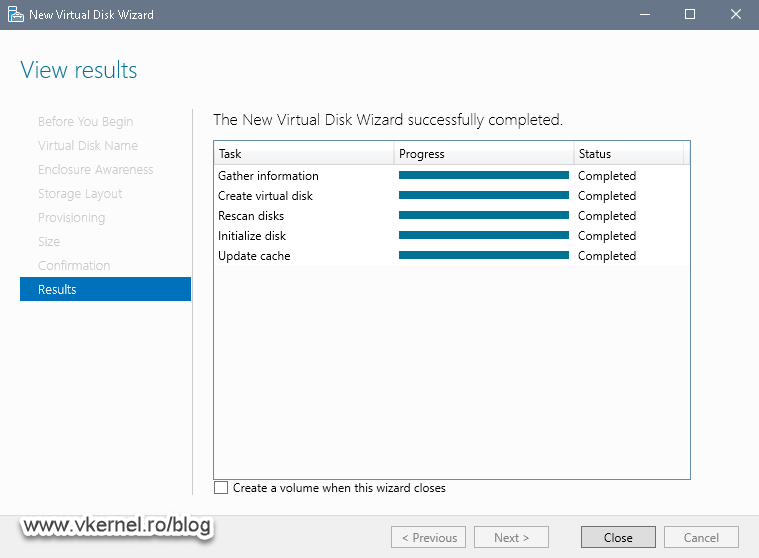
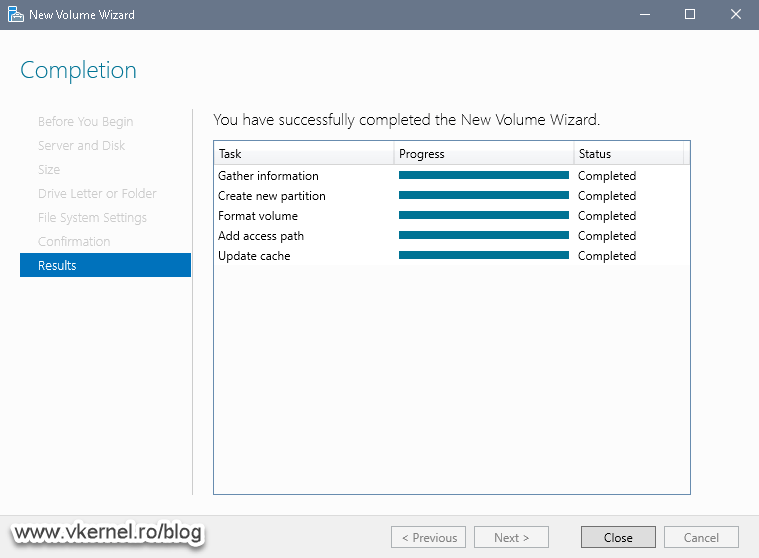
Creating the virtual disk will only take a moment and we can see if the operation was successful in the Results screen.
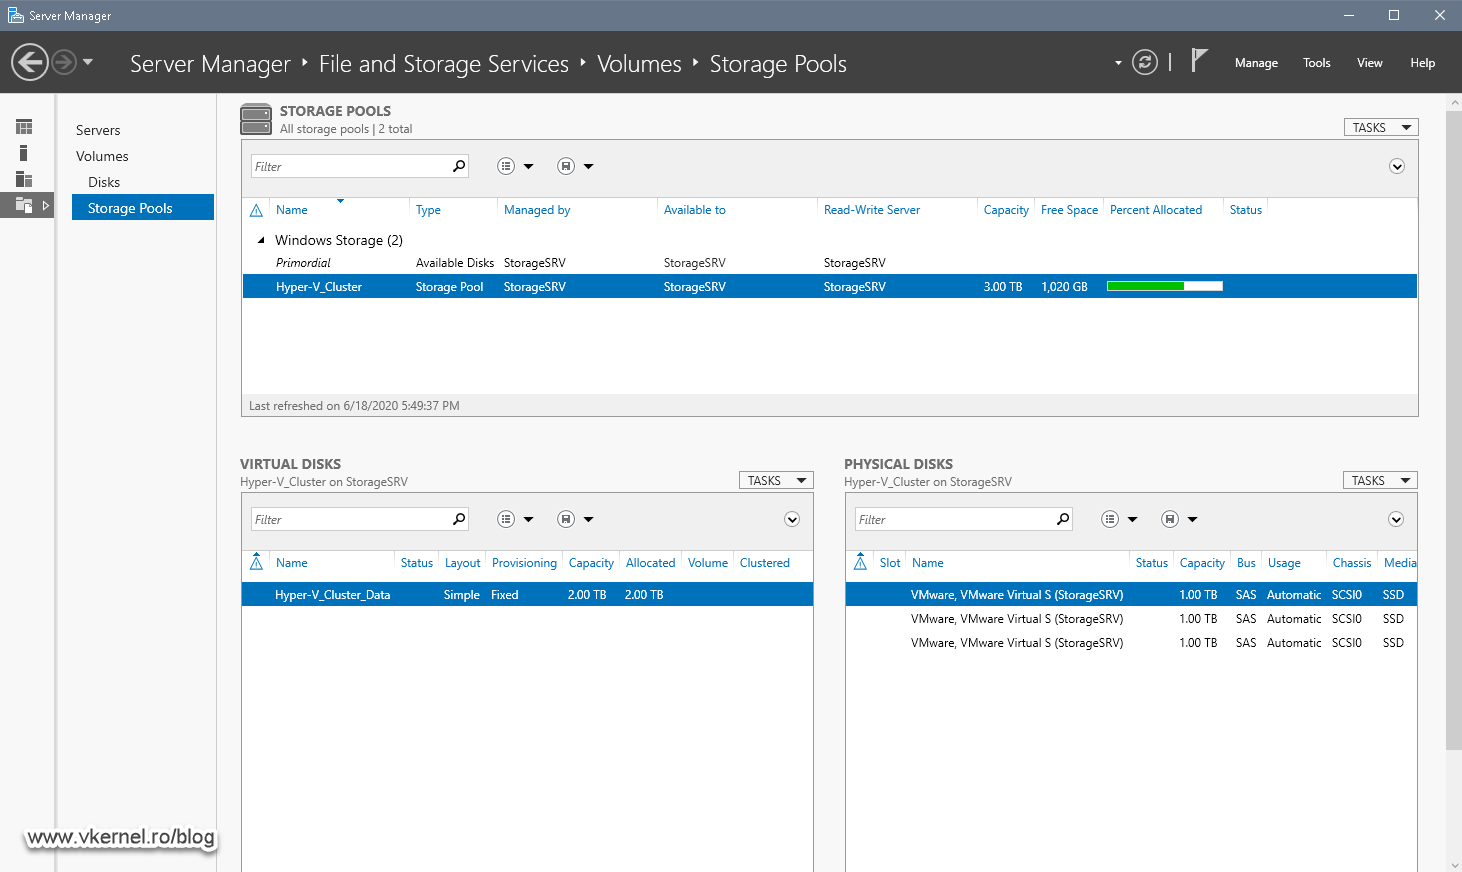
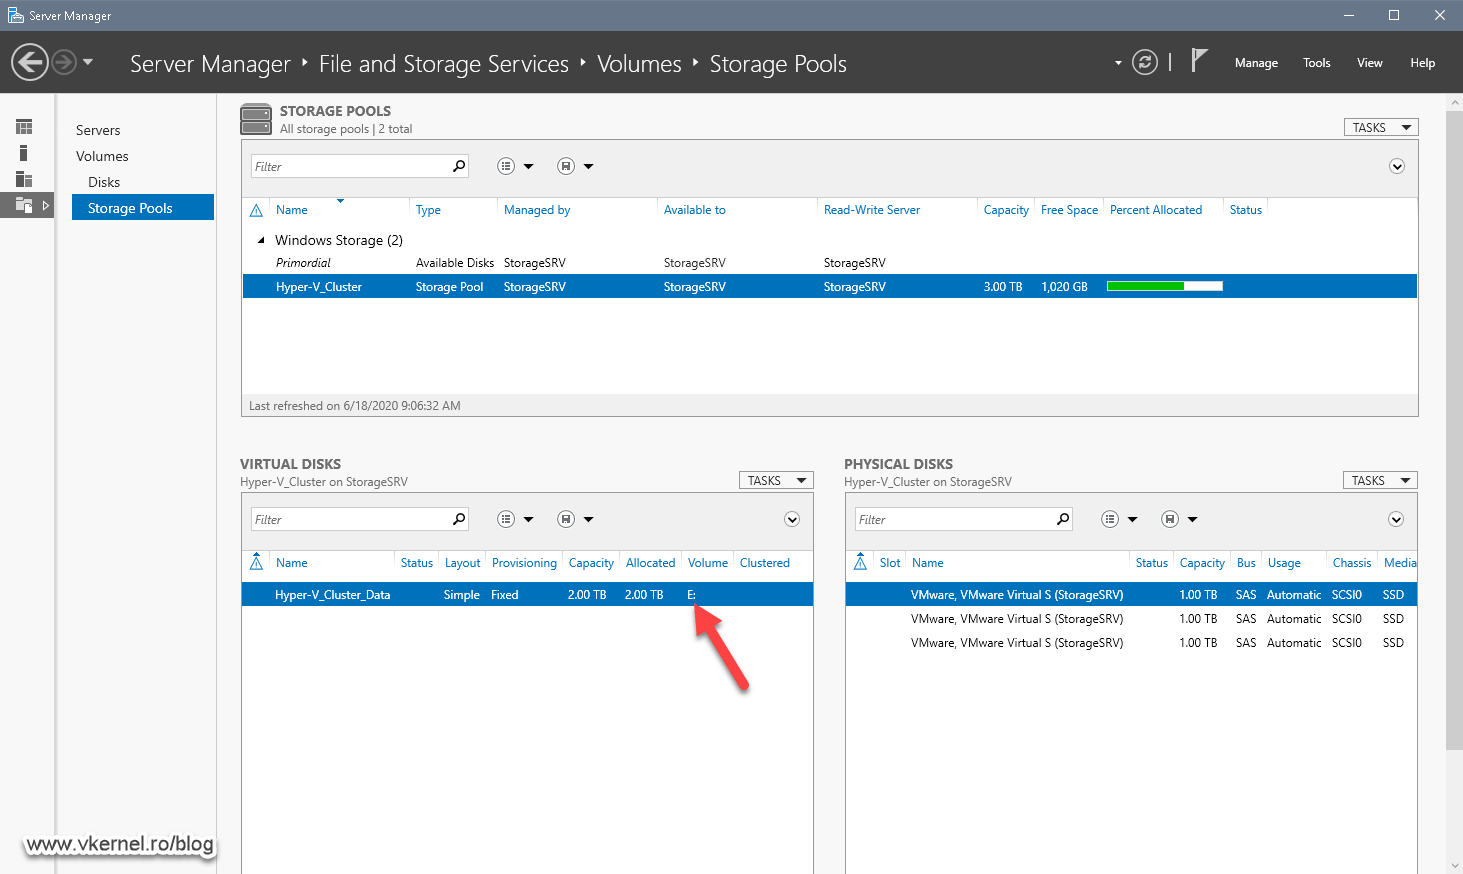
Back in the Server Manager console, we have some information about the virtual disk that we just created, like how much space did we allocated from the storage pool and what type of provisioning and layout the virtual disk has. This information is useful especially when we have multiple virtual disks in the same storage pool.
We can also see the total space occupied by the the virtual disk(s) in our storage pool.
1.4. Creating partitions/volumes
Now that we have a virtual disk, it is time to format it and create a volume/partition where we can put our data. For this, all we have to do is right-click the virtual disk we just created and choose New Volume.

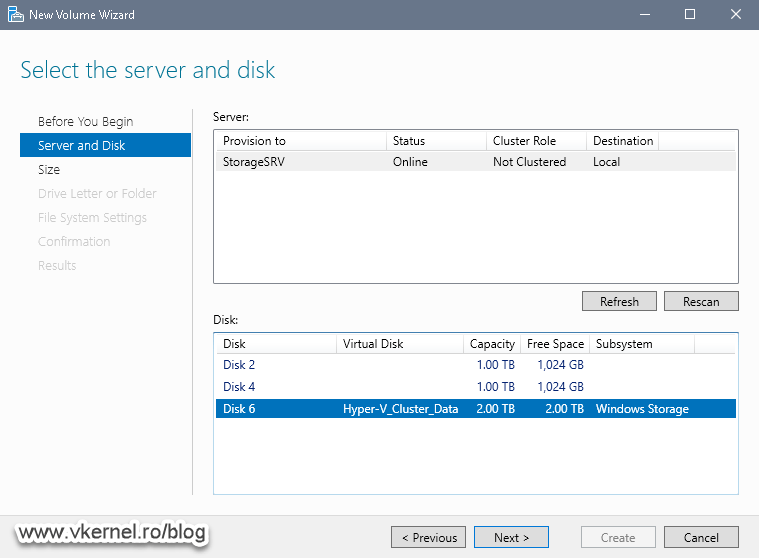
The New Volume Wizard opens and in the Server and Disk screen select the virtual disk then click Next.
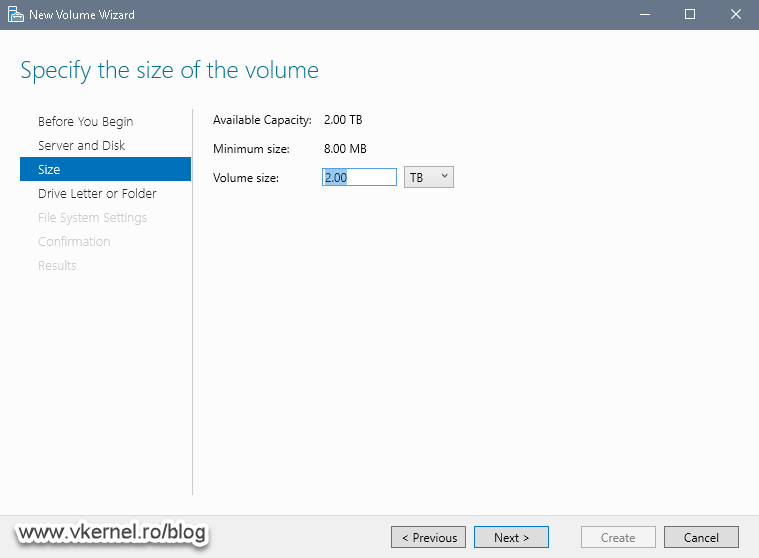
As the size goes, we can use all the available space or create a smaller partition/volume and use the rest of the space to create a second volume. I’ll leave this up to you, but as far as my example goes, I will use the entire space I have on this virtual disk.
Give the volume a drive letter then hit Next.

On the File System Settings screen we have the options to choose. What file system we want for the volume, the Allocation Unit Size and the name of the volume. Most of the times the default settings will suffice, but in case you will have a SQL database on this volume, you will want to change the allocation unit size, since the default one don’t quite fit with SQL server.

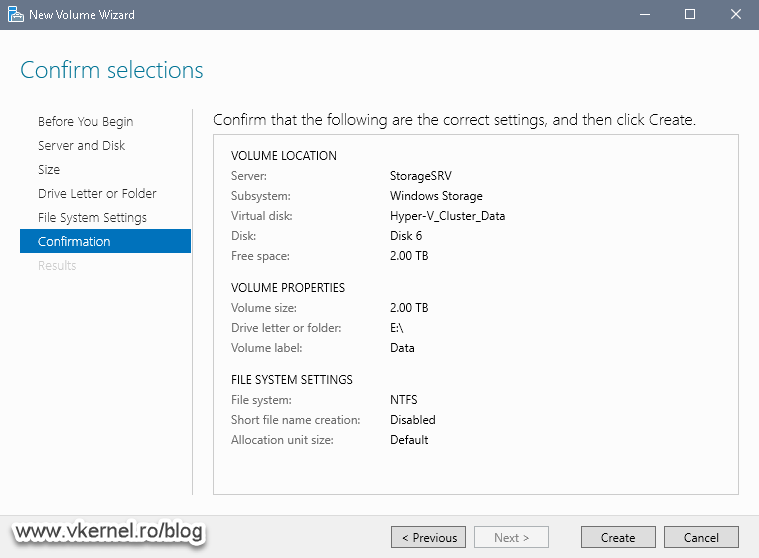
In the Confirmation screen click the Create button to start creating the volume.
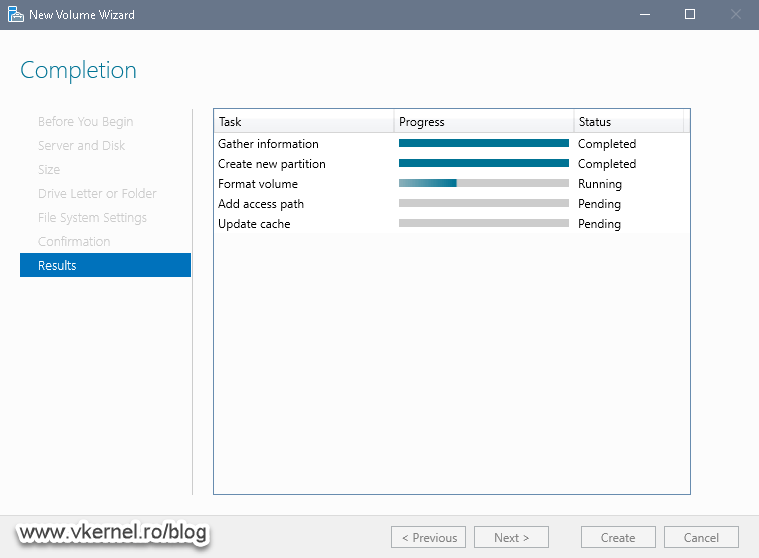
The process of creating the volume will take just a few seconds and the tasks for this operation will be displayed in the Results screen.
Once the volume is created we can see the assigned drive letter in the Volume column inside the Virtual Disks section.
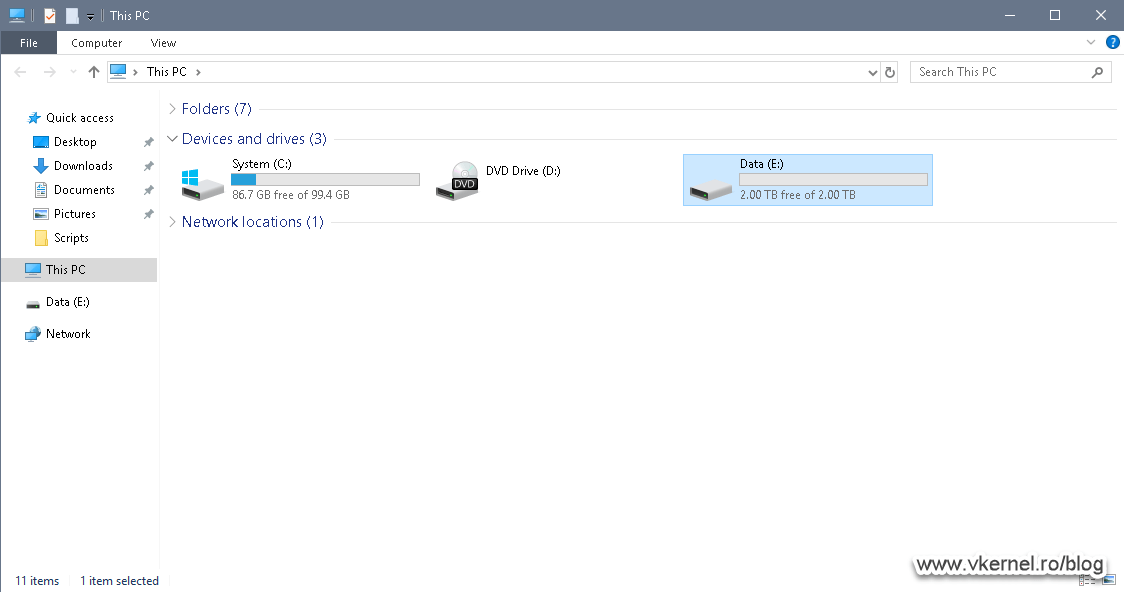
We can also access the volume from Windows Explorer and put our actual data on it.
2. Increasing storage
2.1. Increasing Storage Pool space
There will be times when we need to increase the space of our Storage Pool(s) either because we need to create more virtual disks or the already created virtual disks are starting to fill up -thin virtual disks are usually creating this type of problems because of over-committing-.
In order to increase our Storage Pool space, the first thing we have to do is add more physical hard drives or SSD drives in our server. Once the drives are in, we should be able to see them in the Primordial Storage Pool. As we discussed in section 1.2, this is the storage pool that contains all unallocated drives.
Now select the Storage Pool we just created, right-click it and choose Add Physical Disk.
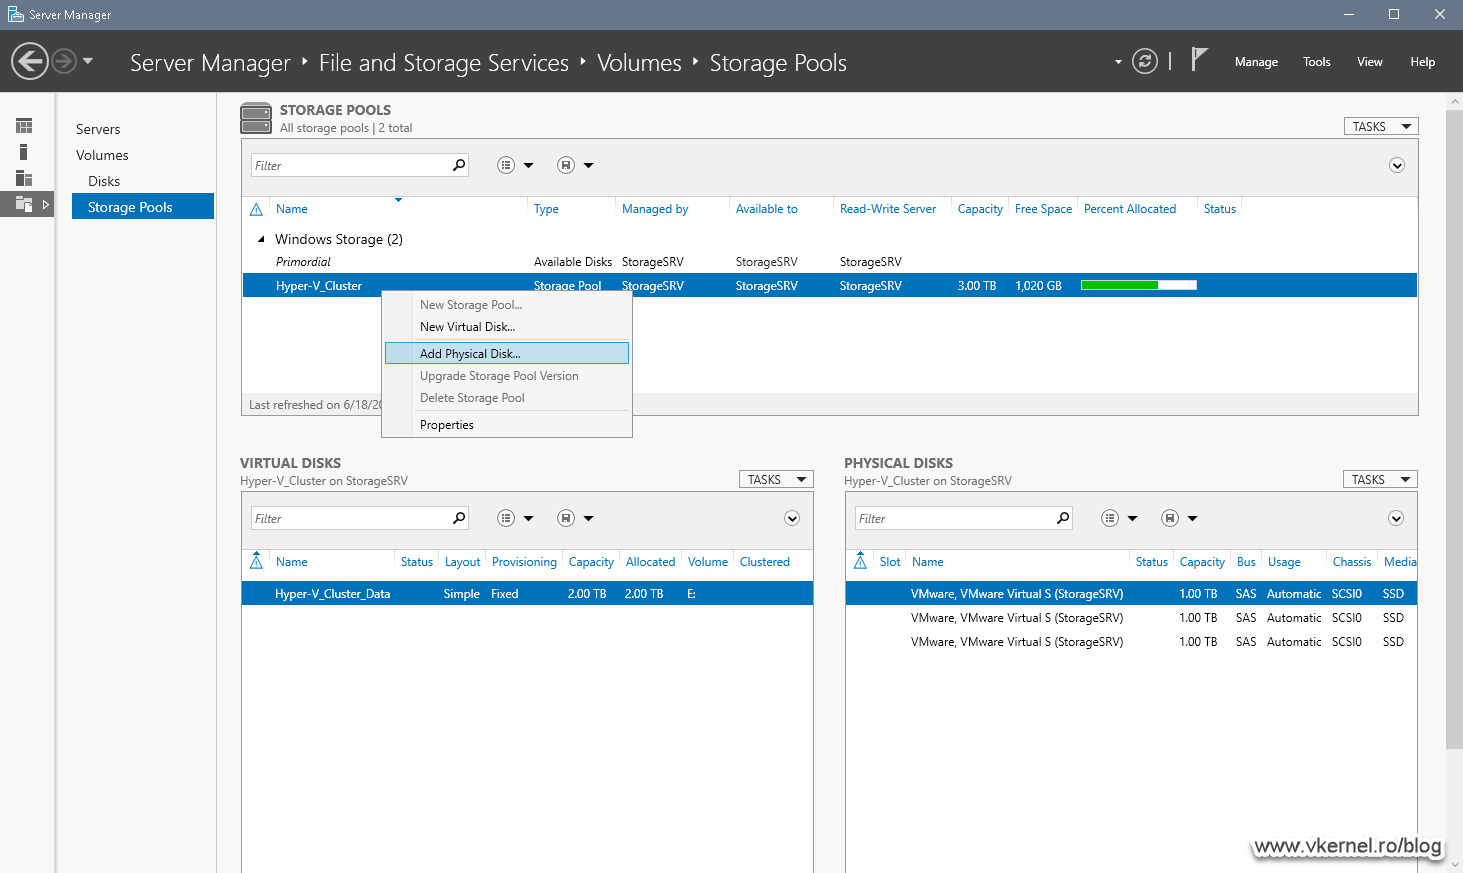
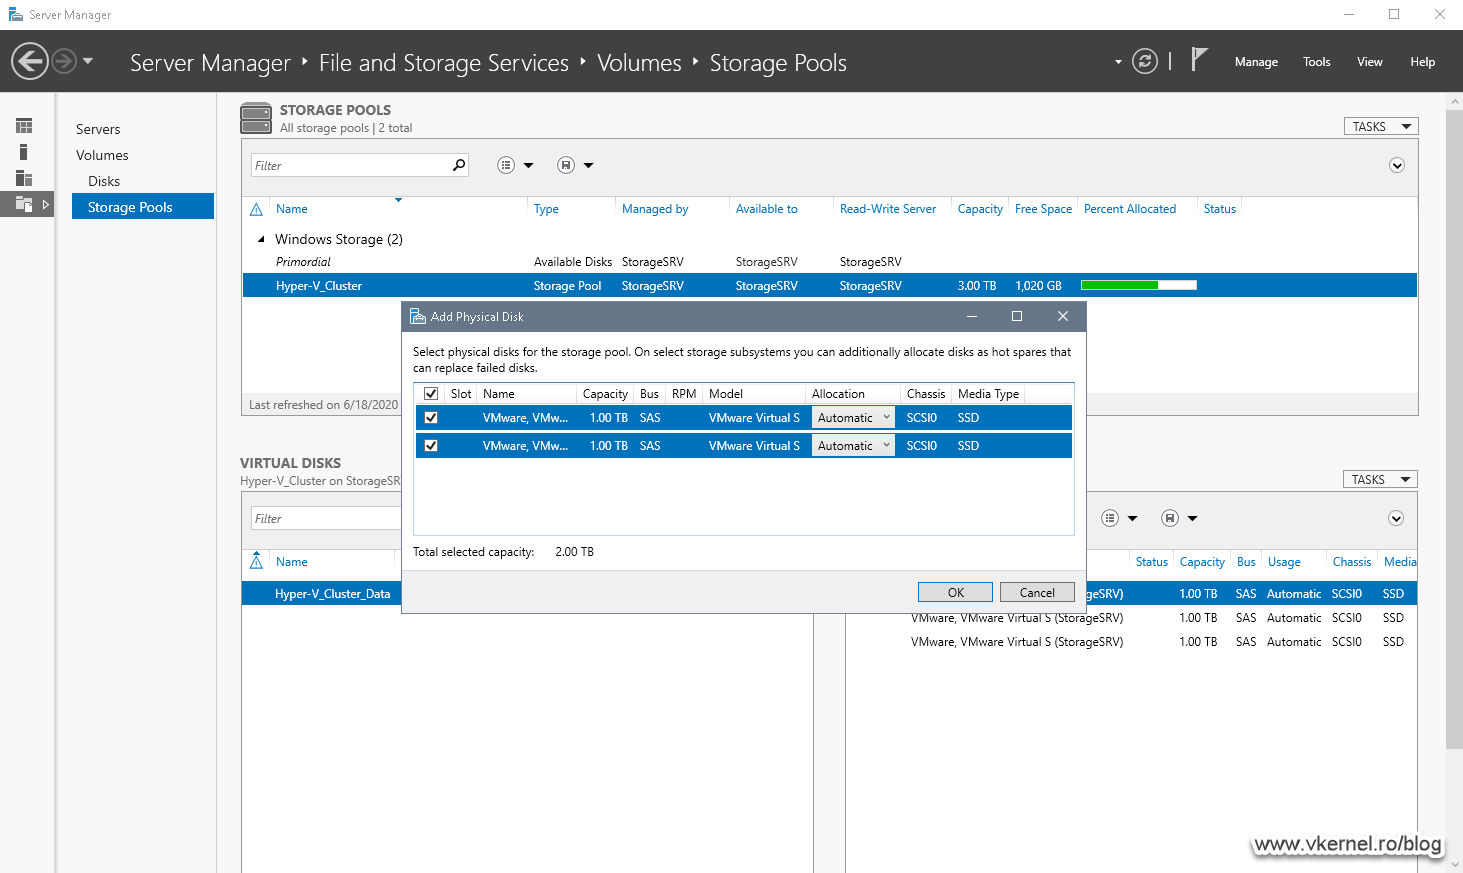
This will open the Add Physical Disk window where we are presented with all the available disks in the server. Select the disks you want to add to the Storage Pool then click OK.
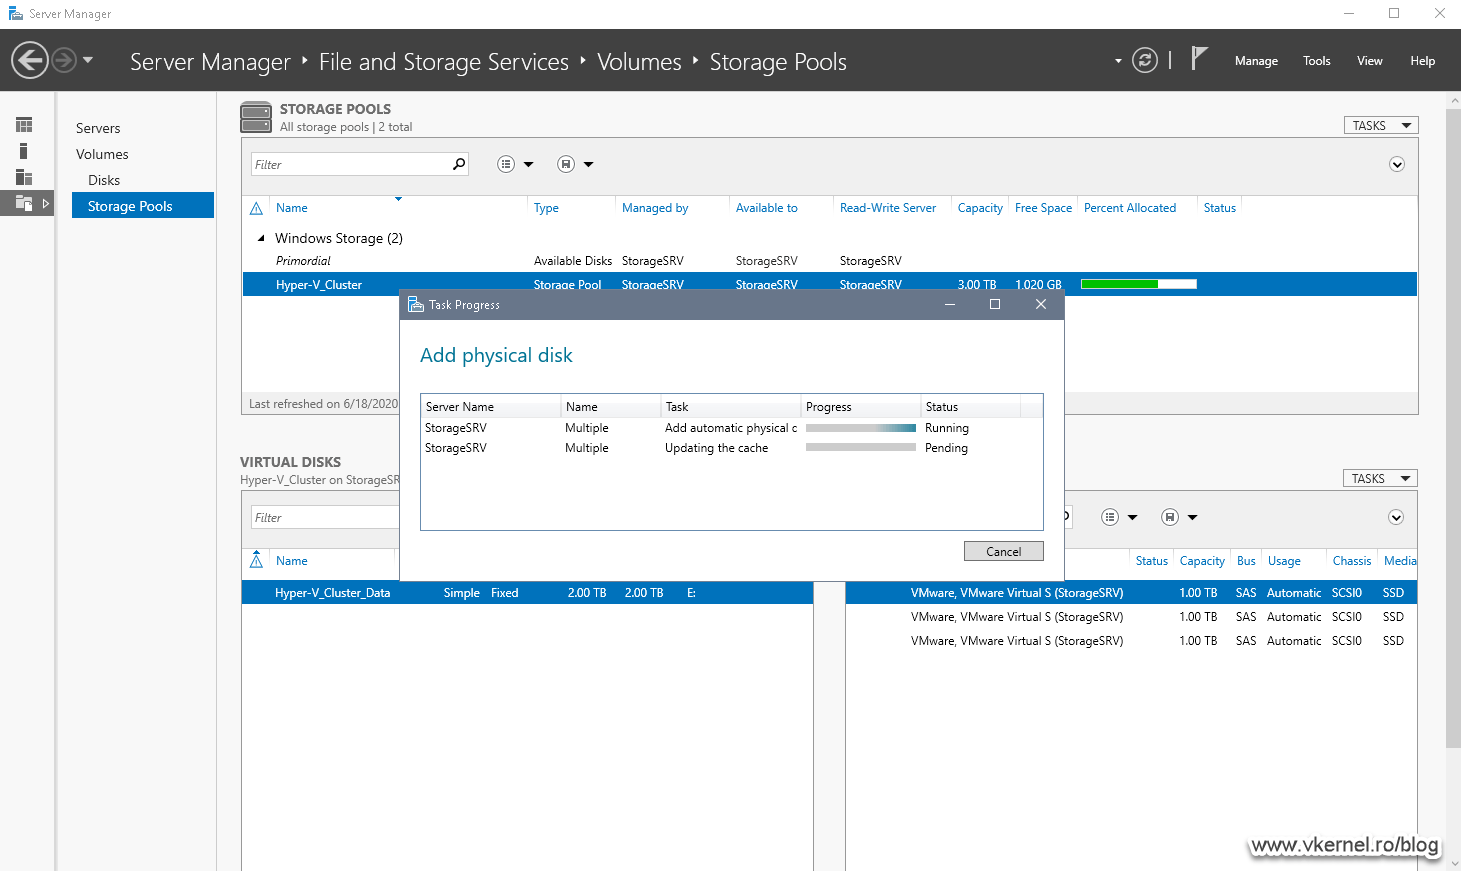
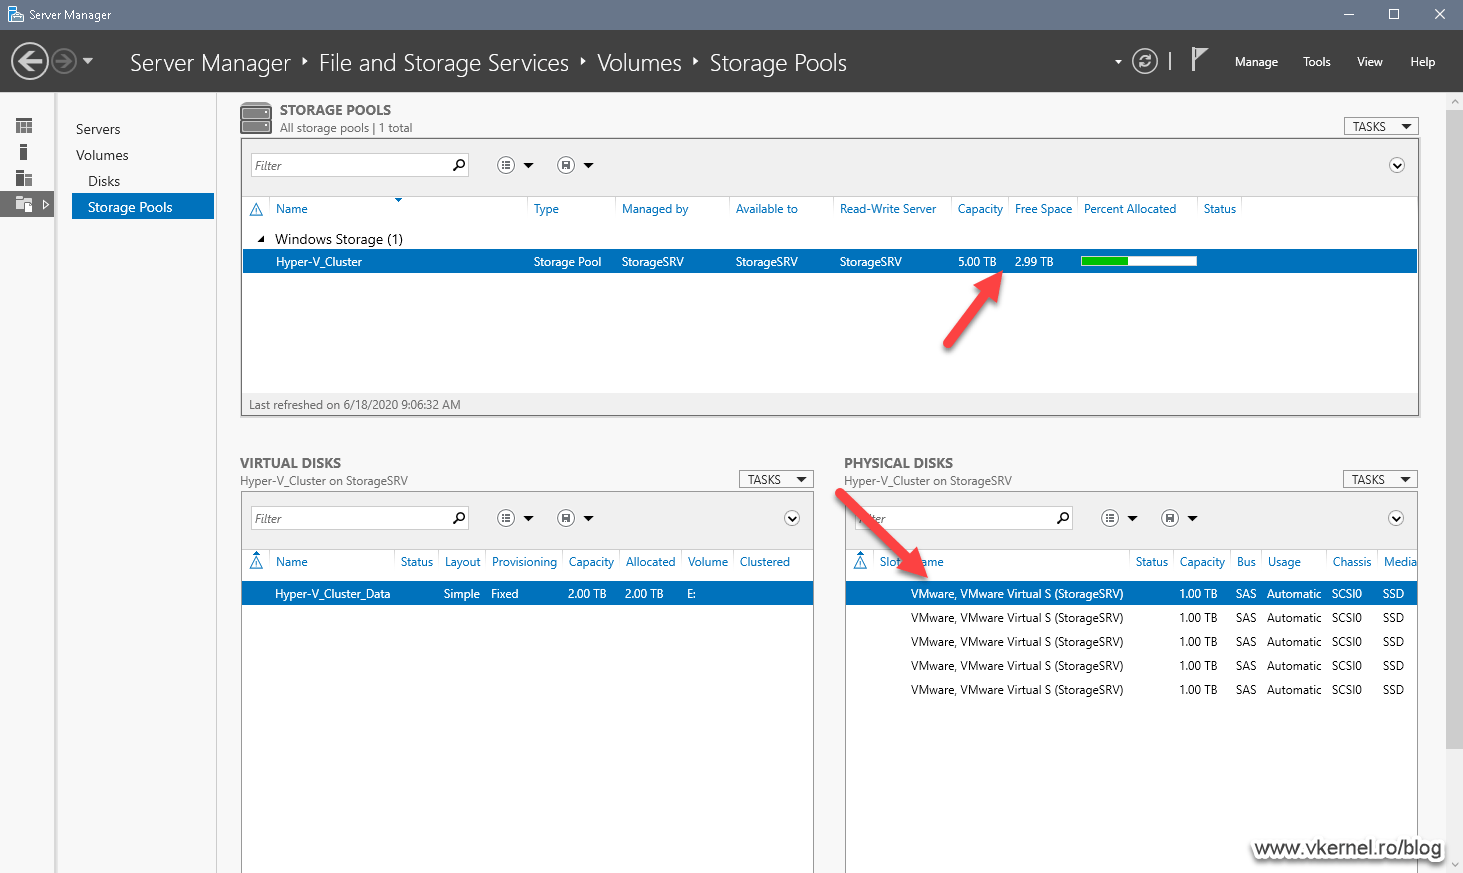
Once they were added to the Storage Pool we should be able to see the increase in space, but also the disks or SSD drives we just added.
2.2. Extending virtual disks in the Storage Pool
Now that we have more space in the Storage Pool, we can go further and also extend our virtual disk(s). For this to happen, all that we need to do is right-click the virtual disk and choose Extend Virtual Disk.
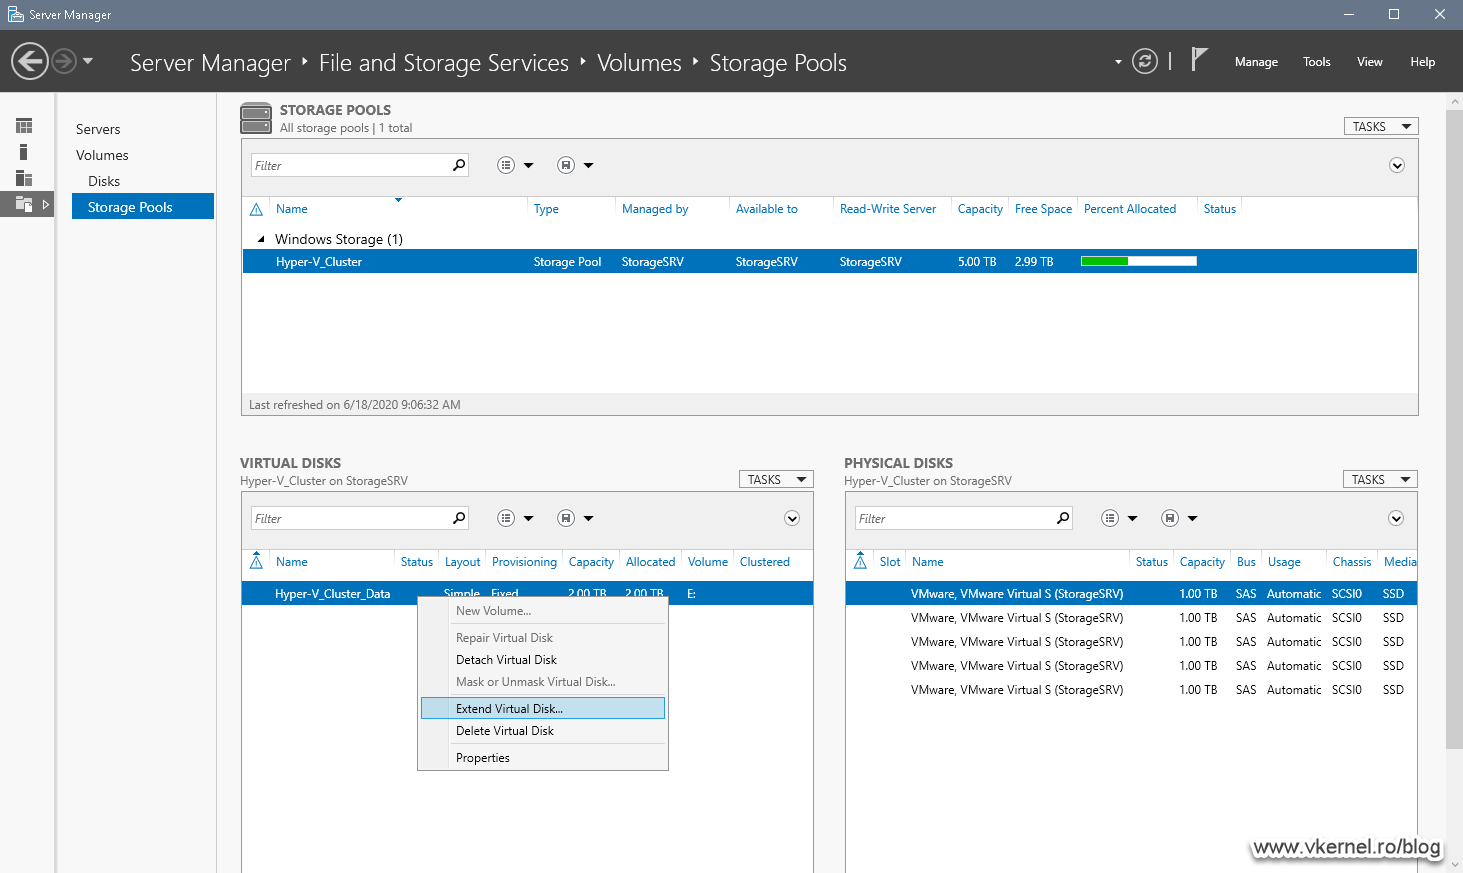
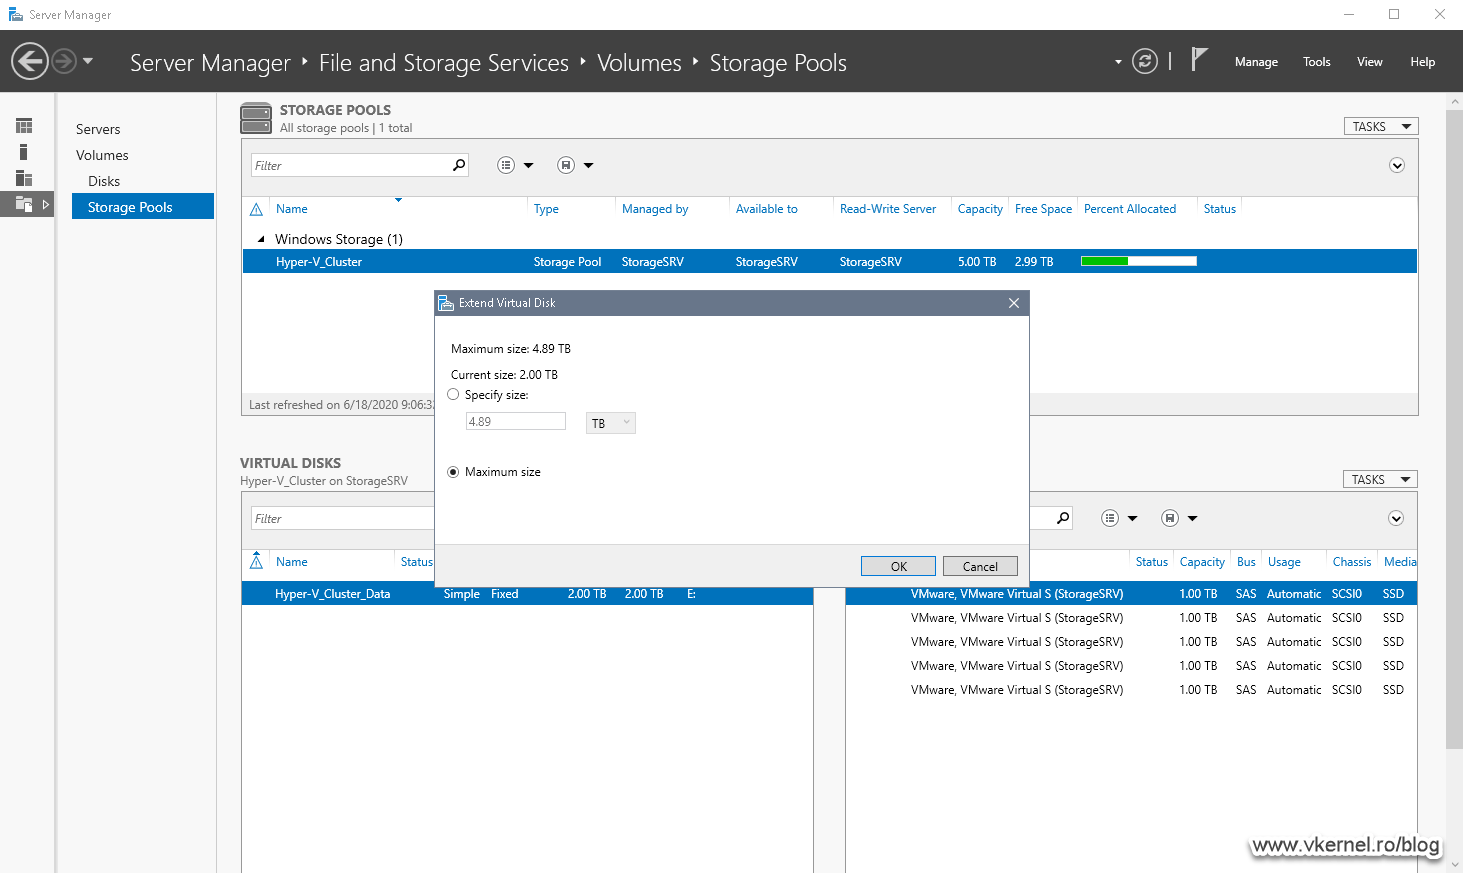
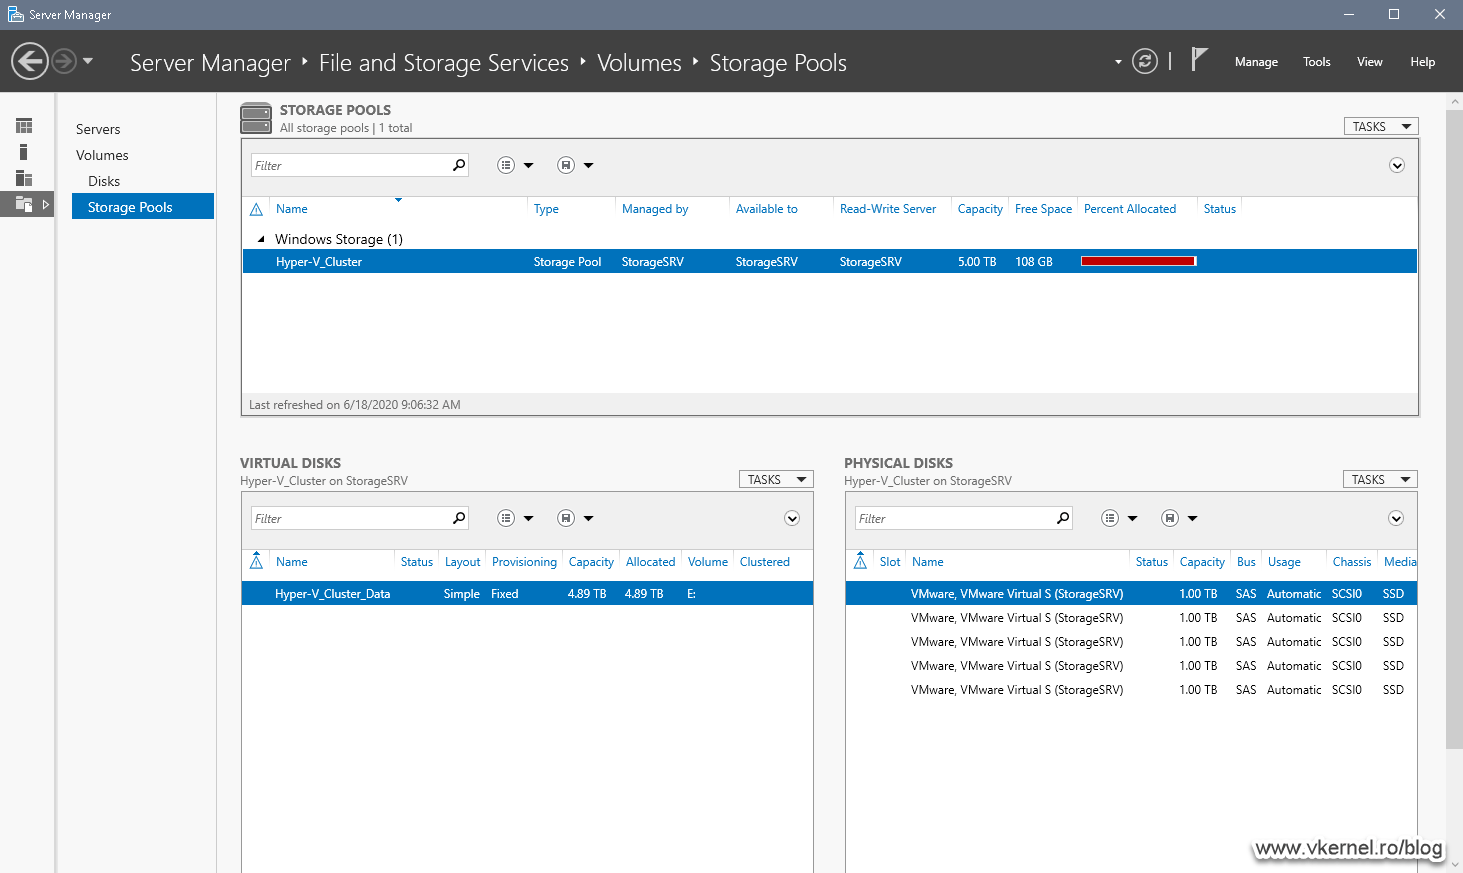
In the Extend Virtual Disk window that pops-up, we have the option to either increase the disk using all the available space in the Storage Pool or to increase it by specifying a custom size. For this example I will increase it to the maximum size that my Storage Pool has.
2.2.1. Troubleshooting the extending of virtual disks
There will be times when the virtual disk just doesn’t want to extend no matter what. It happened to me when I was writing this article, and I think it’s a bug or Microsoft just did not created a code to automatically refresh the Storage Pool after adding the extra drives.
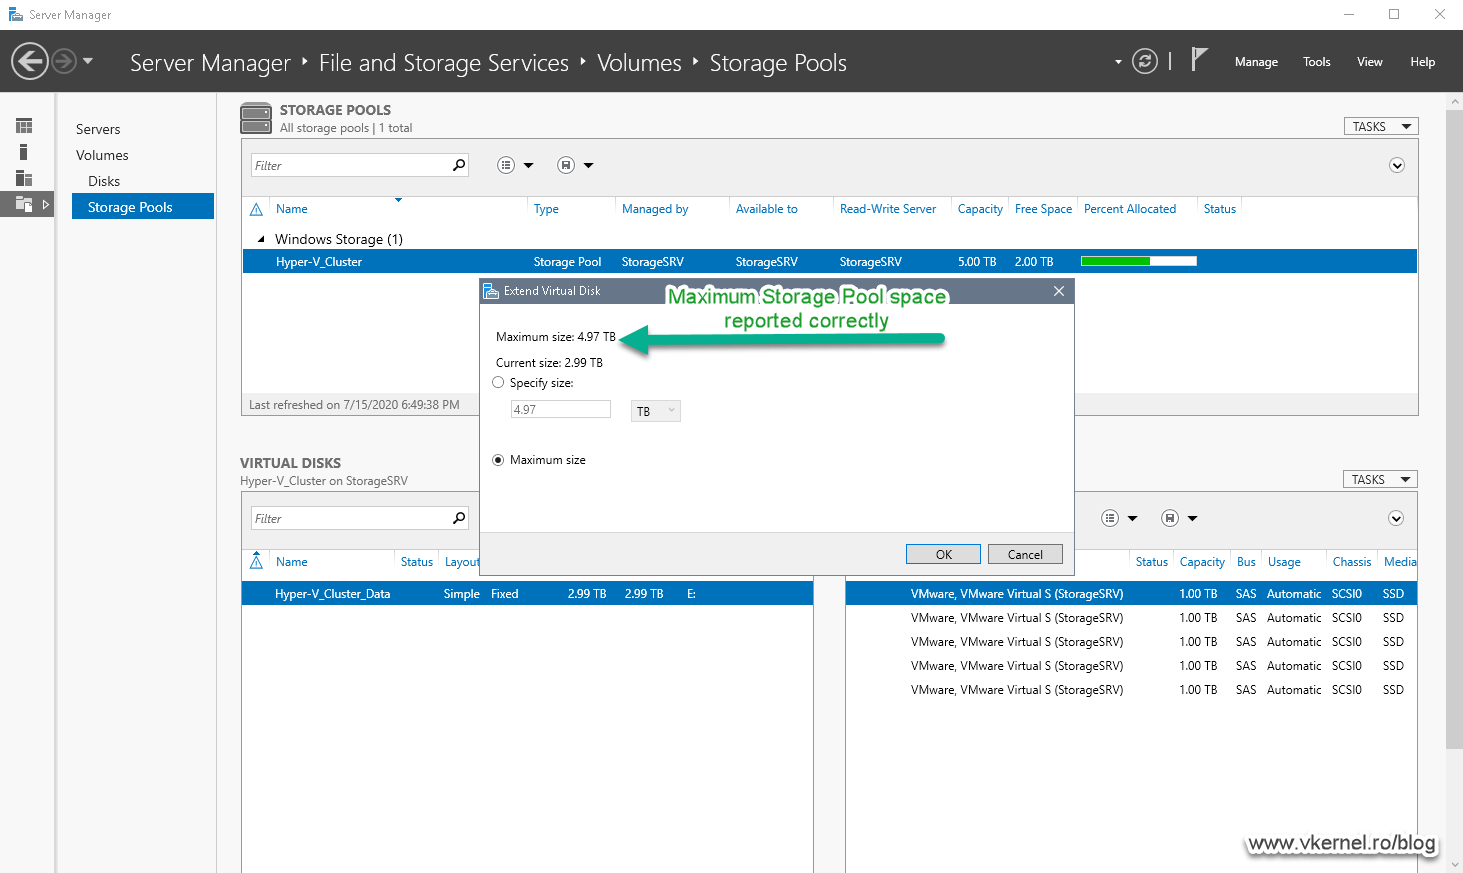
As you can see in the bellow image, I have a total Storage Pool space of 5TB, but when I try to extend the virtual disk it says that my space can reach a maximum of 3TB. Refreshing the console or even re-opening it does not do the trick.
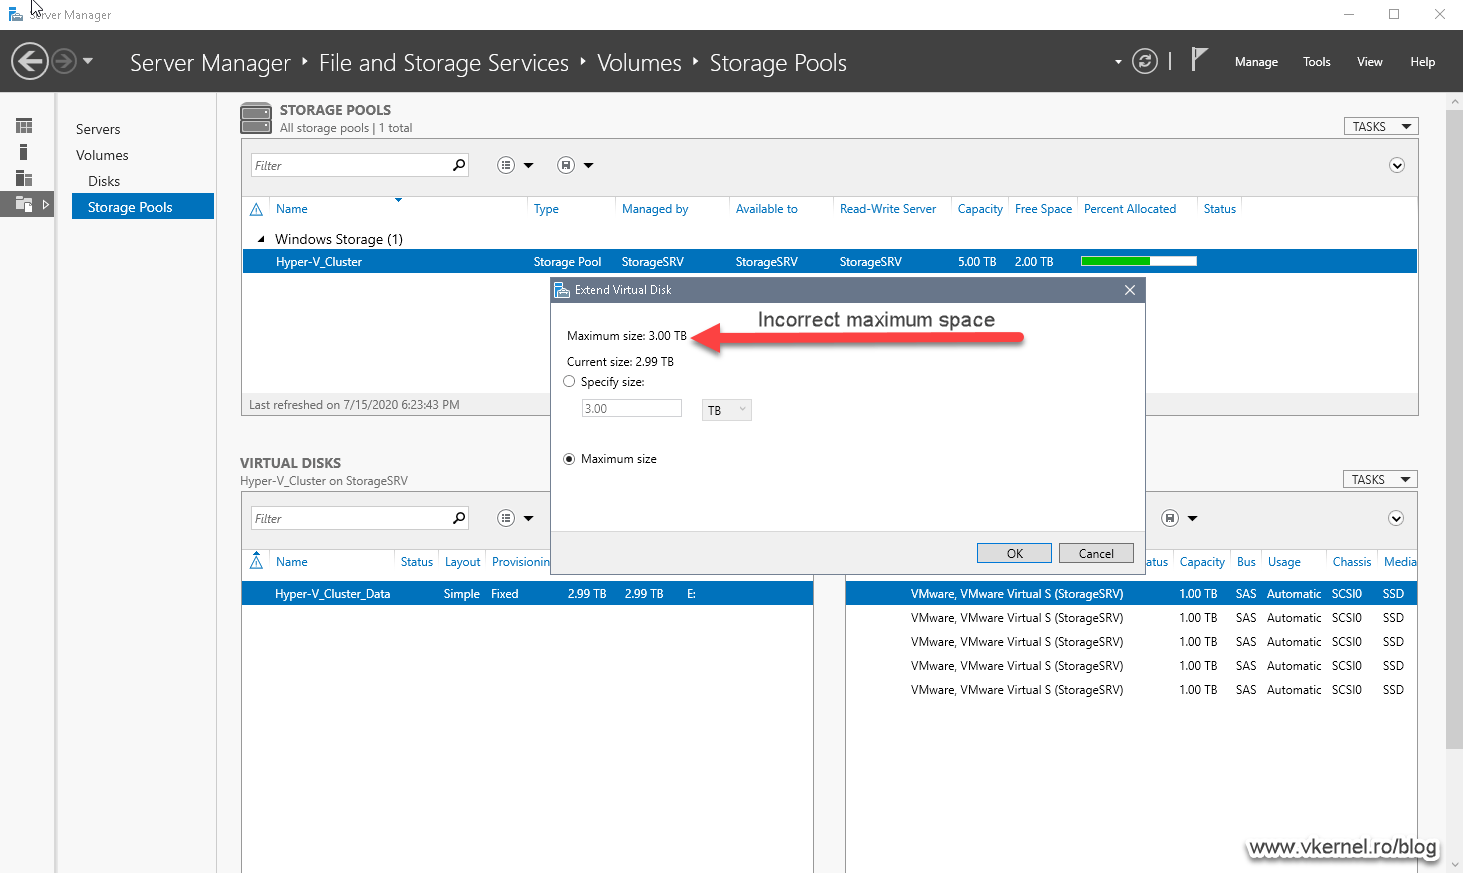
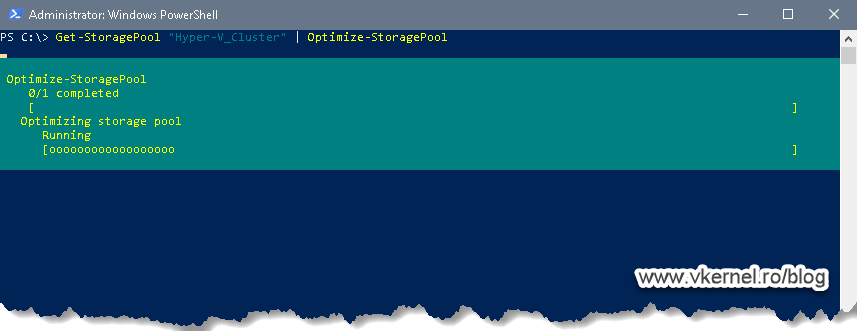
In order for us to tell the virtual disk that it has extra space to extend, we need to use PowerShell. By typing the bellow command, an optimization is done on the Storage Pool and only after the operation succeeds we can extend our virtual disk(s). And be patient, it will take quite some time to finish.
Get-StoragePool "Storage Pool Name" | Optimize-StoragePool
Now when we go and try to extend our virtual disk, the console shows all the remaining space from the Storage Pool correctly.
2.3. Extending volumes
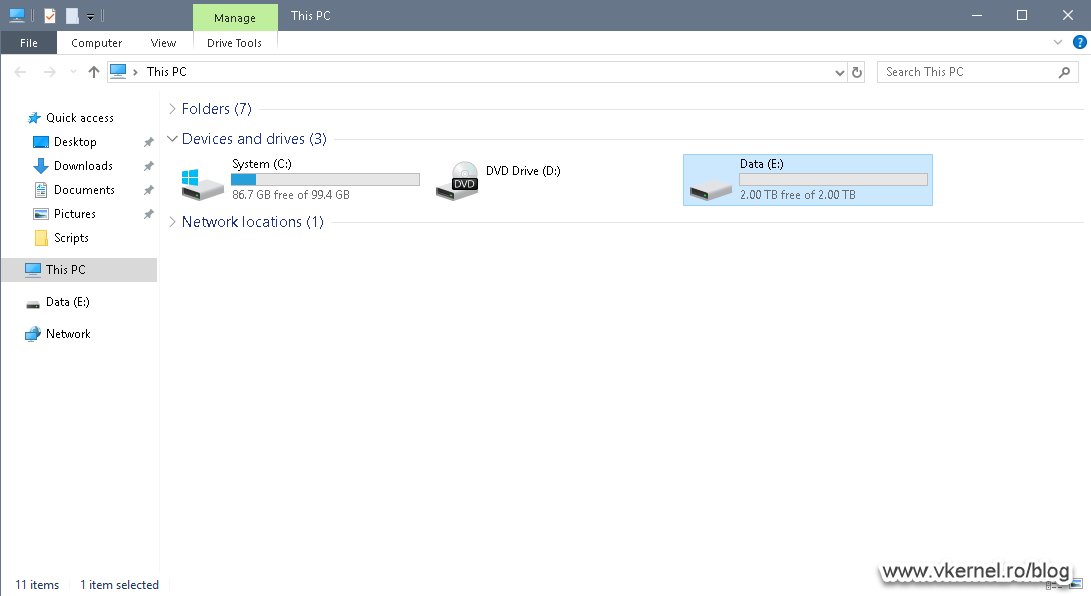
Even if we increased the space on our Storage Pool and extended the virtual disk, if we take a look in Windows Explorer, our volume still has the same size.
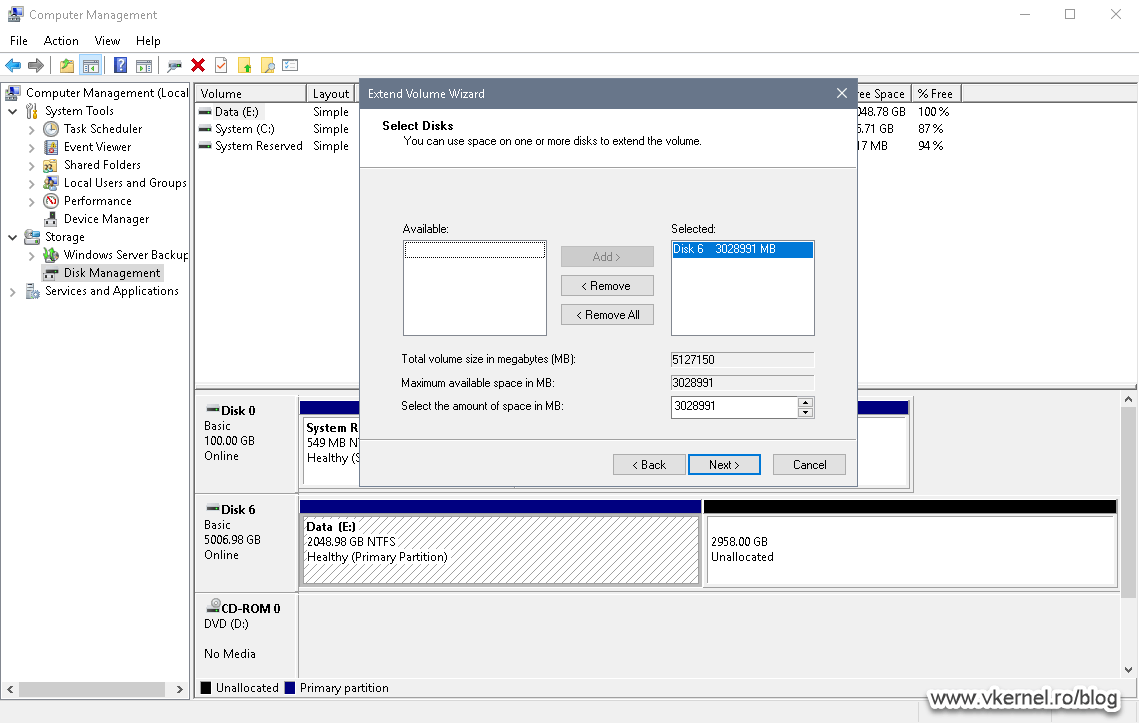
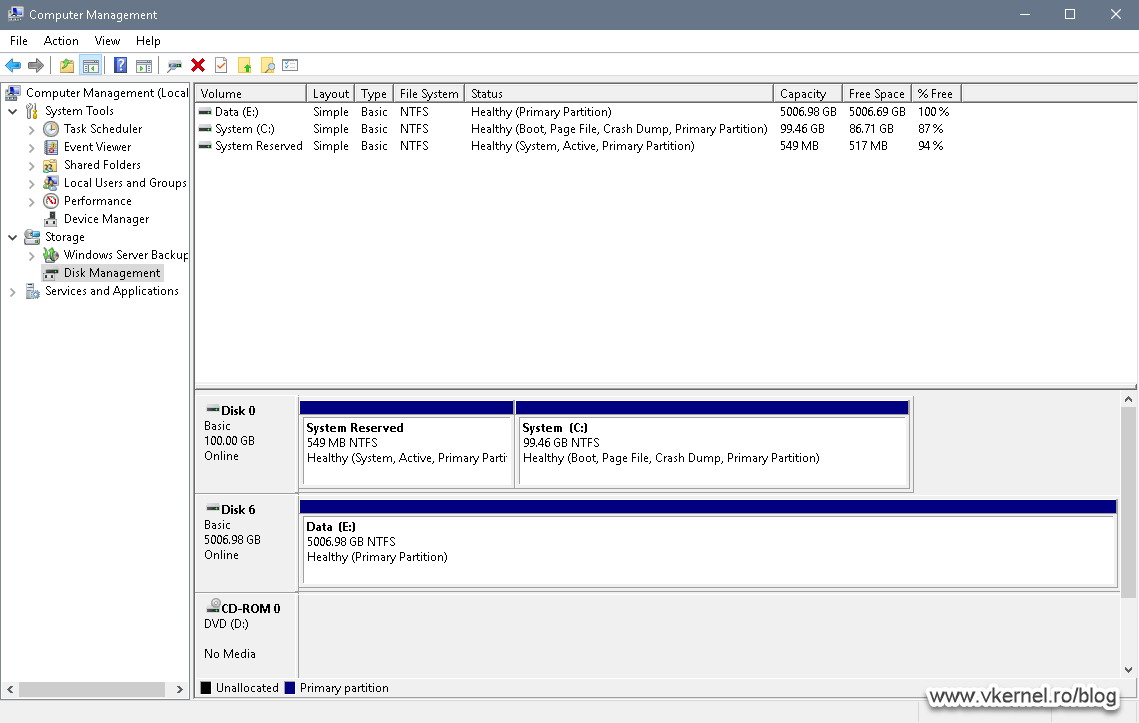
In order to make the changes reflect on our volume too, we need to extend it just like a normal disk. For this we can use the Disks option in Server Manager, but I prefer using the old and good Disk Manager console. Once the console is opened, we can see right from the start our free space on the virtual disk and how much we have.
All we need to do now is right-click the existing volume and choose Extend Volume.

Here we can specify with how much we want to increase our volume, but we also have the option to use the entire space available. Specify the new size for the volume then click Next.
Once we finish the Extend Volume Wizard, we can see that our volume was extended.
And now the changes also reflect in Windows Explorer.

3. Deleting volumes, virtual disks and storage pools
There will be times when we need or want to delete a volume or storage pool, but the delete operation needs to be done in a proper order for it to succeed.
If for example, we want to delete a Storage Pool, but we still have virtual disks in it, the delete option will not even be available to us. Now if we try to delete a virtual disk with volumes in it, we will get the Delete Virtual Disk option enabled, but when we click on it, we get a message like the one bellow.
All volumes must be deleted before this virtual disk can be deleted. Back up any data that you want to keep before deleting the volumes.

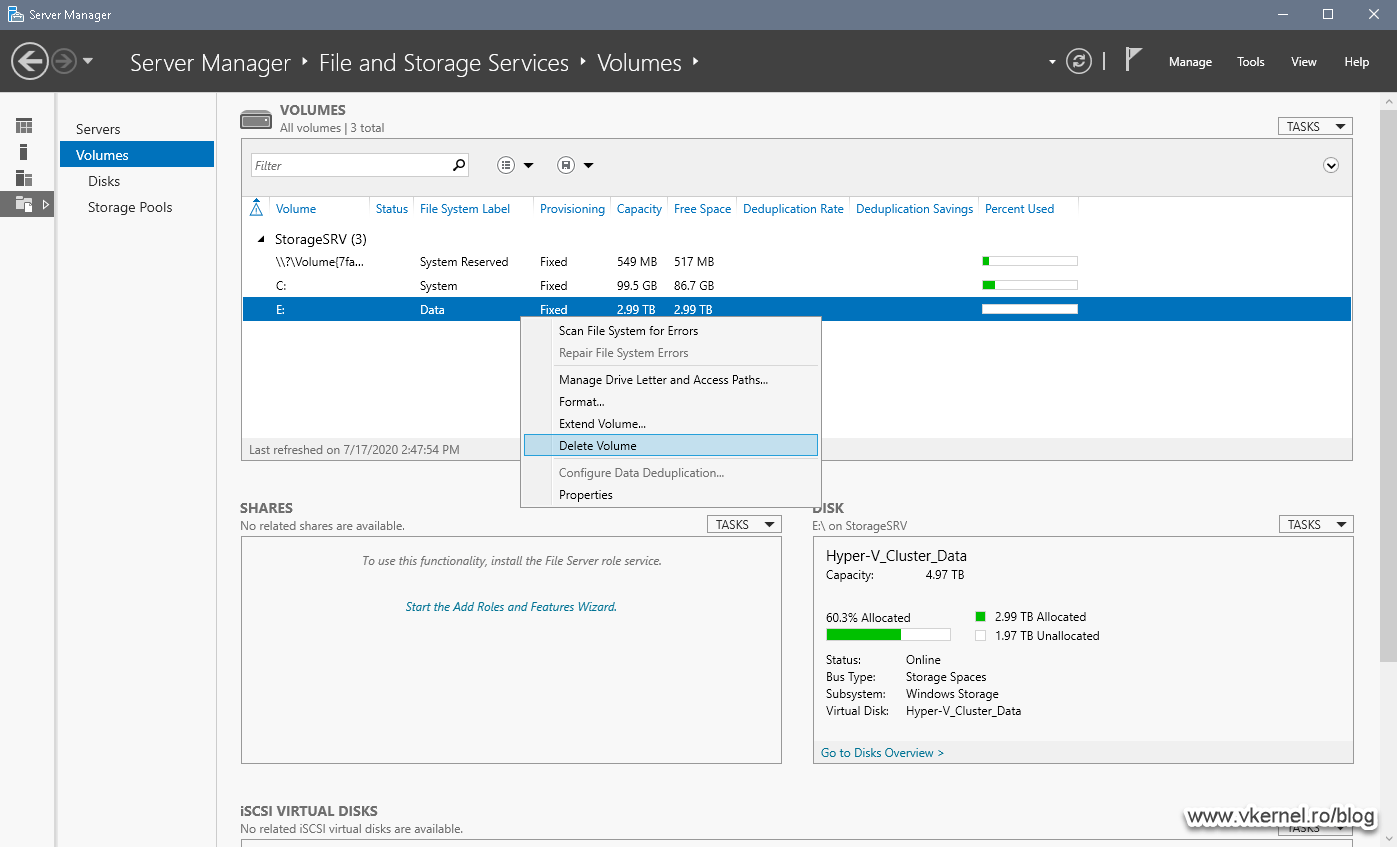
In order to delete our Storage Pool, we first need to begin with our volume(s).
Make sure you don’t have any data on the volume(s) you want to delete or that you have backups because it will be lost with no chance to recover it.
If you still have the Server Manager console open, click on the Volumes item then in the right-hand side section select the volume you want to delete and which is part of the Storage Pool you want to get rid off. Once the volume is identified just right-click it and choose Delete Volume. Confirm the operation by clicking the Yes button on the window that pops-up.
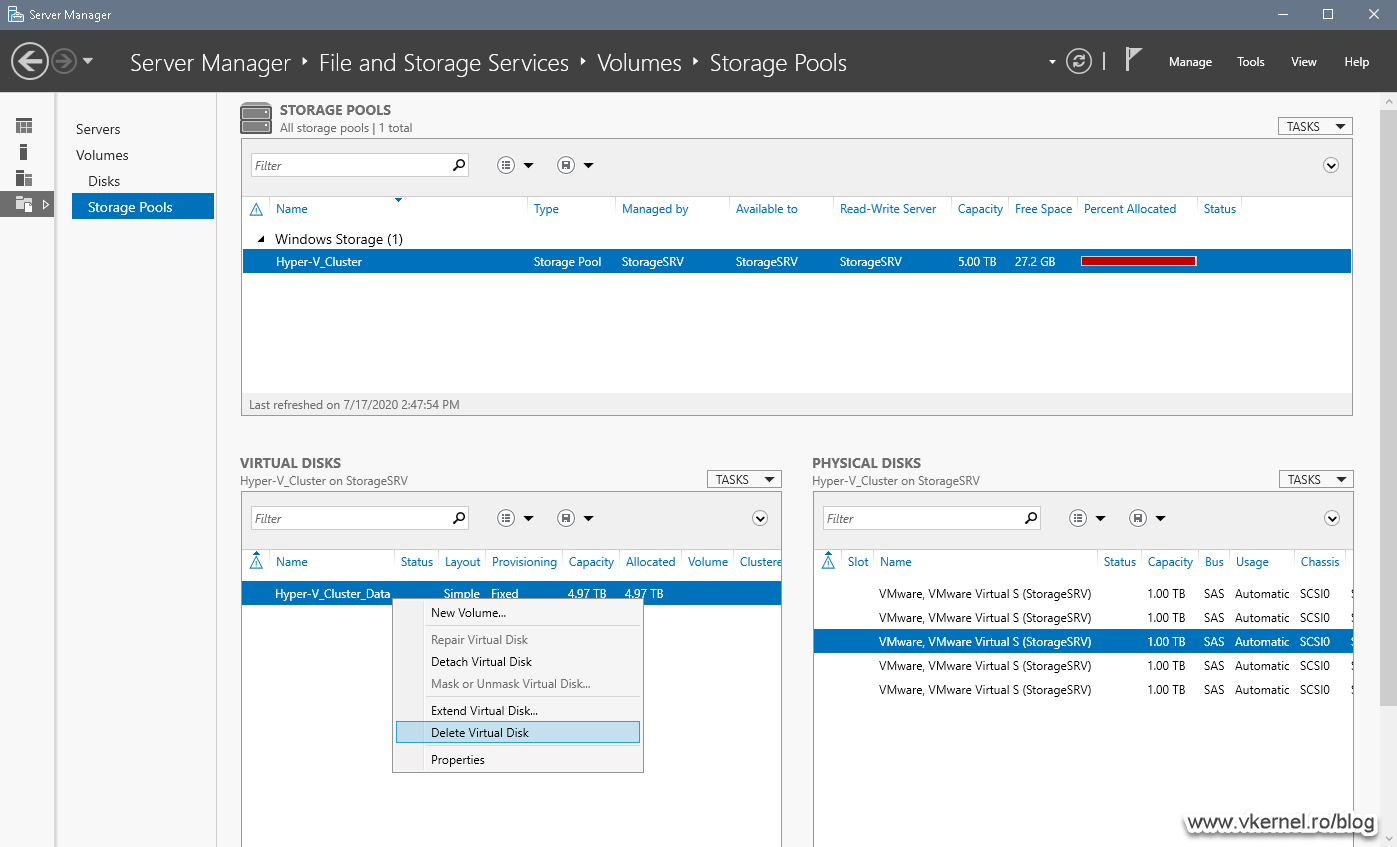
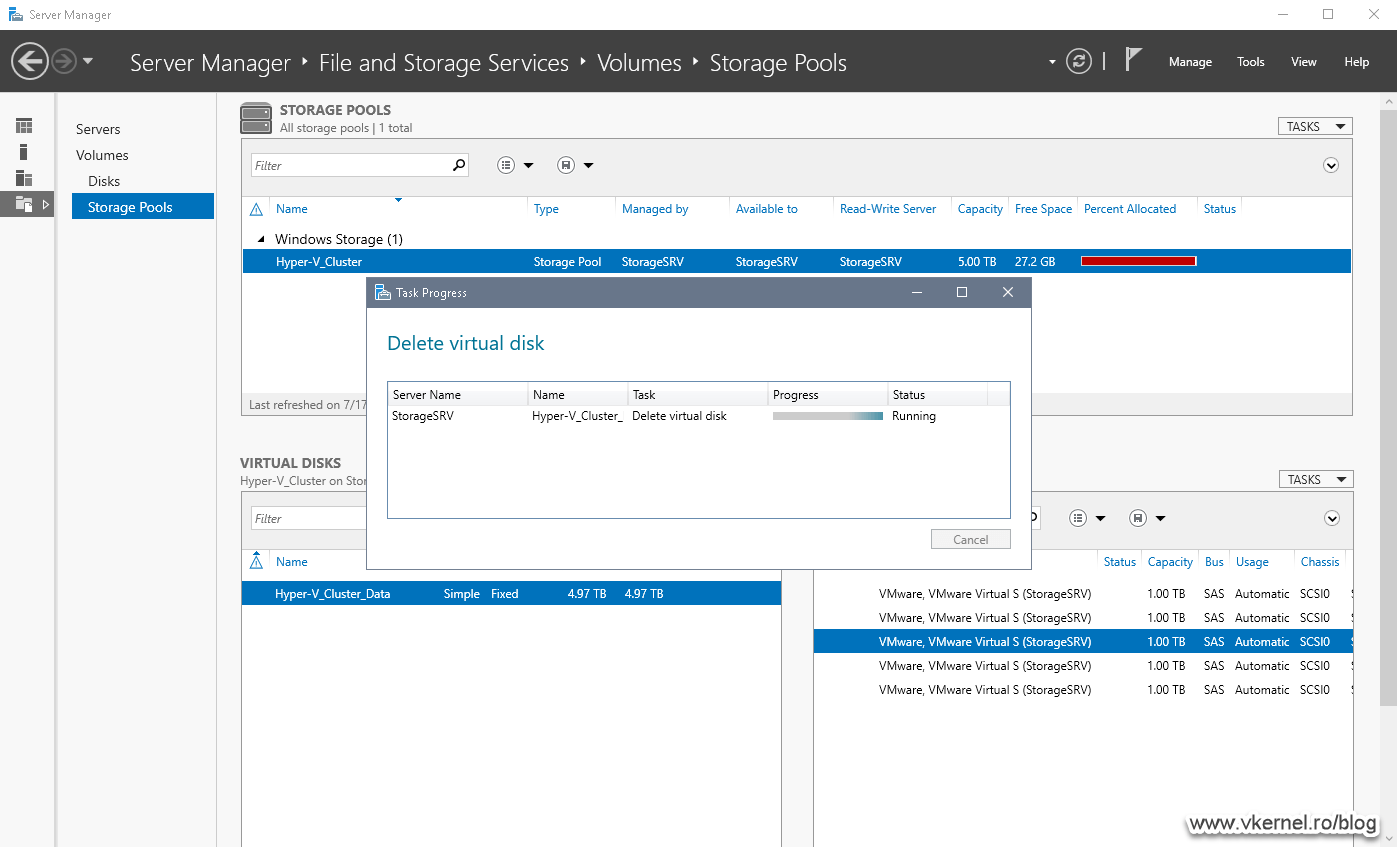
Now if we go back on the Storage Pool section and try to delete the virtual disk, the operation will succeed because we don’t have any volumes on it anymore.
And the last item to delete is our Storage Pool. Now that we don’t have any virtual disks in the storage pool, the Delete Storage Pool option is enabled. Click on it then choose OK in the window that pops-up.
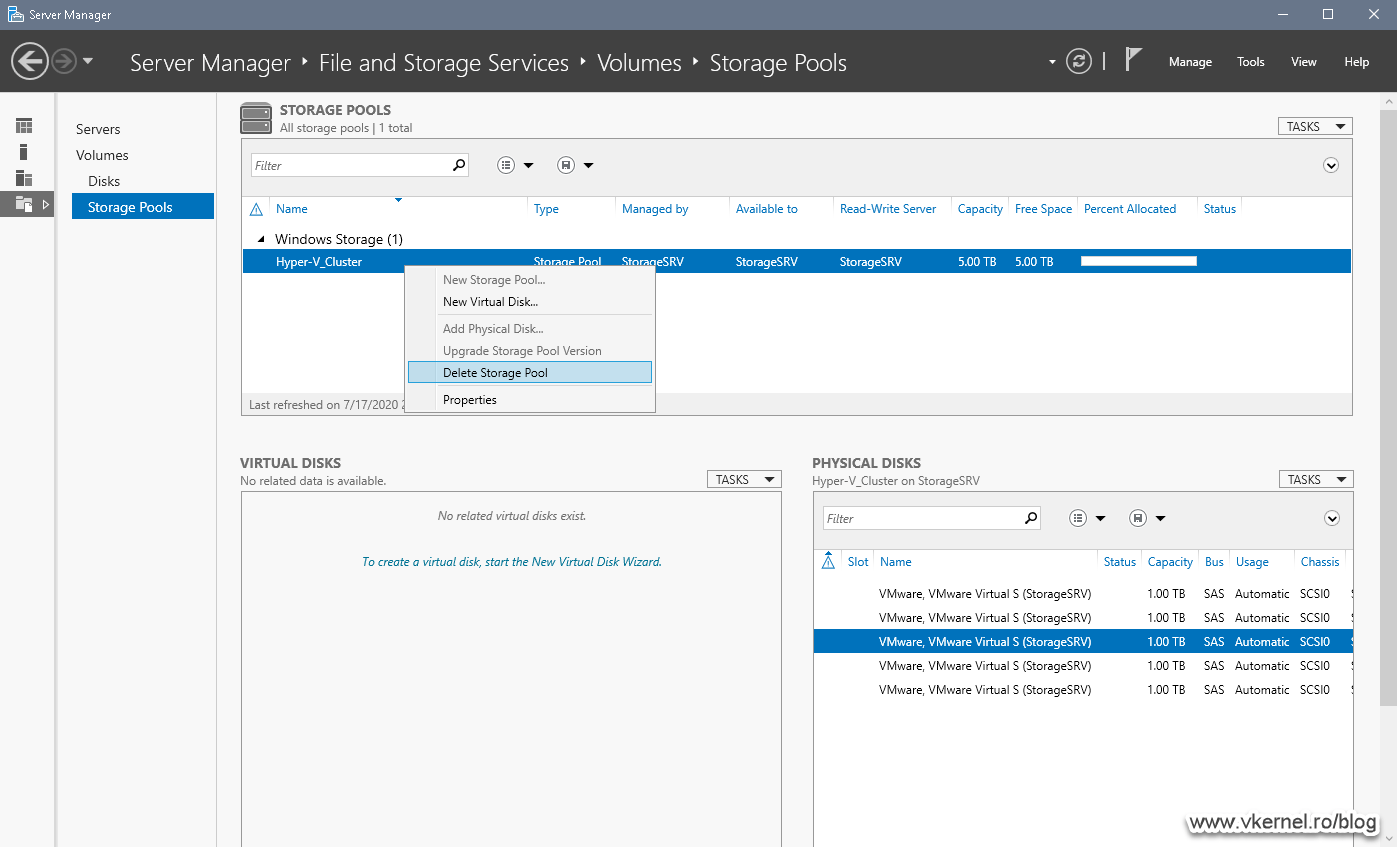

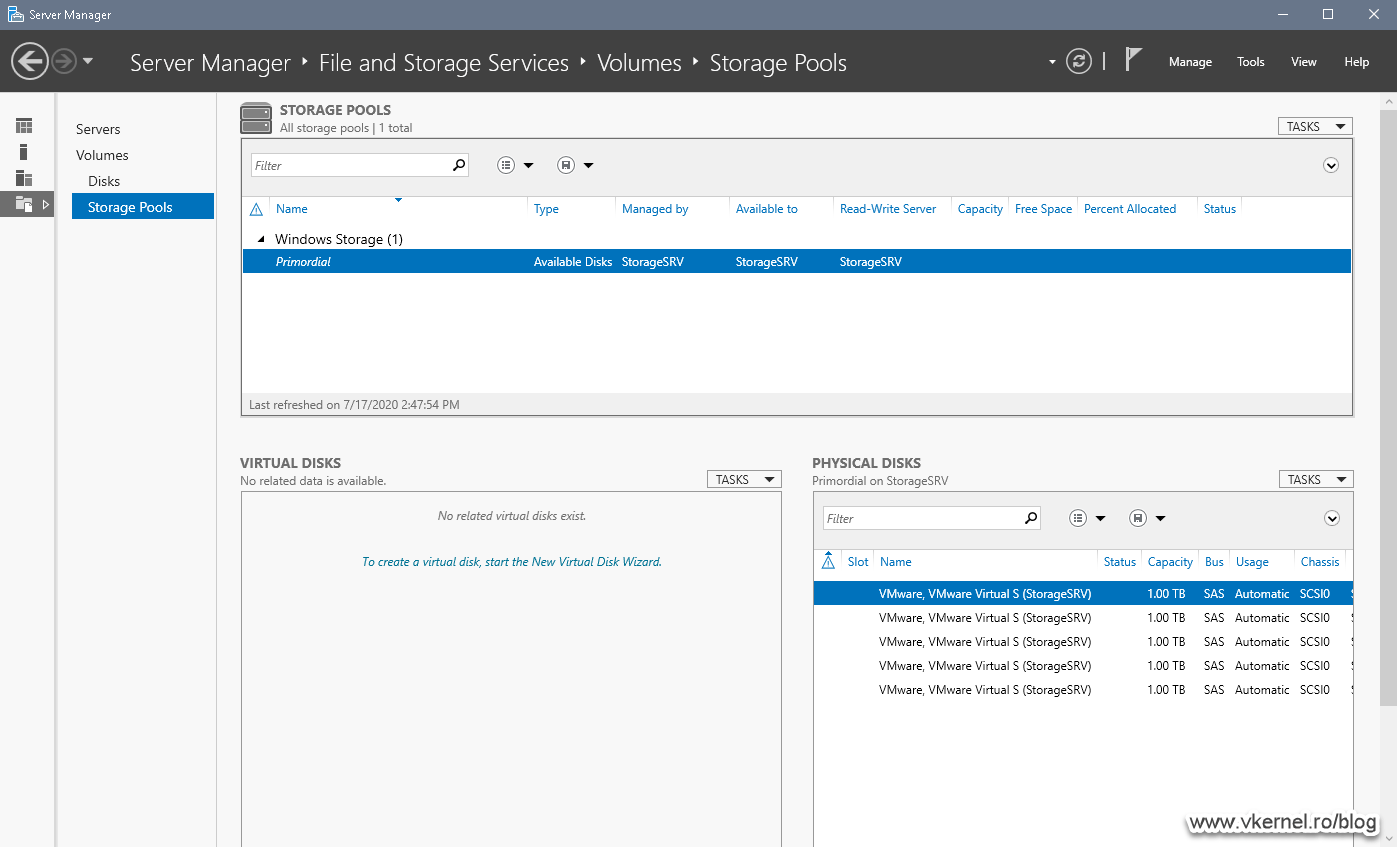
This operation will take a longer time compared with deleting a volume or a virtual disk, but when it’s done we should have all the disks that were part of the storage pool back in the Primordial one.
Summary
I have to say, working with Storage Pools in Microsoft’s world is not that difficult and it does a pretty decent job in the end. I said decent, because there are some bugs in the technology, but maybe in the future will get better. What I really wanted to see is some type of reporting and an email notification option, so looks like Microsoft indeed has some work to do if it wants to continue developing Storage Spaces. Let me know your opinion or your experience with this in the comments area bellow.
Want content like this delivered right to your
email inbox?
More similar articles
 Configuring Hyper-V Replica in Windows Server 2012/R2
- Backing up Domain Controllers using Windows Server Backup and DPM
- Creating a Windows Server 2012 Failover Cluster
- Creating a DHCP Failover Cluster on Windows Server 2008 R2
- Configuring Live Migration on Hyper-V 2008 R2
- Creating a Windows Server 2008 R2 Failover Cluster
Excellent
This is another very well done tutorial!
Congrats,
Adrian
Thank you.