Patching ESX/ESXi hosts using VMware Update Manager
Even if you like it or not, ESX/ESXi hosts needs patching, to correct software errors, bugs, security holes or maybe to add some new features present in an update. That’s why patching VMware hosts is vital. In this guide I’ll show you how to patch your ESX/ESXi hosts that are not part of a VMware cluster using Update Manager. I will use version 5 of Update Manager as for the ESXi hosts, they are also version 5.
Before we start patching the hosts we need to configure the Update Manager. Open your VMware vCenter server, and on the Home page click the Update Manager icon.

In the Update Manager Administration page go to the Configuration tab. As you can see on the left we have some settings, and the first few of them I’m going to discuss them here.
Network connectivity – On this section you can change the ports on which clients and ESX/ESXi servers communicate with the Update Manager server. There is no point of doing that, not now anyway.

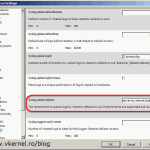
Download Settings
Direct connection to the Internet – If the Update Manager server has an internet connection you should choose this option to download patches from the VMware repository. This is the option I will use for this guide.
Use a share repository – This is for those that don’t have an internet connection on the Update Manager server, and they are using an internal web server to publish VMware patches. If you need more information about the shared repository you can find it here.
Use proxy – Use this only if your Update Manager server needs to pass trough a proxy server to connect to the internet. Is not the case here.
The rest of the settings are self-explanatory, so I’ll just leave them to you. Before we continue we need to select what type of updates are needed in the infrastructure. For example, I don’t have ESX 3.x hosts and vApps, so I’ll just clear the second and the last box. When you are done with your configuration hit the Apply button to save the changes. To start downloading the patches press the Download Now button.
By pressing the download button it will not start to download the patches only an index of them.

As soon as you click the download button, the patches index is downloaded.
![]()
When the process is done you can see all the available updates on the Patch Repository tab.

The next step is to create a Baseline, where we tell Update Manager what updates to download, and what type of updates to use for patching. Usually the default baselines are sufficient, but I just want to show you how to create one in case the existing ones are not right for your environment. Go to the Baseline and Groups tab and click the Create link.

Give the baseline a name and leave the default baseline type which is Host Patch.

If you go with the first option, future updates will not be included in this baseline and you will need to create a new baseline, or edit this one to include those updates. For this example I will go with Dynamic baselines, so future update will automatically be included in this baseline; no manual intervention is needed.

Choose the patch type you want to include in this baseline based on you ESX/ESXi hosts. I will include all updates type for ESXi 5 since I don’t have older versions of ESX hosts in my environment.

In this screen you can exclude some of the patches that you think your hosts don’t need.

Here you can add some fixed patches to the baseline, meaning they will be installed no mater how the baseline is updated by new patches. Remember ? we are creating a Dynamic baseline.

At the end you can see a summary of all the maid selections. Click the Finish button to create the baseline.

Looks like 26 updates are available based on my selections. Click the Compliance View link to go and attach this baseline to one or more ESXi hosts.

If you want to patch all the hosts in the datacenter at once, click the datacenter object in the Inventory pane. If you want to patch one server only, click the server object. I don’t recommend you patch all your hosts in the datacenter at once, especially if you are in a production environment because your VMs will stop, and clients will be unhappy. In this example I will patch them all at once since is a test environment. To star attaching a baseline to our hosts click the Attach link in the upper right corner.

In the Attach Baseline window select the baseline we created earlier then click the Attach button.

Now you can see what hosts in the datacenter (if you selected the datacenter object) are compliant or not. Looks like all my hosts in the datacenter need to be updated. To open the Remediate wizard click the Remediate button.
Remember, all your VMs will stop because the ESX/ESXi hosts need to be in maintenance mode before the actual patching begins. Move the VMs to another host if you are in a production environment.

Leave the defaults here and continue.

Here are the patches needed by the ESXi hosts. Click Next.

Give the remediate task a name and choose if you want to schedule the patching for a later time or do it now.

Since I choose to patch all my hosts in the datacenter I had to change the Power state option for my VMs, because no cluster is present and I don’t have other host’s to migrate them to. That’s OK its just a test environment.

At the Ready to Complete screen click the Finish button to start the patching process.

This is going to take a while, because those patches need to be downloaded from the VMware repository.


Your ESXi hosts will reboot a couple of times maybe, depends on the updates.

When everything is finished you hosts will be automatically be taken out of maintenance mode and VMs will be powered on. Off course hosts should be in compliance now.


Want content like this delivered right to your
email inbox?
More similar articles
 Build and run Windows Failover Clusters on VMware ESXi
- Upgrading from VCSA 5.x to VCSA 6.0 with an Embedded Platform Service Controller (PSC)
- Deploying the VMware vCenter 6.0 Appliance (VCSA) with an Embedded Platform Service Controller (PSC)
- Adding a Raw Device Mapping (RDM) to a Virtual Machine
- Deploying and Configuring VMware vCenter Server Appliance 5.x
- Configure Syslog on ESXi 5.x Hosts