Extending a VMware Virtual Machine disk (VMDK) in ESXi
There are times when the virtual disks of your VMs needs to be increased. The operation is simple and most of the times the server does not need to be shut down; but it depends on the OS running on that VM. And yes…you can add another disk to the VM and create spanned disks, but those are kinda dangerous; if one of them is missing you can’t read the data from the other one. Plus spanned disks can’t be used for the system volume.
For this guide I have an ESXi 5.0 server that is hosting two VMs, one is running Windows 2003 server and the other one Windows 7. The ESXi host is joined to a vCenter infrastructure, but this is not necessary. You can connect to your ESXi host directly (with the vSphere Client) if you don’t have vCenter. Now let’s increase some virtual disks, and I’m going to start with the 2003 machine.
Right-click the VM and choose Edit Settings.

Click the disk that you want to expand and type the new size in the Provisioned Size box. If you want a 60 GB drive just type 60 GB. For example, I have a 40 GB drive on this VM, and I want to extend it at 60 GB. I will type 60 GB in the box, not 20 which is difference. Click OK when your done.

Since this is a 2003 machine you don’t have the option to expand the disk without using third-party software.

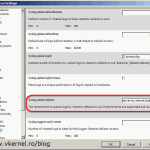
So I’ve downloaded this free partition tool that supports the Windows server edition and extended my volume. Just right-click the C volume and choose Resize Partition.

Drag the slide to the right to use all the available space. Click OK, then hit the Apply button from the top.

When the Pending Operations screen appears, click Proceed.

If the operation succeeded open Disk Management and take a look at the volume. It should be in his full size now.

It’s time to take care of that Windows 7 machine too. Repeat the steps above on how to increase the disk, then open Disk Management in the Windows 7 machine, right-click the C volume and choose Extend Volume. As you can see in Windows 7 we don’t need to use third-party software any more, actually this stared from Windows Vista.

Click Next to skip the Welcome screen.

Leave the defaults here to use all the available free space.

Click Finish to commit the changes.

Now the volume is extended from 40 GB to 60 GB.

Want content like this delivered right to your
email inbox?
More similar articles
 Build and run Windows Failover Clusters on VMware ESXi
- Upgrading from VCSA 5.x to VCSA 6.0 with an Embedded Platform Service Controller (PSC)
- Deploying the VMware vCenter 6.0 Appliance (VCSA) with an Embedded Platform Service Controller (PSC)
- Adding a Raw Device Mapping (RDM) to a Virtual Machine
- Deploying and Configuring VMware vCenter Server Appliance 5.x
- Configure Syslog on ESXi 5.x Hosts