Creating and working with VMware vCenter profiles – Part1
If you are like me and want to automate tasks so you don’t have to click ’till your hand hurts, then believe me vCenter profiles can do that for you. What actually does is creating a profile (network settings, domain settings, firewall configuration etc) from an already configured server and apply that profile to servers you want. After the profile is created you can customize it further. Let’s say you want to open a security port on ten ESXi servers. I don’t think is fun to go on every one of those servers an configure the firewall, instead you can create a profile and apply that profile to those servers.
The version of ESXi and vCenter is 5 for this demonstration, and ESXi servers are already added to vCenter, so let’s get started.
Before we start creating profiles, go to one of you ESXi servers and change a configuration that you want to be applied to all ESXi servers. Once, I had a case at work where I needed to create multiple networks on every ESXi server in the datacenter; so I created the new network on one ESXi server, created the profile then deploy that profile to multiple hosts. In this example I’m going to deploy a new network to all servers; ESX1.vkernel.local is already configured with the new network called New Network. For this to work all your ESXi hosts need to have multiple network cards.

Open your vCenter console and go to Host Profiles, by choosing Home then click on the Host Profiles icon, or from the View menu > Management > Host Profiles.


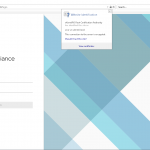
Here click on the Create Profile button at the top, and Create Profile Wizard will pop-up. Let the default setting Create Profile from existing host and click Next.

Choose the server from witch the wizard should build a profile. In this case is ESX1.vkernel.local

Give the profile a name and click Next.

To build the profile click Finish.

After the profile is created we need to attach it to hosts, so right click the profile you just made and select Attach Host/Cluster…

Attach the servers you want to be configure using the this profile and click OK.

On the Hosts and Clusters tab select all the servers, then right click and Check for compliance.
 As you can see all serves except ESX1 are non-compliant, and that’s because ESX1 is already configured with the specified network that the profile has.

Now right click on those servers and choose Enter Maintenance Mode, because we can’t apply a profile until hosts are in maintenance mode. The next step is to right click on every one of the hosts and choose Apply Profile. The bad news is that you can’t select all the servers in the list and apply the profile only once, you need to right click on every one of them and choose Apply Profile; I know…I don’t like it either.

When all hosts are configured, after a few second you will see a green check mark right next to the host, meaning the host is compliant now. To verify that indeed changes took place, go to every one of those servers and see if the network was created. Ooo don’ t forget to exit maintenance mode after you finish. Just select all servers in the Hosts and Cluster list, right click and choose Exit Maintenance Mode.


Want content like this delivered right to your
email inbox?
More similar articles
 Patching the vCenter Server and PSC Virtual Appliance
- Removing vCenter or PSC from Linked Mode configuration
- Repointing Embedded vCenter Server to existing SSO domain
- Backup and Restore the vCenter Server Appliance by using its Management Interface
- VMware vCenter Enhanced Linked Mode configuration
- Replace VMware VCSA 6.x Certificates with ADCS Certificates via the GUI