Creating and Using VMware Guest Customization Specification
I know many of you deploy a lot of VMs in you VMware Infrastructure. Been there, and still doing that. I also know that most of you are using PowerCLI to automate the deployments to make time for some reading; but there are things that need to be done in the guest OS during the deployment and after. Things like: sysprep, naming the guest, join it to a domain etc. If you have vCenter you are a lucky man, if not you will need to use the unattended.xml file method, the MDT deployment method (not practical in a virtual environment) or other scripts to get this done. In vCenter you can create a so called Virtual Machine Guest Customization Specification, by using a simple wizard and apply it to your VMs during cloning. This way a set of scripts are injected into those VMs that are in a cloning process that makes all the things I mentioned earlier. You can do this with Linux guests and off course Windows, which I will cover in this article. Now let’s see how it’s done. I will start building the customization for Windows 8.1 and Server 2012 R2 but applies to Windows Vista/7/2008/R2 also, then I’ll continue with the customization for Windows XP and Server 2003. For systems older than Windows Vista (XP/2003/200) a few more things need to be done in order for this to work.
I presume you already have at least a template or VM running Windows 8/2012/7/2008, if not, go ahead and build one.
[important]As a tip, create the template so the user will not autologon. I noticed the customization works much better this way.[/important]
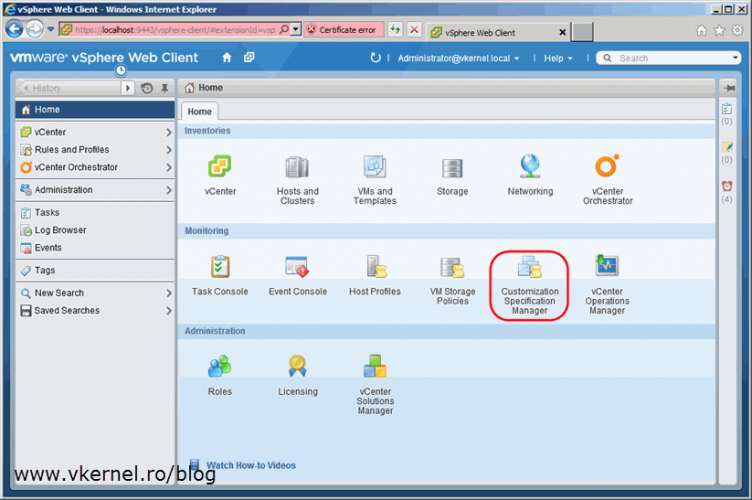
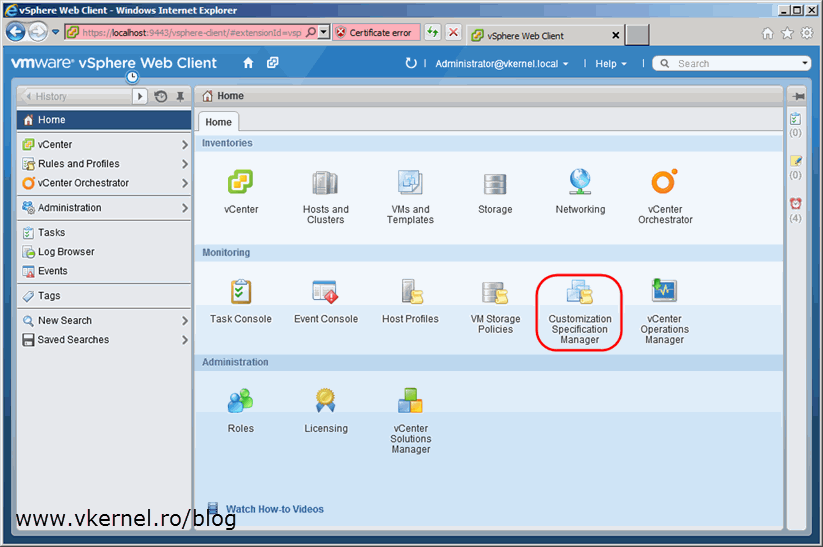
Now from the Home page of your vCenter Web Interface click the Customization Specification Manager icon.
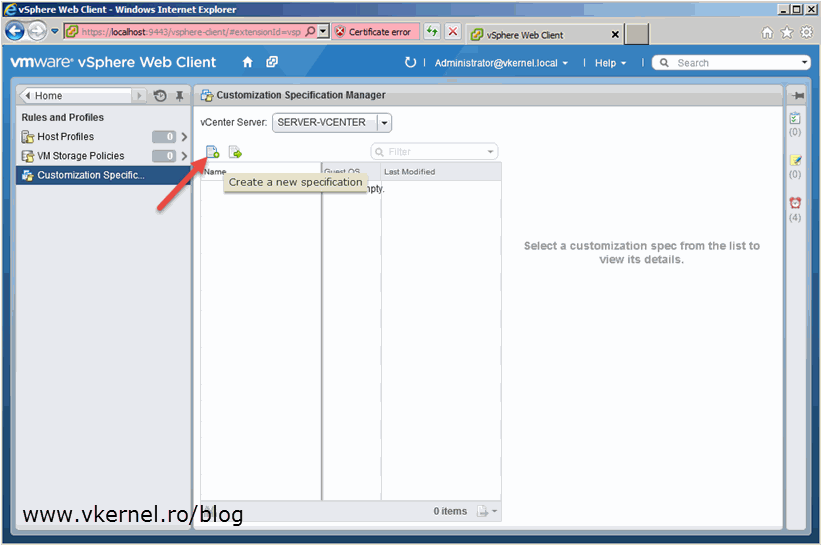
Once in the Customization Specification Manager page click the Create a new specification button. It’s small and kinda hidden, but you will find it.
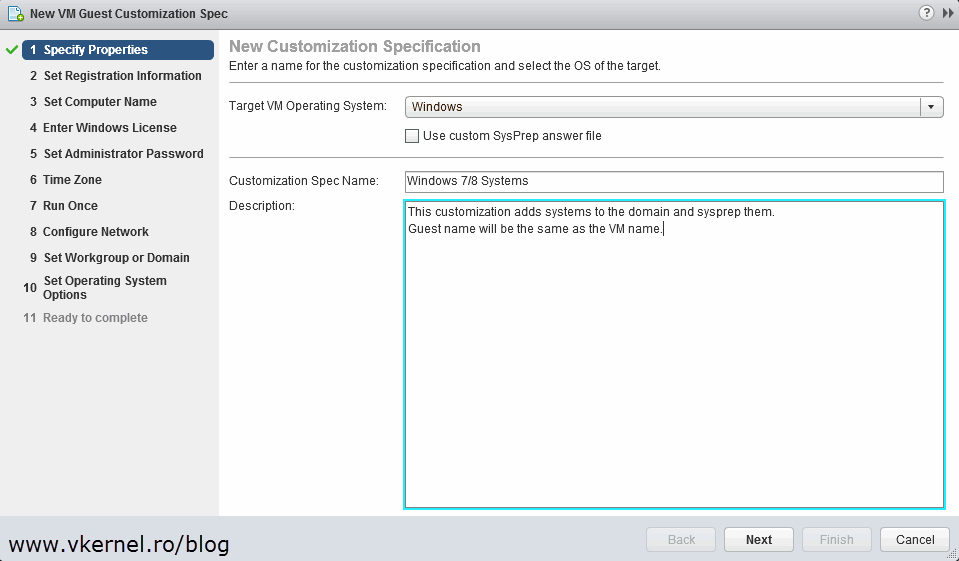
On the first page of the wizard you need to give the customization specification a name and optionally a description. You also have the choice to provide a custom answer file. For now don’t select this option, just continue the wizard.
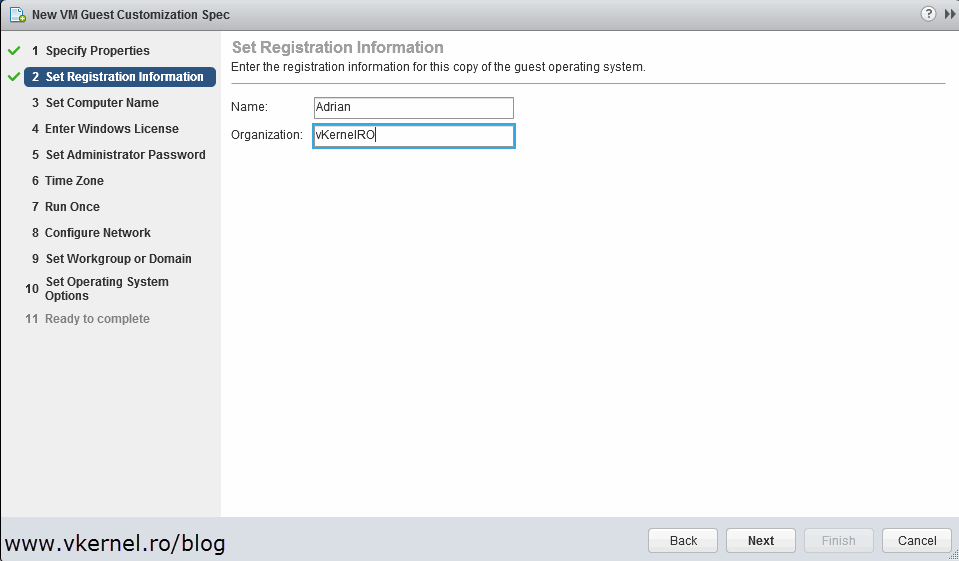
Provide your registration information and click Next.
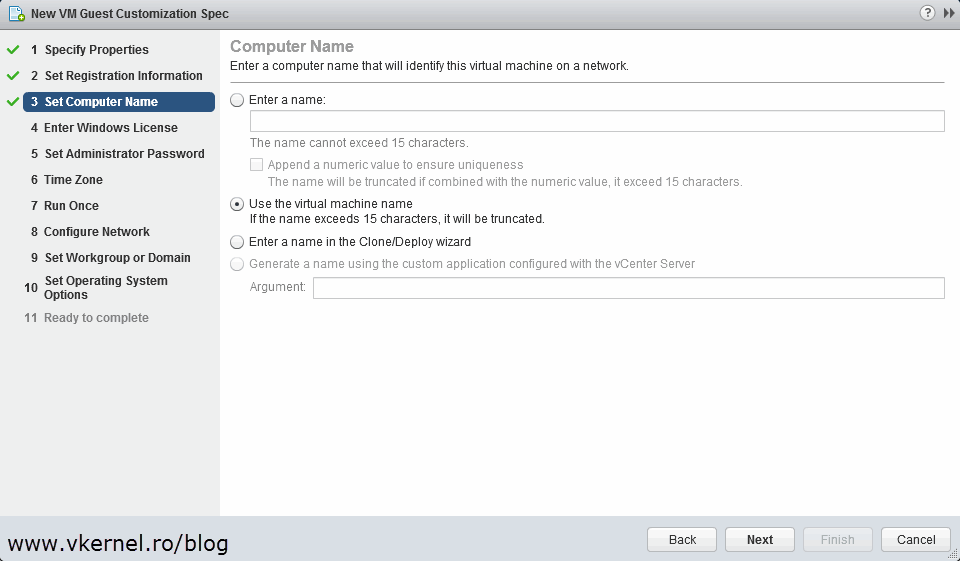
Now this is a very cool feature. How many times you wanted your VMs to have the same name as the guest OS, or vice-versa? You can set this here by selecting the Use the virtual machine name radio button. I think 99% of the time you will want to use this option, so you can find a server much easier and not keep a log of your VMs in some Excel spreadsheet. Choose the way you wanna go and continue the wizard.
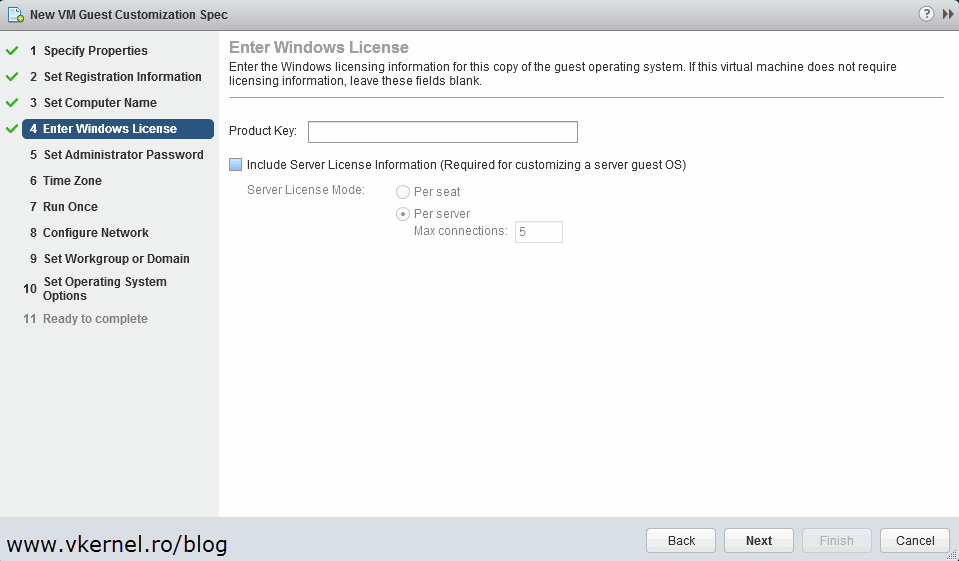
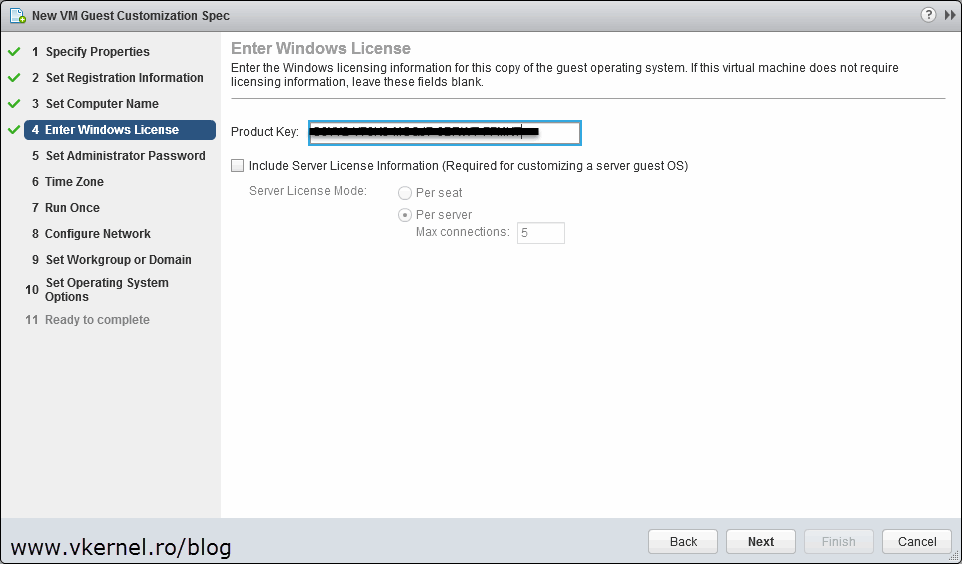
The Product Key box is very obvious, but if you are using a KMS server for activation you don’t have to type a key here (it all depends on your licensing agreement). The key is already installed in the OS (Windows Vista and above). During server base systems installations you will have to provide the maximum number of simultaneous connections for the server to accept (licensing mode). The Include Server License Information (Required for customizing a server based OS) box is just for that, and it will provide the information for you during deployments with the settings you specify here. I usually leave this alone and configure the server afterwords, since there are more stuff involved.
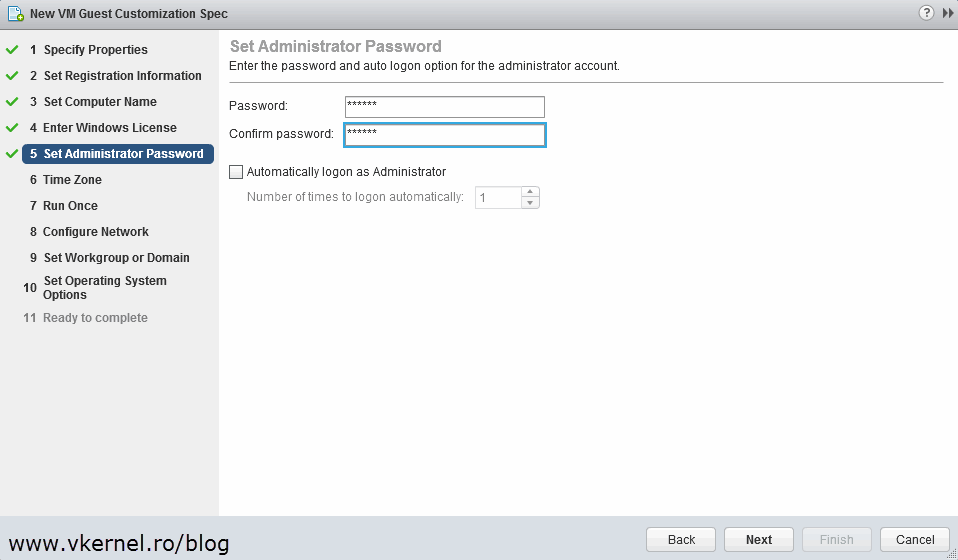
Here, type what password you want to be set for the local Administrator account and if you want it to autologon.
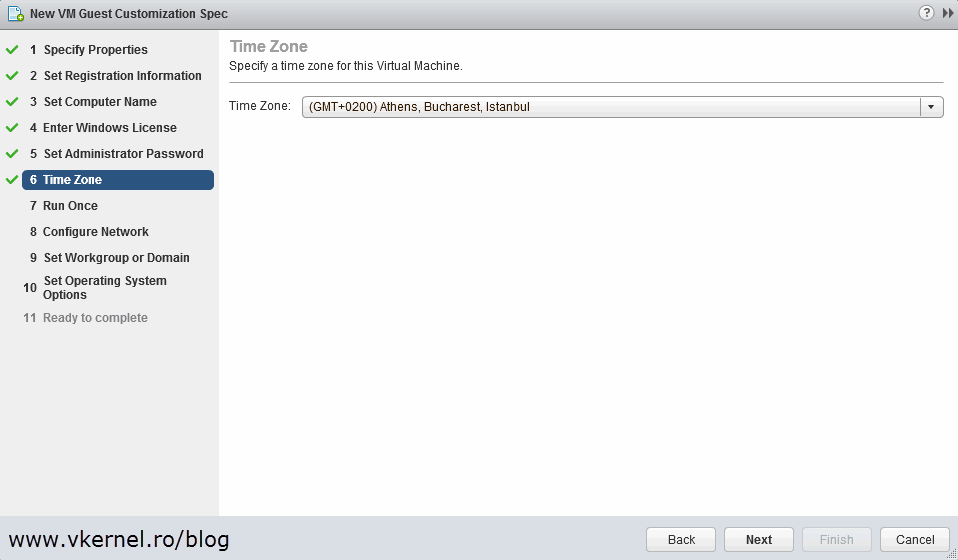
Select your time zone and continue.
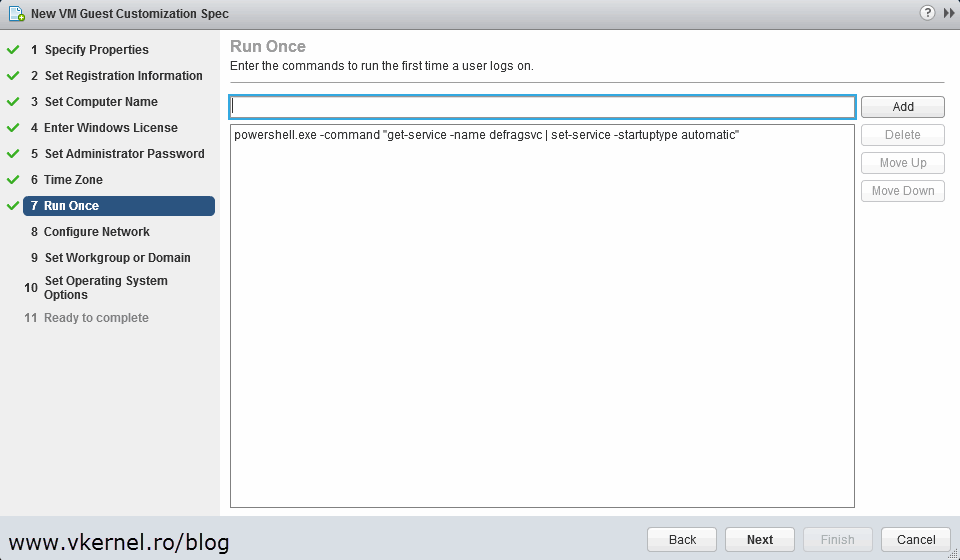
If you need to run some commands on the first log on, put them here and when your done click Next.
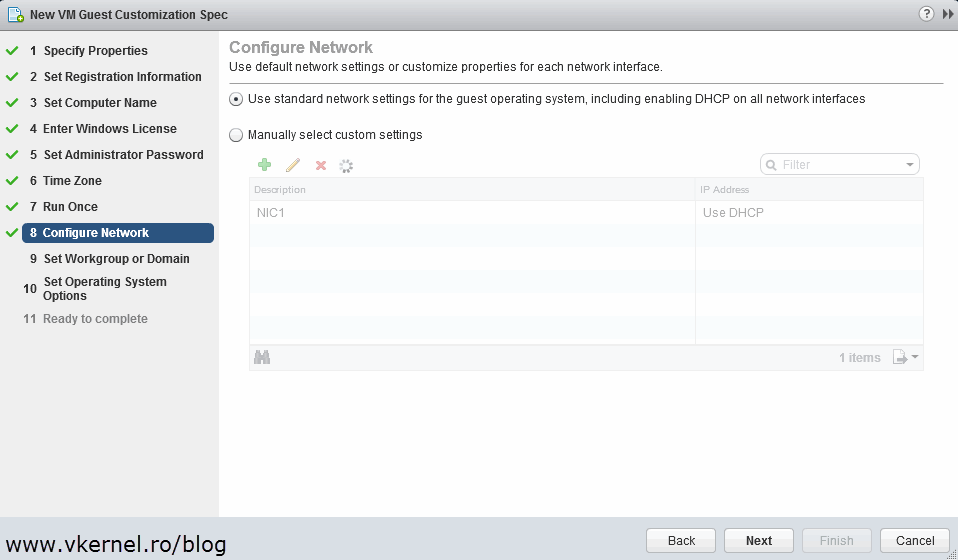
On the Configure Network page you have the option to set a static IP or use DHCP. The preferable approach is off course DHCP, but there are situations when you need to have static IP addresses for your VMs. In that case go with the second option Manually select custom settings.
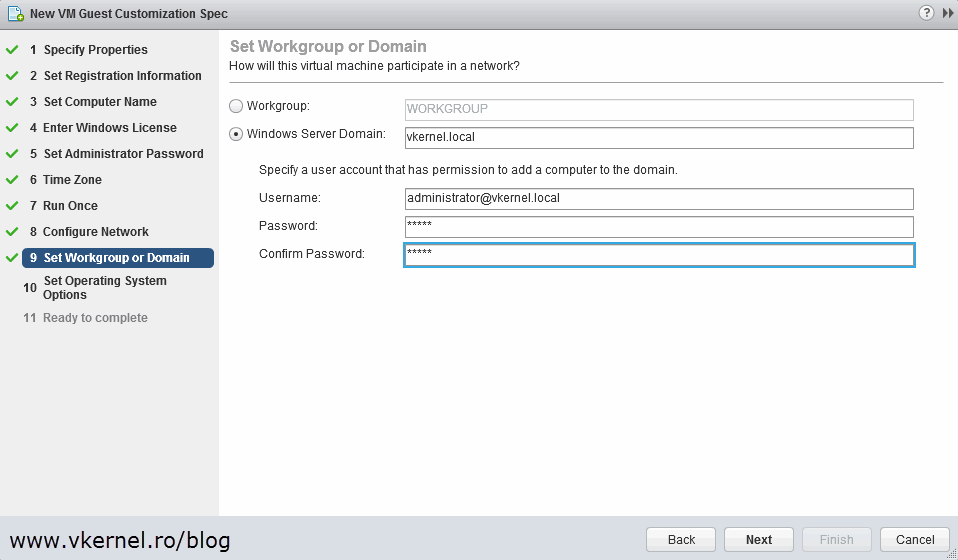
This is another helpful page. You can add your VMs to your domain only by completing these boxes with the necessary information. The account that you put here needs to have proper permissions (create objects) in Active Directory. For systems starting with Windows Vista you need to use the FQDN (vkernel.local) to join the VMs to the domain and the UPN (username @domain.local). It is not going to work if you type the username in the form domain\username; tried it for many times, and every time it failed. More information you can read the VMware KB 1012314.
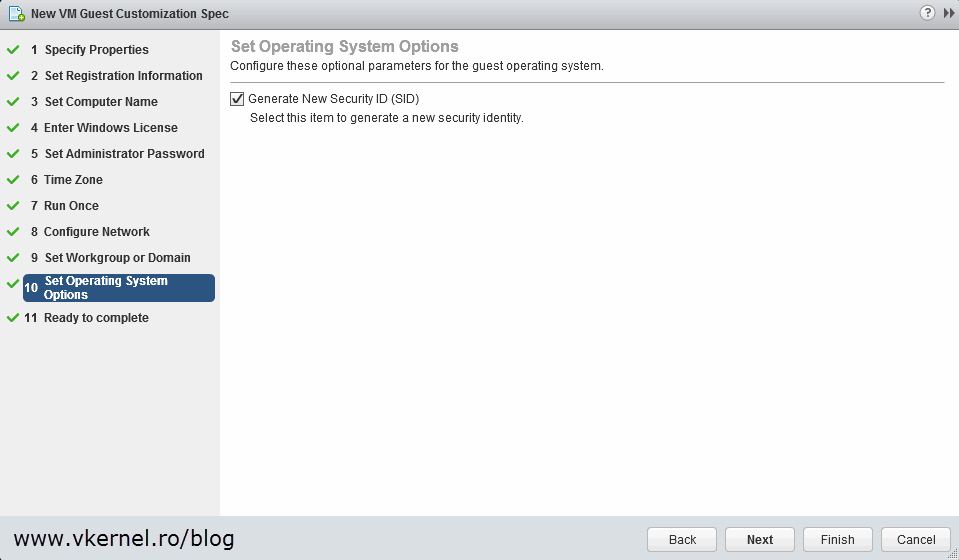
And finally the generate new SID option. If you want your VMs to be sysprepped (recommended) all you have to do is check this box.
[important]For systems older then Windows Vista and Server 2008 simply by checking this box is not going to work. A few more stuff need to be done before launching this wizard, stuff that I’ll cover later in the article.[/important]
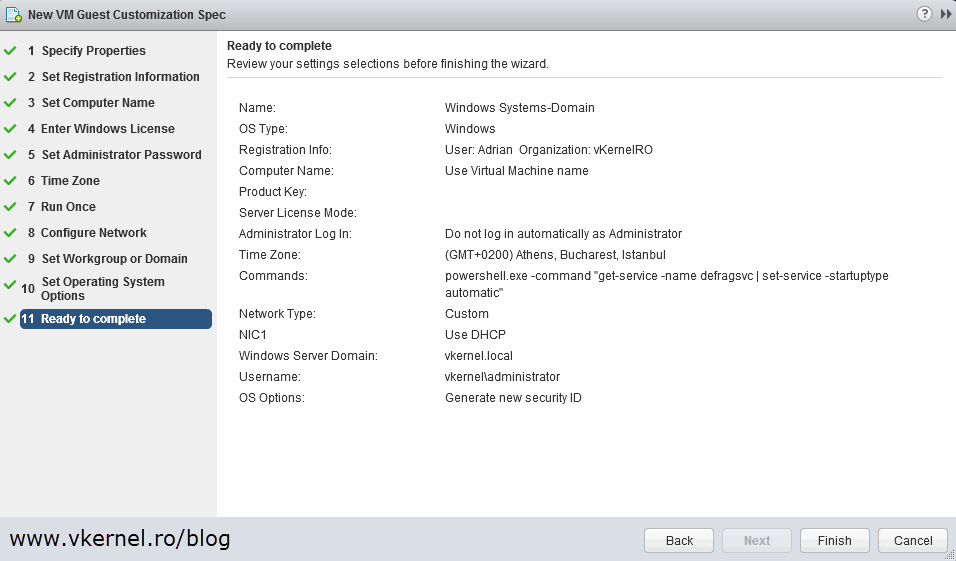
On the Ready to complete page just click Finish to create the customization specification.
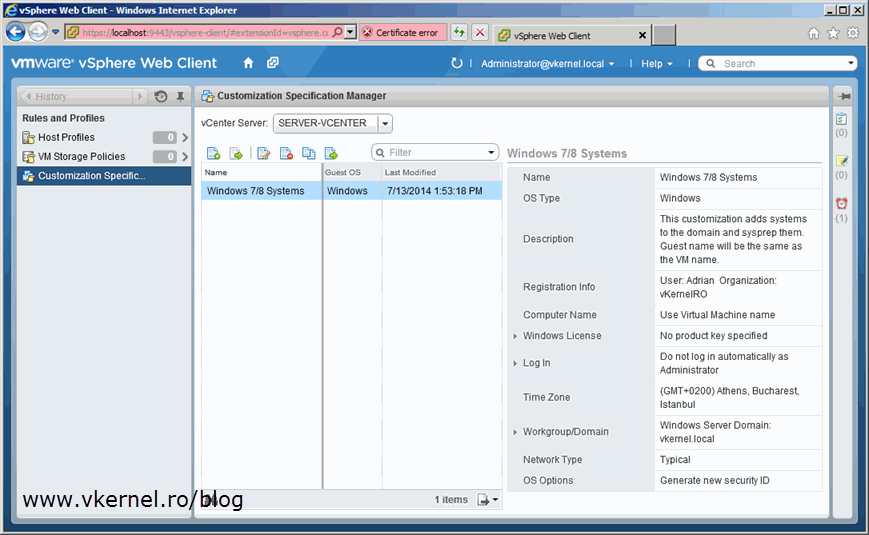
An you should see your newly created customization specification in the Customization Specification Manager page.
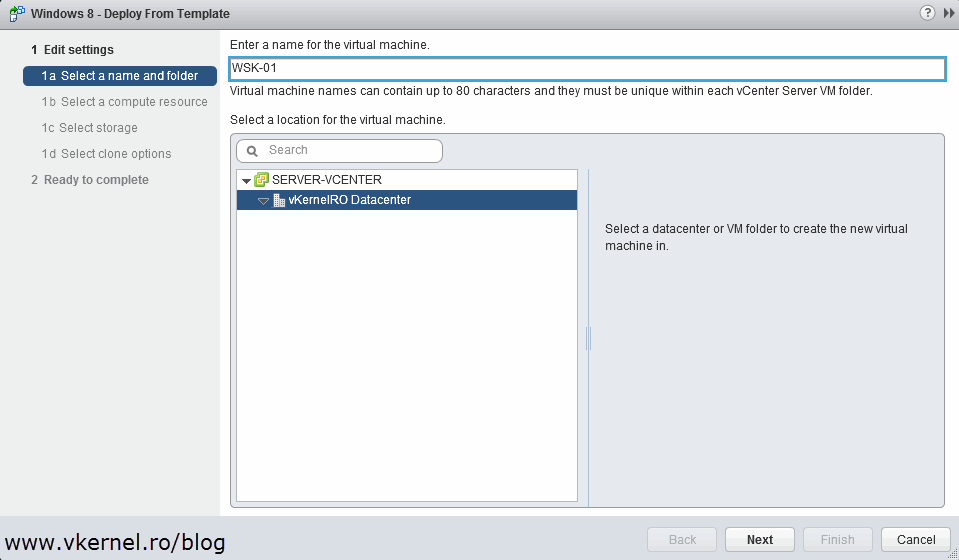
Now when you deploy a VM you can use the already created customization specification.
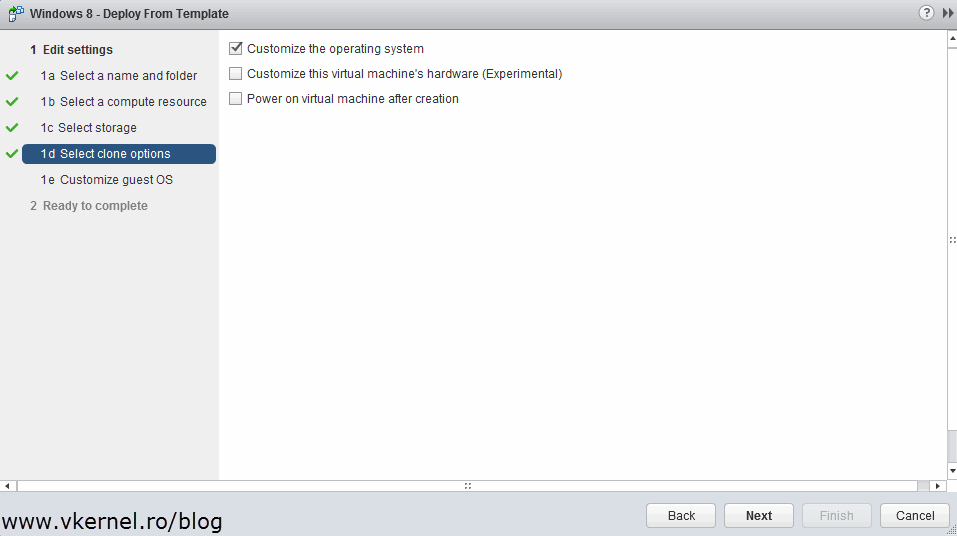
On the Select clone options page check the Customize the operating system box and click Next.
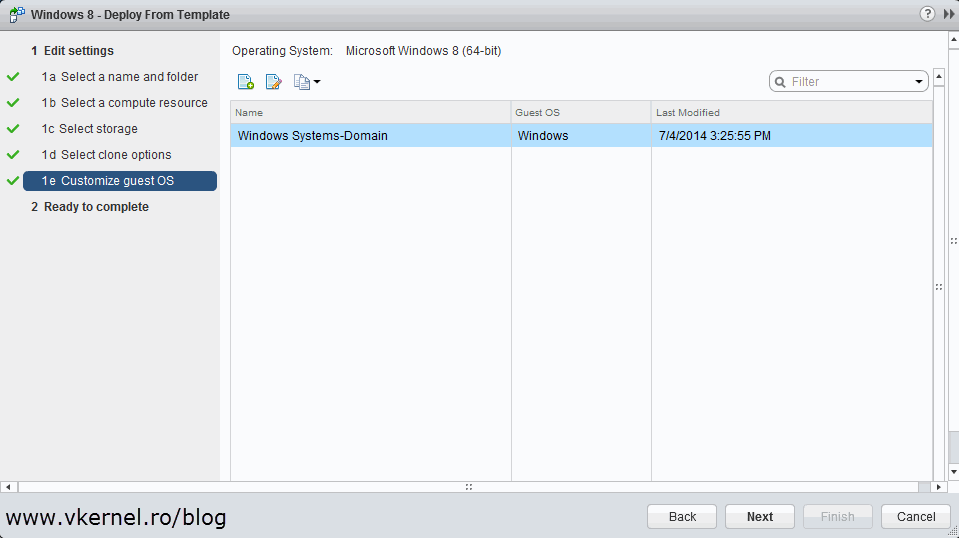
From the list, select the customization specification that we created earlier, then continue the wizard. As you can see, a customization specification can also be created directly from this wizard, by clicking the Create a new specification button.
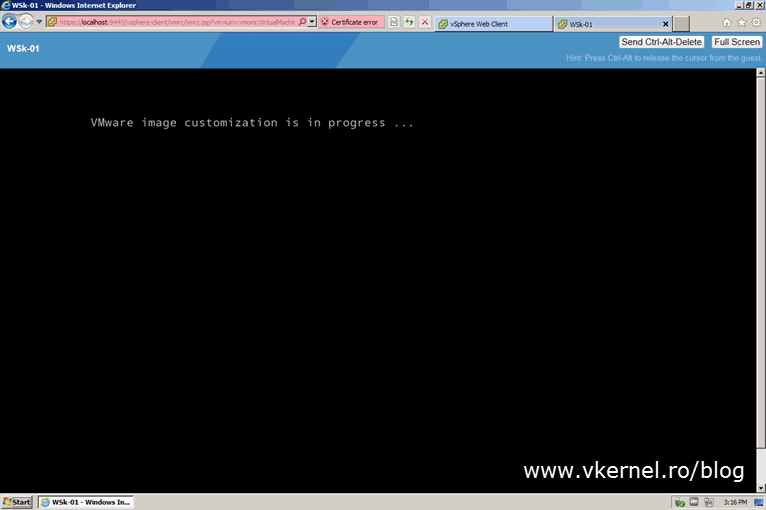
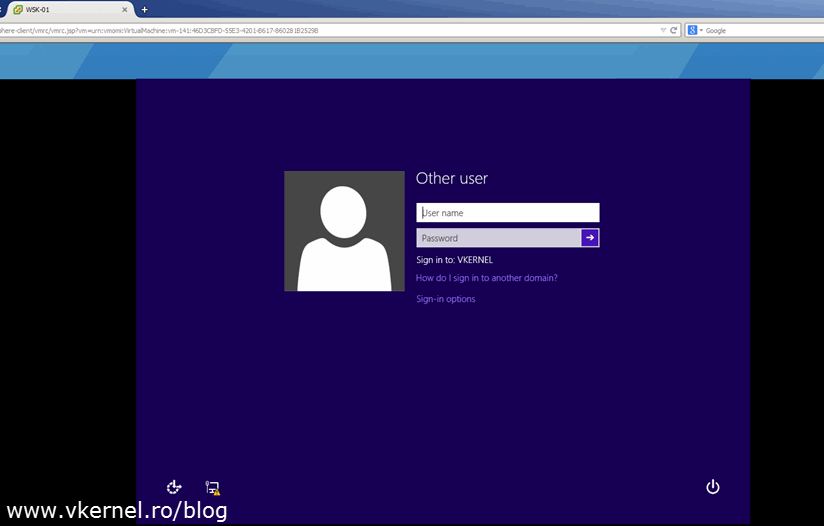
Now, when you power on the VM it will start normally, but after a few seconds the VM will automatically restart and when it boots up it should enter in the customization process.
[important]If you are deploying Windows 8 or Server 2012 the VM might need to restart for a second time until it enters the customization process. This is a known bug from VMware that is present in vCenter 5.5 for Windows 8.1 and Server 2012 R2 guest OSs.[/important]
After the VM finally boots up the guest should be sysprepped, it should have the same name as the VM and it should be added to the local domain. This is exactly what we wanted for this VM.
If you are still deploying Windows XP (even tough it’s support ended) or Server 2003 just by running the customization wizard won’t do it. The sysprep files need to be copied in a VMware folder on the vCenter server. This is because Windows 2000/XP/2003 don’t have the sysprep files part of the OS like Windows Vista/7/8 have. You have to provide those files, so go at Microsoft and download the sysprep files that matches your OS (taken from VMware KB 1005593):
[notice]Microsoft started taken out links for some of the bellow products since the support ended for them, and if that’s the case you will have to search for an alternative download source.[/notice]
| Windows Version | Sysprep Directory | Sysprep Version |
|
Windows 2000 Server SP4 with Update Rollup 1
The updated Deployment Tools are available in the Support\Tools\Deploy.cab file on the Windows 2000 SP4 CD-ROM
|
directory_path\2k | 5.0.2195.2104 |
|
Windows XP Pro SP2
Download at
|
directory_path\xp | 5.1.2600.2180 |
|
Windows 2003 Server SP1
Download at
|
directory_path\svr2003 |
5.2.3790.1830
(srv03_sp1_rtm.050324-1447)
|
|
Windows 2003 Server SP2
Download at
|
directory_path\svr2003 |
5.2.3790.3959
(srv03_sp2_rtm.070216-1710)
|
| Windows 2003 Server R2 Download at
|
directory_path\svr2003 |
5.2.3790.3959
(srv03_sp2_rtm.070216-1710)
|
| Windows 2003 x64 Download at http://www.microsoft.com/en-us/download/details.aspx?id=8287 |
directory_path\svr2003-64 |
5.2.3790.3959
(srv03_sp2_rtm.070216-1710)
|
| Windows XP x64 Download at http://www.microsoft.com/en-us/download/details.aspx?id=8287 |
directory_path\xp-64 |
5.2.3790.3959
(srv03_sp2_rtm.070216-1710)
|
|
Windows XP Pro SP3
Download at
vKernelRO Internal download (not available on Microsoft’s website anymore)
|
directory_path\xp | 5.1.2600.5512 |
|
Windows Vista
System Preparation tools are built into the Windows Vista operating system and do not have to be downloaded.
|
Not Applicable | Not Applicable |
|
Windows Server 2008
System Preparation tools are built into the Windows Server 2008 operating system and do not have to be downloaded.
|
Not Applicable | Not Applicable |
|
Windows Server 2008 R2
System Preparation tools are built into the Windows Server 2008 R2 operating system and do not have to be downloaded.
|
Not Applicable | Not Applicable |
| Windows 7 System Preparation tools are built into the Windows 7 operating system and do not have to be downloaded.
|
Not Applicable | Not Applicable |
| Windows 8 System Preparation tools are built into the Windows 8 operating system and do not have to be downloaded.
|
Not Applicable | Not Applicable |
| Windows Server 2012 System Preparation tools are built into the Windows Server 2012 operating system and do not have to be downloaded.
|
Not Applicable | Not Applicable |
| vCenter Server Virtual Appliance 5.x | /etc/vmware-vpx/sysprep/ | Not Applicable |
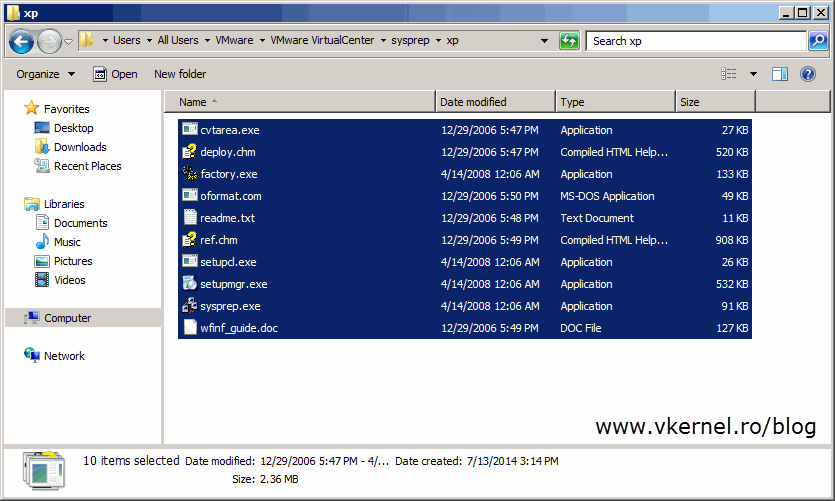
Once downloaded go to %ALLUSERSPROFILE%\VMware\VMware VirtualCenter\Sysprep and unpack the cab archive to the appropriate folder. For this example I used the deploy.cab for Windows XP 32bit, since this is the OS that I want to deploy.
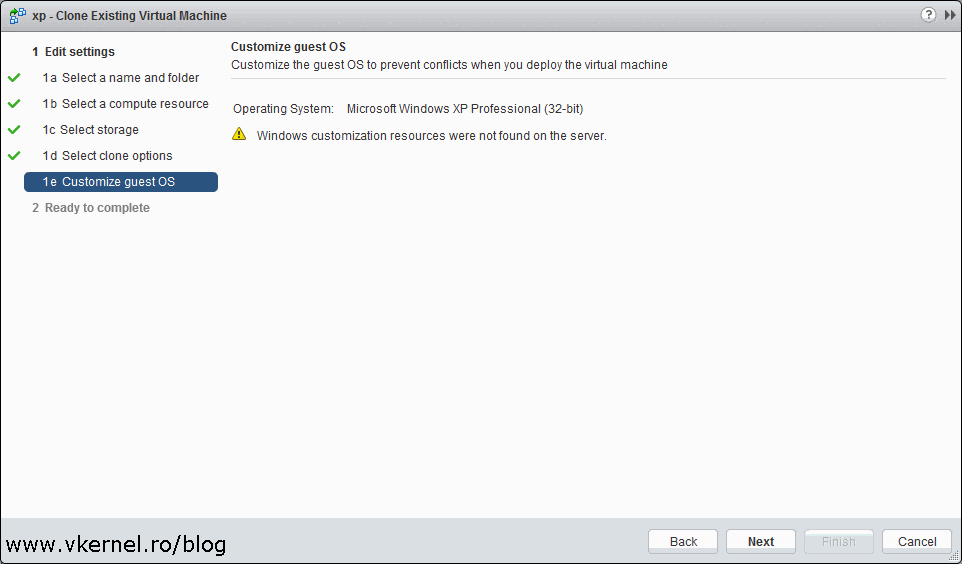
Update 08/feb/2016 – If you are running vCenter 6.x you will have to manually create the VMware VirtualCenter\Sysprep directories in the %ALLUSERSPROFILE%\VMware\ folder or you will get the bellow message during virtual machine deployment:
Windows customization resources were not found on the server.
Now you can go ahead and create a guest customization specification, but this time you will have to provide a product key or the wizard will stop during deployment.
Another important thing is if you want your Windows XP/2003 systems to be joined to the domain you have to use the NETBIOS name of the domain here. Is different from Windows Vista/7/8 where you need to provide the FQDN of the domain. The credentials need to be specified in the form domain\username. More info can be found at VMware KB 1012314.
All you have to do now is deploy a VM from a template and use the customization specification you created for Windows XP/2003.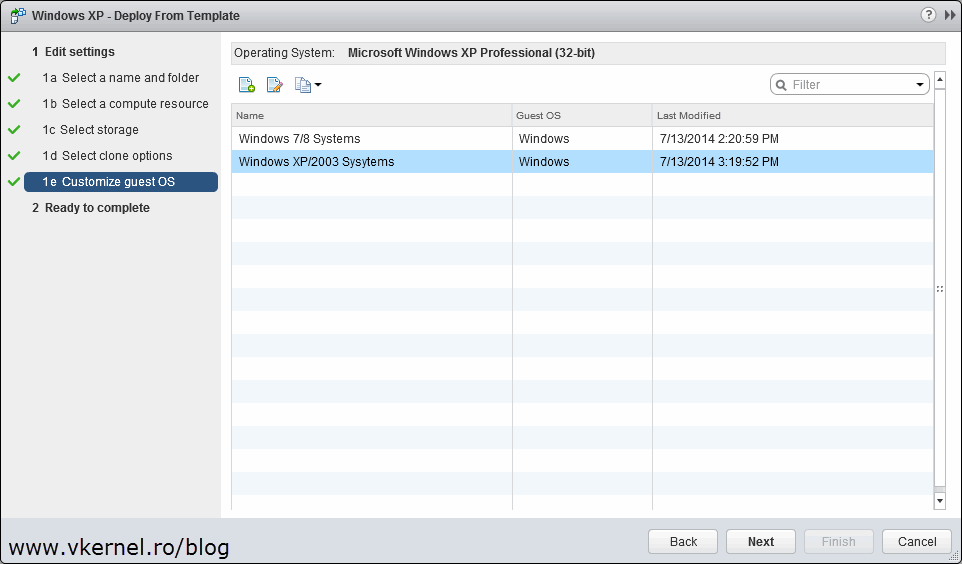
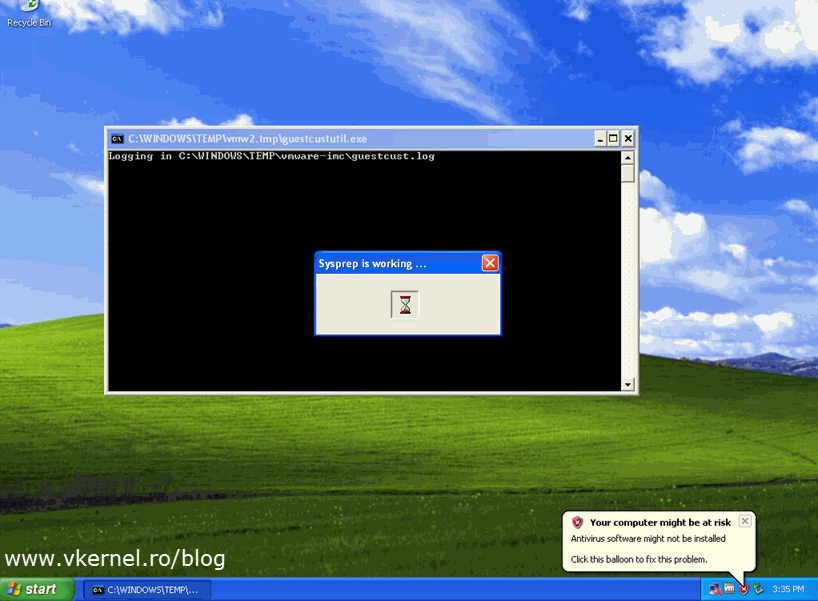
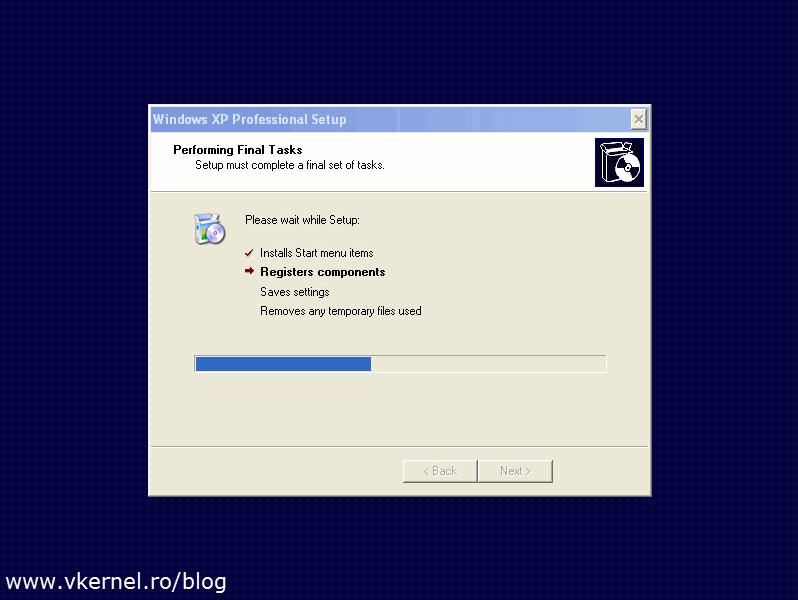
Let the tool do it’s job. As you can see the first thing it does its sysprepping the system then reboots and set the guest as specified in the customization specification wizard. At the end you should have your OS deployed, renamed and joined to the domain.
Using the VMware guest customization specification is a great a simple way to deploy systems in you virtual environment. To automate this all you have to do is add the -OSCustomizationSpec parameter to your automation script. Here is an example:
New-VM -Name 'WSK-02' -Template 'Windows XP' -VMHost 'ESX1.vkernel.local' -Datastore 'Storage1_iSCSI' -OSCustomizationSpec 'Windows XP/2003 Systems'
Want content like this delivered right to your
email inbox?

Have you had any success with Windows 10 Customization Specifications? I have tried using a similar spec to my Windows 7 VMs for use with Horizon View with no luck. The VMs are created, but the customization fails, with no errors stated. In my View Administration console the VMs error after a few hours of sitting there “customizing”.
thanks in advance for any advice.
Rich
So sorry for the late response. To answer your question, no, never had any problems with customizations on Windows 10, but I’m not using Horizon. If I do a simple machine clone and set to customize it, it works great. Try doing that, then use Horizon.
Thank you very much for this great article.
One thing isn’t clear.
Microsoft and VMware clearly states that Sysprep is the only method that is supported by Microsoft, it’s not clear whether or not we should generate a new SID with the wizard.
Reference:
http://kb.vmware.com/kb/1000528
Hi,
Generating a new SID is recommended so you don’t have problems later with duplicate SIDs. Also if you don’t choose the option to generate a new SID you can’t rename the guest or join it to the domain from what I remember (using the Guest Customization). For a production environment I highly recommend you do it.
Thank you for your comment.
I’m a little confused. Please try to enlighten my understanding.
On the one hand, VMware states in their KB that “To change a SID, you must use the Windows utility Sysprep”.
On the other hand, they give us an option in the wizard to change the SID. They also give us the ChangeSid parameter in their New-OSCustomizationSpec PowerCLI cmdlet.
So it seems to me that they’re contradicting themselves.
Either way, the problem is that I’m not sure if it’s enough to generate a new SID with the wizard (or the cmdlet), or if we should run Sysprep manually even after using the wizard.
I check the sysprep logs (%windir%\System32\sysprep\Panther) and saw that sysprep run in respecialize mode – so it’s looking OK. I’m just not sure that it’s enough or if we should run sysprep manually.
Thank you!
Reference
Windows SID needs to be changed after copying a virtual machine directory (1000528)
http://kb.vmware.com/kb/1000528
vSphere PowerCLI Reference | New-OSCustomizationSpec
https://pubs.vmware.com/vsphere-60/index.jsp?topic=%2Fcom.vmware.powercli.cmdletref.doc%2FNew-OSCustomizationSpec.html
Sysprep (System Preparation) Overview
https://technet.microsoft.com/en-us/library/hh825209.aspx
Hi,
What VMware is telling there is that they don’t have a tool or something integrated into the wizard to change the computer SID, they are using the Sysprep utility for that. It is your job to provide the Sysprep tool in order for the Guest Customization Specification wizard to use. You don’t have to run the Sysprep utility manually, instead you need to put in the right folder (as said in the article) if you have Windows XP. If you are running Windows Vista and above, you don’t need to worry about that, the Sysprep utility is already present in the OS.
Just read the article one more time and some same labs, you will master it in a few days. Let me know if you need more help.
Adrian
very helpful notes for quick deployment of vm.
Good article thank you.