Configuring networks in VMware Workstation
If you are using VMware Workstation you will definitely came to the point where you need to configure or create new virtual networks. Is not science, but if don’t understand how is working you’re in a bit of trouble creating proper labs and working with them.
For this guide I’m using VMware Workstation 9 which is the latest version at the time of this writing. After you install the product, you have three virtual networks already preconfigured: the Bridged, the Host-only and the NAT network.
The Bridged network is the one that connects your virtual machines to the physical network adapter on the host (the PC where VMware Workstation is installed). Those VMs will be part of the same network subnet as your host; is like they are connected to the same switch, only that the switch is virtual. To illustrate this better, let’s say your home network has a subnet of 192.168.0.x. When you connect a VM to the Bridged network, that VM will have an IP from the same subnet (192.168.0.x), if you have DHCP, if not you will have to configure the VM IP address manually. This is one of the most common virtual network choice among VMware Workstation users, because is easy to set up and you have access to your physical network without further configurations.
The Host-only network connects your VMs and the host into a private network. By connecting to this type of network your VMs will not have access to internet or the local area network; they can communicate only with the host. To be able to do that, a DHCP server integrated into VMware Workstation will assign IP addresses to those VMs.
The last network, “NAT” creates a private IP network between your VMs and the host. IP addresses are assigned by the virtual DHCP server to the VMs. You can use this type of network when you don’t want the VMs to have direct access to the local network (the one the host is part of), but still can access it by IP.
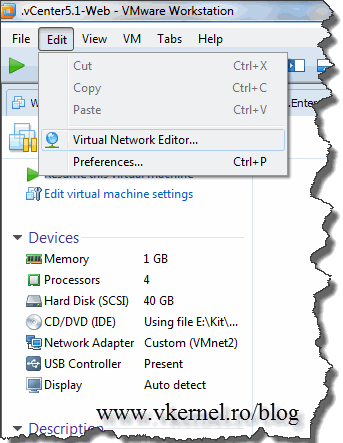
To configure or modify this virtual networks go to the Edit menu and choose Virtual Network Editor.
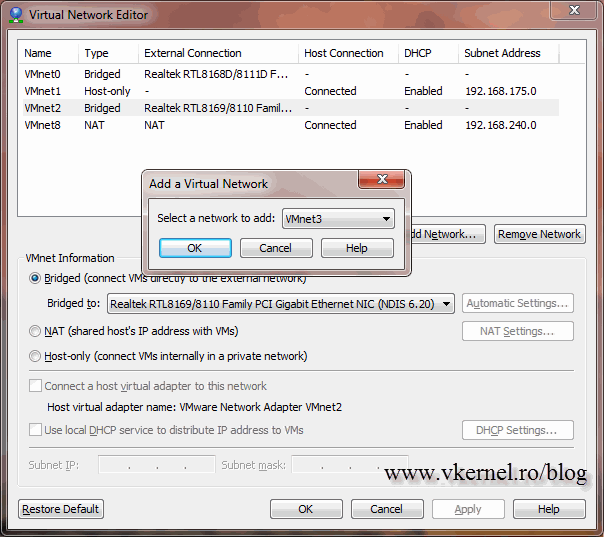
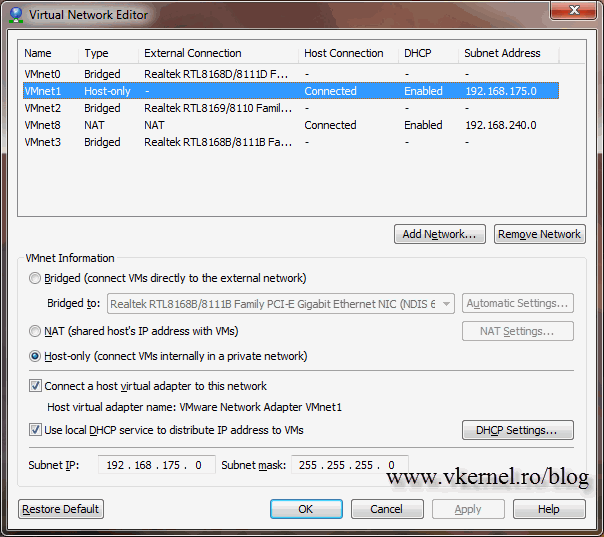
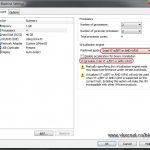
Here you can add, remove and change virtual networks configuration as you want. On my VMware Workstation, as you can see I have three Bridged networks, since I have three physical network adapters in my host PC. If you are wondering why, I can explain; to connect VMs to my second host in case resources are not enough on the first one. In the VMnet Information section you can change the type of network, so from a Bridged one you can make a Host-only or a NAT network.
I’m going to remove on of these and recreate it, just to show you how is done. Now I have a spare physical network adapter on my host. To create a Bridged network just click the Add Network button, and from the list select the network name. I will use VMnet3 since is next in my list, but you can choose whatever network name you want. Click OK.
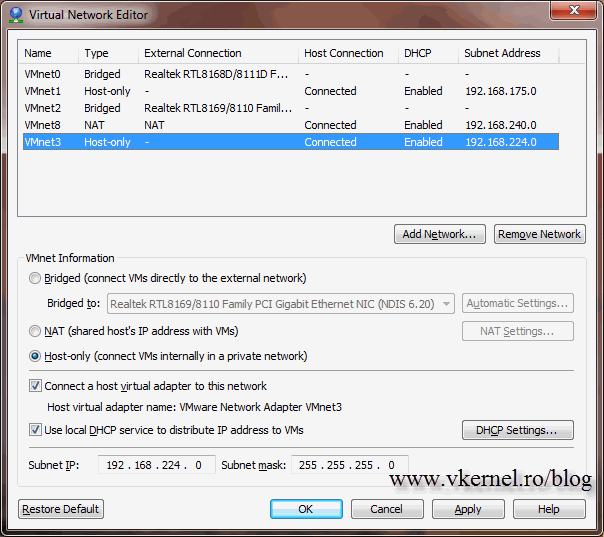
By default the Virtual Network Editor is configuring this network to Host-only, but we want to change that. Click on the Bridged radio button and from the list select the physical adapter you want to bridge this network to. Even tough I have three physical network adapters on my host, only one shows in this list. This is because the other two are already assigned to a virtual network. When you’re done click OK.
If you don’t like the IP class the virtual DHCP is assigning to VMs on the NAT network you can change it. Click the NAT network and on the Subnet IP boxes type you desired IP class then click OK. As you can see, you can also stop the virtual DHCP server by removing the check from the Use local DHCP service to distribute IP addresses to VMs box.
By clicking the DHCP Settings button you get more options. The lease time can be changed for the addresses that the DHCP server is distributing to VMs. I usually leave this alone.
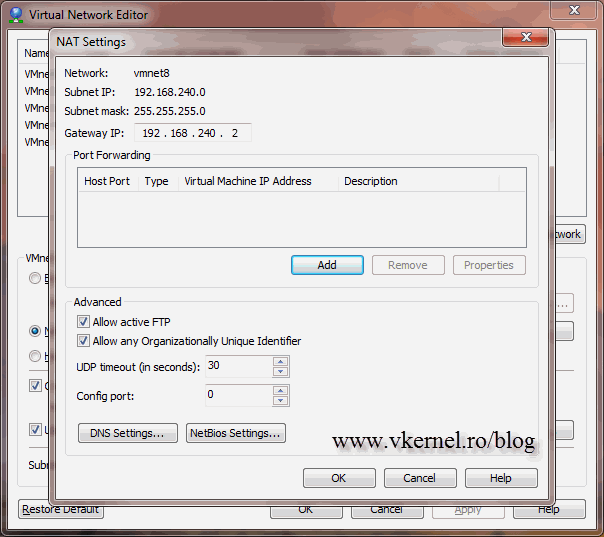
There is another button on this network type, NAT Settings. Here you can do advanced configurations by modifying the default gateway, DNS servers etc. You can also do port forwarding if you have a service running on the VM that you want to be accessible from the LAN.
On the Host-only network there is not much to talk about, most of the settings are the same as the NAT network.
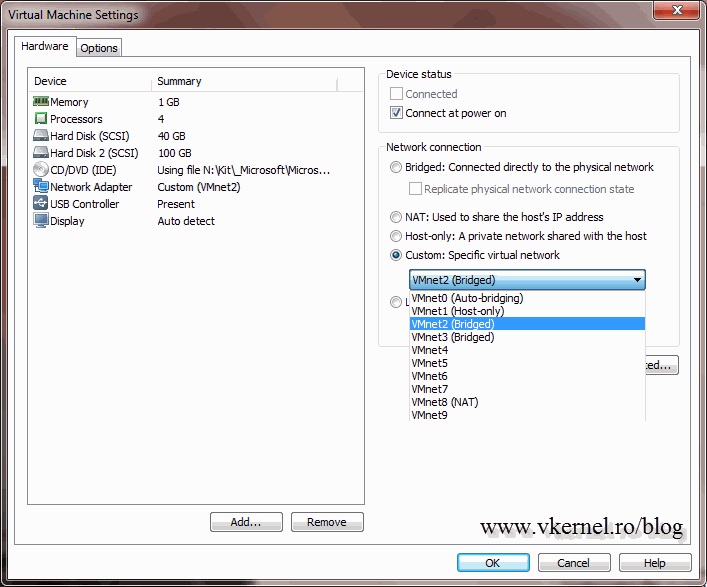
Now if you open the settings of a VM, the networks created before can be assigned to this machine. On the Custom box the virtual adapters that don’t have a network assigned to them will appear in the list. You can use those but you will need a router to connect the VMs to other networks.
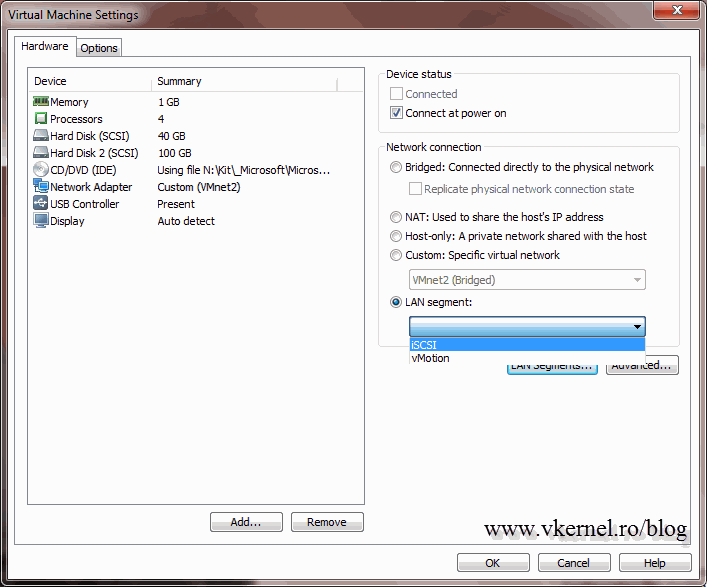
If you want your VMs to be completely isolated from the network, go with the LAN segment option. This will create a network only for VMs, and only those VMs that are in the same LAN segment can communicate with each other. This is awesome, but like before, a router (virtual router) is needed if you want those VMs to communicate with the outside world or the LAN.
Want content like this delivered right to your
email inbox?



Hi
Very nice basic overview of networking in vmware 🙂
Good job
Thanks, trying to do my best.
Hi
Very nice tutorials you have here mate. Thanks for these.
I have a question with a Scenario.
I have installed Vmware Fusion on my Mac and want to create a small lab with Server 2012 R2, windows 7 and windows 10.
Mac is connected to my home internet via wireless and my router is DHCP enabled..
Now, I want to setup DHCP on my Server 2012 so that Windows 7 and Windows 10 gets IP from the Server 2012 DHCP not my router DHCP.
So, I reckon I will need to create a private network for the my lab in Vmware.
How do i do it?
Any help would be greatly appreciated.
Hi Rashed,
Yes, you are right, you need to create a private network, a LAN segment. Now you will need a VM to act as a router if internet access is need on those machines.
Thanks Adrian.
created a new network adapter
vmnet2
ticked “connect the host mac to this network”
unticked “provide addresses on this network via dhcp”
now i have created a server 2012 with active directory, dhcp and dns.
setup static ip
192.168.70.10
255.255.255.0
192.168.70.1
dns: 192.168.70.10
192.168.70.1
now created a windows 10. but this windows 10 vm doesn’t get ip from server 2012 dhcp.
what i am doing wrong here?
its vmware fusion 8.5
thanks in advance.
cheers
Hi,
Connect the Windows 10 machine to the vmnet2 adapter and it should work. Let me know how it works.
I created two win 7-vm in the workstation. i made them both under lan segmentation now they both can communicate with each other. but they could not communicate with external network. what should i do to make them communicate with external network??
plz help me out guys….
Hi,
Off course you don’t have internet connection, you need a router between the two networks (external and LAN segment). This is how labs are done, in an isolated network. To have internet connection you can put a Linux router or use RRAS from Windows Server. In my lab I have a TMG server that is routing traffic between networks.