Cloning Virtual Machines in VMware Workstation
If you are using VMware Workstation to test things, you definitely want to clone your systems. Why ? Because you don’t want to install a Windows 7 or Linux system every time you need to power up multiple instances of those machines. You just go trough a wizard and at the end you get an exact copy of that machine.
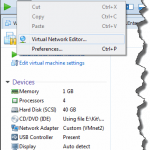
What I like to do is create a clean machine, configure it the way I want, shut it down, create a snapshot, then when I need one or more instances of that VM, I just clone it. For this lab I will use VMware Workstation 9, which is the latest version at the time of this writing. I suppose you already have your VM installed and configured. Shut it down, right-click the VM, and go to Manage > Clone.

The Clone Virtual Machine Wizard appears. Click Next to continue.

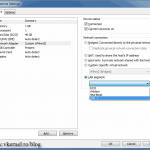
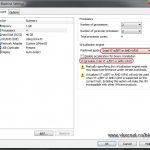
On the Clone Source window we have two options. The first one will automatically create a snapshot of this VM in this state and clone it. You only have the second option available if the VM has snapshots, and those snapshots taken in a power off state (else it will be grayed out). As you might guess I will go with the second option, since I have snapshots for this VM. If I want this clone to be a Domain Controller I just choose the right snapshot from the list (Instalat AD + SP1 .. vkernel.local .. ) and continue the wizard.

Another great feature is the ability to create linked clones or full clones. Linked clones are just a reference of the original VM. If the original VM gets corrupted or deleted the cloned VM will not function anymore. The VM occupies less space on the hard drive (just a few kilos after cloning), and the cloning process is fast. The Create a full clone option will create a complete copy of the source VM, and if the source VM crashes or gets deleted the cloned VM still works. The VM occupies the exact same disk space as the source VM, and it takes more time to clone (a few minutes). In my lab 97% of the machines are linked clones, so this is what I’m going to choose for this example also.

Give the VM a name and choose a location, if the default one does not suits you. Click Finish to start the cloning process.


And voilà. I have a new VM with Windows 2008 R2 installed, VMware Tools updated, network is configured as I want to. One thing you should keep in mind: after the VM is up and running change the VM name, because if you clone another VM and you have DHCP in your network you will get some name conflicts.

Want content like this delivered right to your
email inbox?