Configure Windows Deployment Services (WDS) – Part1
You installed your first WDS server in the network to ease your job, but now it needs to be configured if you want to be able to deploy some images. In this first part of these guide series I’ll show you how to configure your WDS server, and how to add boot and install images. The process is straight forward being driven by wizards. For those of you that don’t know what WDS is or how to install it please go this link. For this demonstration WDS server is installed on a Windows Server 2008 R2 system, and for client system deployments I will use a Windows 7 Enterprise x64 Edition DVD.
To start configuring your WDS server open the WDS management console from Administrative Tools > Windows Deployment Server, right click your WDS server name and choose Configure Server.

The WDS Configuration Wizard pops-up, and the first screen is an info screen; just click Next to continue. On the second screen of the wizard we need to choose where WDS will keep all the files and images of the OSs. I recommend you choose a different partition that the default one presented. Click Next.

Now we tell WDS how it should respond to clients, by choosing one of these three options. The first option Do not respond to any client computer I think is self explanatory. The second one Respond only to know client computers is for those admins that already prestaged the clients in their domain. This means that in Active Directory, the computers that you deploy with this WDS already have a domain computer account. The third and the last option Respond to all client computers, well…is to respond to all clients that connect to the WDS server. Just bellow, is a check box for those of you that want to manually approve connected clients. In this example I’m going to choose the last option, but without the check box. Click Next.

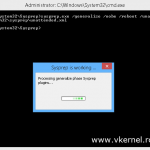
As soon as you clicked the Next button the wizard starts configuring the WDS server.

At the end we have the option to add images for OSs. Uncheck that box, because in a moment I’m going to show you step-by-step how to do this. Click Finish.

Ok the server is configured, but before we can deploy an OS we need to add a so called boot image and install image. A boot image is a lite version of Windows called WinPE that connects to the WDS server and downloads the necessary files for client installation. Install image is a file that contains the OS. Now right click the Boot Images folder under your server name and choose Add boot Image.

The Add Image wizard appears, and here we need to provide a path to the boot image. Click the Browse button and select your boot image. You can find it on the Vista, 7, 2008 DVD inside the sources folder called boot.wim. Click Next after selecting the boot image.

Give the boot image a name and click Next.

On the Summary screen click Next.

Is going to take just a couple of seconds to add the boot image to the WDS server. You can see the results by looking in the Boot Images folder.

Now your client systems can boot from the network and load that boot.wim image in their memory, but there is nothing to install…yet. The next step is to upload an install image on the WDS server, witch contains the OS files, so right click the Install Images folder and choose Add install Image.

Install images must be part of a group in WDS, so give your image group a name on the first screen of the wizard, then click Next. Again we need to choose an image, but this time is going to be an install image. Browse to the sources folder on your Windows 7 DVD and select the install.wim file. Click Next.

Here select the image you want to add to the server. There are cases when one install.wim file contains multiple editions of the same OS, so you need to choose the one you want.

On the Summary screen click Next to begin the import process.

You can see the results by expanding the Install Images folder and click the group just created.

Want content like this delivered right to your
email inbox?
More similar articles
 Customizing the Default Local User Profile before imaging
- Sysprep and Capture a Windows Image with MDT 2012
- Deploying Windows 7 with WDS and MDT 2010 – Part2
- Deploying Windows 7 with WDS and MDT 2010 – Part1
- Configure Windows Deployment Services (WDS) – Part4
- Configure Windows Deployment Services (WDS) – Part3


I have a problem with wds service which does not want to start after
clean install on Server 2012. with the following msg: “The service did
not respond to start in a timely fashion” Can you help me figure out
what should i do to resolve this?
Following my query above, you responded as this:
I know, this happened to me to. All you have to do is wait a few minutes then start the service again (import your boot and install images ’till then). Just righ-click your WDS server name in the console and go to All Tasks > Start. I should work just fine. Let me know how it works.
I am now trying to test your solution out and will post later on the results if i get lucky to have this working.
Hellooo,
Well, just wanted to say thank you, as your suggestions were quite useful to resvole my problem. Tried to start the service manually and didn’t work. Then i continued to install boot and install image as you advised and then closed the WDS console, reopen it and start the service manually again….and this time it worked!!!
Dawn, that was as easy as that!!
Thanks again for the quick tips and response you rock!
Your psoitng really straightened me out. Thanks!
Thank you for posting here.