Securing Websites in Microsoft IIS 7/8 with SSL
Almost all of the sites now days are secured, so “bad people” can’t read or see what you are doing or typing on that web page. By securing the website all the content between you and the web server is encrypted using a special algorithm. To create that encryption algorithm the server, the web server, needs a certificate. If is a public web page, usually that certificate is purchased from a commercial CA. If is an internal web page, you can secure it using an internal Certification Authority (CA) because is free.
For this guide I will use a 2012 server as my web server. This is also joined to a Windows domain. The box is running three websites, and those websites need to be secured on the internet. I presume you already have the certificates installed on the server, and they are visible in the IIS Management Console, if not follow this guide and see how is done.

As you can see only one of those three websites is running, and this is because all three are set to run on port 80. You can’t run multiple sites bind to the same port without configuring the host headers. Since we are going to use certificates, and a common name is set on a certificate, those host headers are automatically configured with the certificate common name. You will see later what I’m talking about.

Now let’s take care of the first site in IIS. Click the site, then from the Actions pane click the Bindings link.

In the Site Bindings window hit the Add button.

Under Type click the drop-down box and choose https. As soon as you do that another drop-down box appears. Click it and select the certificate you want to bind to this website. If you have multiple certificates, like I have, make sure you choose the right one for your site.


After you choose the certificate, you can click the View button to verify the certificate.

Don’t close the Add Site Binding window yet, because a very important setting needs to be done. By design a single IP address can be bind to single certificate, so for our three websites to work, we can’t let the All Unassigned option selected under IP addresses box. We need to tell IIS on what IP address this certificate is bind with. Click the drop-down box under IP addresses, and select the preferred IP.

If you are wondering how those IP addresses are listed there is very simple. All you have to do is click the Add button from the IP Settings tab from your network card. If you want to, you can go with multiple network cards and set only one IP per network card, but I choose to do multinetting since is cheaper and easier.


Back to the binding window. After everything is set up, click OK. I choose to remove the binding for port 80 since this website will run only on port 443. Just select the binding from the list and hit the Remove button.

After publishing the website on my router so external clients can browse it, I had a smile on my face, because it worked.

Now let’s take care of the other two websites. The procedure is the same, but be very careful at the Add Site Binding window to select the proper certificate and the proper IP address for that binding.


After you set the rest of the sites, go ahead and start them (if they are stopped). Right-click the site, go to Manage Website and choose Start.

Now all the websites are running on the same port without any trouble.

Publish the sites on your router and see how is going, because on my side here the sites are running just fine on SSL.


Want content like this delivered right to your
email inbox?
More similar articles
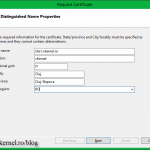
 Request and install SSL Certificates in Microsoft IIS 7/8
- Enable computer and user accounts to be trusted for delegation
- Setting permissions on ADCS Certificate Templates
- Steps to check if Domain Controller was properly promoted
- Creating and configuring Windows Domain Service Accounts
- Domain Controller promotion fails with “Access is denied”