Request and install SSL Certificates in Microsoft IIS 7/8
I know a lot of times you have to deal with Web servers and sites, to secure them or make some changes, even if is not your thing to do. Most of the time you are asked to install certificates on clients web sites, create certificates request and even buy them. Been there, done that…
In this guide I’m going to show you some very cools stuff about how to handle certificates in IIS. Since server 2012 is out, I’m going to use one of these boxes which has IIS 8. If you are still at 2008/R2, no worries, the wizards between IIS 8 and IIS 7/7.5 are no different. The IIS server is part of an Active Directory domain, and an Internal CA will be used to issues certificates for internal clients. For sites that are going to be live on the internet we are going to use a public CA.
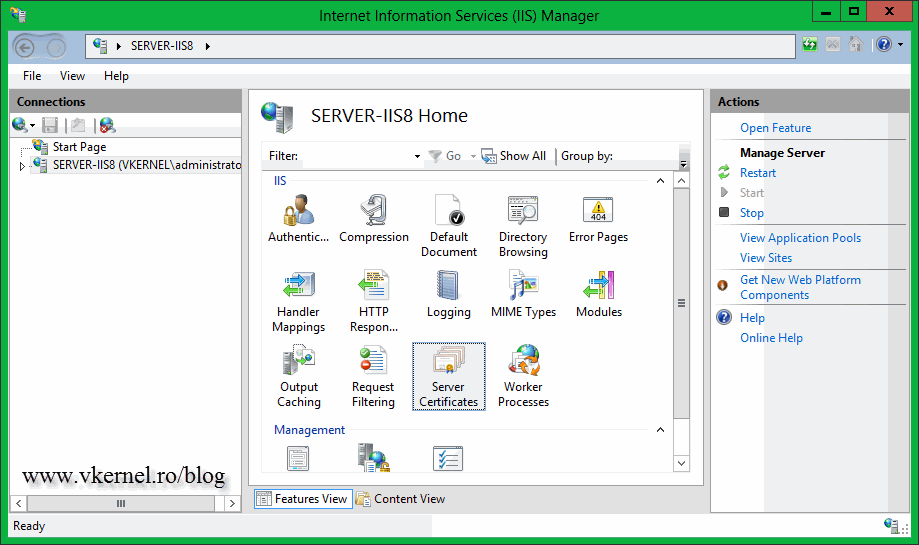
Now open the IIS console and click the server name, than on the View pane double-click Server Certificates. If you have any Web certificates installed on the server they will be displayed here, but right now I have none.
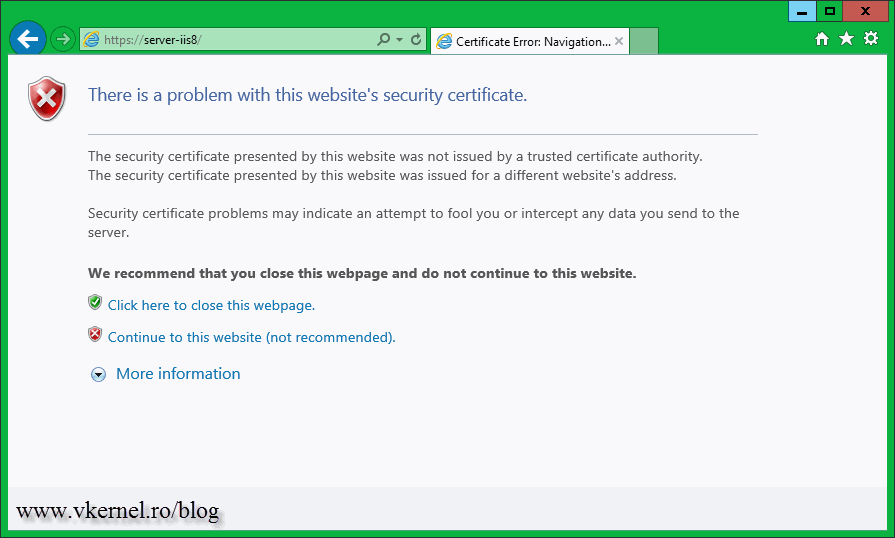
Before you want to request a certificate you need to know if the web site is going to be public (on the internet) or just for your internal users. If the web site is internal, usually the certificate is issued by an internal CA because is cheaper; actually is free. Don’t get confused here, between internal CA’s and public CA’s. You can secure a web site, a public web site, using an internal certificate, but internet user will get a certificate error displayed before the site is actually loaded. This is because the certificate used to secure the web site is not trusted by any Certification Authority.
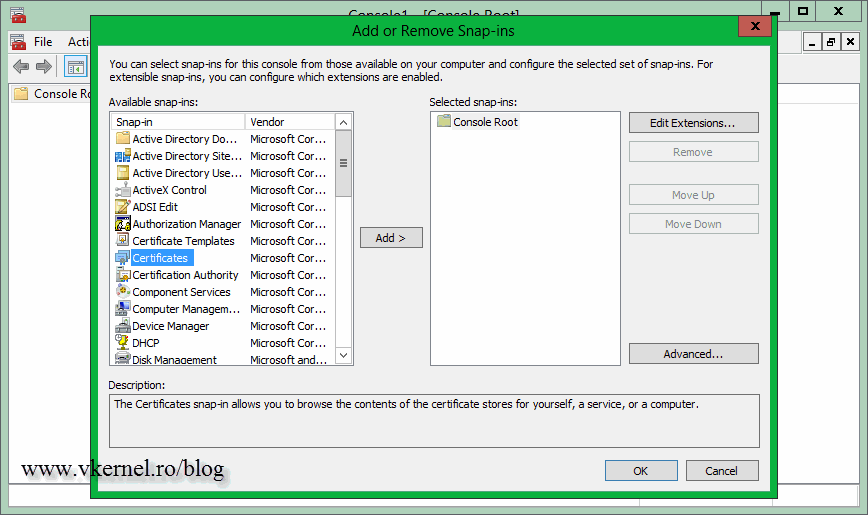
You don’t have that problem is you purchase a certificate from a public CA (Symantec, Comodo, Thawte etc). The root certificates from those public CA’s are already installed on every computer, (and more get installed by updates) and if you secure a site using a commercial certificate, that certificate is automatically trusted. You can view all the root certificates installed on your computer by opening a custom MMC.
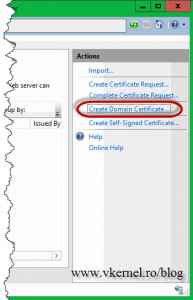
To get back on the subject, let’s create a request for a certificate from our internal CA, to secure an internal web site. Before a certificate is issued and ready to use, a request for a certificate has to be made, also called a Certificate Signing Request (CSR), and there is a wizard for that in IIS. Click the server name and on the View pane double-click the Server Certificates icon. From the Actions Pane click the Create Domain Certificate link. If you were to create a CSR for a commercial certificate you will use the first link, Create Certificate Request, but more on this subject later.
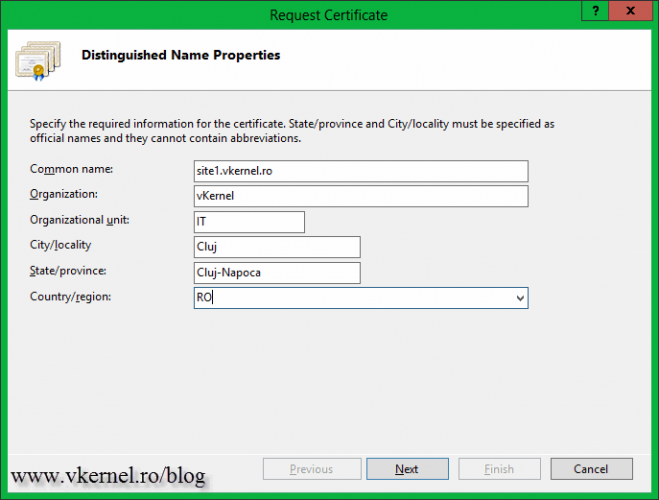
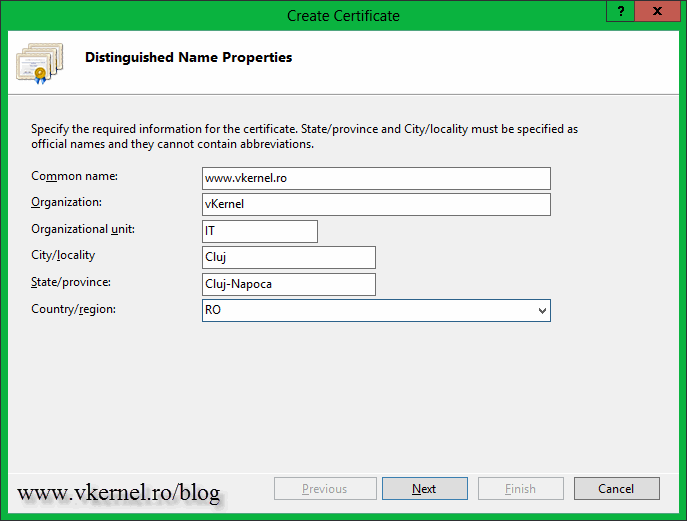
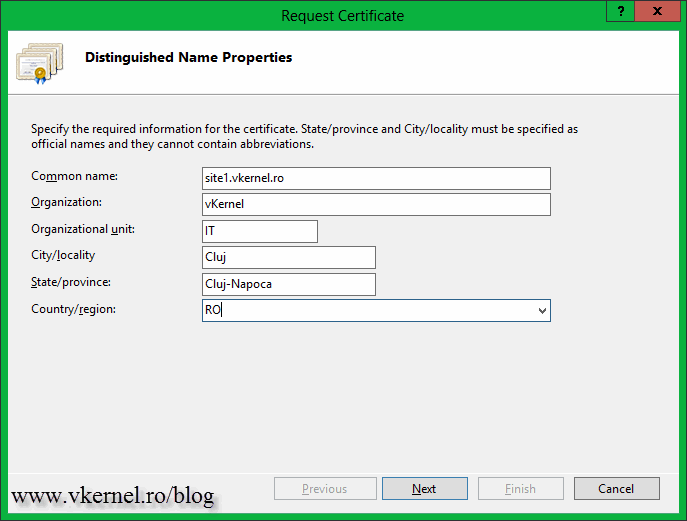
On the Create Certificate wizard complete the boxes with the needed information. Be very careful on the first one, the Common Name box. The name you type here, will be the name clients will use to connect to the web site. Let’s say if I want to secure my blog www.vkernel.ro, this is the name I will type in that box.
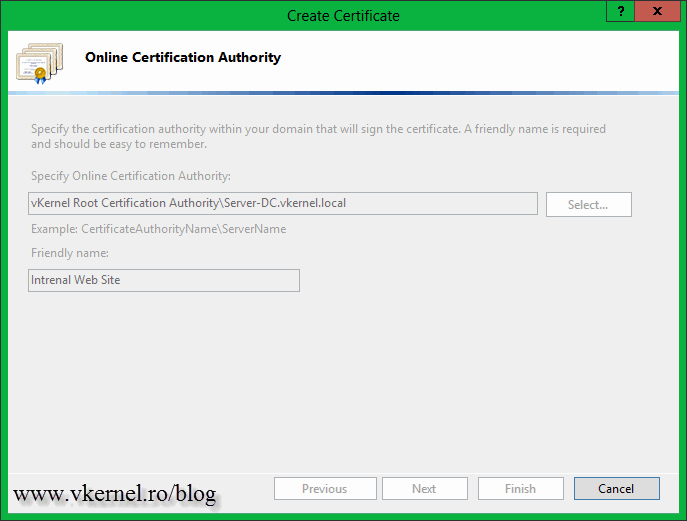
On this page click the Select button, then select your internal CA from the list. Hit OK. Type a friendly name for the certificate and click Finish.
The CSR is sent to the internal CA, the CA will automatically issue the certificate (based on a certificate template) and the wizard will install that certificate on the machine. After the wizard closes you should see the certificate in the IIS console. All that is left now is to bind this certificate to a web site to secure it, but that is for another guide.
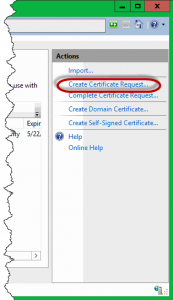
This was easy, but what if this is a company website ! Like I’ve said, for public sites it is recommended to use a commercial certificate issued by a public CA. Let’s get this done too. From the Server Certificates view, click the Create Certificate Request link from the Actions Pane.
As you can see the wizard looks the same as the one before, so complete the boxes with the required information then click Next. Again, make sure you type the correct name in the Common Name box.
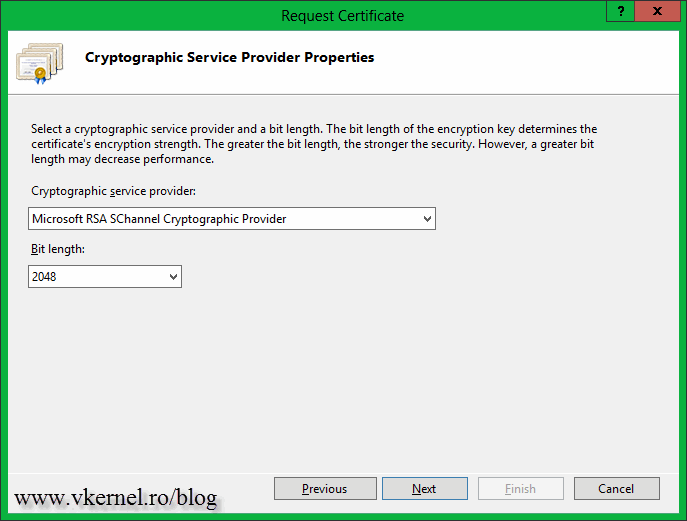
Here choose the cryptographic provider (usually the default one works most of the times), then the encryption bit length. Some public CA’s will not accept a CSR that has an encryption bit length less than 2048, so make sure you consult your CA before choosing this. Don’t exaggerate by using a very big bit length, because the server will be overloaded and the site will be slow.
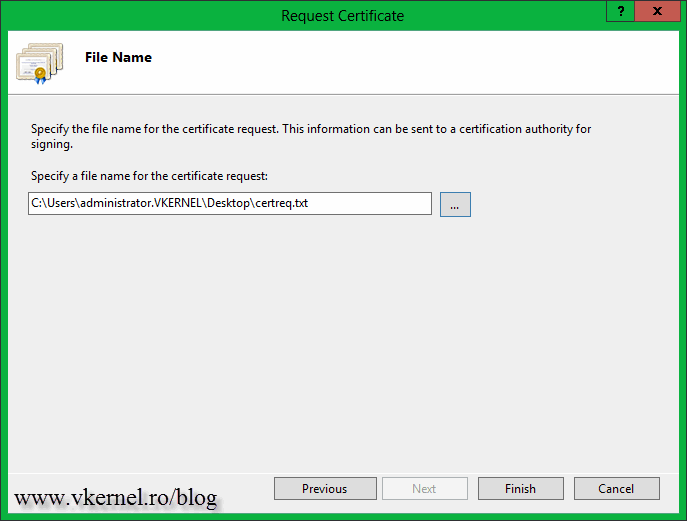
As you can see, we don’t have a Select button any more like when we requested a certificate from an internal CA. Here we only have the option to save the CSR to a file. We then use the information from this file to request a certificate from our public CA. Click the button and save the file somewhere on your computer.
After the wizard closes you can open the file and see how it looks, but do NOT tamper it.
Now that we have the CSR it’s time to request a certificate from our public CA; so go to your preferred public CA, log in to your account and make a request for a new certificate. The method is different for every CA, but they all have a box where you can paste the CSR code (the you just saw when you opened the request file above). For this example I’m going to use the StartCom Certification Authority. So open the CSR file again, select the text/code, copy it to clipboard then paste the information on the certificate request box on your CA web page.
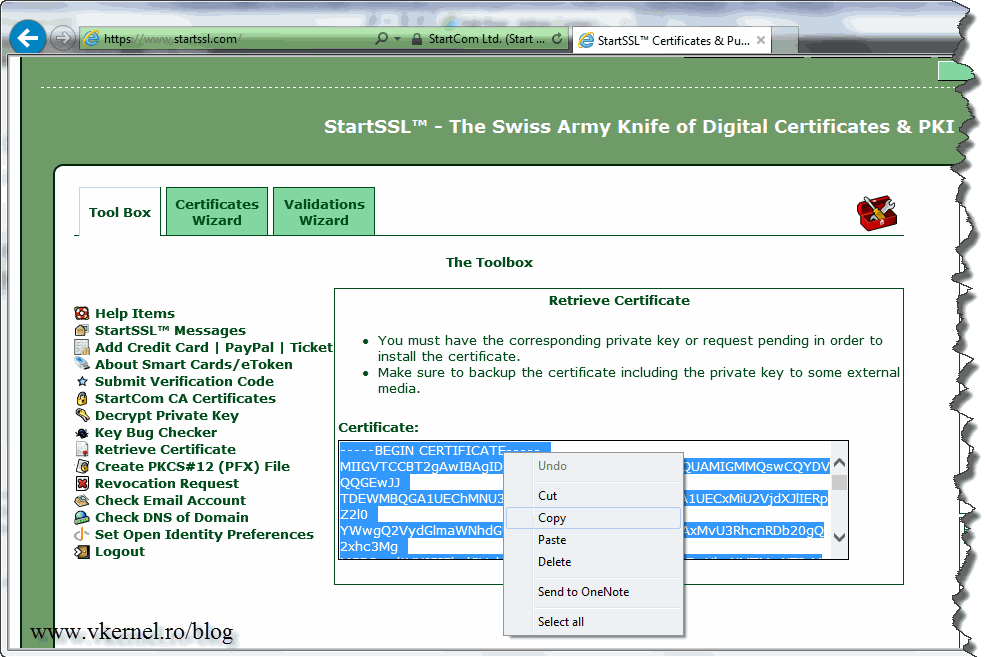
At the end you should be able to save the request as a file, or you are give a certificate code. If you have a certificate code, like me, copy it and put it in a txt file.
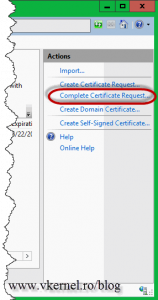
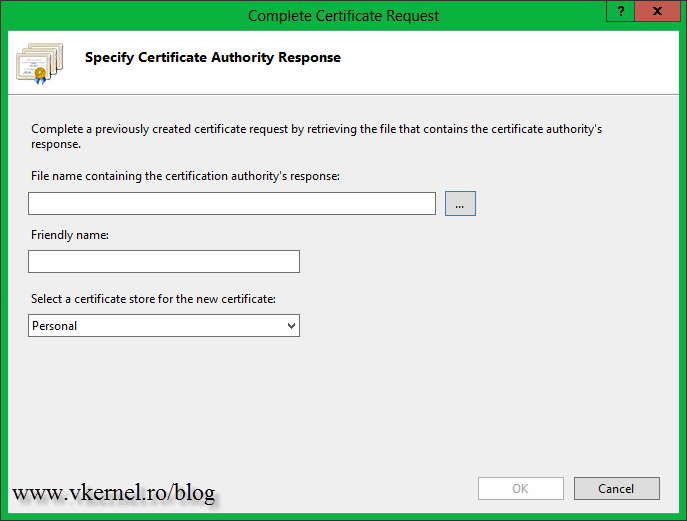
Now open the IIS Manager Console and click the Complete Certificate Request link. You NEED TO USE THE SAME computer/server that you used when you created the CSR file. If not, the private key will be missing from the certificate, making it unusable.
On the right hand side of the first box click that small button to select the certificate request. Since the file does not have a .cer extension you will need to use the file name extension drop-down box and select all files (*.*). Give the certificate a friendly name then hit OK.
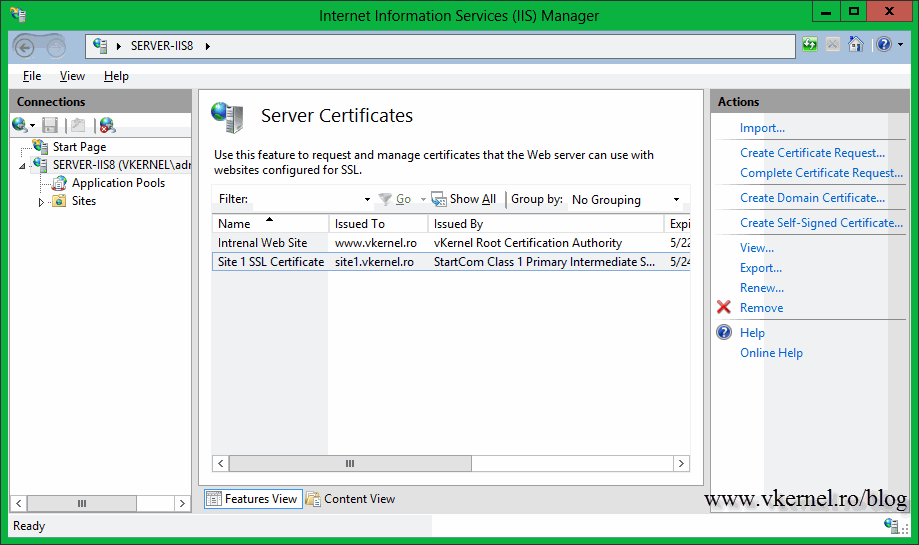
After the certificate is installed, you can see it in the IIS Manager Console.
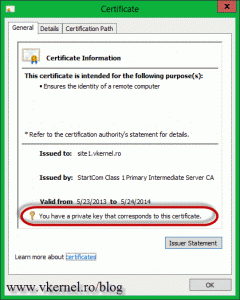
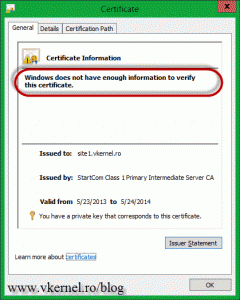
Open the certificate (double-click it in the IIS Manager Console) and see if it has a private key. If it does is good-to-go.
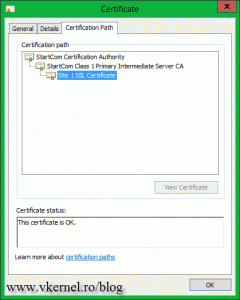
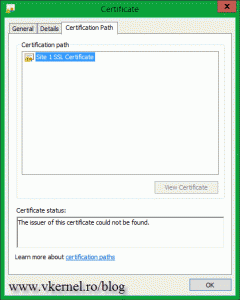
If you have the following message on the certificate Windows does not have enough information to verify this certificate, you will have to download and install any root or intermediate certificate(s) from the CA web page. Those should be free. Now I know that you are thinking: if I have to install those certificates, my clients (internet users) will have to install them too ? The short answer is NO, they don’t have to. This needs to be done only where the certificate with the private key sits, and most of the time you don’t even have to do it, it just works. My server was not updated for a very long time, since this is a VM template, and maybe that’s why I had to install those extra certificates.
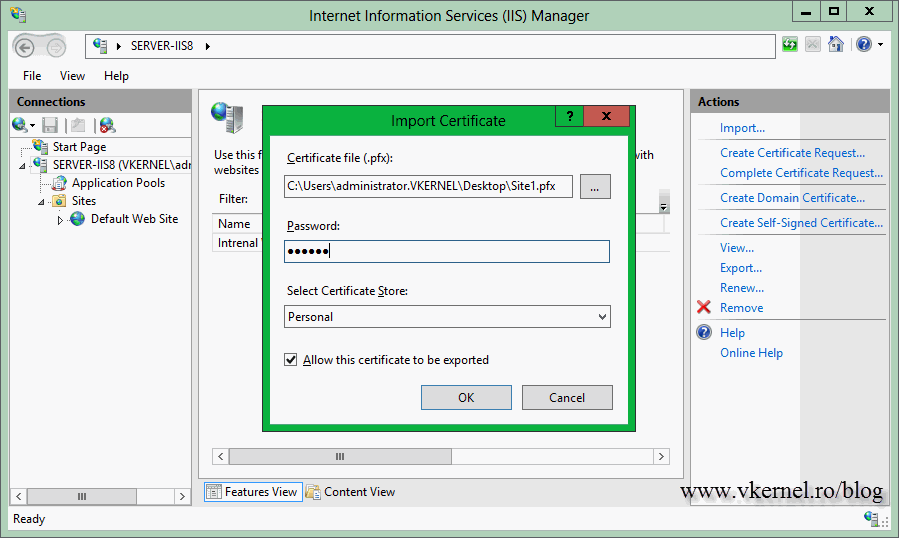
There is more one thing before I close this guide, the Import option. If you open Server Certificates there is an Import link on the Actions Pane. You use this when you have a certificate exported from another server with its private key and you want to import it on another one. Usually this happens when there are multiple web servers in load balance that hosts the same site, so you need a certificate on every one of them. Click the Import link then provide the certificate. It is in .pfx format and you need a password to open it. If you want to be able to export this certificate later on for some reason, check the box Allow this certificate to be exported.
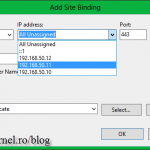
The last operations, after you completed one of the above steps is to bind the certificate to a web site then publish the web site so clients can securely browse it.
Want content like this delivered right to your
email inbox?







Many thanks for the guide, helped me a lot.
Glad I could help. 🙂