How to create Active Directory Sites
The company that you work for is opening one or more branch offices, and you as an administrator need to put in place the network. You install one or more Domain Controller, file servers etc, but what about the replication traffic ? Right now your Domain Controllers think they are in the same network/site and will replicate changes every 5 minutes by default. This means traffic on your WAN links. To solve this problem Active Directory sites comes to the rescue. By creating AD sites you can administer the replication topology not only between WAN sites, but also on you LAN. For all this a management console exists installed by default on every Domain Controller. You can find it in Administrative Tools and is called Active Directory Sites and Services. Using this tool you create, configure, manage AD sites, subnets, site links etc. More information about Active Directory Sites and Services on Microsoft Technet.
For this guide I have three locations (Main Office, Brach1, Branch2) connected trough a VPN connection. In every location I have two domain controllers running Windows server 2008 R2. There is a single forest and a single domain. You should configure sites before adding your Domain Controllers because if you take a look now in my Active Directory Sites and Services you will see there is mess. All Domain Controllers are in a single site; I did this on purpose. Let’s clean it up.
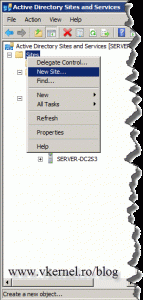
Open the Active Directory Sites and Services console on one of your Domain Controllers (I will use the main office DC) and for starters rename the Default-First-Site-Name. I will call mine Main-Office, because here will sit only the Domain Controllers from the main office. Now right-click Sites and choose New Site.
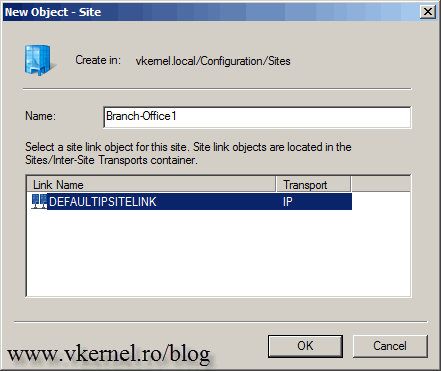
Give it a name that represents your connection. I’ll call this Branch-Office1. Select the DEFAULTIPSITELINK and click OK. Off course you will have to think of a more distinctive name for your production sites, but for now this will do. Create the rest of the sites that you need. The DEFAULTIPSITELINK is the transport that the sites will use to communicate, and this one is based on IP, actually is using RPC over TCP/IP. You can also configure it trough SMTP, but me personally never used it this way.
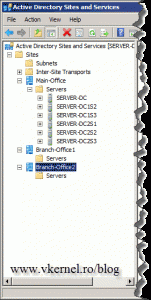
Now you should have something like this:
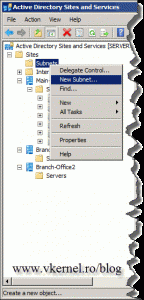
It’s time to create the IP subnets and assign them to our newly created sites. Right-click Subnets and choose New Subnet.
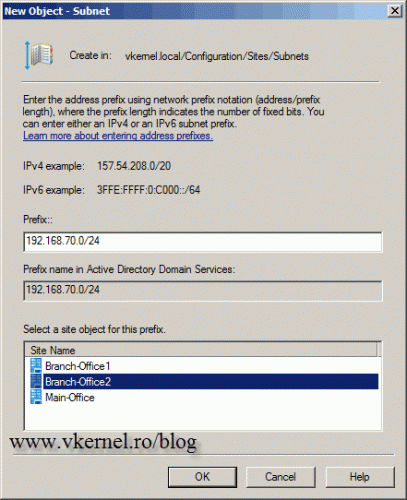
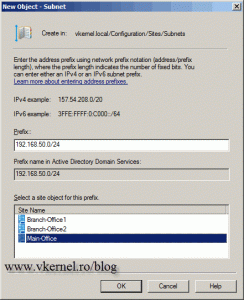
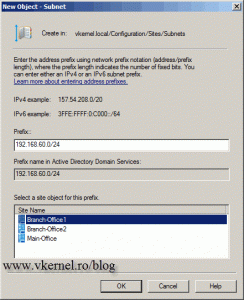
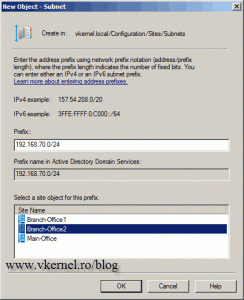
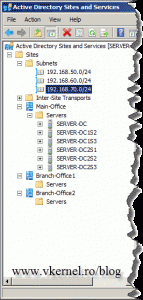
I will start with the main office, and I know that here I have 192.168.50.x/24 subnet. Put your correct subnet and preffix on the box then assign it to the correct site form the Select a site object for this preffix section. Do this for the rest of your sites subnets.
You should now have something familiar.
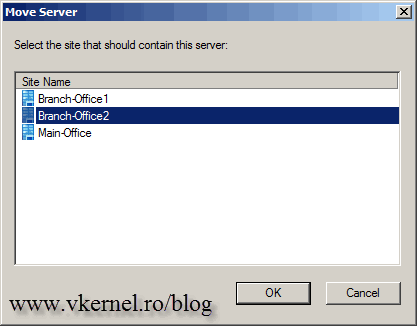
It’s time to move the servers on their correct sites. You can drag-and-drop or right-click the server and choose Move.
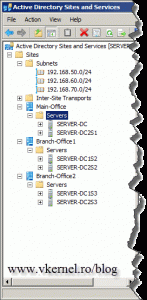
In the end it should look like this.
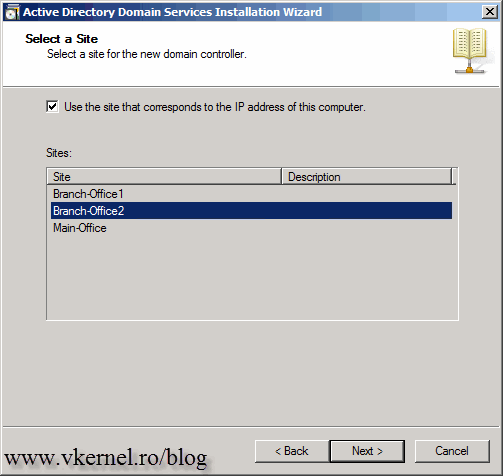
Now when you add another Domain Controller to one of your sites, the correct site is automatically chosen during the Active Directory Domain Services Installation Wizard, based on the configured subnet. Not only that, but is placed in the correct site if you take a look in the Active Directory Sites and Services console. Now that we are done creating sites, is time to configure and tune replication between them, create site links, and assign preferred bridgehead servers to transport protocols. The the steps are mentioned in this article.
Want content like this delivered right to your
email inbox?



Thanks