Add Domain Users to Local Groups using Group Policy Preferences
Until server 2008 came out, every time you wanted to add domain users or groups to computers local groups you had to rely on scripts or use Group Policy Restricted Groups to make the changes. The last one worked great but it failed working when you wanted to modify those local groups on your client computers. Now we have Group Policy Preferences which is an extension of Group Policy. By using this extension you can easily manipulate local groups in any way you want, as you will see later.
As a prerequisite, just in case you still have Windows XP clients in your network, those clients need to have the Group Policy Preference Client Side Extensions patch installed in order for this to work. Anything else bellow Windows XP does not support this extension and there is no patch to fix this. For Vista and later no patch is needed, these operating systems support natively the technology.
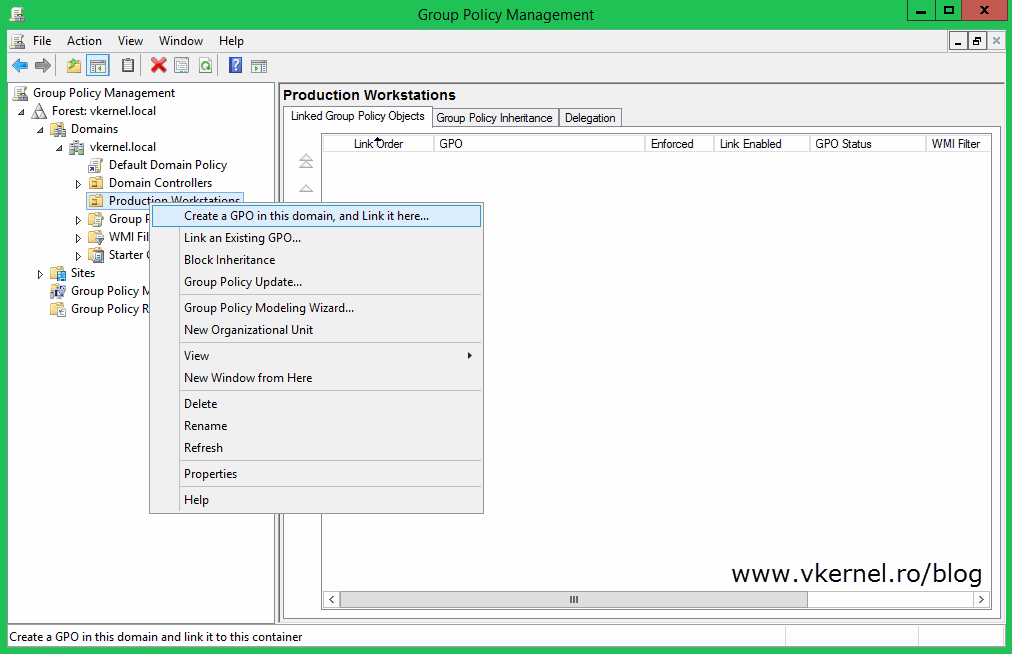
Now log in on one of your domain controllers, and using the Group Policy Management console create a new GPO, give it a name and link it to where you want this policy to apply.
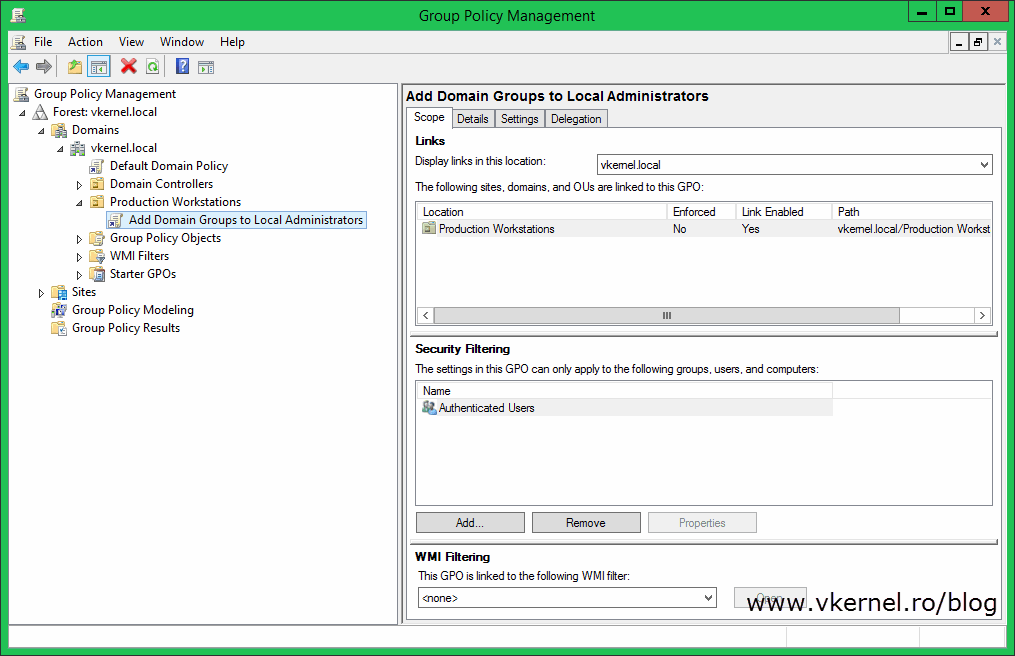
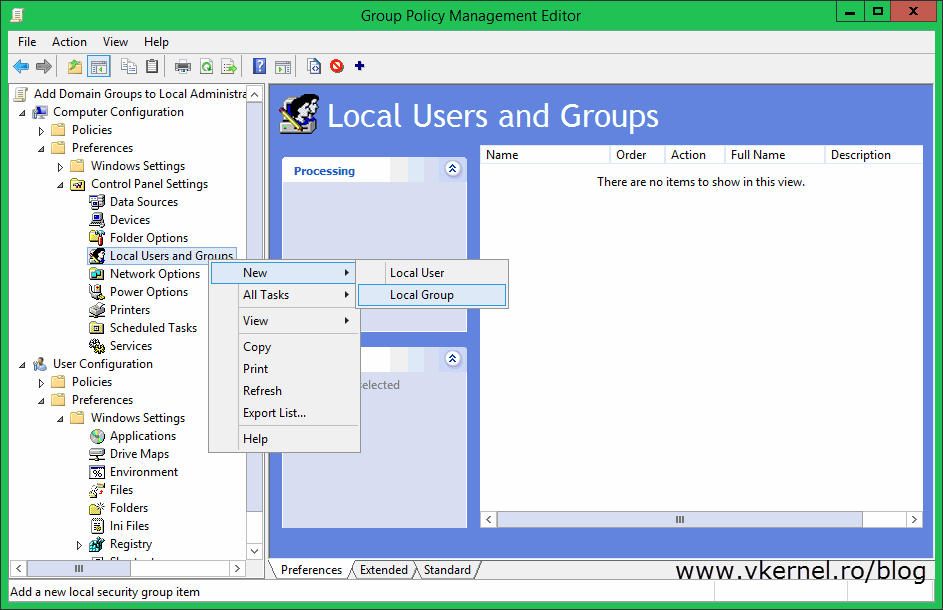
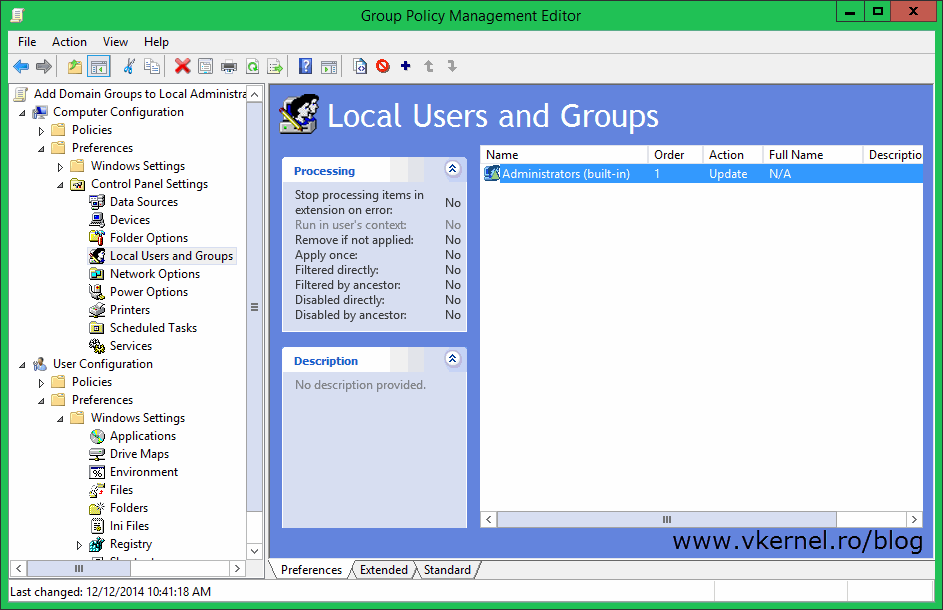
Right-click click the newly created policy and choose Edit. Since this needs to apply on per computer basis, in the Group Policy Management Editor console expand Computer Configuration > Preferences > Control Panel Settings and click on Local Users and Groups. As you can see, there are other stuff you can configure here too like shortcuts, printers, enable or disable services on clients etc and if you open the Windows Settings folder you can find more. Feel free to explore and test them, but right now do a right-click on Local Users and Groups and choose New > Local Group.
[important]The Local User option is there in case you want to remove, update/modify some local users you might have on your clients. You can also create them.[/important]
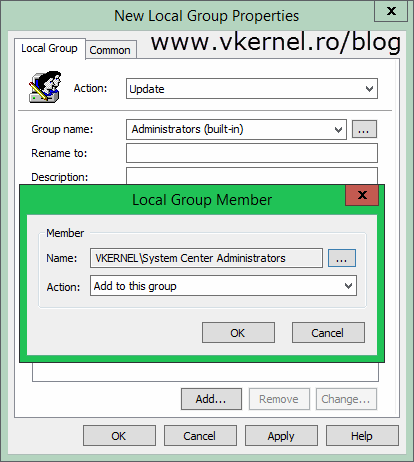
On the Action drop-down box you have multiple choices. If you want to create a new local group on your clients go with the Create option, if you wan to replace a local group with the one you name here go with Replace and so on. Right now choose Update and from the Group name drop-down box select the local group on which you want to make changes. The local Administrators and local Remote Desktop Users are the most used ones. If the group name you want to update is not listed here you can type it, but do not click the ellipse button and search for it because it will search the domain, and you don’t want that.
Click the Add button from the Members section and add your domain users and/or groups (groups are recommended) that you want to be part of the group you selected in the Group name box. On the Action drop-down box make sure Add to this group is selected and click OK. Leave the rest of the settings unchanged.
[notice]If you check the Delete all member users and Delete all member groups check boxes it will remove any users or groups that are not explicitly being added to the group trough this policy.[/notice]

The GPO Preference item should now be seen in the console.
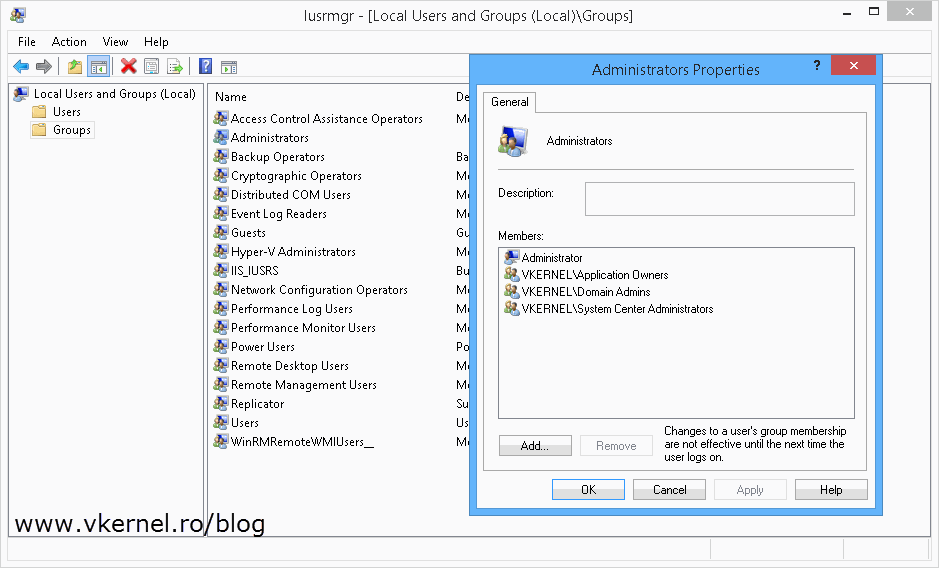
To be able to see the changes and not wait until the policy is applied (between 90-120 min), you can do a gpupdate /force on some of your clients to re-read the policies from the domain controller(s) and apply them, or you can use the Group Policy Update option if you have 2012 domain controllers. After the policy is applied, you can go ahead and check if it worked. Launch the Local Users and Groups console (Start > Run > lusrmgr.msc) on a client PC, click the Groups folder, then open the properties of the group you updated trough Group Policy Preferences. The domain users and/or groups should be member(s) of this local group.

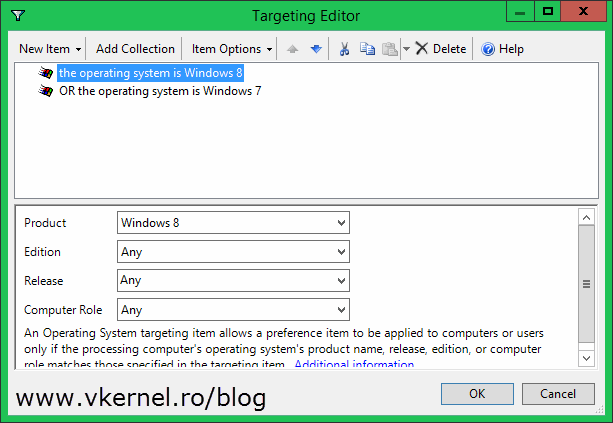
If you want to be more granular with the policy, you can set it so it applies only on specific operating systems, or to computers that have a specific MAC address. Just click on the Common tab on the Group Policy Preferences item and check the Item-level targeting check box, then hit the Targeting button. As you can see, there a quite a few settings from which you can choose.


Now go ahead and filter it out.
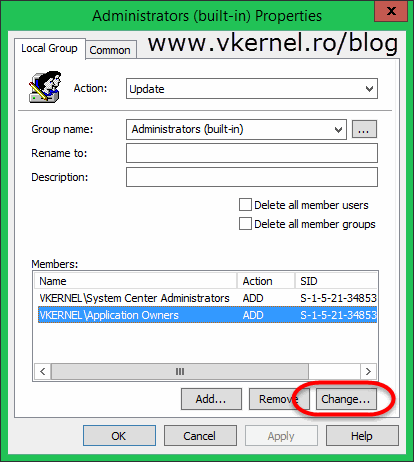
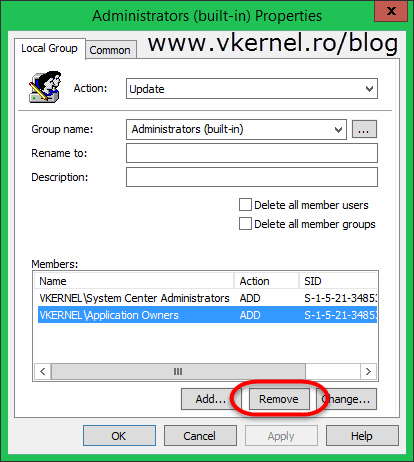
In time, if you want to remove some of the members from the local group(s), don’t just go and delete the Group Policy Preferences item(s) because it will not accomplish what you want. You need to update this again. From the policy, open the item properties, select the domain user or group you want to remove, click the Change button, then in the new window select Remove from this group. Click OK.

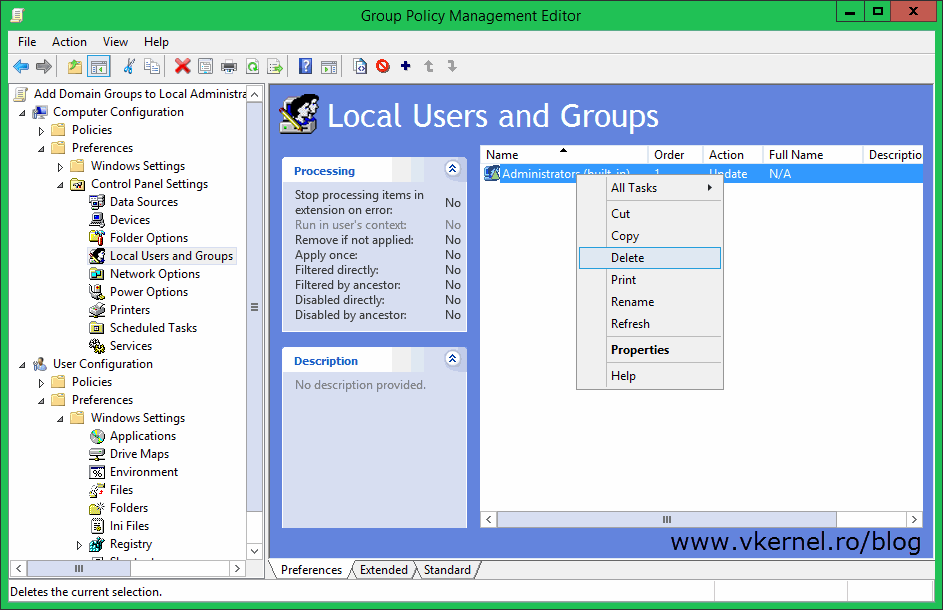
Leave it a few days or weeks, just in case some of your users are traveling and they did not connect to the company’s network. After the membership was removed from the local group(s) you can go ahead and delete the member(s) from the Group Policy Preference item, or delete the item itself if no other members are present or you don’t need it anymore.
And that’s it, simple and effective. By using this method you can add domain members to whatever local groups you want without typing any bits of code. Also, you can create, modify, and remove those local groups as needed.
Want content like this delivered right to your
email inbox?

how to make every domain user to be an local admin on his machine only?
Hi Khaled,
You can either filter the GPO by using the GPO Security Filtering or Item Level Targeting. This way the GPO will only apply to the user machine or the user account (depends if you configured the GPO settings for user or computer).
Hello Adrian,
great instructions! With it even I was able to distribute my backup user to all computers in less than 5 minutes 😉
Many Thx and keep up to enlightening us Win Admin noobs out here!
Thanks a lot, much appresh…
Very useful tip, clear instructions. Much appreciated! Thank you Adrian!
You are more then welcome.
I tried this but for some reason it does not work. I tried adding some domain users on the BuiltIn\Administrators local group but they do not appear on the target machine even if I have done gpupdate/ force several times. There are no restricted group policies that are implemented before this one that is why I am puzzled why it does not take effect.
Any ideas?
Hi,
Does the policy apply? Do a gpresult /r and see the results.
I discovered that I have to use the %DOMAINNAME% variable or by pressing F3 instead of typing in the name explicity into the field. It works that way.
Thanks for the tip, much appreciated.
Thank you. That tip worked for me too.