Configuring SSTP VPN Client Access on TMG 2010
I don’t wanna call VPN an old technology, because it’s been improved over the years, but I can say it exists for a long time. The majority of the companies out there is still using it. What actually does, it allows users to connect to the company’s network from a remote location (home, airports, hotels etc), or connect two or more sites together and act as one big network, also called site-to-site VPN. Since the last one is already discussed, I will concentrate my writing in this article on how to configure a VPN server with TMG 2010 so users can connect to the company’s network from remote locations. As you probably know, a few protocols exists that you can use to set-up a VPN connection and TMG 2010 supports three of them: PPTP, L2TP/IPSEC and SSTP. The last one (SSTP) is a great one, because it secures data and can pass any firewall since is using port 443. Another great thing about this is the ease to set it up.
If you have the money, a commercial certificate is recommended since you don’t have to keep managing CRLs and root certificates on workgroup clients, if you have them. For this lab however I’m going to use an internal CA to issue and manage certificates since all clients and servers are joined to a Windows domain. This Certificate Authority server also acts as an OCSP Responder. If you don’t have an OCSP responder or you think is not worth deploying one in your environment, you will have to make a small registry hack so clients skip the CRL checking. This is shown later in the article.
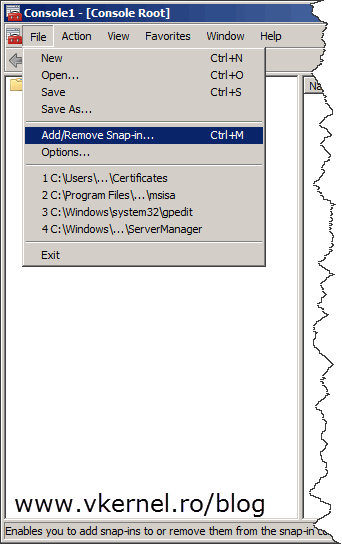
As a first step, the VPN certificate needs to be issued. Log in to you TMG server and open the certificates store (Start > Run > mmc). From the File menu choose Add/Remove Snap-in.
[notice]If you want to use a commercial certificate just create the request (CSR), then go directly on how to import the certificate on the TMG server. The certificate needs to have the Server Authentication extension to be valid for VPN connections, so make sure you issue one having this extension.[/notice]
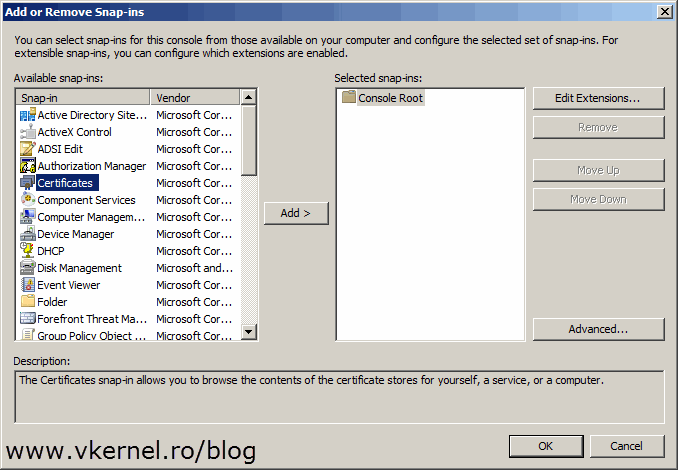
Select Certificates and click Add.
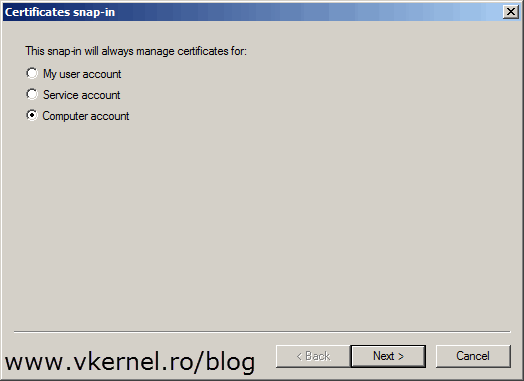
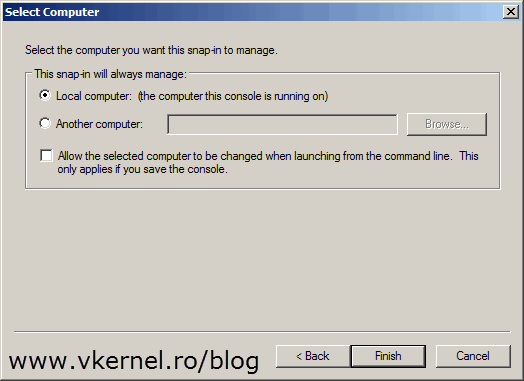
Since the certificate needs to sit in the computer certificates store select Computer account > Local computer.
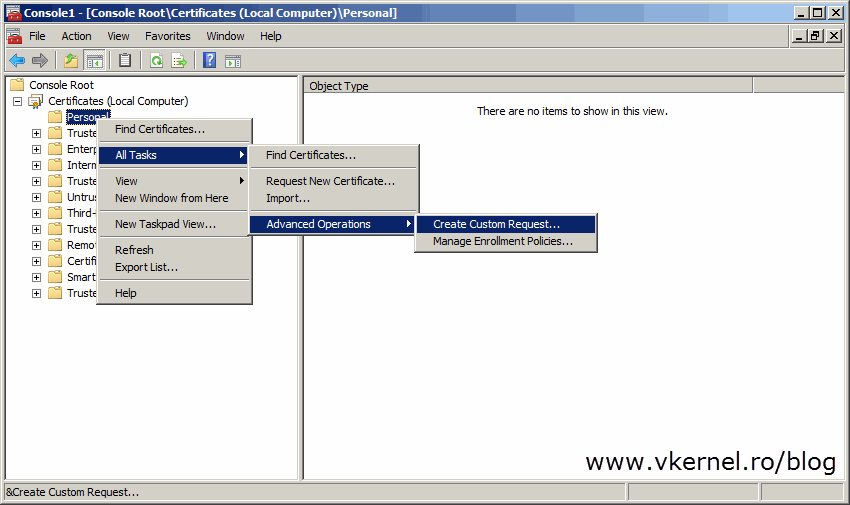
Right-click the Personal folder and choose All Tasks > Advanced Operations > Create Custom Request.
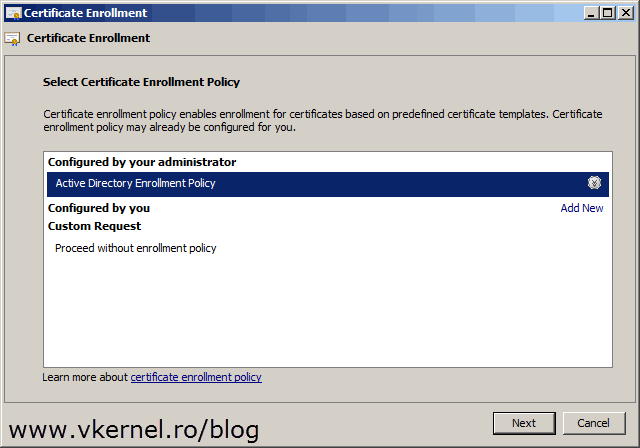
On the Certificate Enrollment wizard select Active Directory Enrollment Policy and click Next.
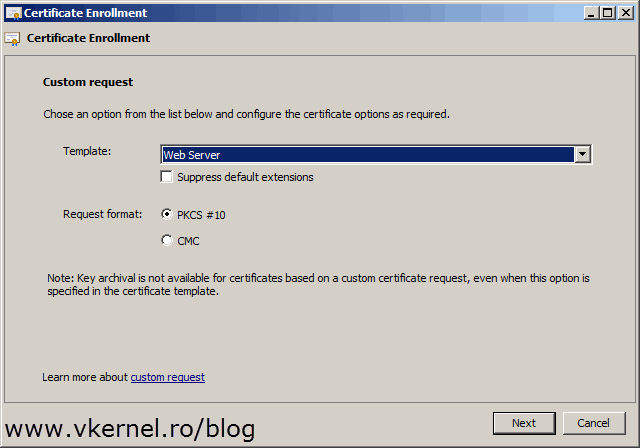
Choose the Web Server template and continue the wizard.
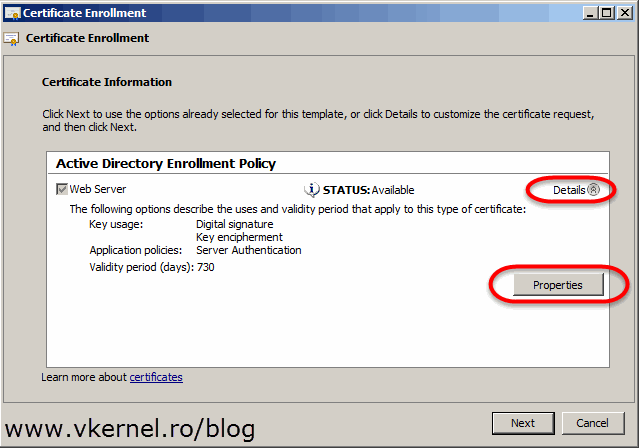
Click the Details arrow to expand the template information then hit the Properties button.
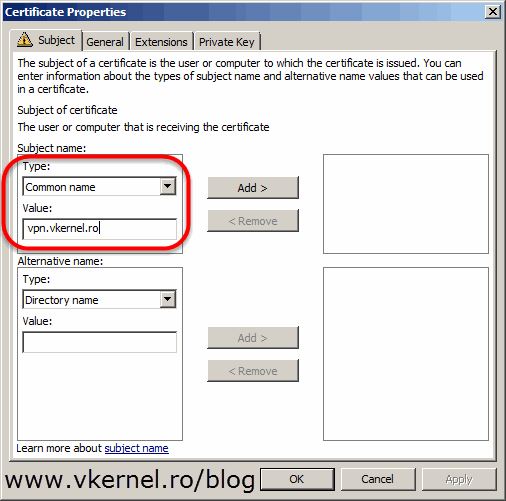
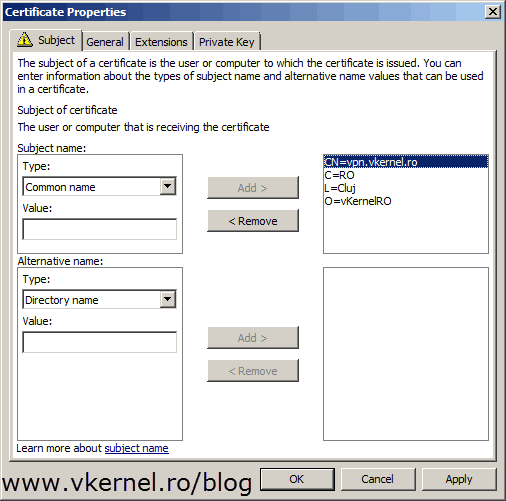
On the Subject tab, click the Type drop-down-box and select Common name. In the Value box, type the public FQDN you will configure for the clients to connect to the VPN server. For example, “vpn.vkernel.ro” will be used for clients as a VPN server, and this name points to your public IP address. Off course, in order for this to work you will have to create that A record (eg: vpn.vkernel.ro) on your public DNS server(s) also. Click Add. You can also populate the certificate with other information like, country, organization etc if you want to.
Switch to the General tab and give the certificate a friendly name and optionally a description, then click OK.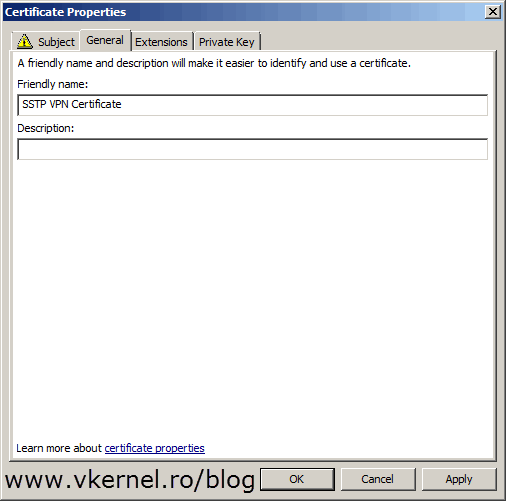
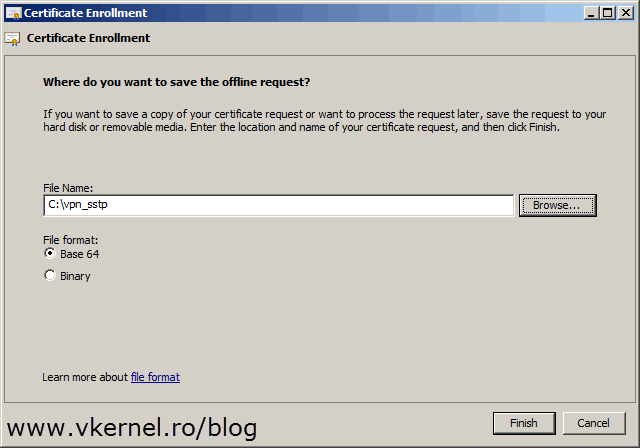
Here click the Browse button and provide a path where to save the certificate request file then hit Finish.
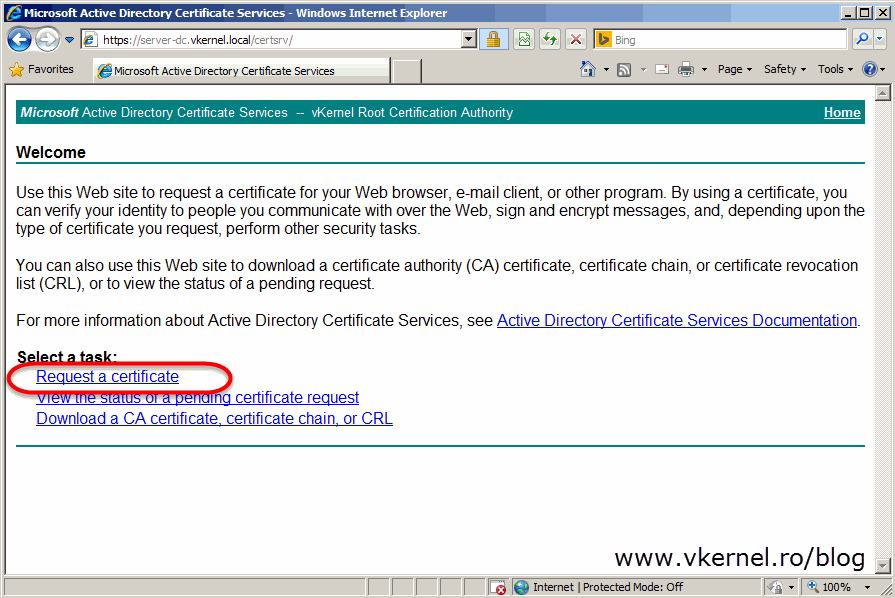
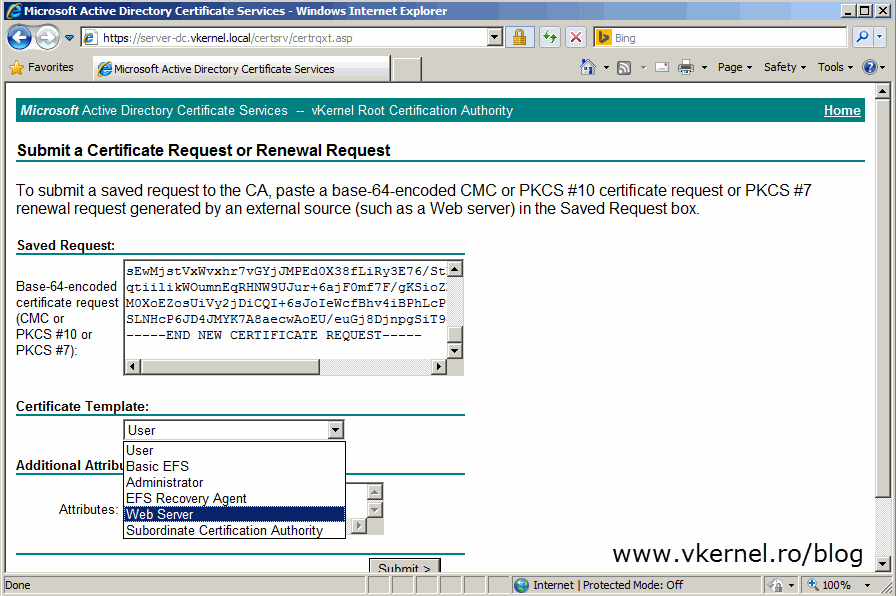
Now open this file using Notepad, copy its content on the clipboard and paste it on your internal Certification Authority web page by going to Request a certificate > submit an advanced certificate request > Submit a certificate request by using a base-64-encoded CMC or PKCS #10 file, or submit a renewal request by using a base-64-encoded PKCS #7 file. On the Certificate Template drop-down-box select Web Server then paste the file content code in the Saved Request box. Click Submit.
[notice]If you want to, you can create your own certificate template to issue this type of certificates. I choose to use the built in Web Server template because this one already has the Server Authentication extension configured, so why not use it ?[/notice]
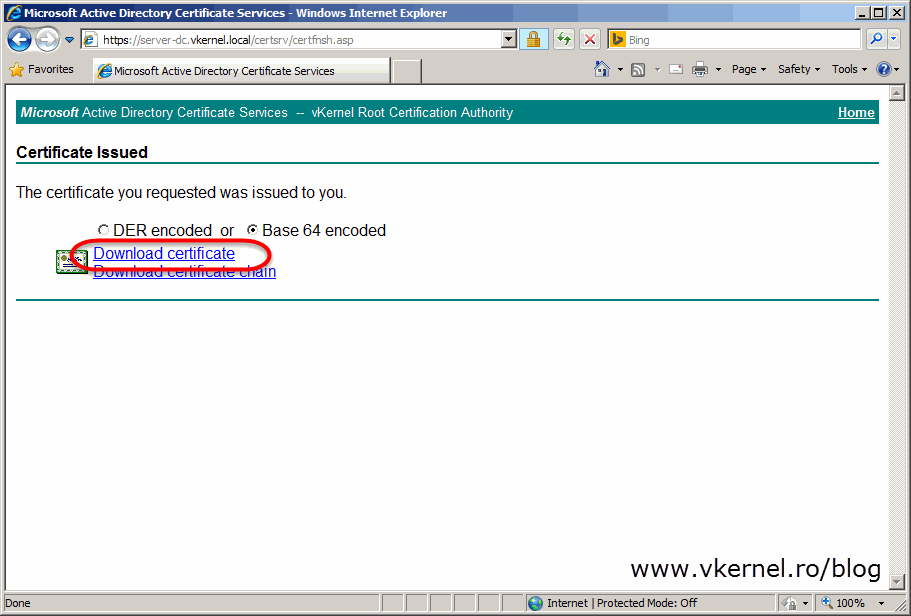
Select Base 64 encoded then click the Download certificate link to save the certificate on the local computer.
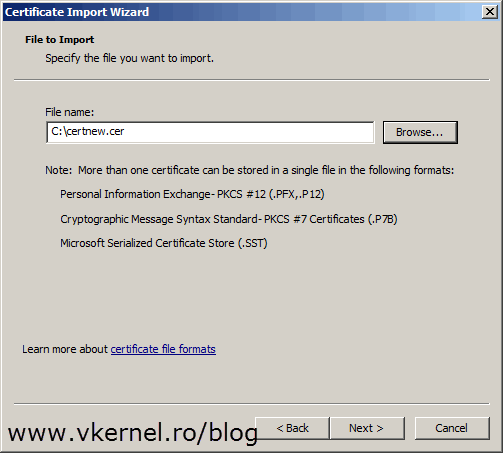
Now the certificate is ready to be imported on the TMG 2010 server. In the computer certificate store right-click the Personal folder and choose All Tasks > Import.

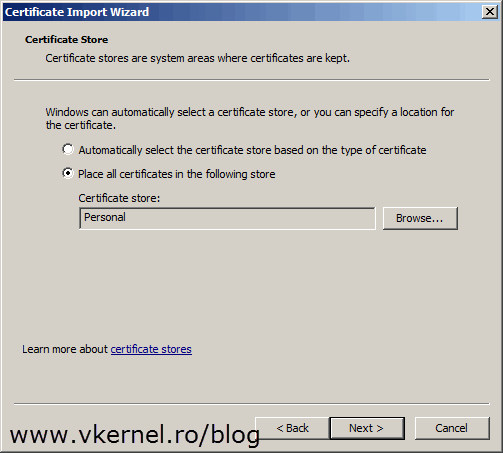
Browse for the certificate and continue the wizard using default options.
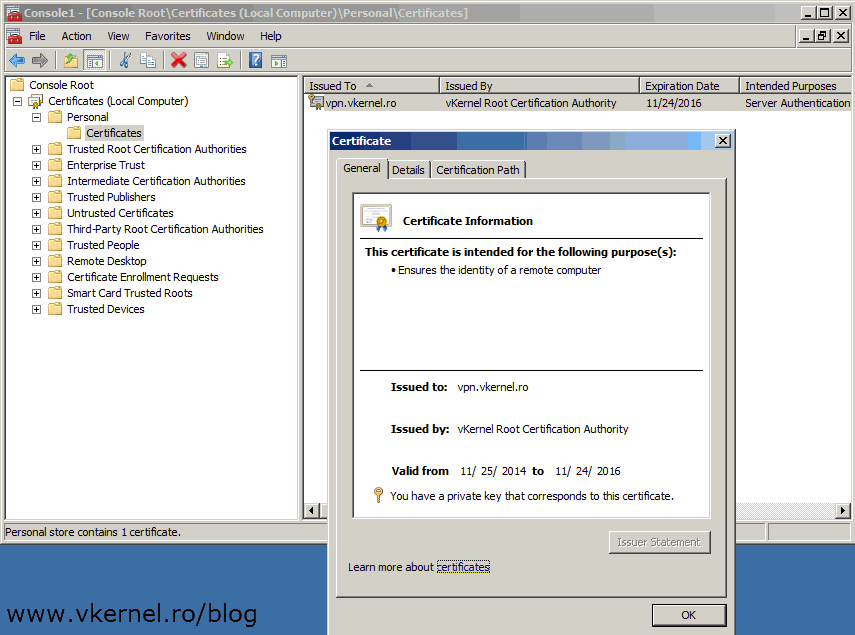
Now you should have the certificate imported with its private key. If the private key is not present the certificate is useless, and you will have to issue another one that has a private key.
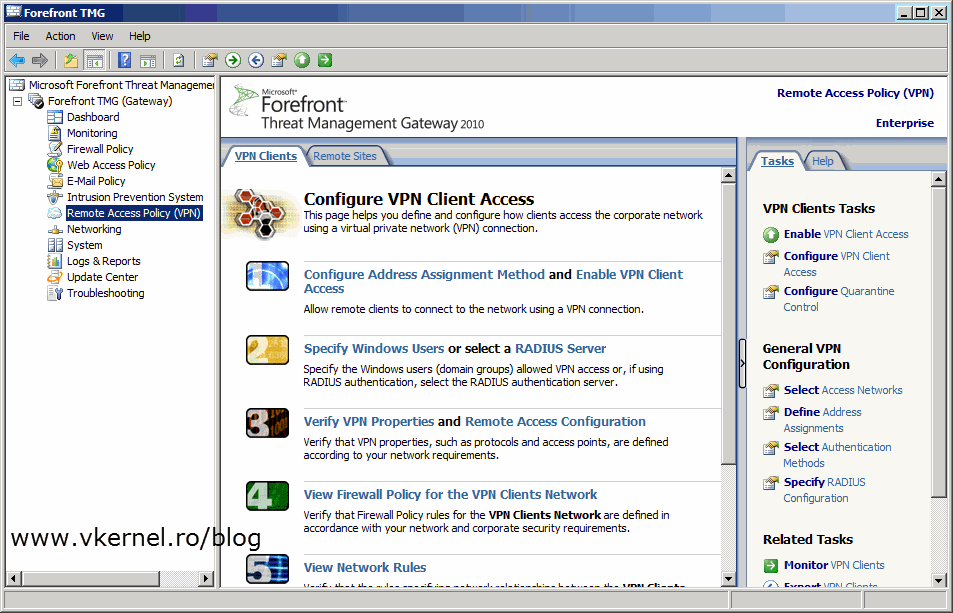
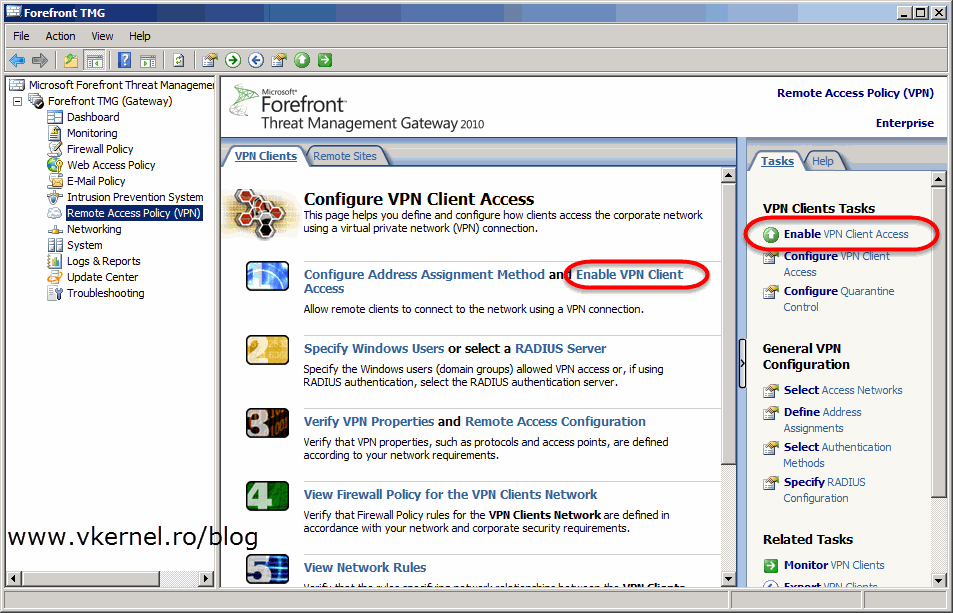
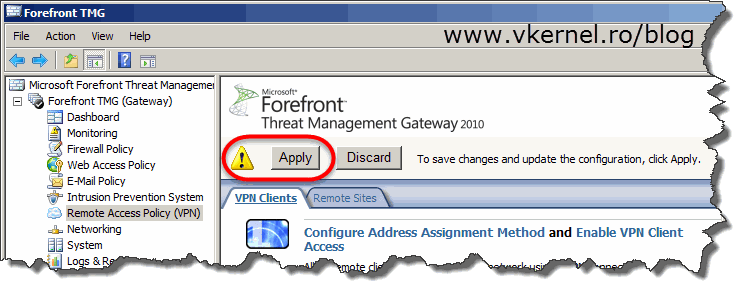
The finale step is to configure TMG 2010 as a VPN client access server. For this, open the TMG console and click on Remote Access Policy (VPN). As you can see there are quite a few settings to configure, and the first one is Configure Address Assignment Method.
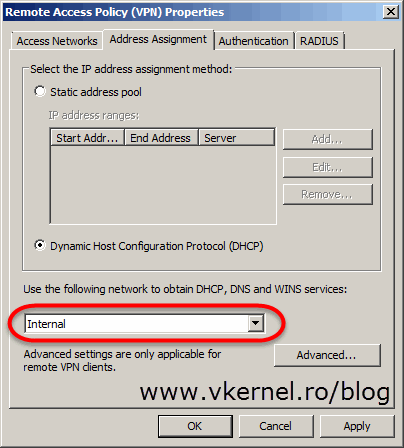
By default a static IP assignment method is selected and in some networks this is how is set up. Personally I don’t like to use this option, I had some routing problems with it, but it’s up to you. The second option is to use DHCP to assign IP addresses to VPN clients. For that just click the Dynamic Host Configuration Protocol (DHCP) radio button then select your internal network from the drop-down-box, or the network where your DHCP server is located. Click OK when done.
Now go and click on Enable VPN Client Access either form the Tasks pane or from the Work pane.
The next setting is to configure who can connect and how they authenticate. Click on Specify Windows Users then hit the Add button to add users or groups (recommended) to the list. This is the part where Active Directory comes in handy. If you want to, or need to use RADIUS for authentication just click the RADIUS Server option and configure it’s settings.

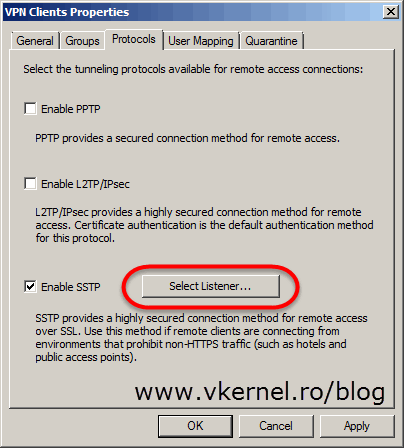
Back on the TMG console, click on Verify VPN Properties option to configure what protocols TMG should accept for VPN connections. PPTP is an old one, but you can use it. The downside of using this protocol is that most of your traveling users will not be able to connect from hotels or airports because the ports it uses (TCP 1723, GRE 47) are usually blocked. For L2TP/IPsec is the same story, but this one is secure. The one that actually works very well and is also secure is SSTP. Check the Enable SSTP box then hit the Select Listener button.
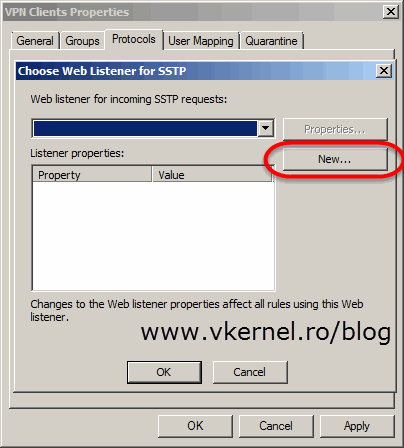
Since there is no listener, a new one needs to be created. Click the New button to open the New Web Listener Definition Wizard.
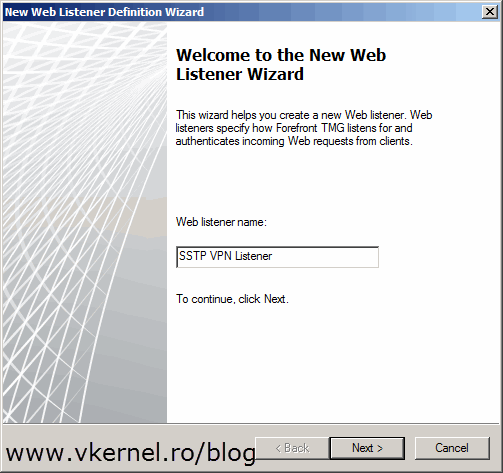
Give the listener a name then hit Next.
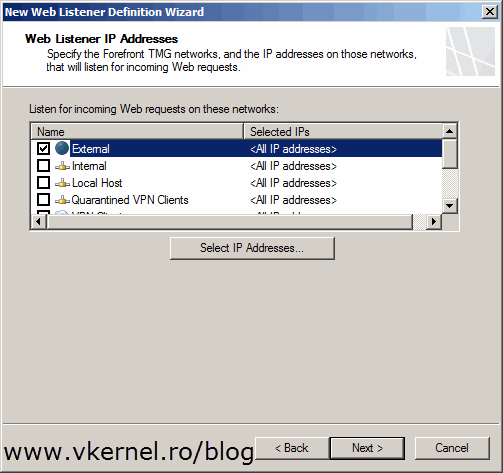
Select the network on which TMG listens for VPN traffic. You might have to select Internal if your TMG server is using only one network adapter or is behind NAT (Network Address Translation). In this example however the TMG server is acting as a router, which means it has one network adapter connected directly to the internet.
[important]If your TMG 2010 server is behind NAT you will have to forward port 443 on your firewall to the TMG server.[/important]
Click the Select Certificate button then select the issued/imported certificate.
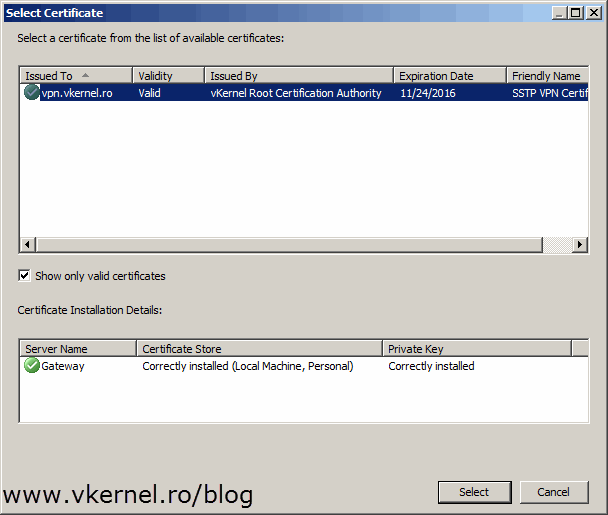

Hit Finish to create the listener.

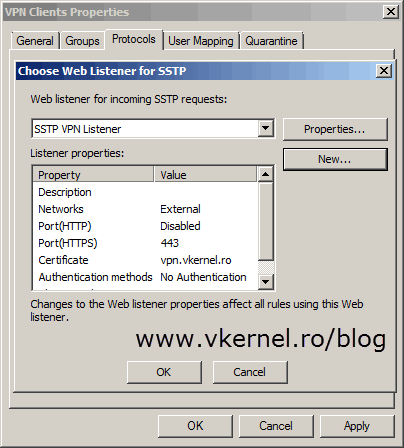
Back on the Choose Web Listener for SSTP window select the listener we just created and click OK then OK again on the VPN Client Properties window.
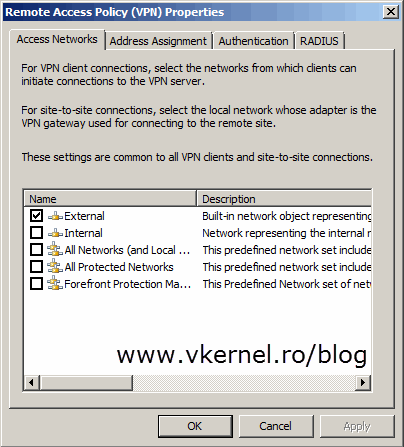
The last step until clients can connect to the VPN server is to configure the network on which those clients initiate connections to the server. Click on Remote Access Configuration and select your network.
Now hit Apply to save all these changes to the TMG configuration store. It might take a few minutes until your VPN server is fully functional, so have a little patience.
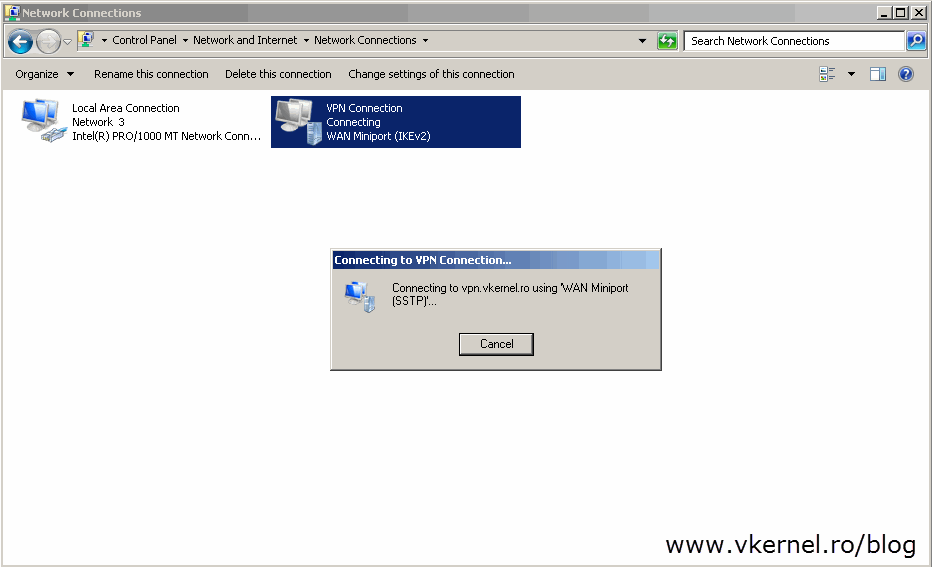
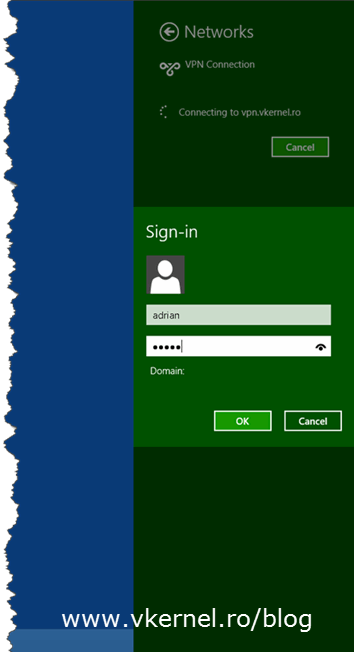
You can now go to one of your clients, create a new VPN connection and test this. If you don’t have an OCSP responder or not using a commercial CA the connection will fail with the following error message:
Error 0x80092013: The revocation function was unable to check revocation because the revocation server was offline.

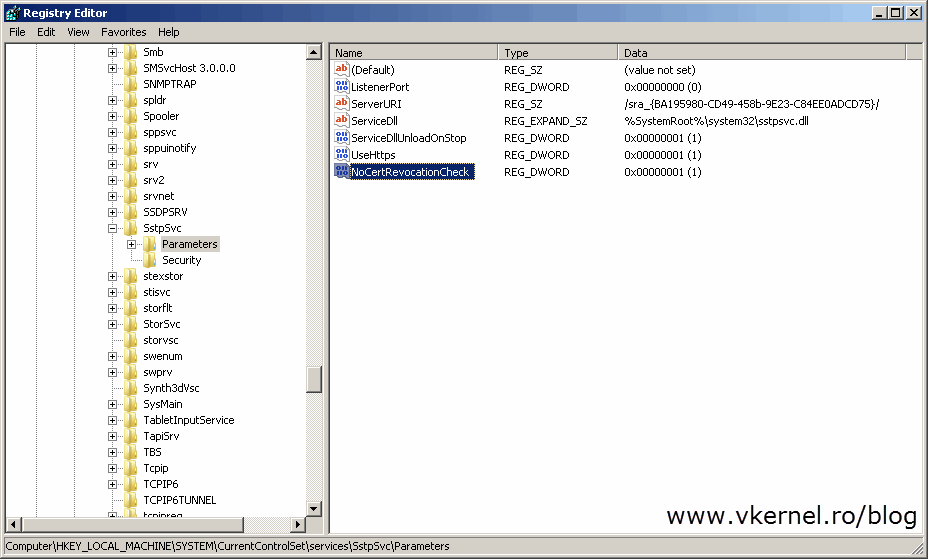
This is because the client can’t find the revocation server to check if the certificate was or was not revoked. To skip this error (not recommended in production), a registry key needs to be created on clients:
Registry subkey: HKEY_LOCAL_MACHINE\System\CurrentControlSet\Services\Sstpsvc\Parameters
Registry entry: NoCertRevocationCheck
Data type: REG_DWORD
Value: 1

Now if you try again the VPN connection should succeed.
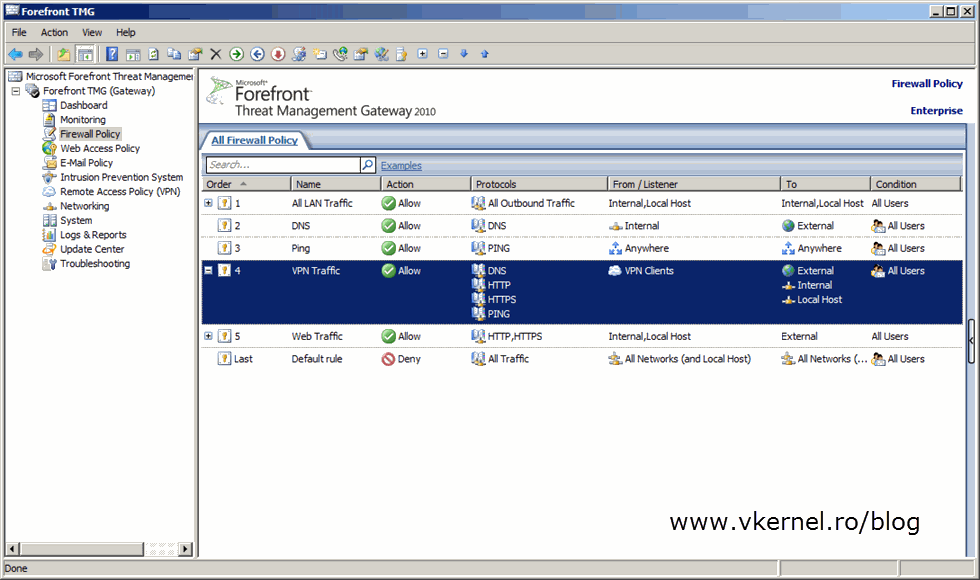
Even if succeeds, you now have another problem; clients can’t access internal resources or browse the internet. This is because no firewall access rule exists that permits traffic from those VPN clients to the internal network or to the outside world. To fix this, just go to your TMG Firewall Policy and create a new access rule, or several of them. It all depends what kind of traffic you want to allow for those users.
And that’s it. Creating or configuring an SSTP client access VPN with TMG 2010 is easy and it just works, even behind a firewall. This is because it uses the same port as secure web sites are using, which is 443, and I’ve never seen companies or institutions that block this port. Try it, test it, implement it, and you’ll see.
Want content like this delivered right to your
email inbox?
More similar articles
 Publishing Multiple HTTP Web Sites with TMG 2010
- Publishing Exchange 2010 Outlook Anywhere with TMG 2010
- Configure TMG 2010 for certificate request from internal CA
- Configuring a PPTP Site to Site VPN with TMG 2010
- Publish VMware vShpere 5 Web Client Server with TMG 2010
- Publish Outlook Web App (OWA) with TMG 2010


What to do if the error: “a certificate chain processed, but terminated in a root certificate which is not trusted by the trust provider”? while trying to connect to the VPN server? I am having this issue for several days now and my hair is white 🙂
I am using Routing and remote access to create a vpn connection and i can see the certificate in there and it’s OK by the root certificate.
Issuing a certificate by the web server as a self-signed does solve the name as server.vpn.ro (for example) but it’s only PPTP, not SSTP.
What am i missing here?
Hi Alex,
But what you are saying I guess you have an internal PKI, so the root certificate needs to be installed on the clients also in order for the chain to complete. And for VPN you also need to have the Certificate Revocation List (CRL) published so the clients can access it.