Installing and configuring a Microsoft Online Certificate Status Protocol (OCSP) Responder
Starting with Windows 2008 Microsoft has an Online Certification Status Protocol (OCSP) Responder feature. Many of you wonder what this is, and I’m going to explain this the best I can. Until OCSP came out, those companies that have their own Certification Authority had to publish to a web server or a LDAP path the so-called Certificate Revocation List (CRL). CRLs contain a list of certificates that expired or were revoked. If a user left the company, and that user had a certificate used for authentication, you as an administrator will want that certificate to become invalid, so no one can use it anymore. After the certificate is revoked you need to copy the CRL file to your repository and replace the old one that exists. Over time those CRL files can grow to a large size, and clients will have to download those CRLs. This will have a negative impact on your network and most of the clients will time out (the default time-out is 15 seconds) while downloading a CRL.
By implementing an OCSP Responder, clients (only from Windows Vista and above) that need to download a CRL list will contact the OCSP Responder server. This server will determine the status of the certificate presented by the client. If the request is in the OCSP Responder cache, it will send the response to the client; if not will retrieve the CRL from the CDP locations listed in the certificate, then will send the response to the client.
The OCSP Responder needs a client to communicate with, and this client is already integrated staring from Windows Vista. At this point there is no OCSP client for Windows XP, and I don’t expect to see one in the future, but just google and you will find some third-party tools that work on Windows XP.
I presume you already have your internal Enterprise CA installed and configured, if so let’s move forward with the OCSP Responder installation. I’m doing this on a 2008 R2 server that is joined to a Windows domain. If you are in small environment you can install it on the internal Certification Authority server, but right now I can afford to do this on a separate machine.
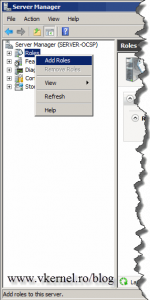
Open Server Manager, right-click Roles and choose Add Roles.
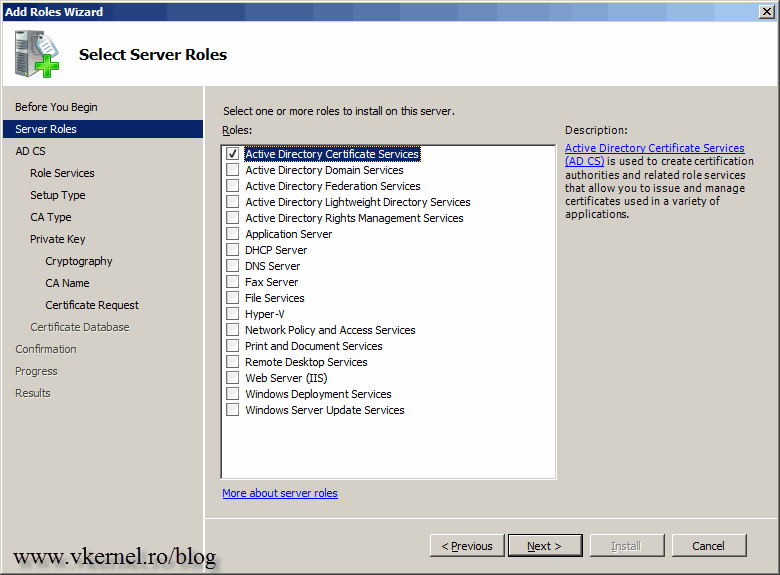
On the Select Server Roles page check the Active Directory Certificate Services box then click Next.
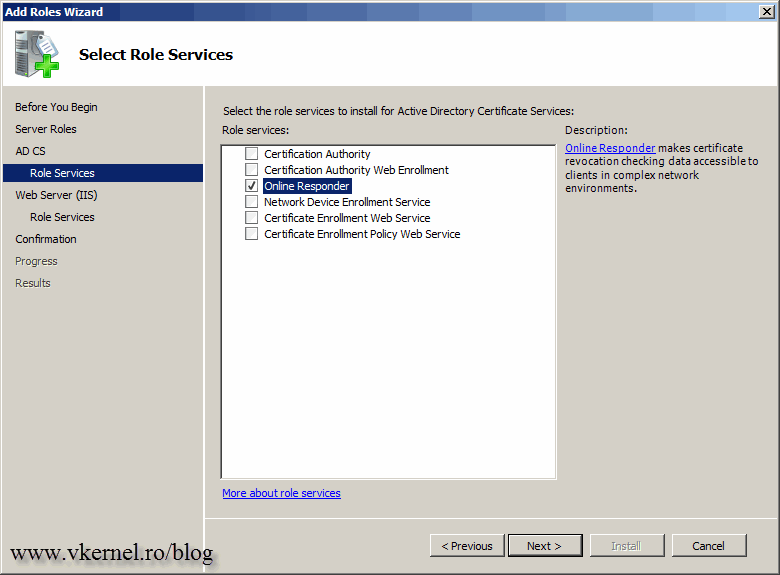
Clear the Certification Authority box and check the Online Responder one. The Online Responder role service requires additional features for it to function. On the window that pops-up click Add Required Role Services button and finish the wizard using the default settings.
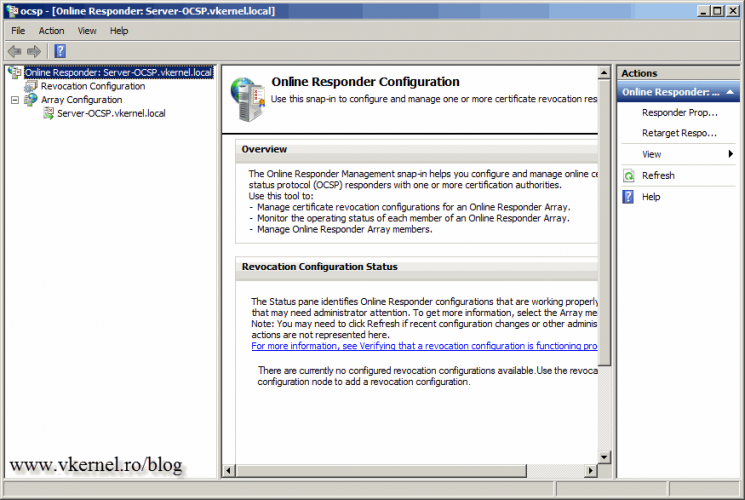
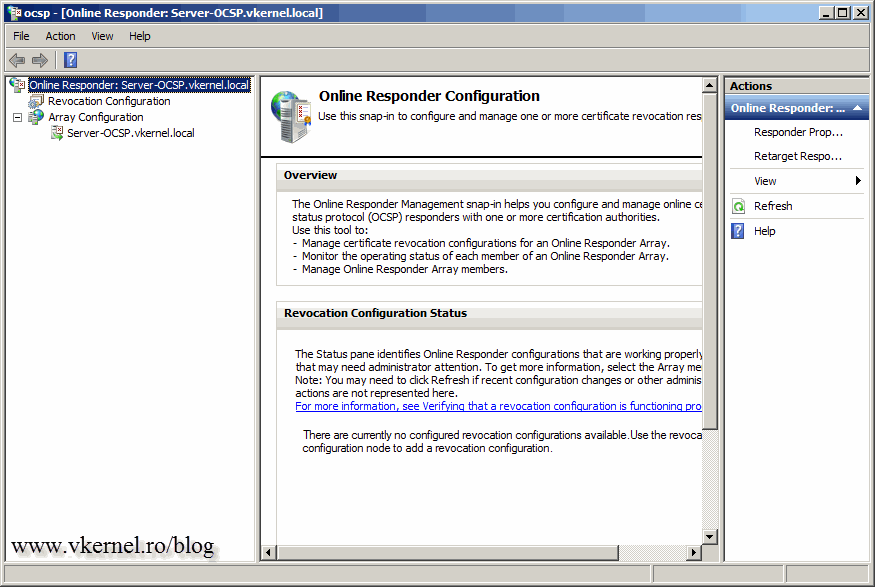
And here it is, the Online Responder management console. You can open it from Server Manager or the shortcut from Administrative Tools > Online Responder Management.
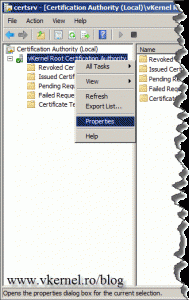
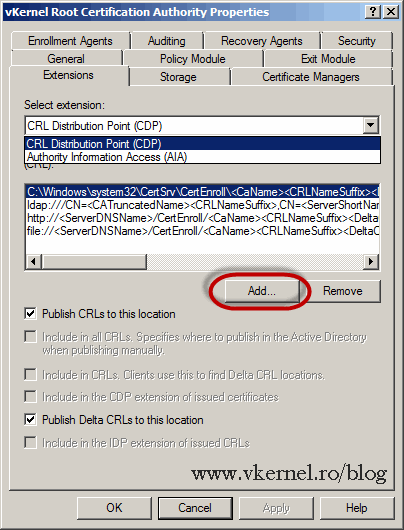
Now that the installation is done, we need to leave it for a while as it is and go configure the Certification Authority. Log in to your server where you have the internal CA installed and open the console from Administrative Tools > Certification Authority. Here we need to configure the AIA (Authority Information Access) extension to support OCSP. Basically we put in the certificate a pointer (address) where clients can find status information for a particular CA. Right-click the CA name and choose Properties.
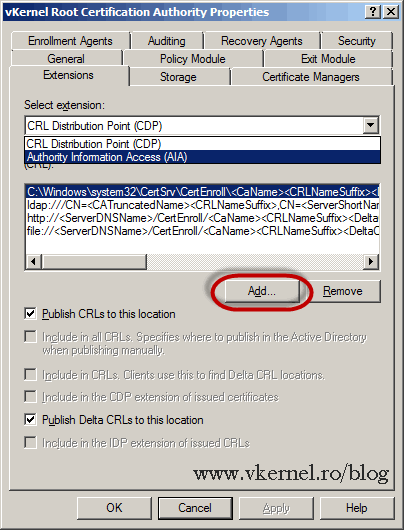
Go to the Extensions tab, and from the Select Extension drop-down box choose Authority Information Access (AIA). Click the Add button and type the FQDN address for the OCSP responder in the form http://OCSP responder FQDN/ocsp, then hit OK. Remember, this needs to be a public domain name because external clients need to find the OCSP responder server. Internal clients already know the address using LDAP. In my case pki.vkernel.ro points to my external IP of my OCSP Responder server. You also need to open/forward port 80 on your firewall to the OCSP Responder server. Click OK when done.
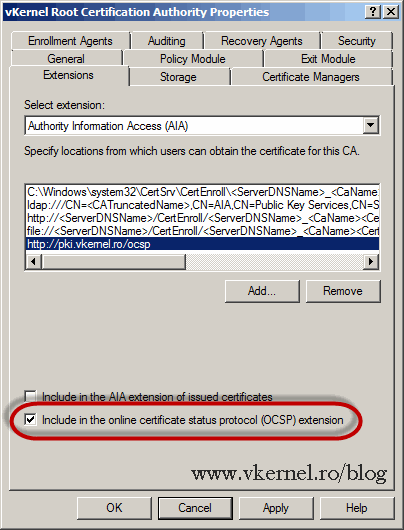
Now select the OCSP address from the list then check the box Include in the online certificate status protocol (OCSP) extension and click Apply. You are asked to restart the certificate services for changes to take effect. Choose Yes.
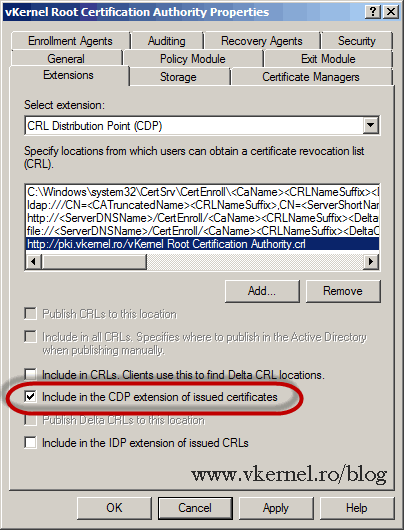
I told you to hit Apply so you don’t have to reopen this window again to configure the CDP extension. This is not a must, but it helps out with the OCSP Revocation Configuration wizard later on. From the Select extension drop-down box choose CRL Distribution Point (CDP). Click the Add button then type the FQDN address where your revocation list sits or can be reached; you need a web site for this. Don’t worry, we are going to create this site in just a moment and I’ll explain to you how to put that revocation list in the site, but for now click OK.
Select the address we just created then check the box Include in the CDP extension of issued certificates. Hit OK then Yes to restart the certificates services.
Now I told you that a site is needed for that revocation list, so let’s create it. This can be a site running on any web server, even on a Linux box (Apache), but since we are using Microsoft products, we use IIS. And an IIS server is already running on our OCSP server box so all we need to do is put the revocation list on the existing default site, or create a virtual directory. All this depends on how you typed the link in the CDP extension. In my example I have pki.vkernel.ro/vKernel Root Certification Authority.crl, so my revocation list will be in the root of the web site. If your address is like this pki.domain.ro/some folder/revocation list.crl, then you will need to create a virtual directory under the default web site. If the OCSP server is on a different box then the CA, then you will also need to create a script that periodically copies and replaces the revocation list on the web site with the newest version. You don’t have this copy and paste problem if the OCSP Responder is sitting on the Certification Authority server; just configure the web site or create a virtual directory that points to the CertEnroll folder (C:\Windows\system32\CertSrv\CertEnroll). I know is a little bit hard to get this if you are just starting, but write me a comment on the comments area below if you have some questions, and I will try to lite it up for you.
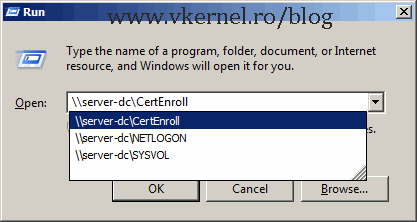
The simplest way to find the revocation list and copy it on the site is to just type the name of your Internal CA and a CertEnroll share will be displayed in the list.
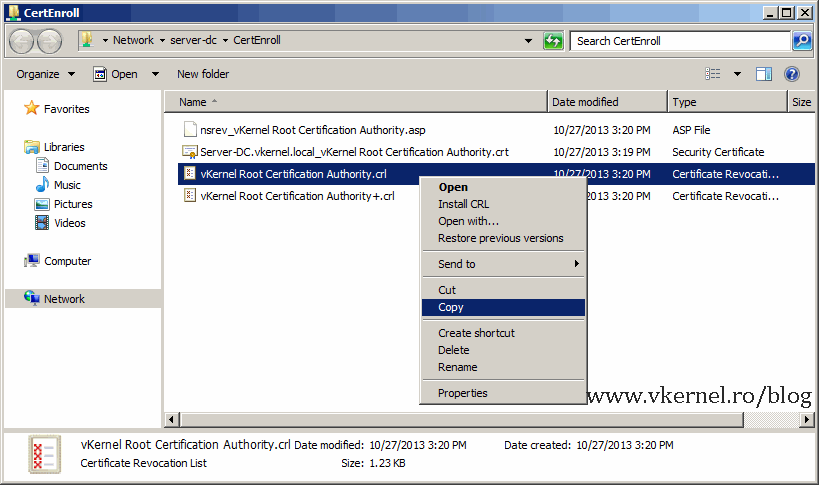
Copy and paste. As you can see, I paste it in the root of the default web site folder.
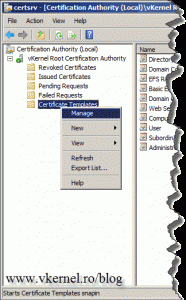
We are done with the revocation lists and shares for now, but still some other configurations are needed on the CA before we actually start configuring the OCSP Revocation server. In the Certification Authority console, right-click Certificate Templates and choose Manage.
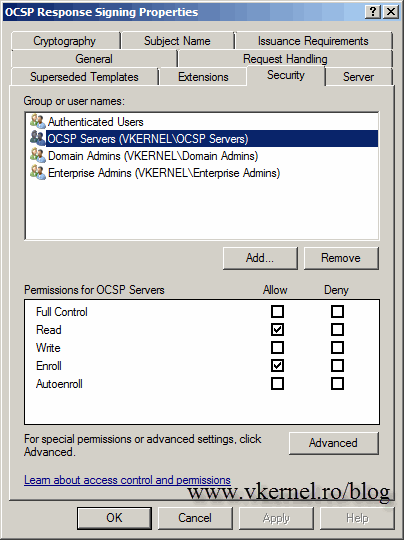
Locate the OCSP Response Signing template, right-click it and choose Properties. We need to give our OCSP server the Enroll permission to the OCSP certificate template. You can create a security group in AD that has your OCSP server as a member, or you can just add the OCSP server directly. When your done click OK and close the Certificate Templates Console.
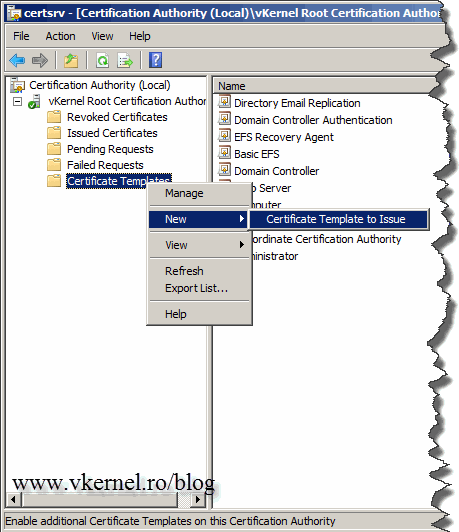
Back on the Certification Authority window, right-click Certificate Templates and choose New > Certificate Template to Issue. From the list select the OCSP Response Signing template and click OK.
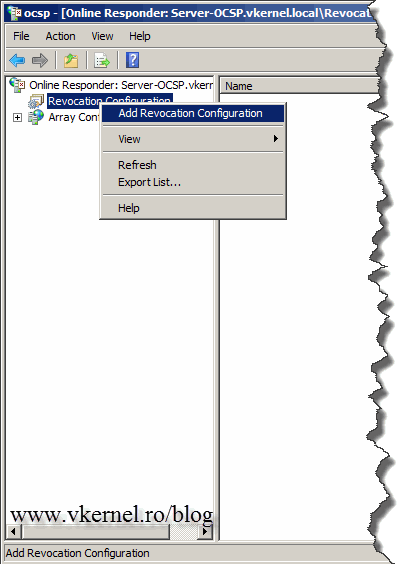
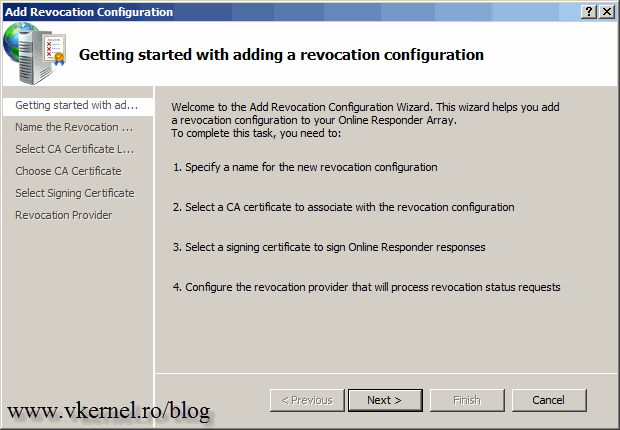
We are now done configuring the Certification Authority settings; let’s move over to the OCSP Revocation server. Open the management console from Administrative Tools > Online Responder Management, right-click the Revocation Configuration object and choose Add Revocation Configuration.
On the Getting started page click Next to continue.
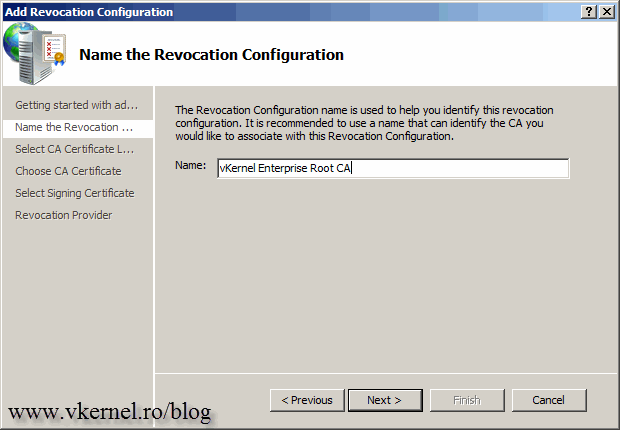
Give the Revocation Configuration a friendly name then continue the wizard.
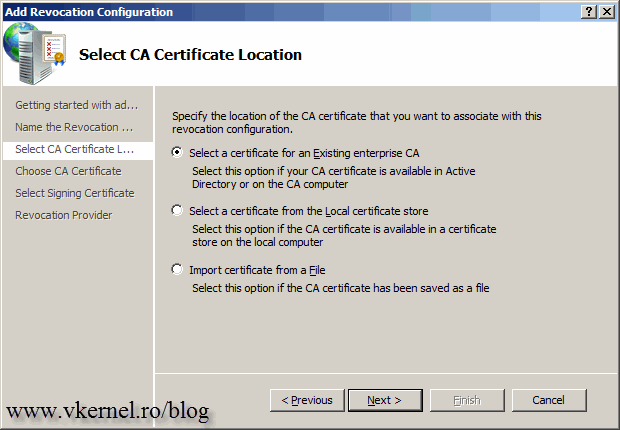
Since we are configuring this with an Enterprise CA leave the first option selected and continue.
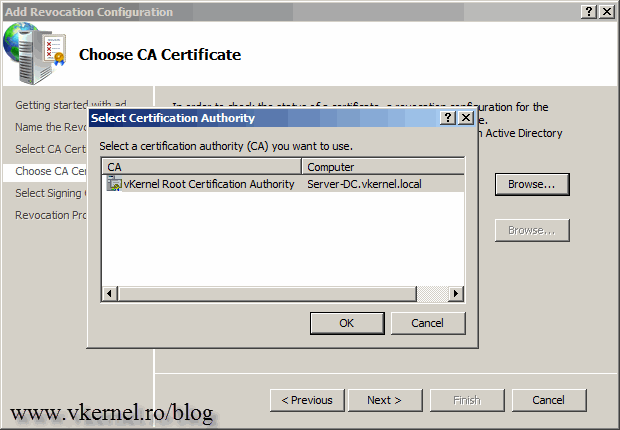
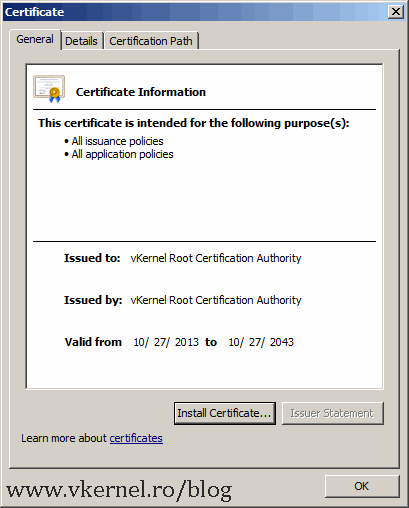
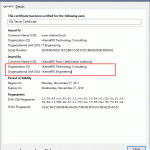
Click the Browse button and select the Certification Authority from the list. You can verify the certificate by clicking the link that appeared on the wizard.
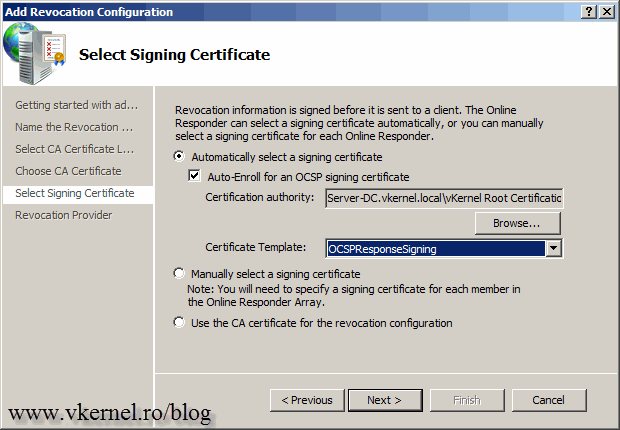
Leave the Auto-Enroll for an OCSP signing certificate box enabled and click Next. As you can see the certificate template is automatically selected.
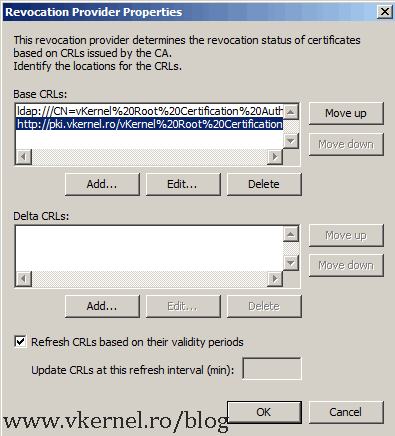
For this button we worked so hard by copying the revocation list and put it on a web site, a few moments ago! The location/address that we typed in the CDP extension is automatically recognized by the wizard. If you skipped that part, you will have to manually type the address here by clicking the Add button. Hit Finish to save the configuration settings.
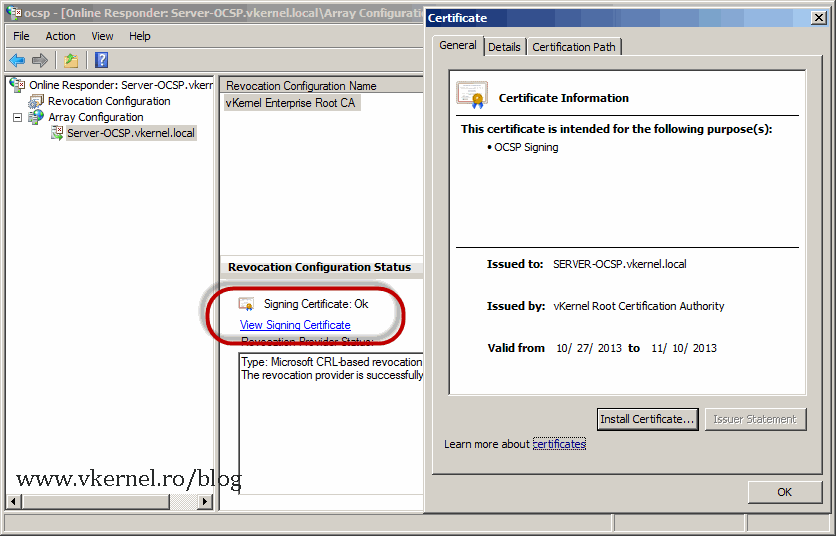
After a few seconds, the OCSP Responder should be working just fine. You can tell that by looking at the Configuration Revocation Status section; if is green, you’re good-to-go.
The signing certificate can also be viewed by expanding Array Configuration, selecting the server then clicking the View Signing Certificate link.
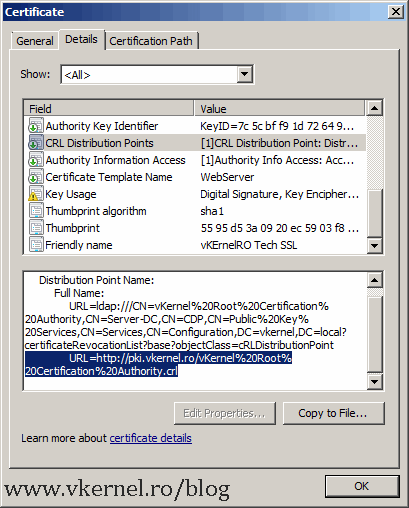
If you issue a certificate and open it, you can see on the Details tab on the CRL Distribution Points and Authority Information Access fields a new line. That line is the OCSP and CDP address we configured above.
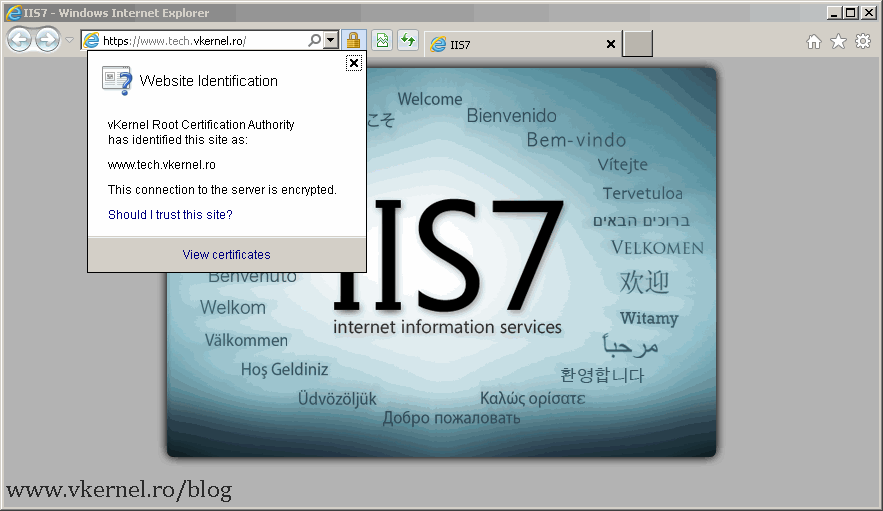
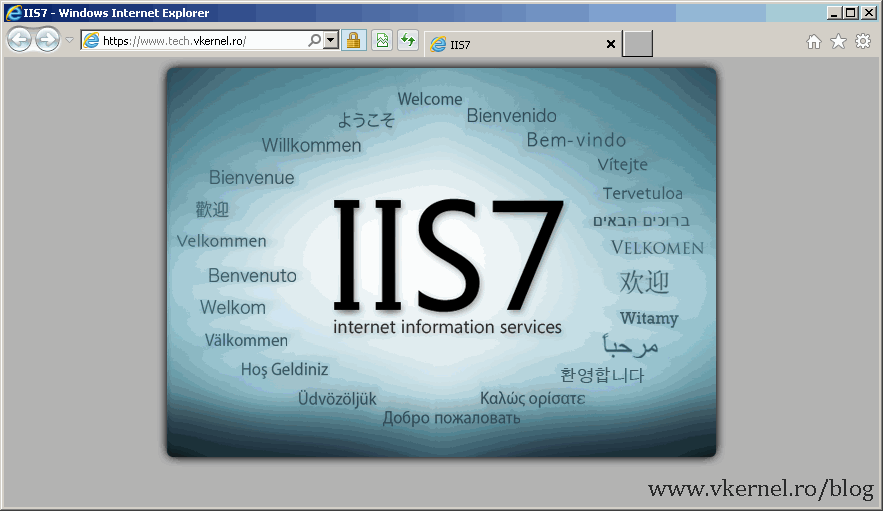
OK then, let’s test this and see if it’s working. I will use a Windows 7 client that is not joined to the domain, and is somewhere around the world. Do not join the client to domain, or the revocation list will be copied to the repository using LDAP. You still need to install the root certificate from your internal CA on this client. I will now open a web site that is secured by a certificate issued from my internal CA, and see what happens. And looks like is working just fine.
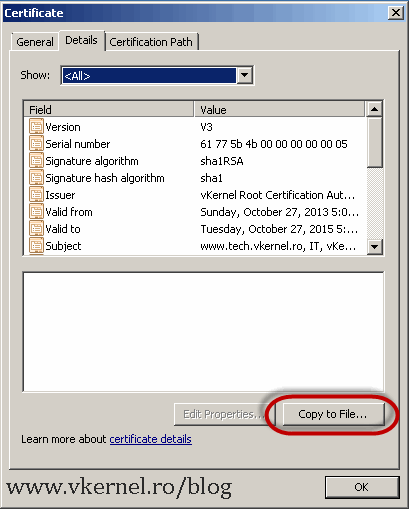
But how do I know that the browser requested the revocation list from the certificate ? There is a tool for that, but before we use the tool we need to download the certificate from the web site we just opened. Click the lock from the browser, choose View Certificates, go to the Details tab and hit the Copy to File button. Go with all the defaults and save the certificate somewhere on your computer.
From a terminal issue the following command:
certutil -url 'your certificate file name'
where ‘your certificate file name’ is the name of the certificate you just exported using the Copy to File button.
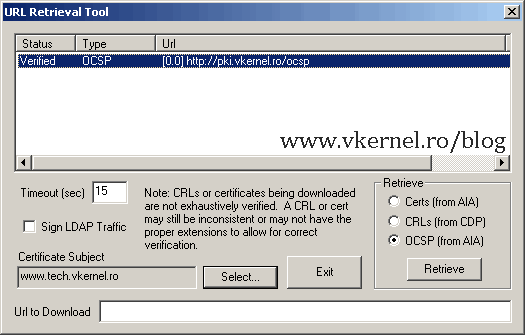
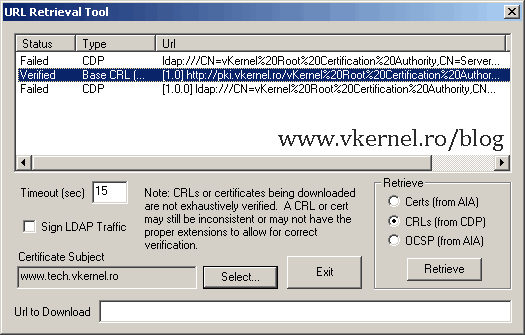
Select the OCSP (from AIA) button and hit Retrieve. If is says Verified, is working.
You can also check the CRL’s. Some of the addresses will fail, and that’s normal because you can’t access the address trough LDAP from an external client. Look at the one you configured in the CDP extension, it should be listed as Verified.
What if the certificate get revoked for some reason ? Let’s see what happens.
What ?? Is still working you might say ? Well yeahh, because the revocation list is still in the client cache. Issue the bellow commands to clear the cache.
certutil -urlcache ocsp delete
certutil -urlcache crl delete
or to delete all:
certutil -urlcache * delete
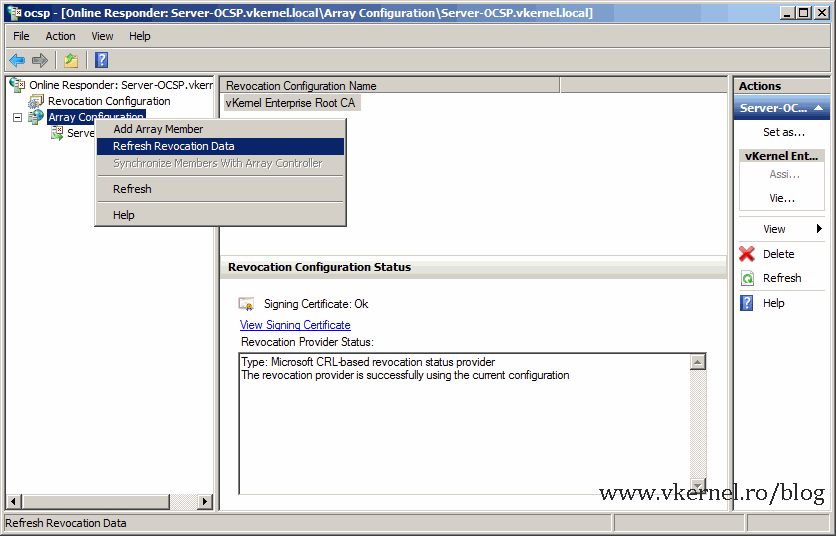
If the site still opens and no certificate error is received is because the OCSP server did not refreshed its database with the newest revocation list. Wait a few minutes or force the refresh by right clicking Array Revocation then choose Refresh Revocation Data.
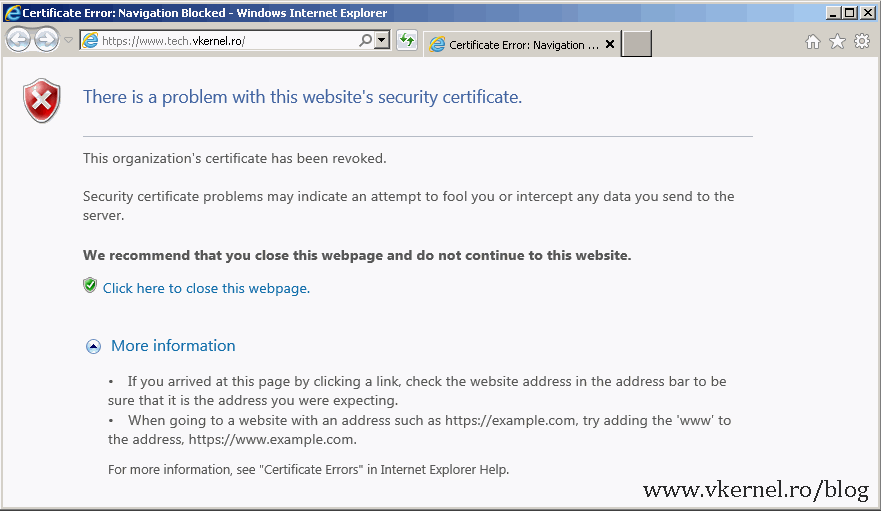
And bam! you can’t browse the site anymore, because the certificate was revoked.
Is working, the OCSP Revocation server is working! This is a great feature in Windows and you will start to appreciate it once you have a lot of certificate in the revocation list. Plus the management is really easy.
Want content like this delivered right to your
email inbox?


So… can you just ditch CRL and CDP, and just use OSCP?
Hi,
You can ditch CRL since we can do the same thing with OCSP but since browsers and the entire industry is still using CRL I will not do that. CDP is still needed.
Not sure if this site is still active. But I cannot find the answer to this question on Technet. If I have a root CA and a Subordinate CA only available to install the OCSP on, which would be the better option?
It is still active, and it will continue to be. If these are your only options and don’t have a separate server for the OCSP service, then install it on the Subordinate CA.
Oh ok, thanks.
Thank you, this is a good guide,
But, I always finish with this error : “wrong signature certificate on the group controller”
The responder is not working.
By the way, I couldn’t give the OCSP server the Enroll permission to the OCSP certificate template.
And I tried to create a security group in AD that has the OCSP server as a member, But I couldn’t find the OCSP Server
when I click on “add” on the permission tab!
Any idea ?
Does the Windows OCSP responder REQUIRE a MS AD CA? We have a non-MS CA, don’t publish the CDP in the certs and I was going to look at using the MS OCSP server rather than attempt to distribute all the CRLs to the workstations in the network.
and before you ask, (no) it’s not possible to change or integrate the CA into AD and (no) they outright refuse to publish the CDP or AIA in the issued certificates
Hi,
You can install the OCSP responder on a stand-alone server also from what I know. Never tested it, but is a good idea for a new article. I will take a look at this once I fix my hardware lab problems. Let me know if it works.