Publish Outlook Web App (OWA) with TMG 2010
Hi there, me again. Just a couple of days before, I had to publish Exchange 2010 OWA for a client; than I thought, why not make a guide on this blog and show you the steps. And here it is. In this post I will show you how to securely publish Exchange 2010 OWA to the internet using Forefront TMG 2010. All the action takes place in a single forest/domain environment, one Exchange 2010 SP1 with all the roles, TMG server is joined to the domain, and certificates are going to be issued by an internal Enterprise CA.
To be able to test this in a lab environment if you don’t own a public domain, you can edit the hosts file on an external client and point the FQDN to the external IP of the TMG server.
Before we start to publish the OWA site we need to make some configuration changes on the Exchange server. Open your Exchange console, expand Server Configuration and click the Client Access object. In the middle pane click your Exchange server and select the Outlook Web App tab.

Right click OWA (default Web Site) and choose Properties. Go to Authentication tab, select Use one or more standard authentication methods, and check the box Basic Authentication (password is sent in clear text). Don’t worry the passwords are not sent in clear text, we are going to encrypt the traffic using a certificate.

Now back on the management console click the Exchange Control Panel tab. Right click ECP (Default Web Site) and choose Properties. Go to Authentication tab, select Use one or more standard authentication methods, and check the box Basic Authentication (password is sent in clear text).

For the configurations to take effect we need to restart IIS. Open a terminal and type:
iisreset /noforce
Sometimes the service takes a log time to stop, like in mine case. Wait a minute or two and issue the command again.

The next step is to install a proper Exchange certificate. I have a post where I talked about how to install and configure Exchange certificates here. Read the post, then come back.
Now we need to export the Exchange certificate and import it on the TMG server. Click Start > Run, type mmc. On the console go to the File menu, choose Add/Remove Snap-in, select Certificates and click Add. On the new window select Computer Account > Local Computer, and click Finish and OK. Now expand Certificates > Personal, right click the Exchange certificate and choose All Tasks > Export.

Select the option Yes, export the private key and click Next to continue.

Choose to export all extended properties.

Type a password to protect the certificate.

Specify a path to export the certificate to and finish the wizard.

Now we need to import the certificate on the TMG server. Again open the mmc console and add the Certificates Snap-in like we did before. Right click the Personal folder and choose All Tasks > Import.

Click the Browse button and select the Exchange certificate.

Provide the password to decrypt the certificate. This is the password we set on export. Finish the wizard.

It’s time to create our publishing rule, so open the TMG console and go to Firewall Policy. On the Tasks pane click Publish Exchange Web Client Access.

Give the publishing rule a name and click Next.

Since we are publishing Exchange 2010 OWA, from the list select Exchange Server 2010, and check the box Outlook Web Access.

We are only publishing a single web site, so the default option is OK. Click Next to continue.

The publishing rule will use SSL, so choose the first option.

Type the internal site name, and provide the IP or computer name, so TMG can connect to the publish server. In the internal site name I usually type the external name of the site, so users don’t have to memorize two web addresses. The published server is our Exchange server.

Here type the public name, the one that external users will type in their browser to connect to Exchange OWA.

On the Select Web Listener screen click the New button to create a new listener. The existing one is for HTTP traffic and we need a listener for HTTPS traffic. Name the new listener and continue the wizard.

We need a secure connection, so leave the default selection here and click Next.

Check the box next to External, to listen for traffic coming from the internet.

Click the Select Certificate button, and select the Exchange certificate we imported just now.

On the Authentication Settings page, be sure HTML Form Authentication is the one selected. Click Next.

We do not need SSO, so uncheck the box and continue.

Click Finish to close the listener wizard.

Back to the Exchange OWA publishing rule click Next to continue.

On the Authentication Delegation page select Basic Authentication. This is the type of authentication we configured on the Exchange server.

Click Next leaving the defaults on the User Sets page.

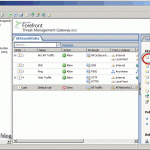
Finish the wizard and apply the configuration on the TMG server by clicking the Apply button. Now let’s see if it works. From an external client access the OWA page in this form https://FQDN/owa.

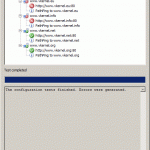
And now the TMG logs.

Want content like this delivered right to your
email inbox?