Configure Windows Deployment Services (WDS) – Part2
In the first part (click here for the first part) I showed you how to install and configure your WDS server, and how to add a boot or install image. In this part we are going to deploy a clean Windows 7 system from the image we previously imported in WDS. For this to work you client computer(s) needs to be able to boot from the network.
To start power on your client PC and force him to boot from the network, either by configuring the BIOS or by pressing a key or a combinations of key so the boot menu will pop-up. After the client was assigned an IP address from the DHCP server, he is redirected to the WDS server. At that moment you are prompted to press F12 to boot from the network.

The boot.wim image will start loading into the client memory.

Here click Next after you configured your keyboard and local settings. A window appears to enter the necessary credentials, if you want to be able to connect to the WDS server. Provide your credentials and click OK. Your credentials should be in the form domain\user. If you put just the username is not going to work.

Since we have only one install image, click the Next button to continue.

Format and create partitions the way you want, then continue the wizard.

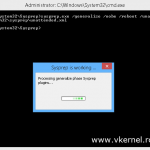
As soon as you click Next the wizard will wait a couple of seconds for the WDS server to initiate the session,

then the normal Windows 7 installation screen appears.

If everything worked out well you should be able to see you new system that is already joined to the domain. Cool stuff…

Now you can start installing missing drivers, and the software that you need. In the next part of this series I’m going to show you how to capture this Windows 7 system that we just installed, and deploy that custom image to other systems in your network.
Want content like this delivered right to your
email inbox?
More similar articles
 Customizing the Default Local User Profile before imaging
- Sysprep and Capture a Windows Image with MDT 2012
- Deploying Windows 7 with WDS and MDT 2010 – Part2
- Deploying Windows 7 with WDS and MDT 2010 – Part1
- Configure Windows Deployment Services (WDS) – Part4
- Configure Windows Deployment Services (WDS) – Part3