Adding Disks and Tape Libraries to DPM 2010
Now that you have your DMP server installed, the next thing to do, is to add disks for your backups. You can use DAS (Direct Attached Storage) which are hard drives connected directly to your DPM server, iSCSI which is storage accessed through the network, Fiber Channel LUNs which is storage accessed trough fiber optic cables, or tapes for archiving, called Libraries in DPM. Since I don’t have a Fiber Channel connection in my lab, I can only show you how to add the rest of the supported storage to DPM.
We will start with DAS, so connect or create a new hard drive (if you are in a virtual environment) on your DPM server. Once is connected we need to put the new drive online, and we do that using Server Manger. Here expand Storage and click the Storage Management object. Right click the drive and choose Online, then right-click it again and choose Initialize Disk.


Do not create a volume, or DPM will not be able to allocate free space for backups. It will “think” that no space is available on the disk anymore, and that is 100% full.

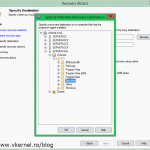
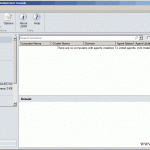
You can now close Server Manager and open the DPM 2010 console. Once opened, go to Management > Disks tab. On the Actions pane click the Add link, to open the Add Disks window.

Here, select one of the available disks, if you have more than one, then click Add and OK.

If your disks are set as basic disks they will be converted to dynamic disks. A message will be displayed informing you about the operation. Click Yes to convert the disk.

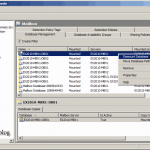
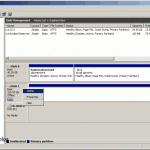
We now have a healthy disk to the DPM Storage Pool Disks that we can use for backups.

The second thing I want to show you, is how to add iSCSI storage to the DPM Storage Pool. For this exercise you will need an iSCSI Target. The one that I’m using is from StarWind Software and a trial is available here. One you have your target in place, on the DPM server open the iSCSI Initiator from Start > Administrative Tools > iSCSI Initiator. Click YES on the message box that pops-up, to start the iSCSI service. Here in the Target box type the IP address or FQDN of iSCSI target, and click Quick Connect.

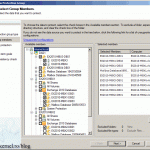
The Quick Connect window will pop-up, showing the discovered drives on the specified target. Select the drive and click Connect.

Click OK to close the iSCSI Initiator Properties. Now open Server Manager and go to Disk Management, because we need to initiate the new drive (iSCSI drive). Like we did before, right-click the disk and choose Online, the right-click it again and choose Initiate Disk.

Open the DPM console, go to Management > Disks tab, and from the Actions pane click the Add link. Select the available disk, click Add and OK. On the warring message choose YES to convert the disk to a dynamic disk.


And now we have a second disk to our DPM Storage Pool. As you can see the total capacity was increased.

The last example is how to add tape drives to DPM. For this I’m going to use the StarWind Software target again. If you want to use this software to do the exercise please read the documentation on their website on how to install tape devices on Windows. If everything is in order all you have to do is open the DPM console, go to Management > Libraries tab, and on the Actions pane click the Rescan link.

On the displayed message click YES to start the scanning for new attached libraries.


As you can see it found a tape library attached to the system. Now I can use this library to store backups for a long period of time.

Want content like this delivered right to your
email inbox?
More similar articles
 Microsoft System Center Data Protection Manager 2012 R2 Cookbook
- Restoring failed Active Directory Domain Controllers
- Restoring Exchange 2010 Mailbox Databases using DPM 2012
- Backup Exchange 2010 Mailbox Databases with DPM 2012
- Installing Data Protection Manager (DPM) 2012 Agents
- Adding Disks and Tape Libraries to DPM 2012