Patching the vCenter Server and PSC Virtual Appliance
VMware has come a long way in how we update our vCenter Server virtual appliance, and it has become easier than ever. If back in the days we had to copy the patch files and issue endless commands in a shell, nowadays -starting with version 5-, all we have to do is just click a button. If we include automation/orchestration, we don’t even have to do that anymore.
To patch our vCenter/PSC servers, we have two methods: the online method and the offline one, where patches using the offline method can be installed either using the GUI (VAMI) or the command line -if you want to automate-. There is actually another method where we create our own internal repository and all our VCSA and PSC appliances will connect to it and download the updates. This subject deserves a dedicated page just for itself, so I’m going to discuss it in a future article.
Before any work starts on the appliance(s), make sure you have a recent backup. If not, do one right now and only then continue with the steps in the article. Also, a maintenance window is needed since the vCenter appliance will automatically reboot after the patching process is finished.
1.Patching the VCSA or PSC appliance using the online method
This is the easiest and fastest way in small to medium environments to patch our vCenter Server appliance(s) or PSC since all the packages are automatically downloaded from VMware’s online repository. As you can guess, the more the environment and the security requirements grow, this method is no longer suitable since it consumes a lot of time and internet bandwidth.
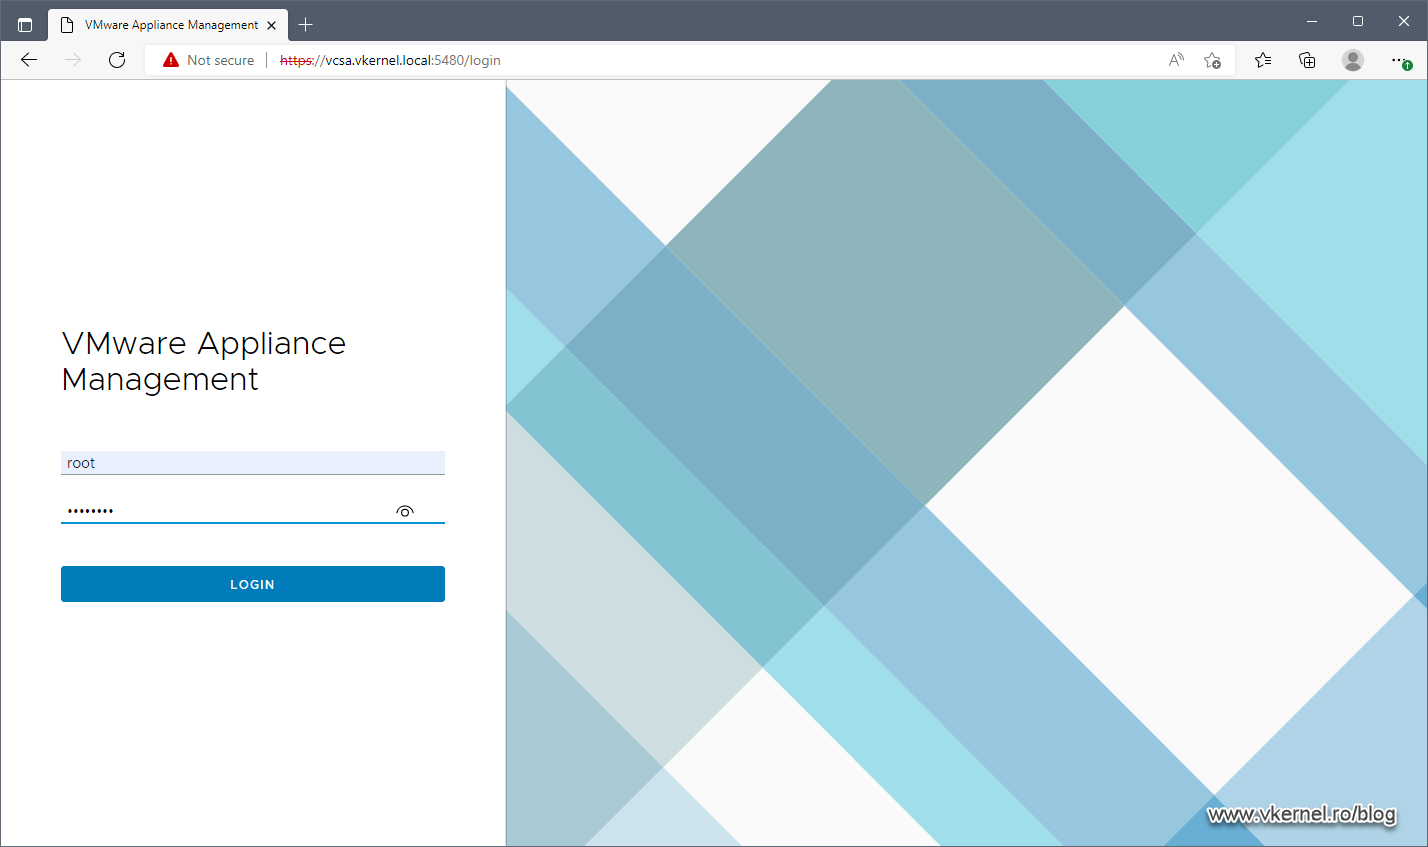
To begin patching our vCenter Server/PSC appliance we need to connect to the vCenter Server Appliance Web Console (VAMI) which is running on port 5480. The link will be in the form
https://<vCenter/PSC IP or FQDN>:5480Once the portal opens, we need to log in using our root credentials that were set up during the vCenter appliance deployment.
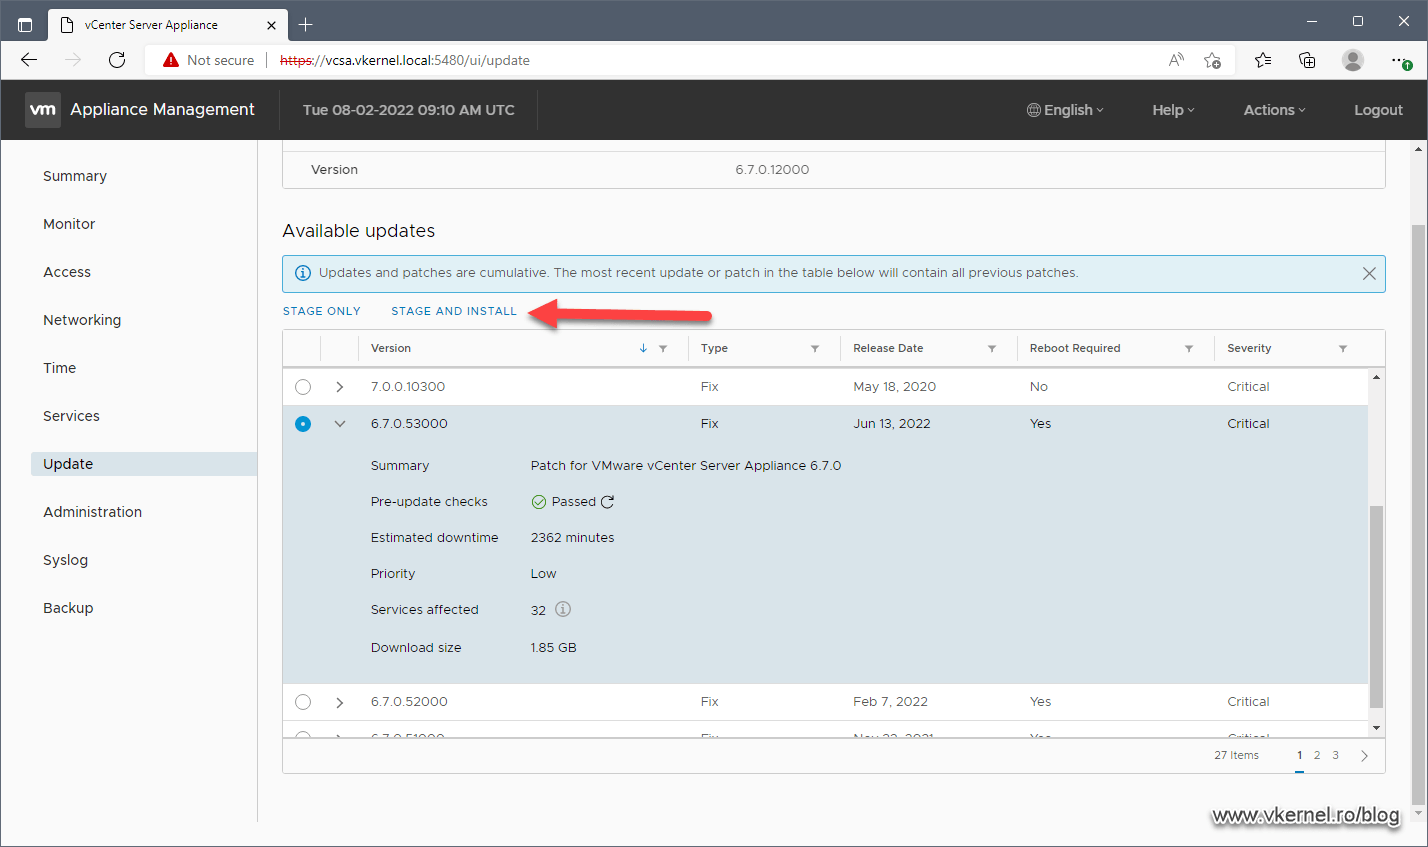
Click the Update menu from the left-hand side then CHECK UPDATES > Check CD ROM + URL (we will deal with CD ROM alone in the next section). Most of the times we don’t even have to click the CHECK UPDATES button because once we enter the Update section, the appliance will automatically start searching for patches from VMware’s repository. This can be noticed by the spinning circle.
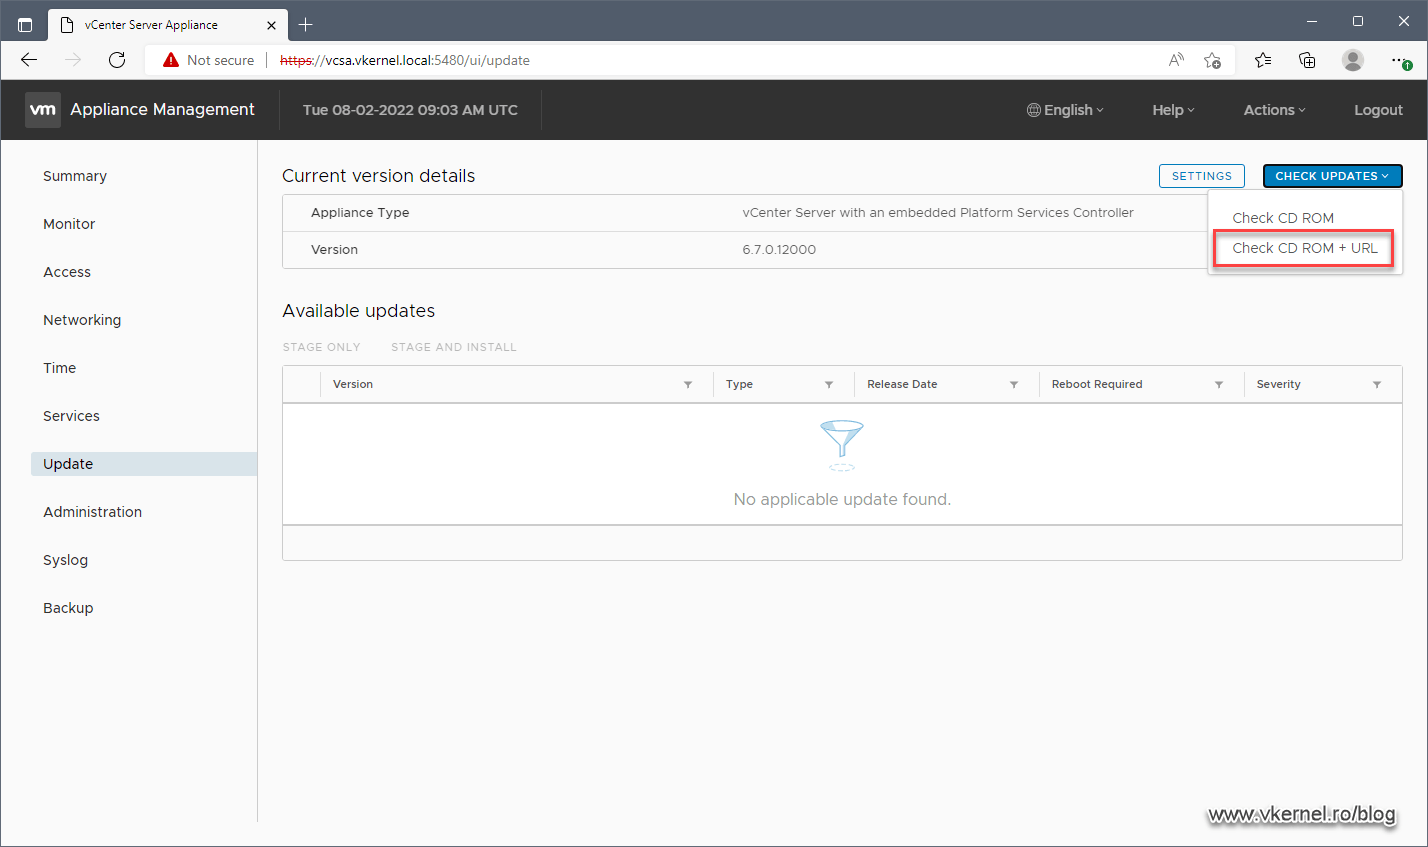
The process will take a few minutes to complete, and once it’s done, we will be presented will all of the available packages for our vCenter Server version. You should always install the latest package because these are cumulative patches and the latest one will contain everything from the previous one(s).
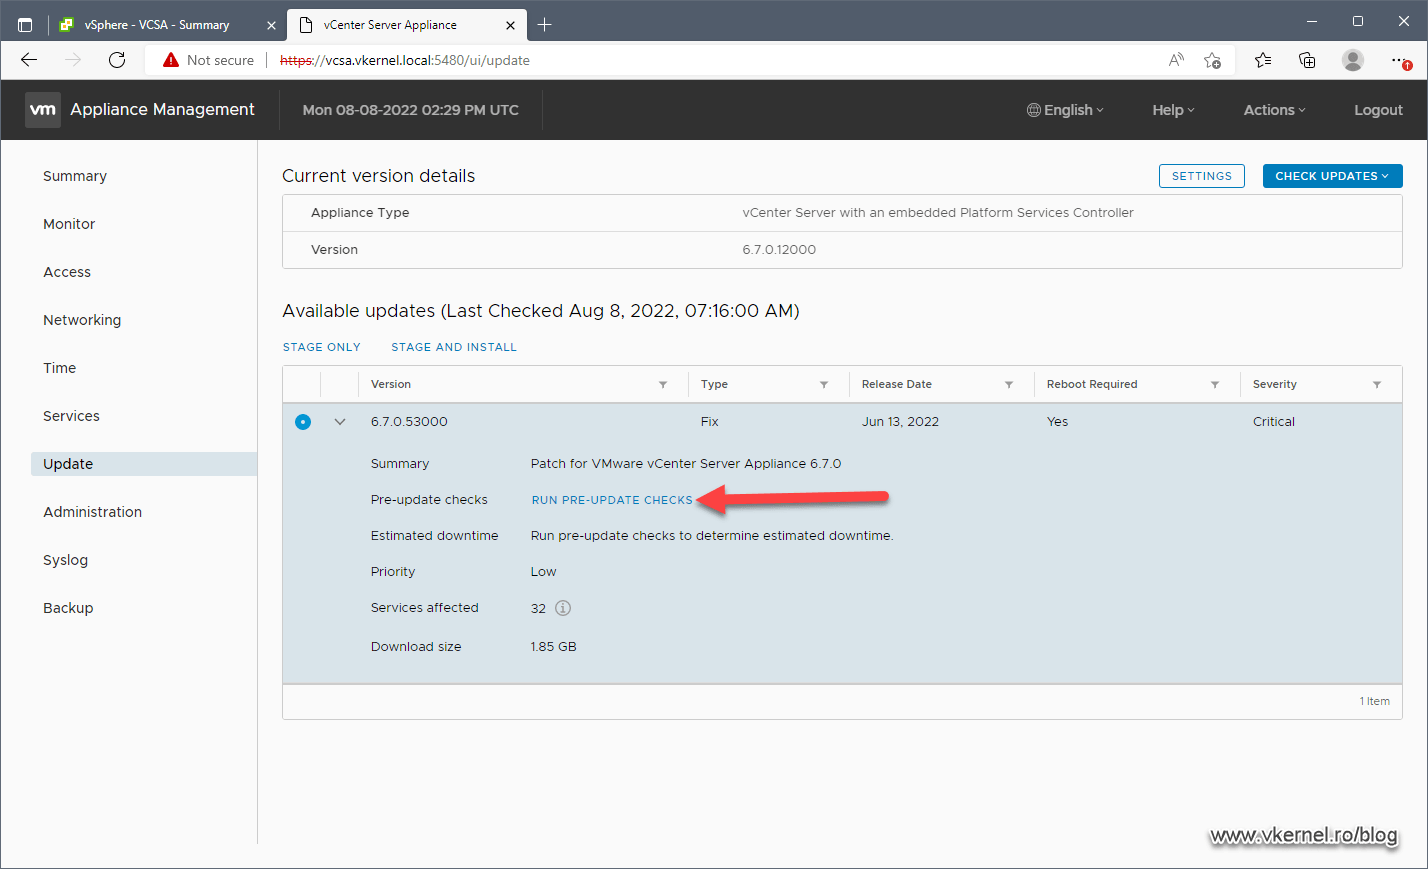
By clicking the arrow on the left hand-side of the package we can view some more information about the patch or update. We also have a RUN PRE-UPDATE CHECKS link, and when pressed, the appliance will do some verification to see that everything is in order before the updates will be installed.
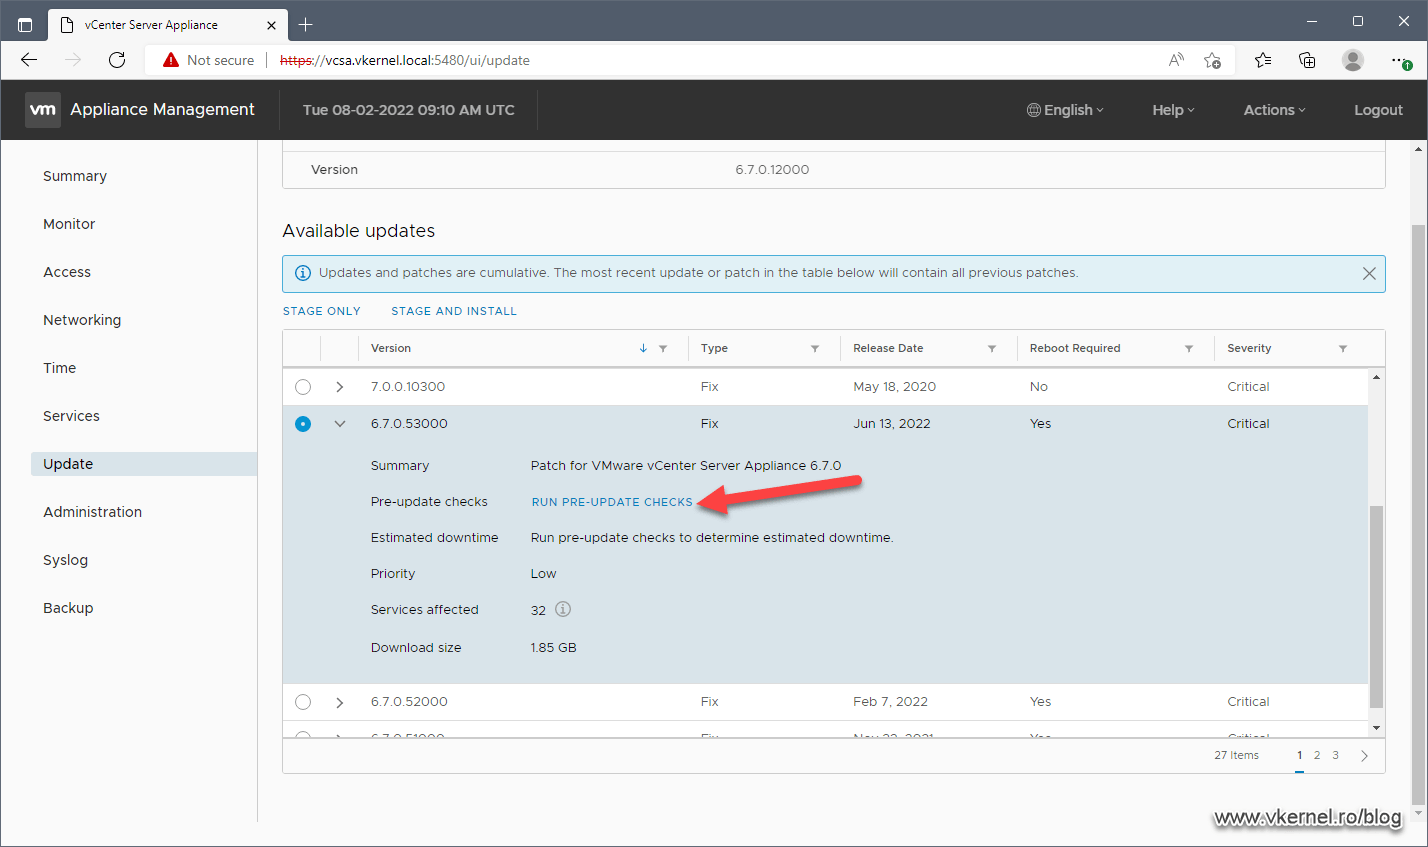
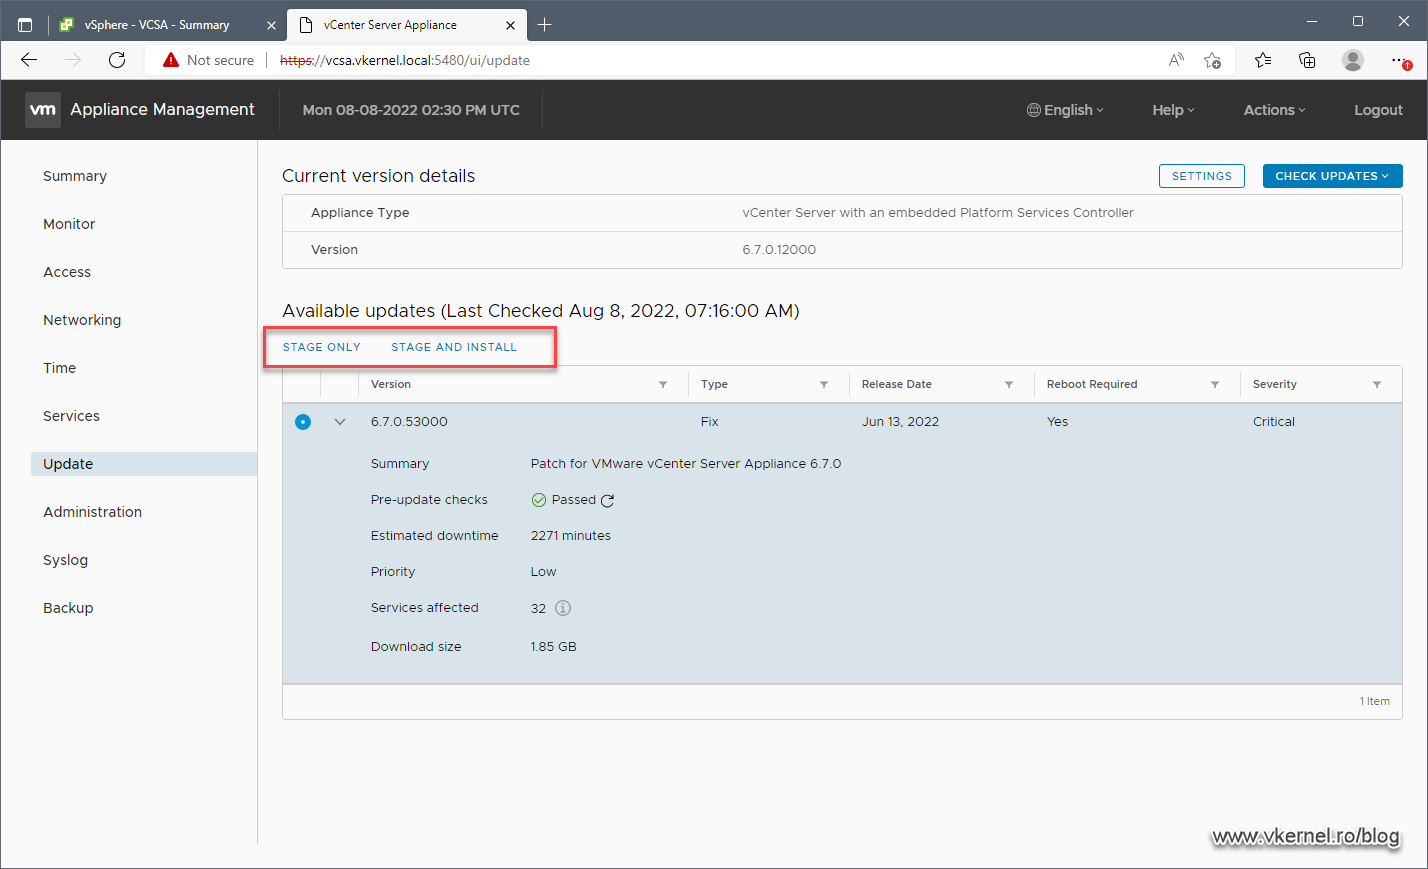
The pre-update check takes just a few seconds and if passed we can then move forward to either stage the patching or install it. By staging it, we are only downloading the package so we can install it later on. This is useful in sites with low internet bandwidth where you can stage the update/patch before you leave the office and install it the next day when you come back so you can keep an eye on the process.
To install the patch/update all we have to do is click the STAGE AND INSTALL link.
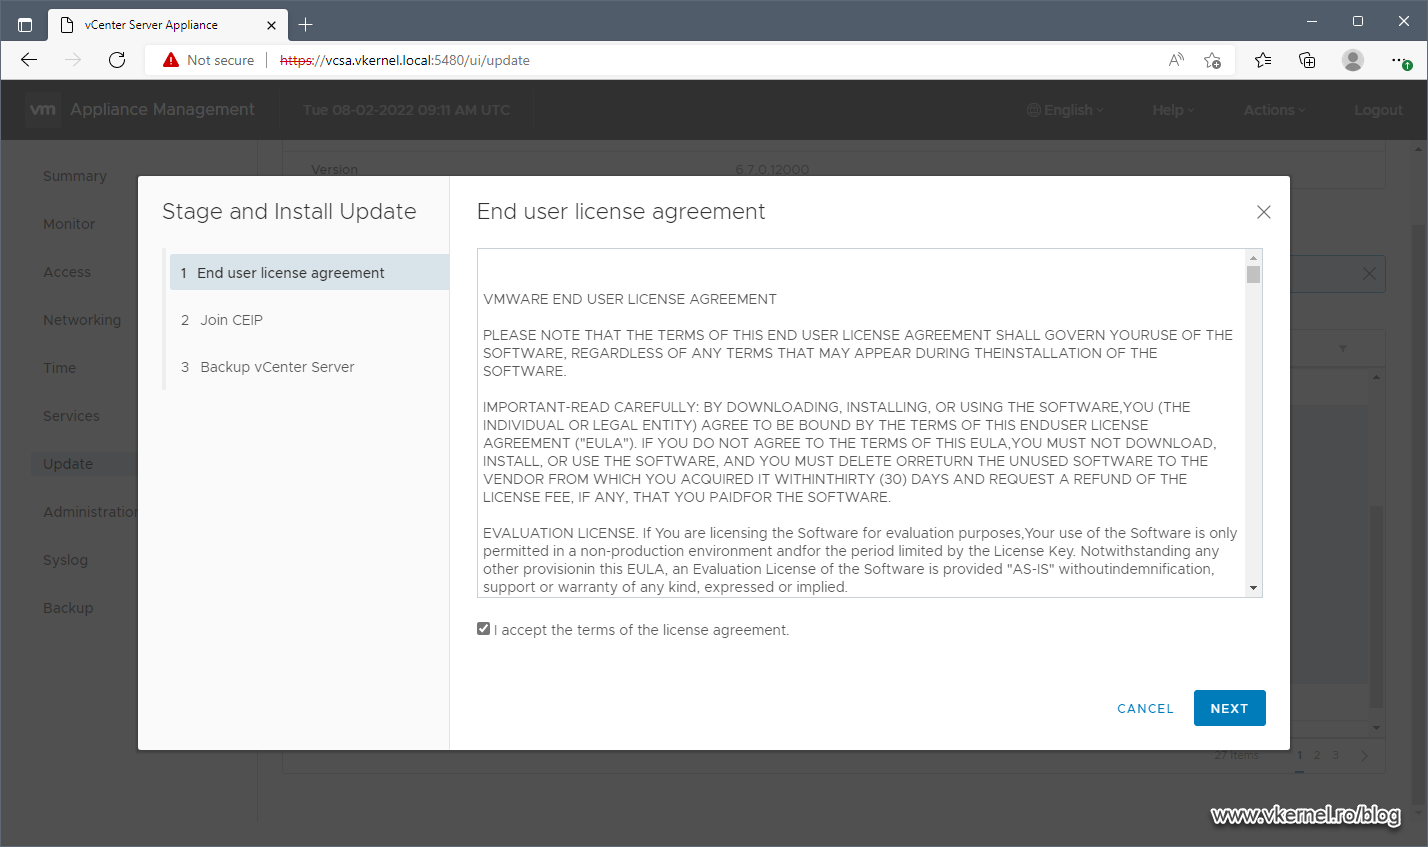
Accept the EULA and click Next.
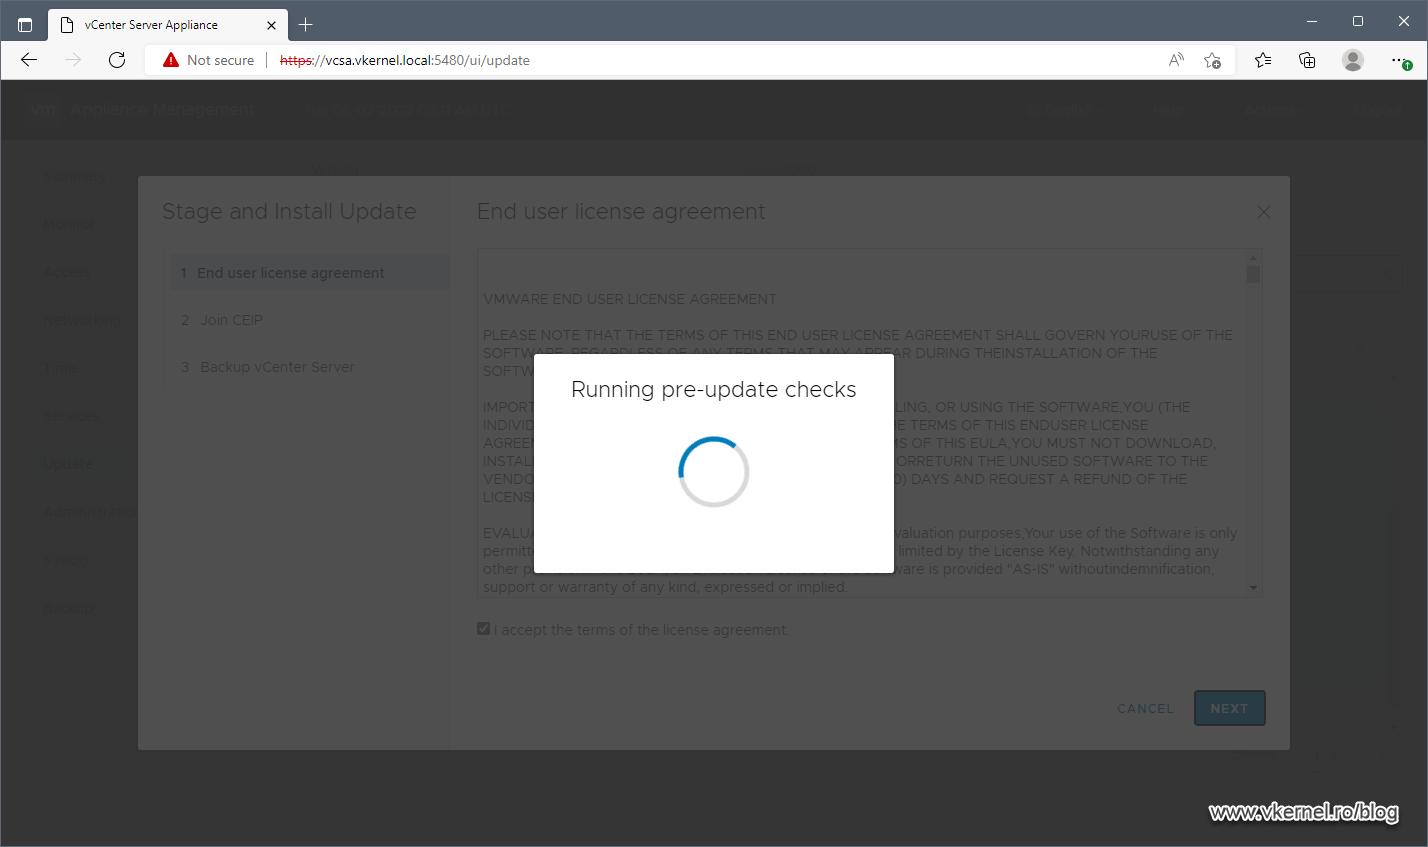
The wizard will do another pre-update check to see everything is in order.
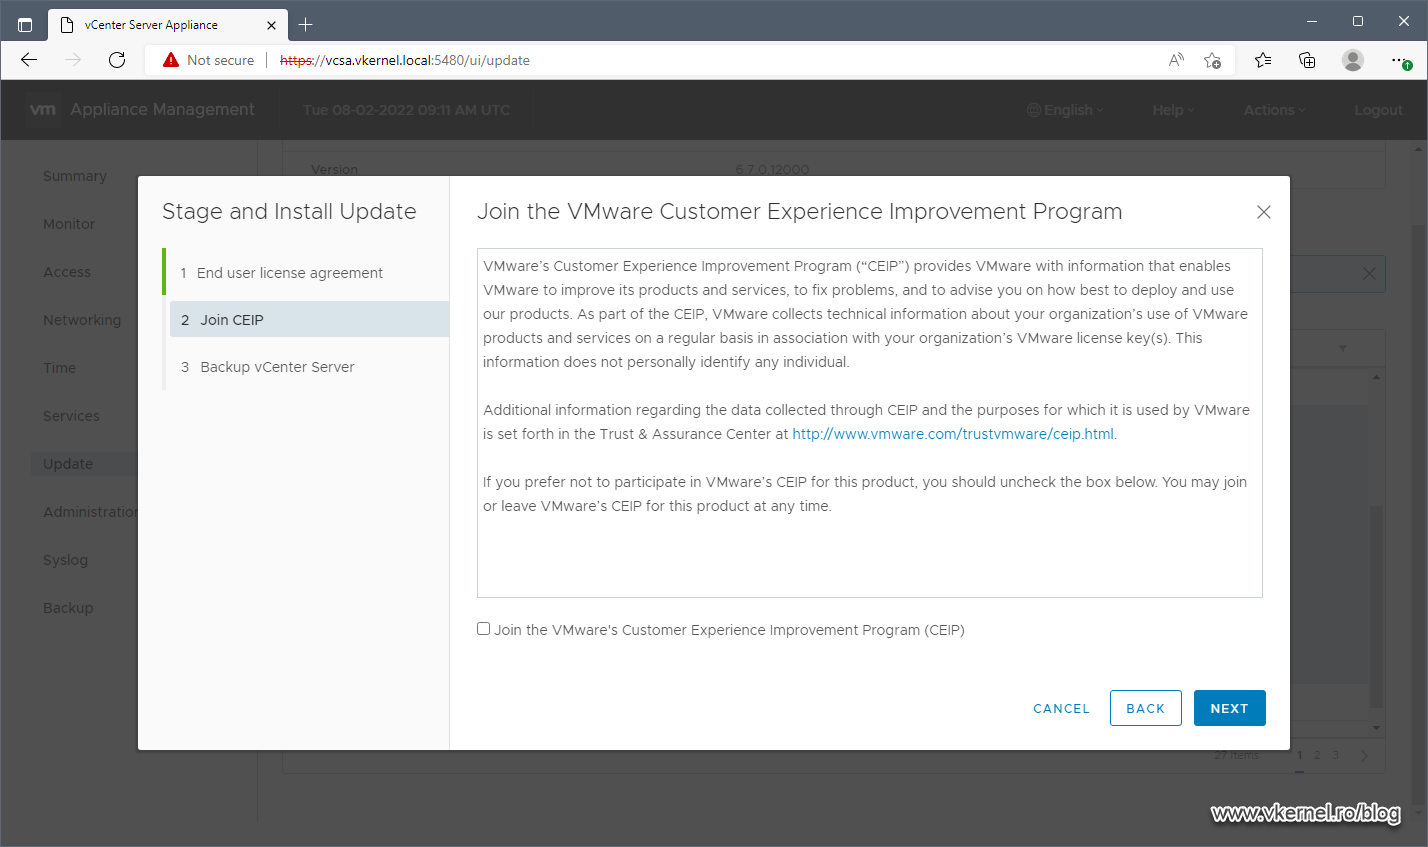
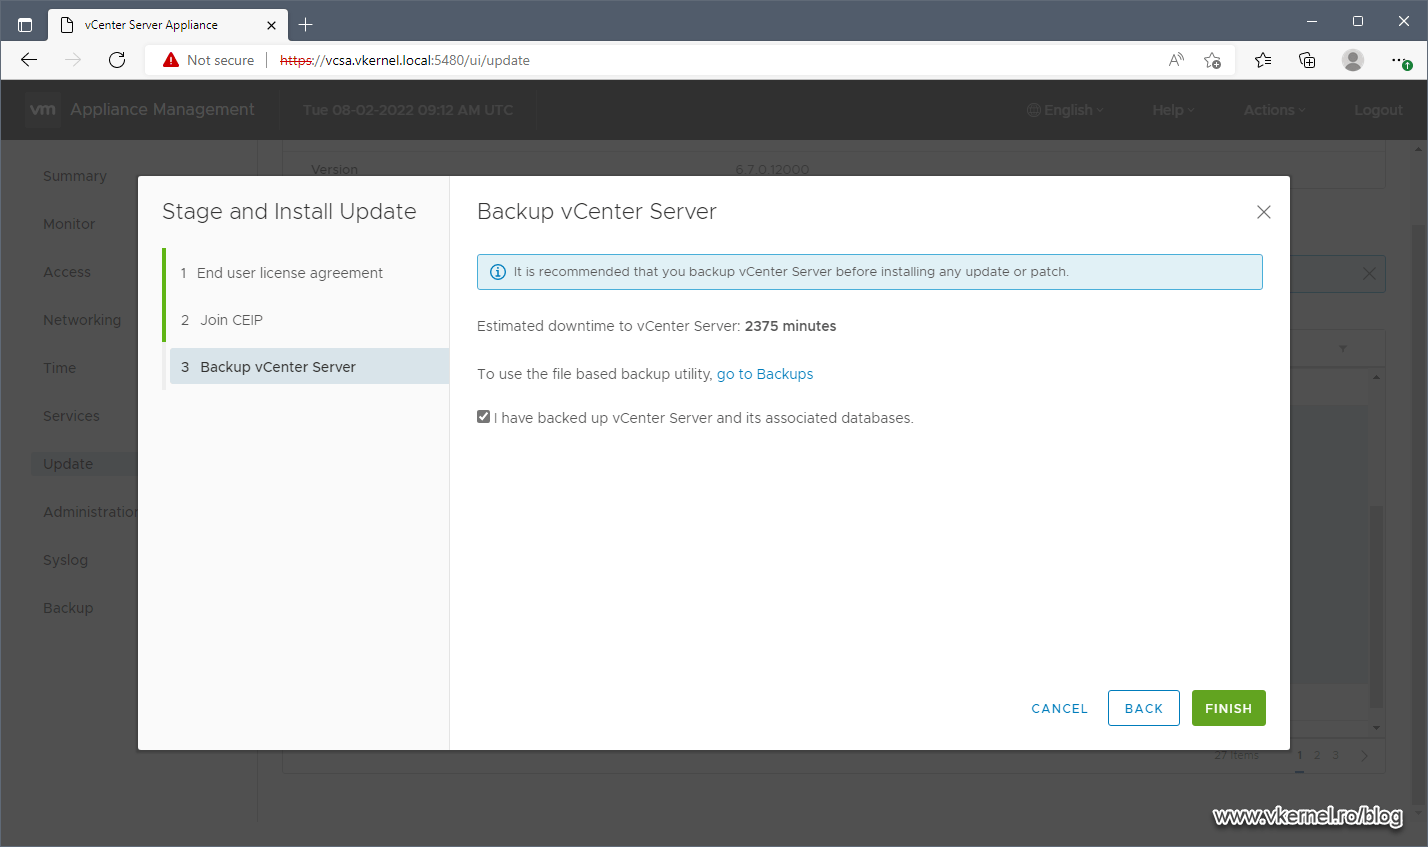
If passed, we will be directed to the second screen of the wizard where we have to option to join or not join VMware’s CEIP program. Once you are done, hit Next.
In order to actually start the patching process we have to confirm that a successful backup of the vCenter Server appliance exist. If that was taking care of, tick the box I have backed up vCenter Server and its associated databases then click Finish to begin patching the appliance.
The process will take quite some time to finish and it will start by downloading the package from VMware’s repository, stopping the vCenter Server services and last but not least, installing the updates.

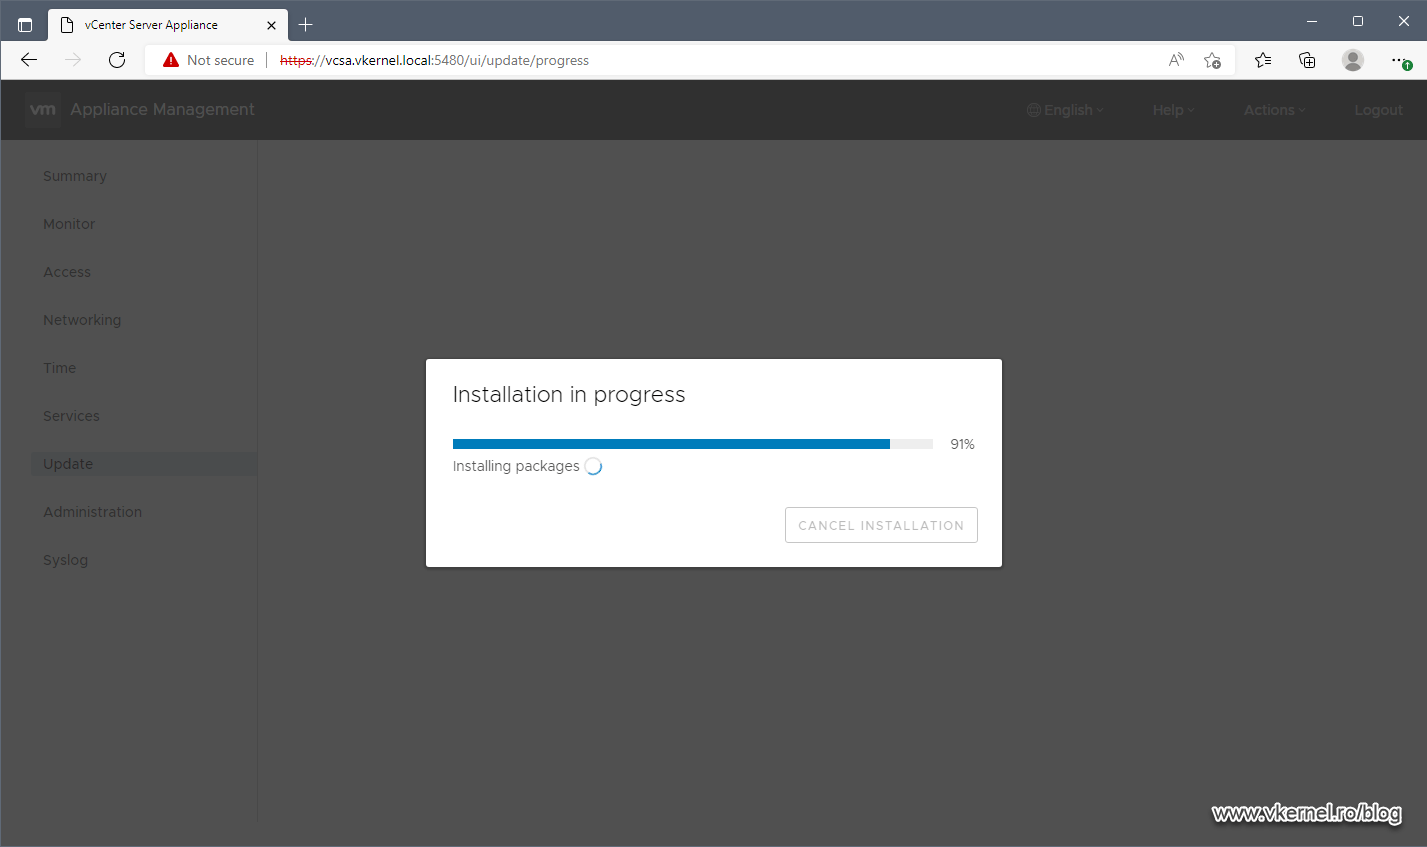
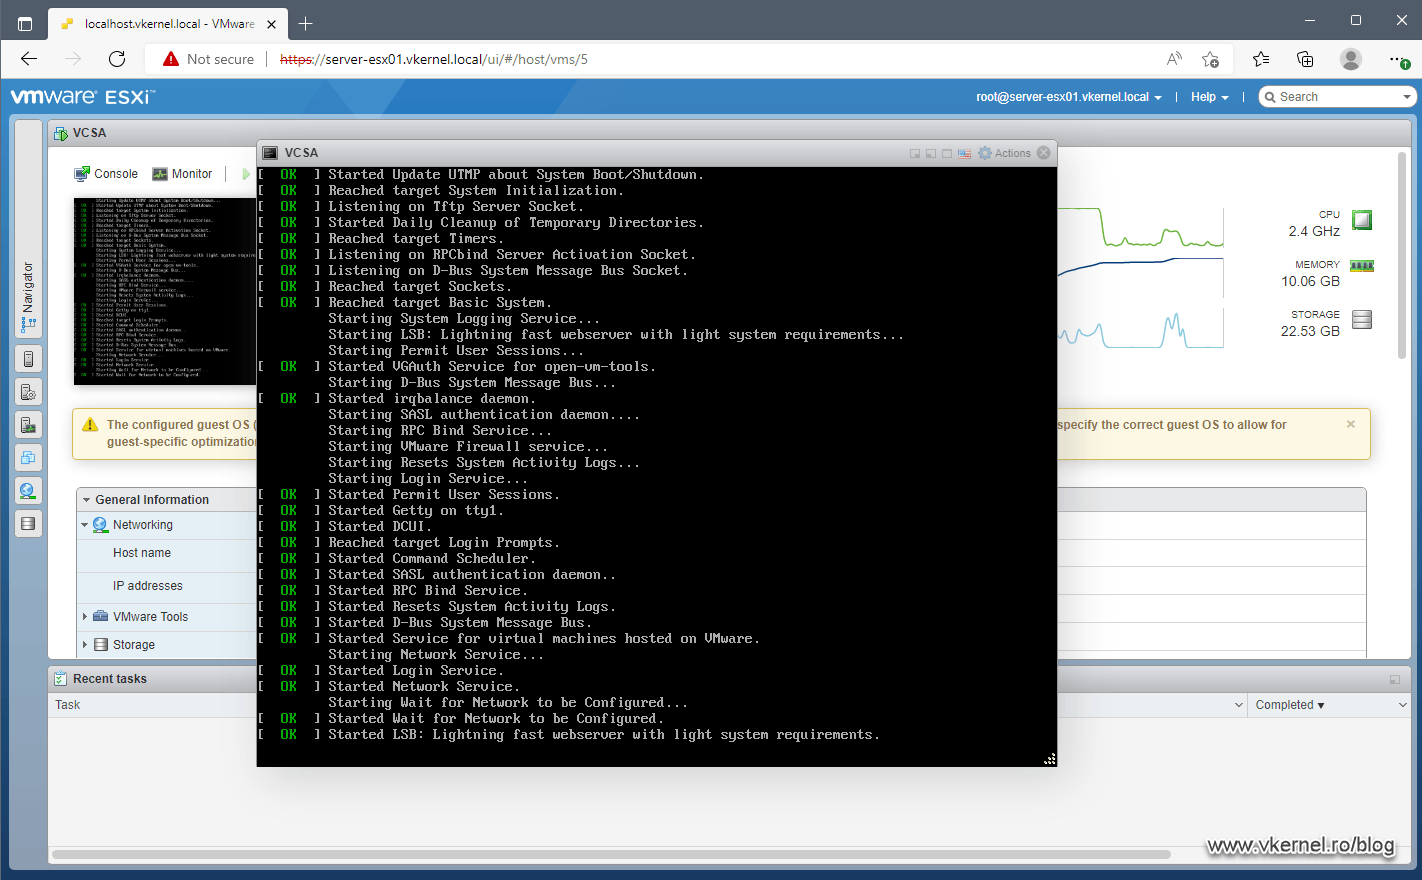
During this time, the appliance will also reboot.
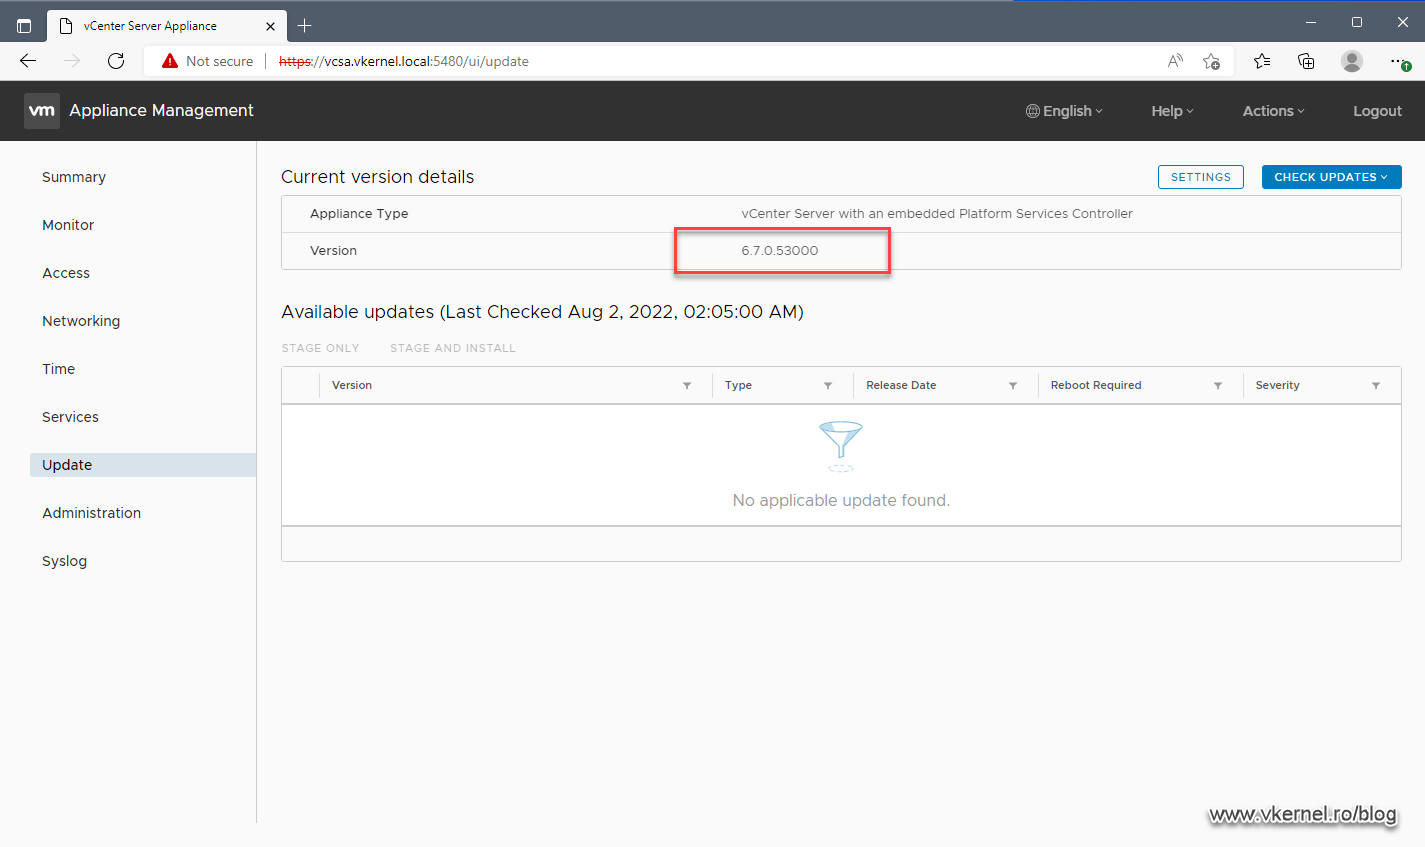
When the process is done, we will have a message on the VAMI portal saying that we need to reload the browser in order to continue, so hit refresh.

And the last step is to take a look at the build number which should be higher than before the patching and should also reflect the one of the installed package.
2.Patching the VCSA or PSC appliance using the offline method
2.1.Patching the VCSA or PSC appliance from CD ROM (ISO) using VAMI
Patching the VCSA or PSC appliance using the CD-ROM option from VAMI it’s pretty straight forward and easy, but first we need to download the ISO file from the VMware portal containing the latest updates. Log in to the portal and from the Select a Product drop-down box choose VC, then select the version of the vCenter Server you have in your environment. Click Search.
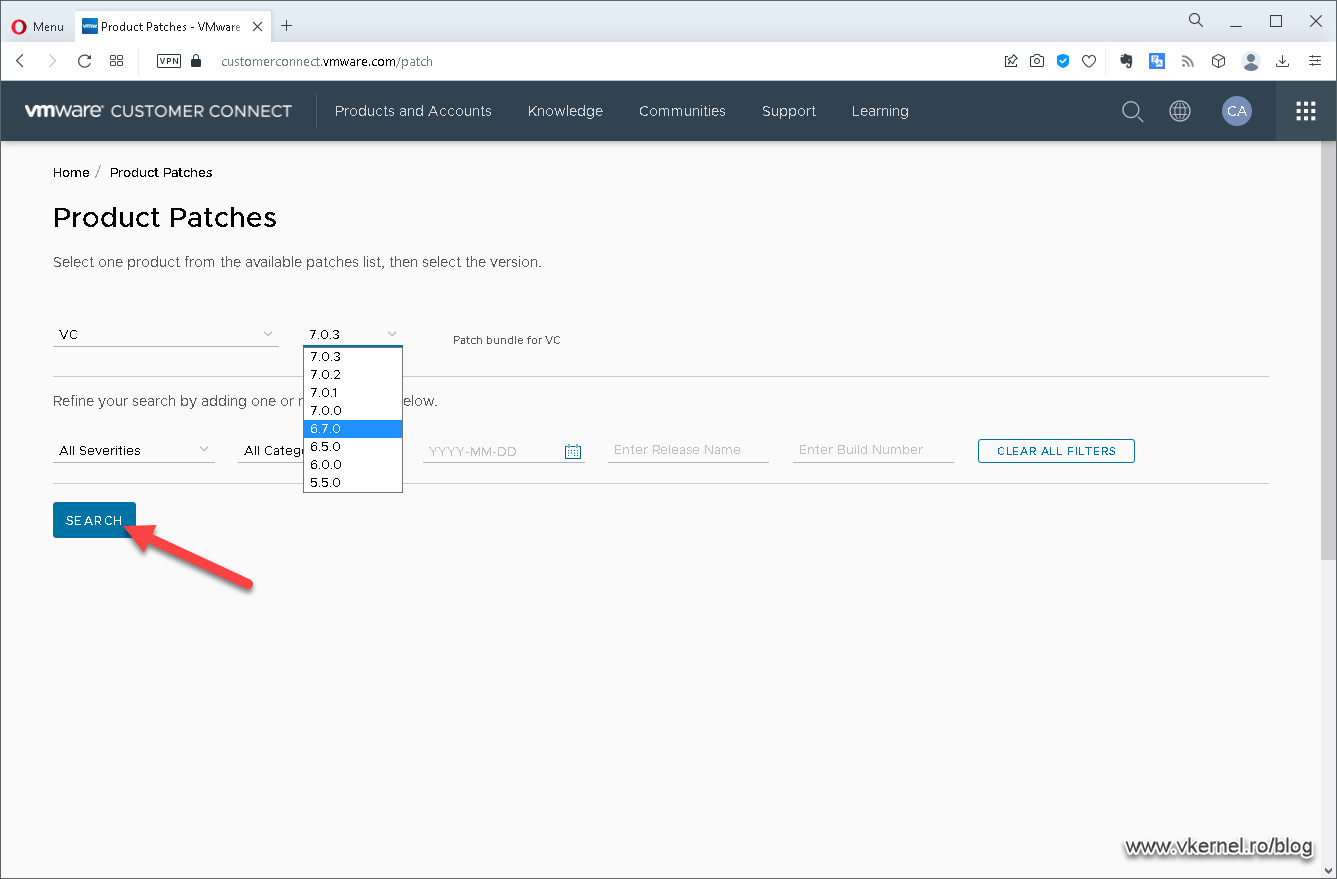
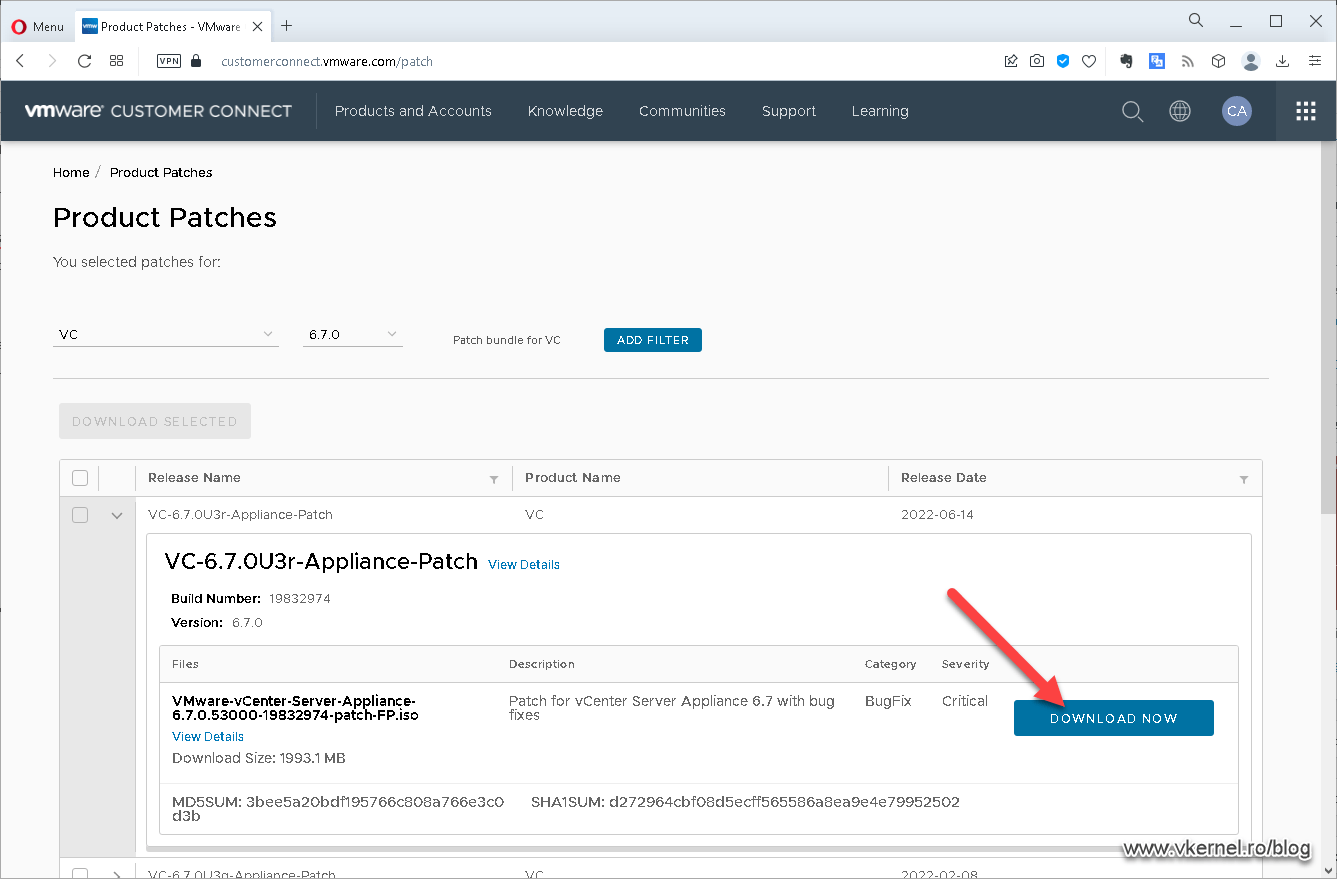
Right of the bath we are presented with a lot of packages where the newest one will be right at the top, expanded. These are cumulative updates, so the latest one will contain everything from the previous packages. Click DOWNLOAD NOW.
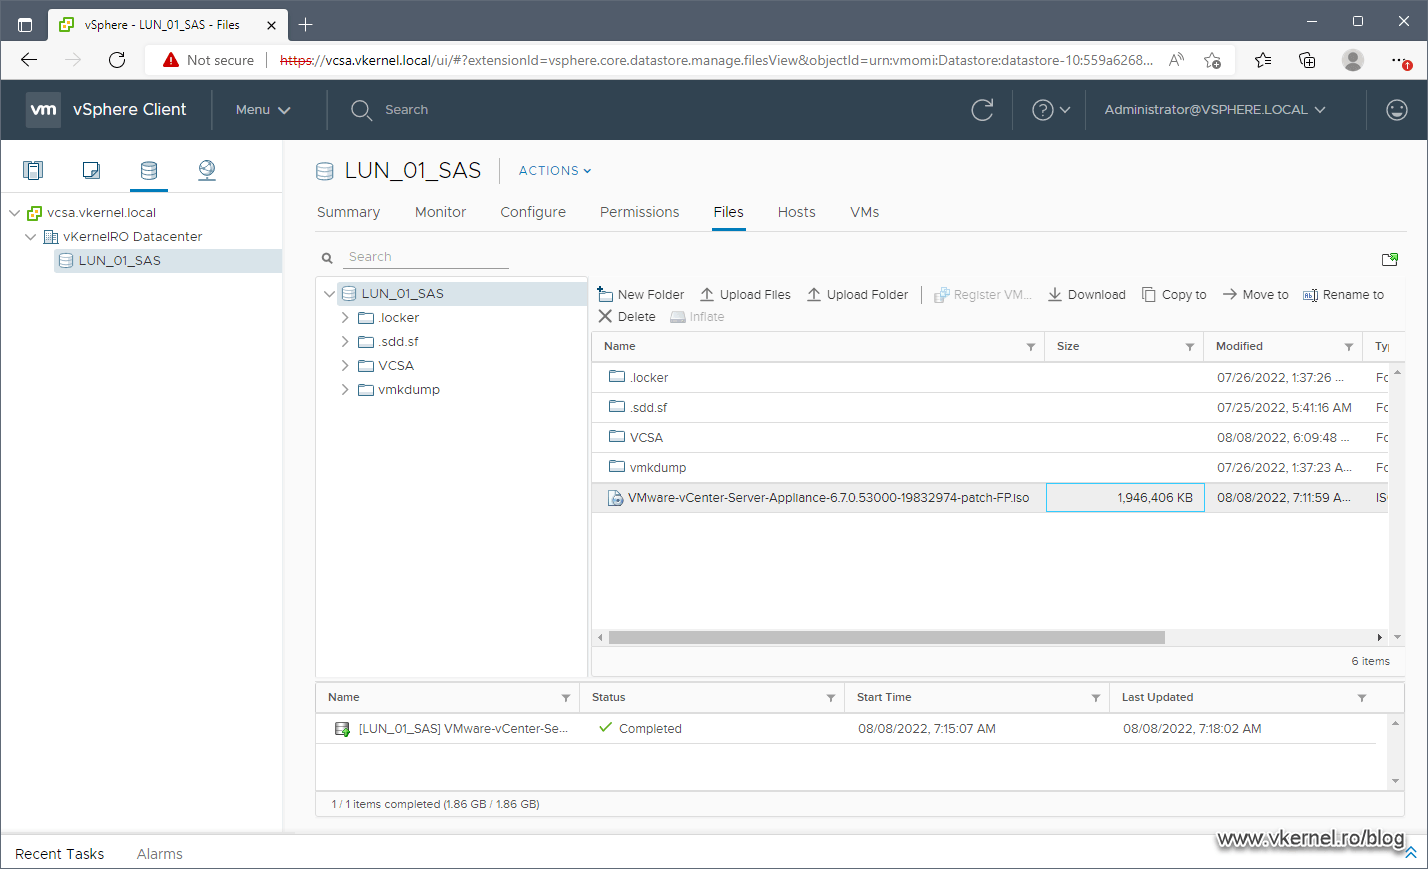
Once the download is complete, we need to mount this ISO to our vCenter Server or PSC appliance. One method of doing this is by uploading the ISO image on the ESXi datastore where vCenter/PSC is sitting then mount the ISO on the appliance.

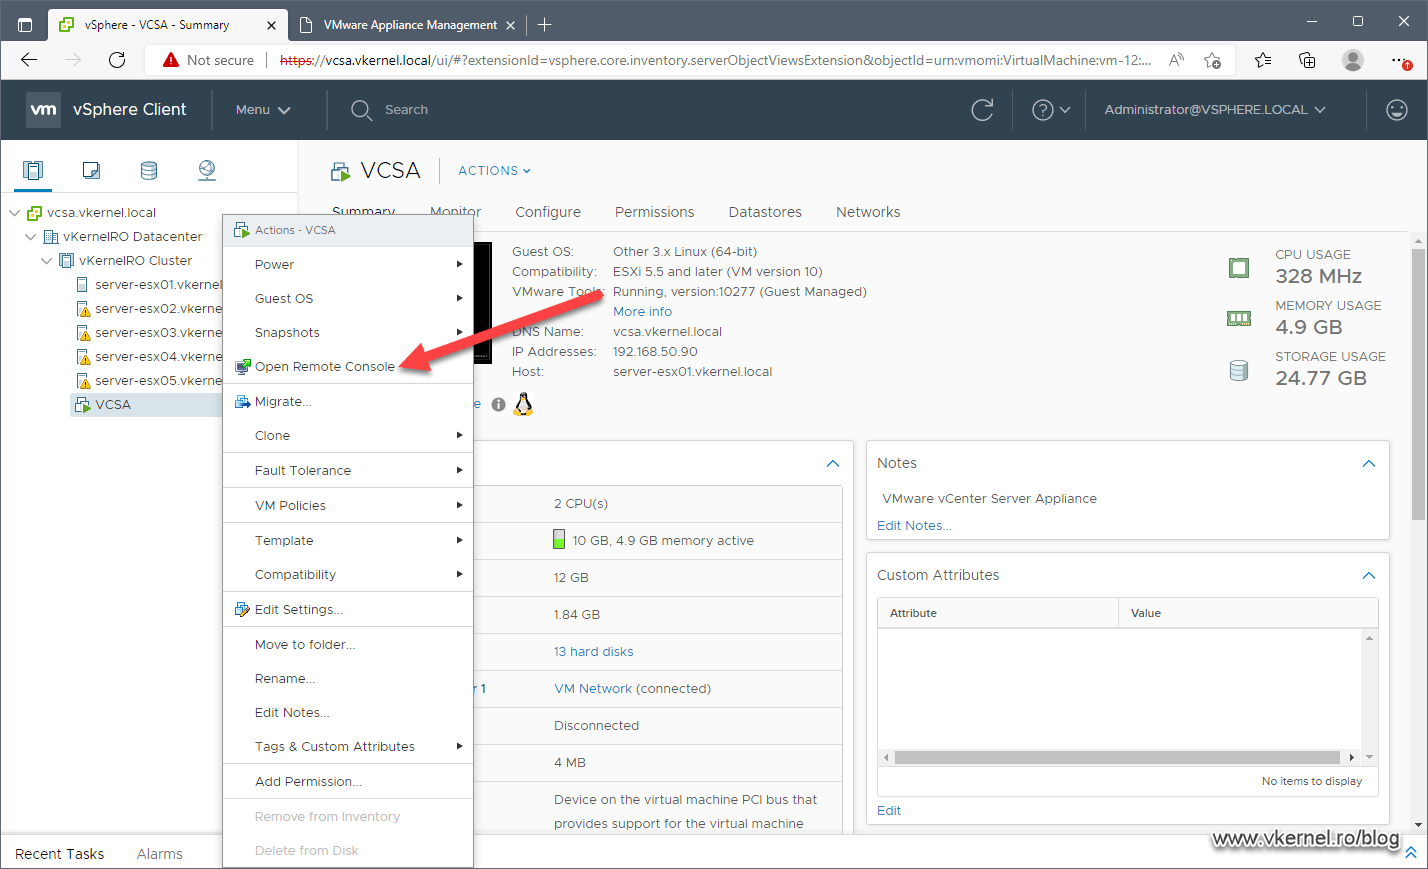
The second method, which is way faster and easier, is by opening a Remote Console from the vCenter/PSC virtual appliance and mount the ISO image to the console. The benefit of using the Remote Console is that we get to keep the ISO image locally, on our technician workstation or a file share. In order for this to work, we need to have the VMware Remote Console or VMware Workstation installed on the machine from where we are launching the console.
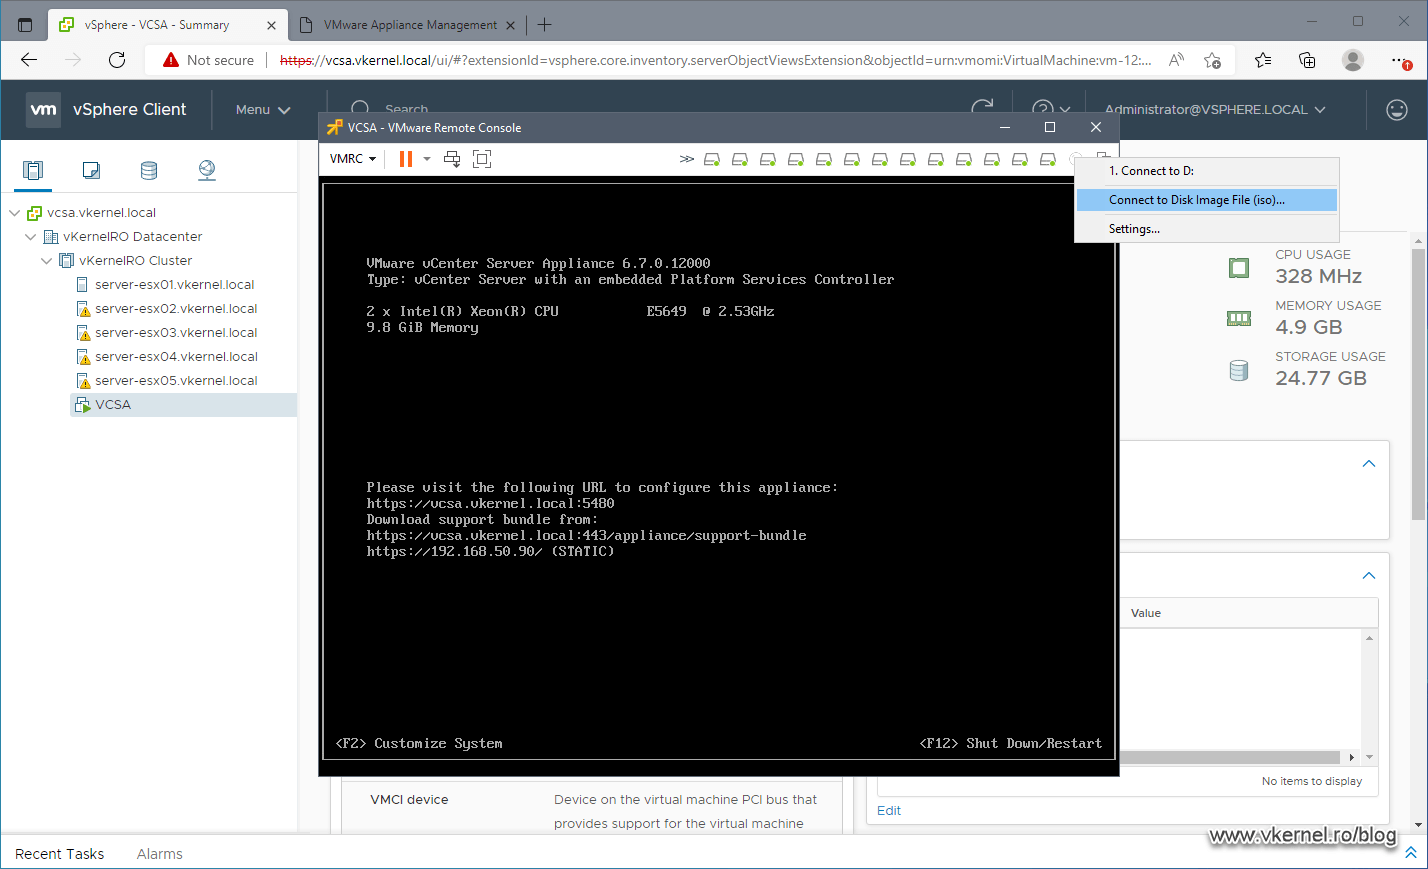
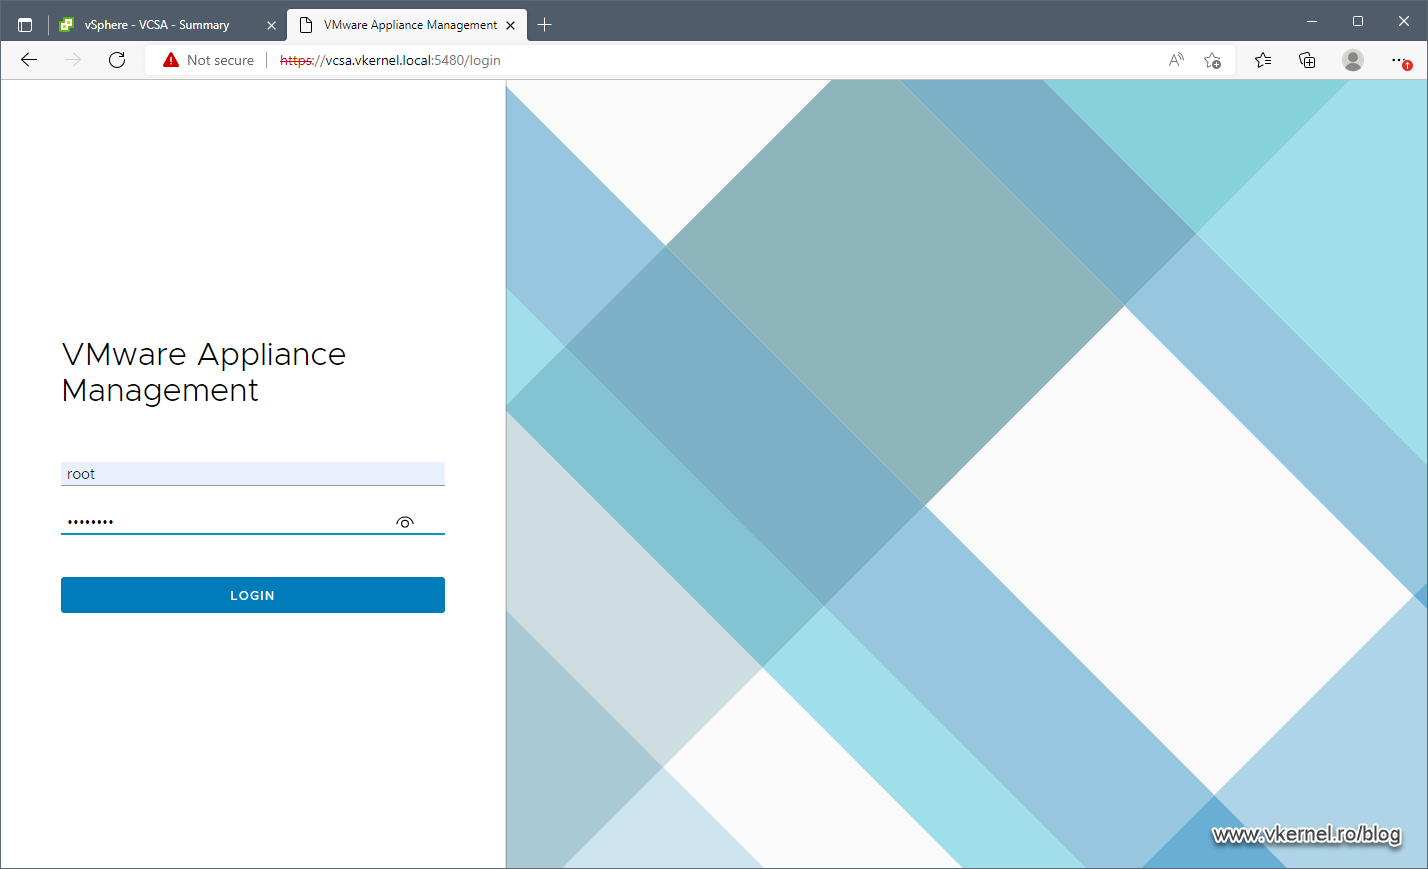
Log in to the vCenter Server Appliance Management Interface (VAMI) using root.
Click on the Update tab and wait for the spinning circle to time out. Since the vCenter/PSC appliance has no connection to the internet, we will get the bellow error message. This happens because the appliance cannot reach VMware’s online repository. Click CHECK UPDATES > Check CD ROM.

After a few minutes we are presented with a summary of the patches that are available for our vCenter/PSC virtual appliance. Click RUN PRE-UPDATE CHECKS.
If the update check was successful, click the STAGE AND INSTALL link to start pulling the updates from the ISO image and installed them. If you want to only download the updates and install them later one, then click the STAGE ONLY link.
After clicking one of the mentioned links, the Stage and Install Update wizard will open. Follow the wizard like we did in the first section of the article, and in the end we should have a healthy patched vCenter/PSC appliance.
2.2.Patching the VCSA or PSC appliance from CD ROM (ISO) using CLI
This method is not that heavily used because it requires us to log in to the virtual appliance using SSH which is one more step to do. However this can be a great method for automation/orchestration. Either way, it is available and easy to use.
First, we have to download and mount the ISO image containing the latest updates, like we did in the second section of the article. Once this was taking care of, connect to the vCenter/PSC appliance using SSH and issue the bellow command lines.
This first command will evaluate the packages and prepare the staging area. It will also provide a long EULA to read and once done, just type yes and press ENTER to continue.
software-packages stage --iso

The second command will provide details about the package that we just staged.
software-packages list --staged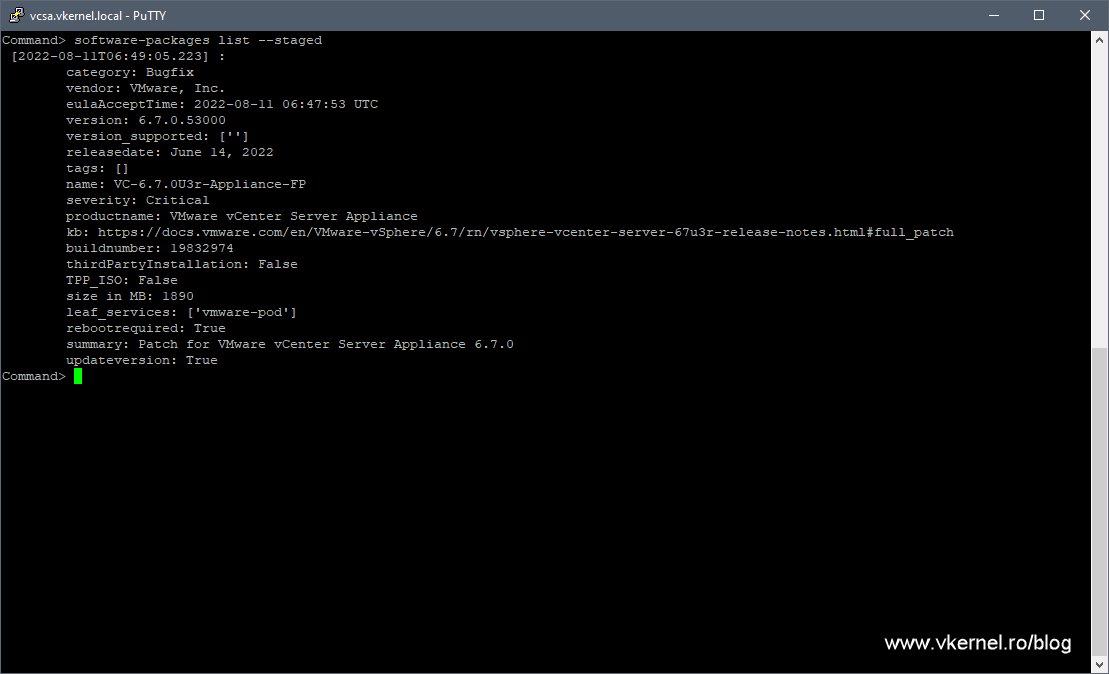
If everything is good, we can proceed with the installation of the updates. We can see if patching was successful in the message inside the terminal but also in the build number of our vCenter/PSC virtual appliance.
software-packages install --staged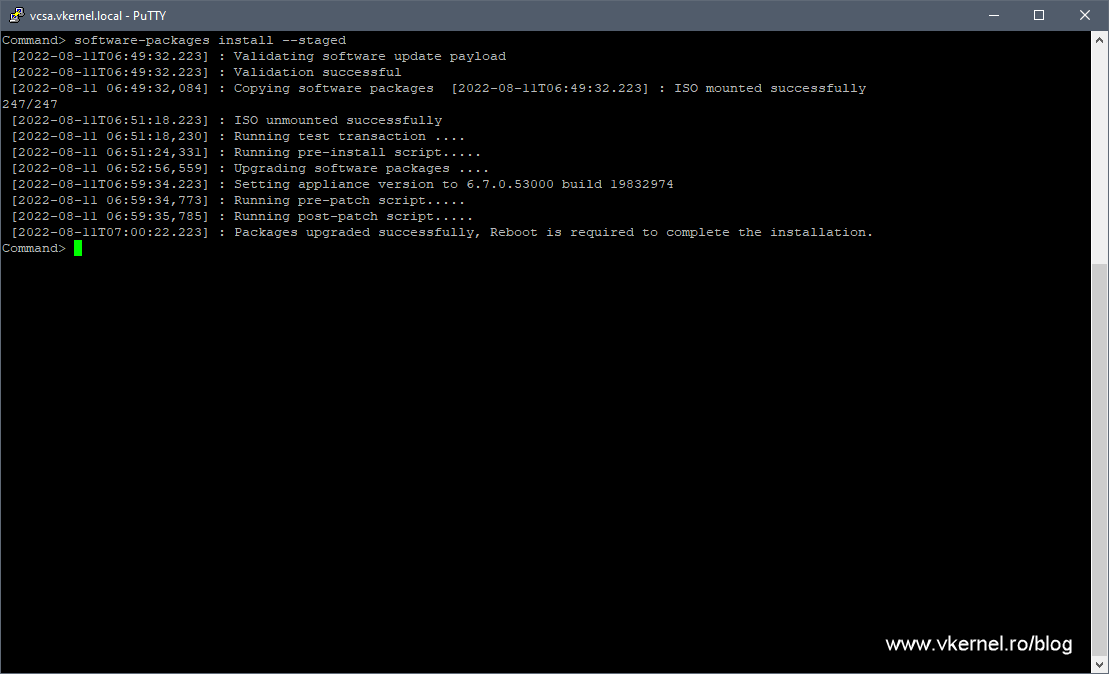
All we need to do now to complete the patching process is to reboot our virtual appliance.

Summary
If you followed along using practice, you can see that VMware made it quite easy for us to update the vCenter/PSC virtual appliance; plus we have to option to script everything and automate it. Off course, we always have to be careful and have a good backup and a large maintenance window just in case things don’t go as planed. Test it, learn it, and let others know how it worked out for you in comment area.
Want content like this delivered right to your
email inbox?
More similar articles
 Removing vCenter or PSC from Linked Mode configuration
- Repointing Embedded vCenter Server to existing SSO domain
- VMware vCenter Enhanced Linked Mode configuration
- Replace VMware VCSA 6.x Certificates with ADCS Certificates via the GUI
- Build and run Windows Failover Clusters on VMware ESXi
- How to deploy VMware VCSA 6.5 in VMware Workstation 14