Install VMware vCenter 5 on Windows Server 2008 R2
Your environment is growing and you can’t monitor or maintain those ESXi servers individually. Every time there is a problem or you need to create some VMs on different ESXi servers you have to open a console for every server. To make your life easier VMware vCenter comes to the rescue. This is a management software meaning, if you have a bunch of ESXi servers, or allot of them, you can add all those ESXi servers and manage them using a single console. The good news is that it offers new functionalities that you never had with the stand alone console.In this post I will show you how to install VMware vCenter 5 (witch is the latest version at the time of this writing) using a remote SQL database. For this lab I have the following:
1. One Domain Controller running Windows Server 2008 R2 SP1
2. One Windows Server 2008 R2 SP1 witch will host the vCenter Server, named Server-vCenter
3. Server-vCenter is already joined to the domain vkernel.local
4. One SQL Server 2008 Enterprise running on Windows Server 2008 R2.
The following are the minimum system requirements for vCenter:
Processor: Intel or AMD x86 processor with two or more logical cores, each with a speed of at least 2GHz.
Memory: 4GB RAM. RAM requirements may be higher if your database runs on the same machine.
Disk storage: 4GB. Disk requirements may be higher if the vCenter Server database runs on the same machine.
Database: Microsoft SQL Server Express for small deployments 5 hosts/50 VMs. Not important for this scenario.
Supported operating systems:
Microsoft Windows Server 2003 Standard, Enterprise or Datacenter SP2 (required) 64bit
Microsoft Windows Server 2003 Standard, Enterprise or Datacenter R2 SP2 (required) 64bit
Microsoft Windows Server 2008 Standard, Enterprise or Datacenter SP2 64bit
Microsoft Windows Server 2008 Standard, Enterprise or Datacenter R2 64bit
For a full list of prerequisites please read the vSphere Setup guide here. Now let’s get started.
Log on to your SQL Server and open the SQL Management Studio, because we need to create the database that vCenter will use. Here right click Databases and choose New Database.

Give the database a name and click OK to create it.

We now need to create a SQL Server user for authentication, so expand Security an right click Logins. Choose New Login. The new user is created because we are not going to use Windows Authentication.

Type a user name, select SQL Server Authentication and provide a password for the user. Uncheck Enforce Password Policy and change the Default Database to vCenter5.

In the same window select from the left pane the User Mapping option. Check the boxes for the msdb and vCenter5 databases. Set the default schema to dbo, and on the Default role membership to db_owner for both databases. Click OK when you’re done.

Now that the user and database are created, go to the vCenter server (well…the future vCenter server) because some prerequisites needs to be installed.
First we need to install .Net Framework 3.0, so open Server Manager, go to Features and choose Add Features. Expand .NET Framework 3.5.1. Features and select .NET Framework 3.5.1. Finish the wizard.

For vCenter to be able to connect to the SQL server it need to find a 64 bit DSN (Database Source Name) on the local machine. For this we need to install the SQL Server Native Client. Be careful to install the SQL Server Native Client corresponding to your edition of SQL Server.
Launch your SQL Server installation and choose New SQL Server stand-alone installation or add features to an existing installation.

After is done checking the environment click OK and continue the wizard until you reach the Feature Selection screen. Here choose to install the Management Tools – Basic and finish the wizard using the default settings.

Now we can create the System DSN, so open the Data Source (ODBC) from Administrative Tools. Go to the System DSN tab

and click the Add button. Select the SQL Server Native Client 10.0 and click Finish. Don’t get your hopes up, is not finished yet.

A new wizard opens, and in the Name box type a name for the System DSN. If you want to give it a description do it now, and go to the Server box where you type the FQDN or IP address of the SQL Server.

Select SQL Server Authentication and type the user name and password that we created earlier on the SQL Server (vCenterUser).

Under Change the default database to, verify that the vCenter5 database is the default one, if not you have to check the box and select it from the list.

Leave the defaults here and click Finish.

On the window that just opened click the button Test Data Source to test our connection with the SQL Server.


If everything is working click OK to close the ODBC Data Source Administrator.

Now we can start the vCenter installation, so insert the vCenter DVD or mount the ISO if you are on a virtual environment. On the left pane click vCenter Server then click the Install button.

The vCenter installation wizard appears. Click Next on the Welcome screen.

Read and accept the EULA.

Typer the customer information, and the license key if you have one. If no license key is provided vCenter will be installed in trial mode for 60 days.

Here select the second option Use an existing supported database, and select the System DSN we created earlier.

Enter the user name and password for the System DSN.

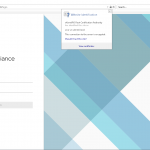
If the database is set to Full Recovery Mode you will get the following warning message. Click OK to continue, but if you want more information go to the VMware article presented in the message.

Because I don’t want to run the vCenter service under the System account, I will use a domain account. Just create a normal user account in your Active Directory and add this user to the local Administrators group on the vCenter server.

Change the installation path if the default one does not suits you.

Since this is our first vCenter Server we are going with the defaults.

Leave the ports unchanged and continue the wizard.

Again don’t change anything, just hit Next.

Select witch deployment scenario suits you the most, depending on your hardware.

Click Install.

After the installation we can check the services if they are installed and started.

Another method to check is by login in using the vSphere client console. Just ignore the certificate error that pops-up.

Now your vCenter server is installed and ready for action.

Want content like this delivered right to your
email inbox?
More similar articles
 Patching the vCenter Server and PSC Virtual Appliance
- Removing vCenter or PSC from Linked Mode configuration
- Repointing Embedded vCenter Server to existing SSO domain
- VMware vCenter Enhanced Linked Mode configuration
- Replace VMware VCSA 6.x Certificates with ADCS Certificates via the GUI
- Build and run Windows Failover Clusters on VMware ESXi