Clean Install of Windows XP
As my first post on this blog I thought I’ll start with something easy. Yes Windows XP is an old operating system but is still very used in allot of companies and homes (at the time of this writing). I used Windows XP for many, many years, and I’m still using it to allot of my clients, because is a good operating system and not resource intensive. Now there are many reasons why you need to install from scratch, like you just bought a new system, or your old system crashed. Before we start with the installation I need to remind you that all of the information on the drive that Windows XP is currently on, or will be (this is usually your C: drive) will be destroyed during this process, so if there’s any data that you want to keep you should back it up to a CD/DVD or an external hard drive prior to beginning this process.
Minimum requirements for you to be able to install Windows XP can be found here. OK let’s begin
Power on the system and insert the XP installation media in your CD/DVD drive, and you should see the following screen, if you never had any operating system on this hard drive.

Just as the setup begins a message will appear to press F6 for additional SCSI adapters drivers. You can ignore this if you don’t have any SCSI adapters, or RAID option is disabled in BIOS. If you do have a RAID controller or SCSI adapter press F6 and provide the necessary drivers from a Floppy drive.

After the setup copied all the necessary files, the second part of the installation begins, where three options are presented for us. Since we are performing a clean installation, the first option “To set up Windows XP now, press ENTER” will be our option. So press the ENTER key to continue.

The next screen is about EULA or End User License Agreement. Press F8 to continue

The next part is where we create the partitions; this are going to be drive letter C, D etc… in Windows. I usually create a 30 GB partition for the system (for Windows XP), and let the rest for data. Since I’m not a big fan of multiple partitions on a system I’m going to do just that on this example. To create the system partition press the “c” key from your keyboard and in the box put 30720 for 30 GB the press ENETR, this is going to be our C drive (letter) in Windows. To create the data partition select the space left using the down arrow key, and then press ENTER, this is going to be our D drive in Windows.

For Windows XP to install on a partition, that partition need to be formated. XP support two type of file systems FAT32 ant NTFS; FAT32 is an old file system used in previous operating systems, and NTFS (New Technology File System) is it’s predecessor witch is more secure and has a higher performance. Now select the first partition in our example “C:” and press ENTER. This will take you to the format option screen, and here you have four choices. For our example I’m going to choose the first one at the top – NTFS quick format – and press ENTER.

After you press ENTER, setup is going to format the partition and copy the necessarily files for the third part of the installation, witch will begin after the system restarts.

After a wile the first screen on the third part of the installation appears, and here you need to configure the language of the keyboard and the regional options. For this example I’m going with the defaults.

In the next screen provide your name and organization then hit Next

Now you need to provide a product key. Usually you can find this on the back on your CD case.

Every person need a name, so do computer systems. Enter a name for your new system, and an administrator password then hit Next.

Next you need to configure the clock on the system and the time zone. In this example I set the time zone to Bucharest, but maybe this is not valid for you. Choose your own time zone then click Next.

Now we need to take care of the network so we can communicate with other systems or connect to the internet. In the next screen I’m gonna take the defaults and let the system configure itself using the so called DHCP.

Here we tell the system if it’s part of a workgroup, and if it is witch one, or if it’s part of a domain. I’m going to talk about domains in future posts because is a log an complicated topic. I will take the default again and press Next.

For the last part of the installation we need to configure a few wizards and then we are done. So click the Next button on the first screen and it will take you to the “Help protect your PC” screen, witch is actually Windows Updates, so that the system will connect to Microsoft servers and download the latest updates to fix security holes and bugs in the system. I recommend to let this option ON by clicking the “Help protect my PC by turning on Automatic Updates now” button, then click Next.

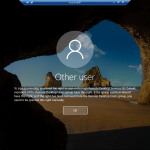
The next step I usually skip it since I’m using an automatic configuration with DHCP to connect to the internet. On the “Ready to register with Microsoft” screen click the button “No, not at this time” then hit Next. Provide a name for the new user at the “Who will use this computer” screen and click Next then Finish.

And we are done with the installation. You should be able too see and use your new system.

Of course there are steps to be done after the installation like installing the system drivers, updating the system and many tweaks, but I’m going to talk about those in future posts.
Want content like this delivered right to your
email inbox?