How to set up Exchange Send Connectors with a Smart Host
Sometimes you need to route all your outbound emails trough a SMTP smart host and not route them directly to the internet. There are multiple causes for this, like the cost for the company is too high buying antivirus and antispam software; not to mention hardware and OS licenses for those. The second one is for testing, like we are going to do in just a moment. There are SMTP smart host companies out there that offer antivirus, antispam and other security features for your emails, so using their services might reduce the licensing, hardware and other costs for your company.
Configuring your Exchange server to route emails trough an SMTP smart host is not difficult and is done on the Send Connectors tab on the management console. I’m going to create two scenarios here, the Send Connector is already created and the second one is where we don’t have a Send Connector so we will create one from scratch.
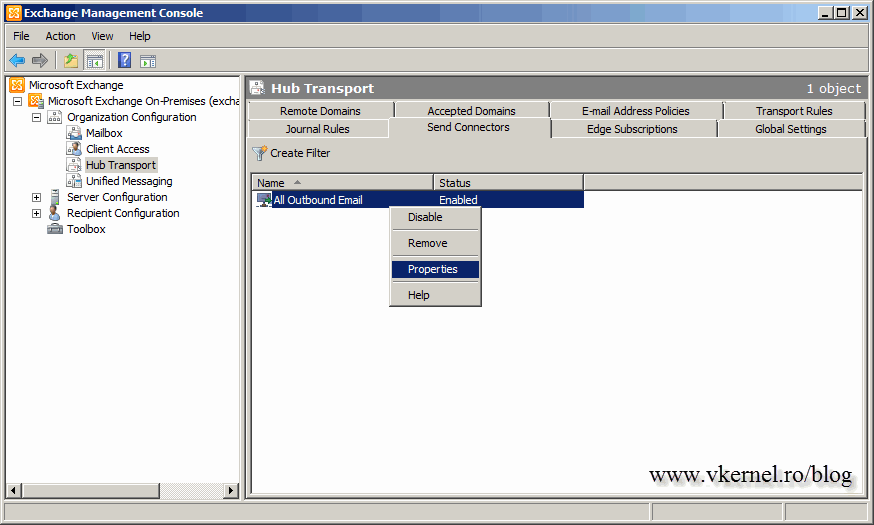
Let’s start with the one where the Send Connector is already present and configured to route outbound emails directly to the internet. I’m going to use an Exchange 2010 server for this example, but this can also apply to Exchange 2007. Open the Exchange Management Console (EMC), right-click the connector and choose Properties.
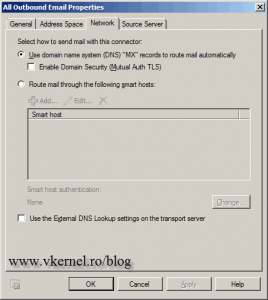
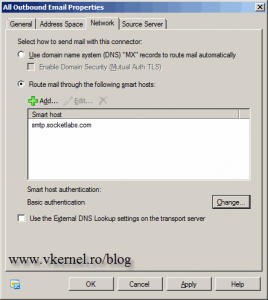
Once the Send Connector properties window is opened, go to the Network tab. As you can see email is directed to the internet based on your DNS MX records.
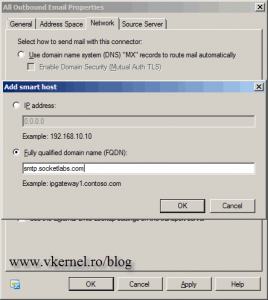
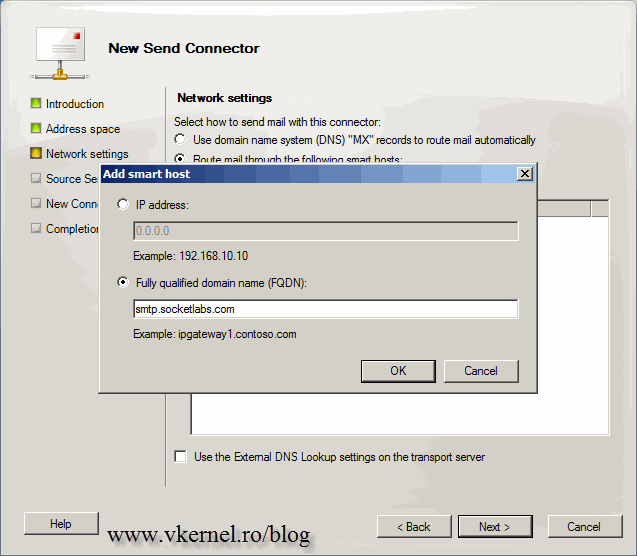
To configure a SMTP smart host select the second option Route mail to the following smart hosts, then click the Add button. In the Add smart host window we have two options to connect, using an IP or FQDN. For this article I registered a free account at Socketlabs, so I’m going to use a FQDN. Type your smart host address and click OK.
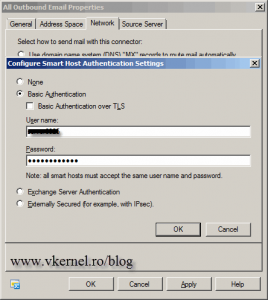
Don’t close the Send Connector properties just yet because we need to configure the authentication with the smart host. Almost all smart hosts need authentication; to tell you the trough I never found one that doesn’t require authentication. This is for security reasons so spammers can’t user the registrar SMTP servers to send unwanted emails. To configure the smart host authentication click the Change button. Select Basic Authentication and provide the correct credentials in the bellow boxes. If you are using any other methods for authentication select it in this window, as your registrar tell you. Click OK when done.
Save the changes by hitting the OK button on the Send Connector properties.
Send an email to see if it actually works. Here is a screen-shot of the mail header in Thunderbird, and as you can see data was received from Socketlabs SMTP servers and sent from my email server.
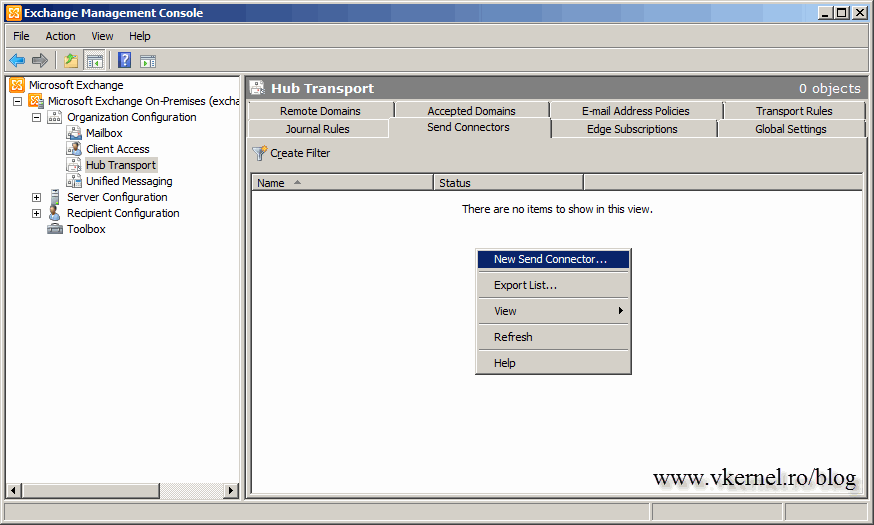
Now let’s create a Send Connector and configure it to use a smart host from scratch. Right-click on the white space on the Send Connector’s tab and choose New Send Connector.
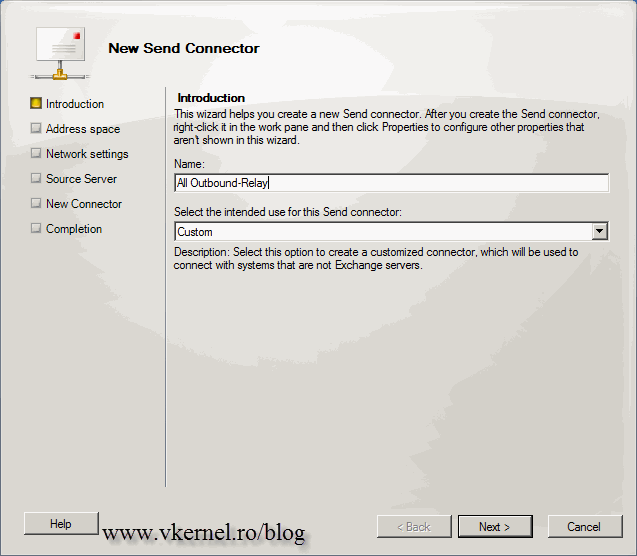
In the New Send Connector window type a name for the connector, and in the Select the intended use for this Send connector list leave Custom.
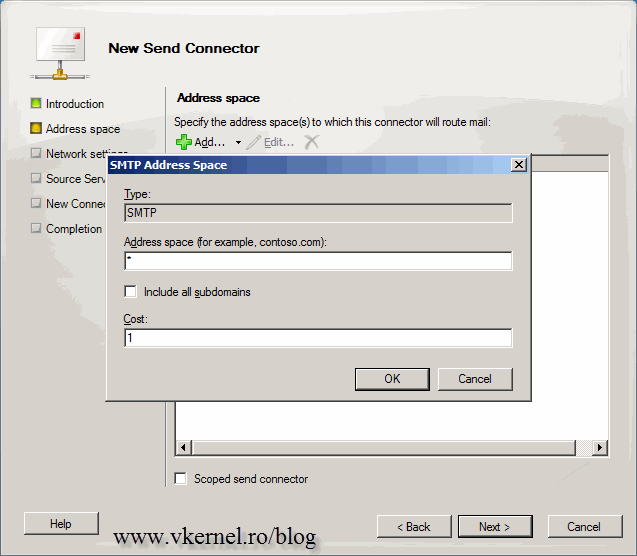
Click the Add button, and in the Address space box pun an asterisk (*). This means that you want to be able to send emails to all the hosts in the internet. If you type a domain name here, you will be able to send emails only to that domain.
From here on, the settings are now familiar, since we already saw and configure them above. Select Route mail trough the following smart hosts then click the Add button. Type your smart host address and hit OK.
Select the authentication type your smart host is using and click Next.
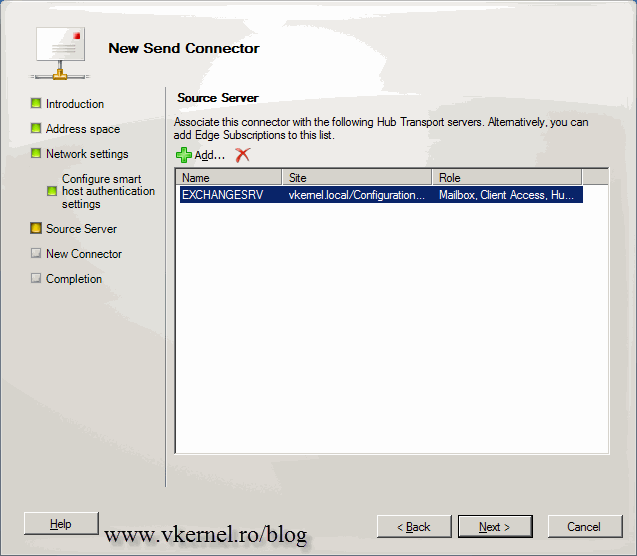
Leave the defaults here and continue.
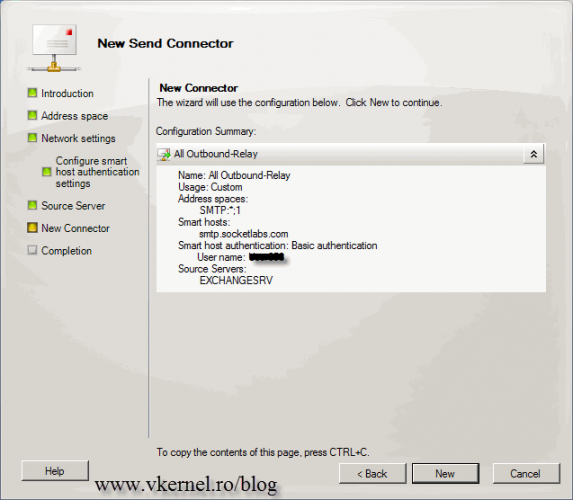
The last step is to click the New button to create the Send connector.
Send a test email and see if it works, which it should.
Want content like this delivered right to your
email inbox?




helped me a lot thx
You’re welcome. I’m glad it helped.