Creating a 3-Leg Perimeter Network (DMZ) with TMG 2010
You’ve been thinking on moving some internal services more closely to the internet to provide a better experience for your users, and you’ve heard that by creating a Demilitarized Zone (DMZ) will help you accomplish that, with security in place. Creating forests and domains that will be exposed to the internet might be another reason to build a DMZ (or perimeter network), but whatever the reason might be, that network needs to be secured from outside threats. With TMG 2010 we can achieve just this in a few easy steps, by either building a Back-to-Back DMZ or a 3-Leg DMZ. The first one is where our perimeter site sits between two TMG servers, one located in front of the internet and the other one in front of the internal network. The second type is where one TMG server handles the security, the DMZ network, the internal and the external network; and as the title says, this will be type of network discussed in this article.
In order to deploy a 3-Leg perimeter network with TMG 2010 we need to have a minimum of three network cards installed in the server; one for every type of network (internal, external and DMZ). Once we have these, there comes another question: is this a new TMG install or an already existing system?
Configure a 3-Leg perimeter network with TMG 2010 from a fresh install
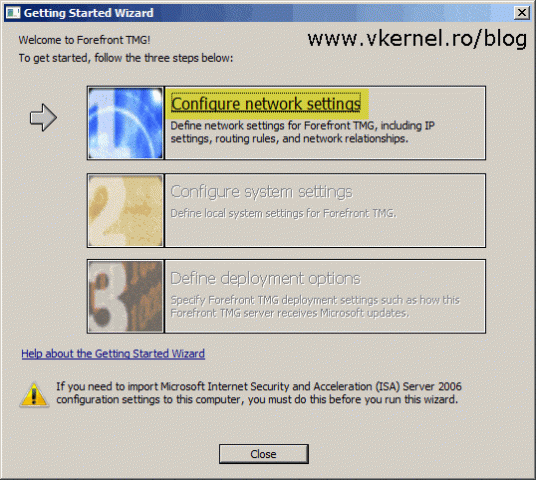
If it’s a new install the deployment is easy by following the Network Setup Wizard.
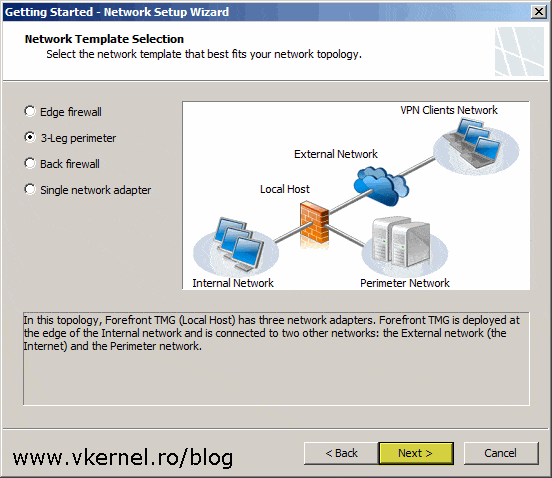
From the Network Template Section page all we have to do is select the 3-Leg perimeter option and click Next. If the option is grayed-out you either did not installed a third network card in the system or is not recognized by it. Make sure you have all your network drivers and cards in order before launching the wizard.
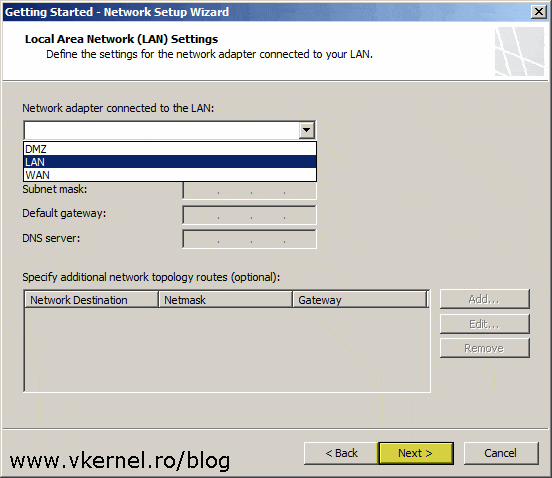
From the drop-down-box select the network adapter that is connected to your LAN network then click Next. A good practice is to name your adapters so you know which one is connected to which network.
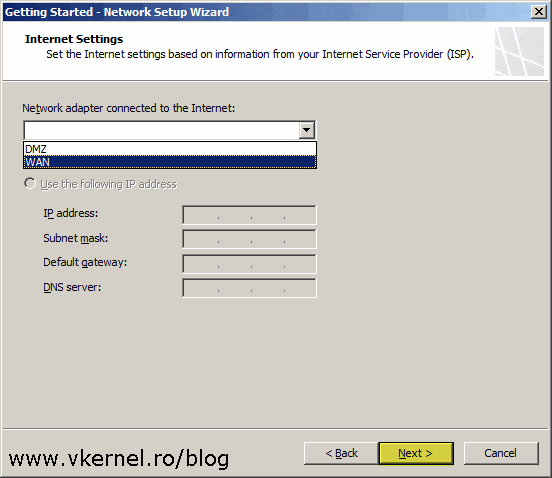
Here, select the adapter that is connected to your internet and once you’re done continue the wizard.
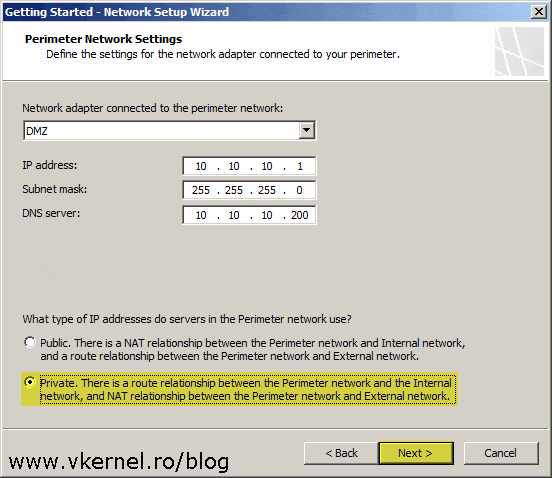
The last network interface is the one that needs to be assigned to the DMZ network. Select it, then down at the bottom choose the type of network relationship you want the DMZ network to have with the rest of the networks. We select Public if there is another firewall in front of the TMG 2010 server so we don’t do double NAT. For this article however, we are going to choose Private since our TMG server is connected directly on the internet.
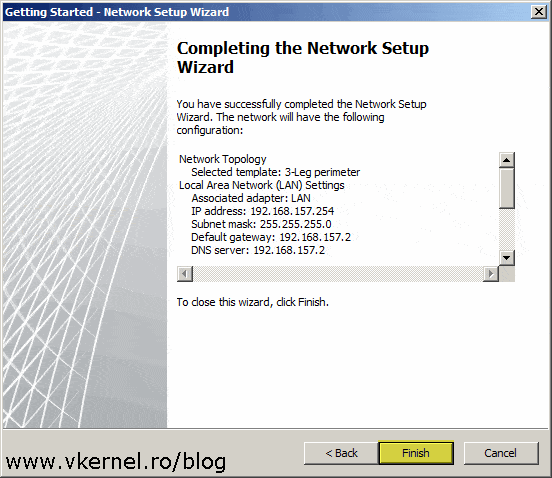
Hit Finish to save the configuration.
The DMZ network is now created, but there is still one more thing to do that the wizard is not doing it, and that’s creating firewall policies. Right now, no traffic is allowed between the perimeter network and the other networks but I’m not going put here the step-by-step guide on how to create a firewall rule in TMG 2010, because I have an article exactly for that.
Configure a 3-Leg perimeter network with TMG 2010 from an existing install
Now, if you already have a TMG 2010 server running in your network, and I’m sure most of you have, creating a DMZ network involves a few more steps compared to the one mentioned above.
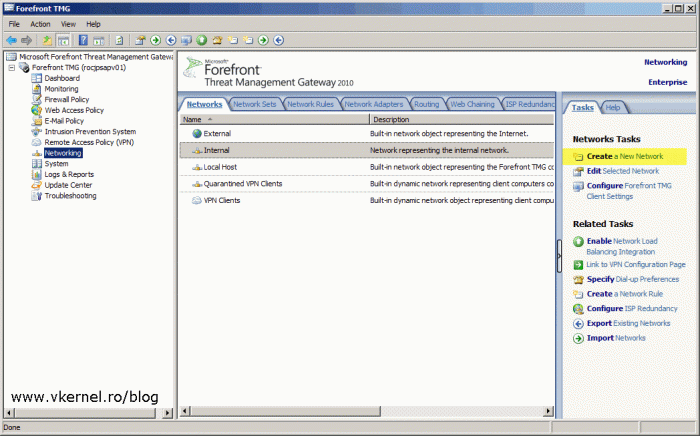
The first thing we need to do is to create the DMZ network, and for this open the TMG 2010 console, go to Networking and here click the Create a New Network link from the Tasks pane.
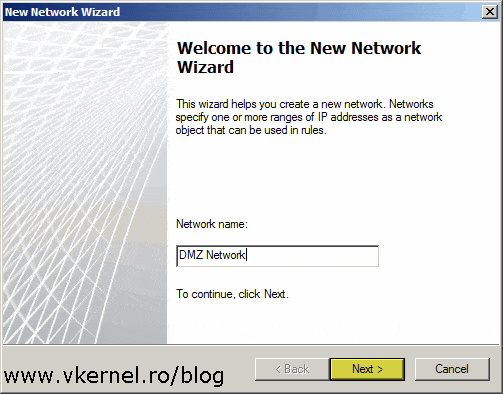
The wizard that opens is not something new, and if you’ve been following along from the beginning, you can notice that is the same wizard as the one we used in the first section of the article. Type a name for the new network then click Next.
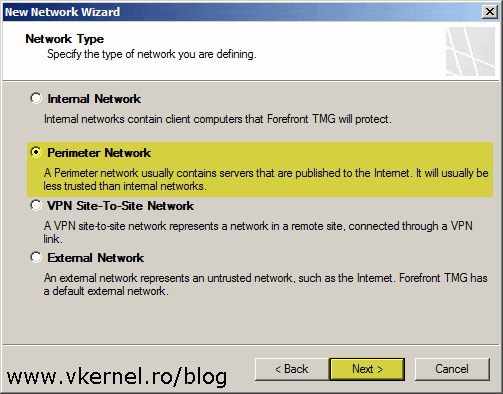
In the second screen of the wizard select Perimeter and click Next.
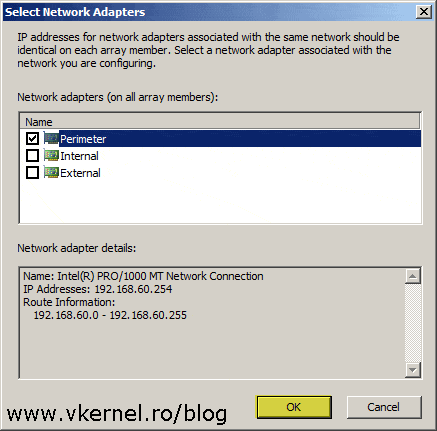
Here, click the Add Adapter button and in the window that pops-up check the box next to your network card that belong to the DMZ/Perimeter network. Hit OK then Next to continue the wizard.
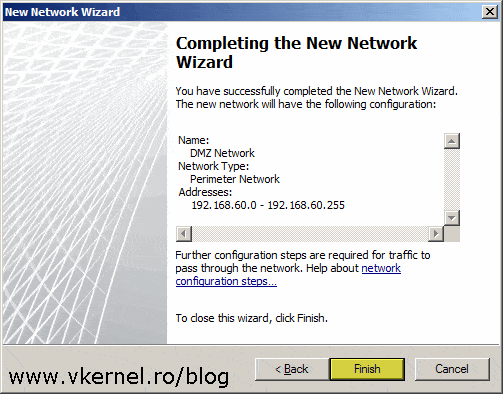
Click Finish to create the perimeter network.
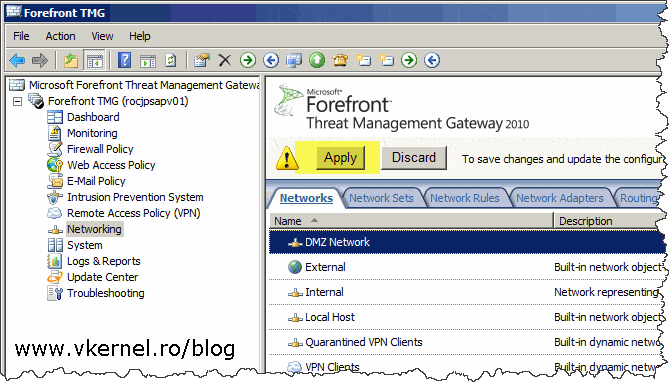
The last step into making this rule functional is to hit the big Apply button so TMG synchronizes this configuration with it’s local database.
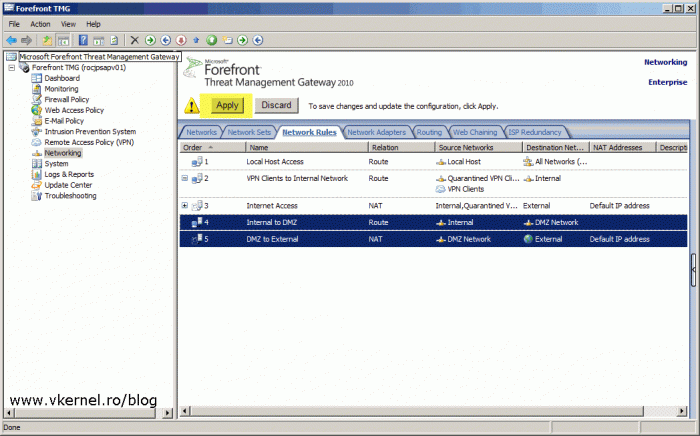
Now just by creating the network it’s not going to do the job. It needs a NAT or route relationship with the other networks that TMG manages, and the next step is to create this relationship rules between the DMZ network and the other ones. The first rule that we are going to create is between the DMZ network and the external one. This will be a NAT relationship since our TMG server is connected directly to the internet.
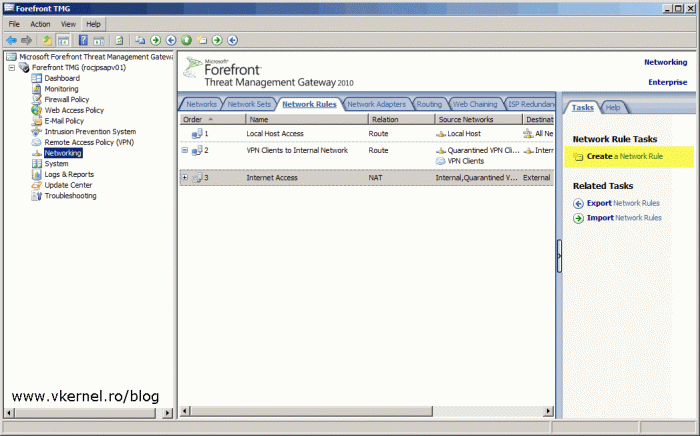
Still in the Networking section, click the Network Rules tab then from the Tasks pane click the Create a Network Rule link.
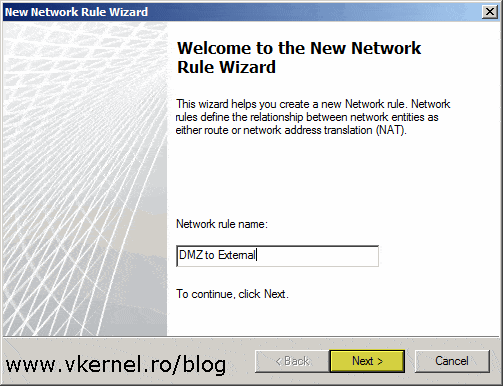
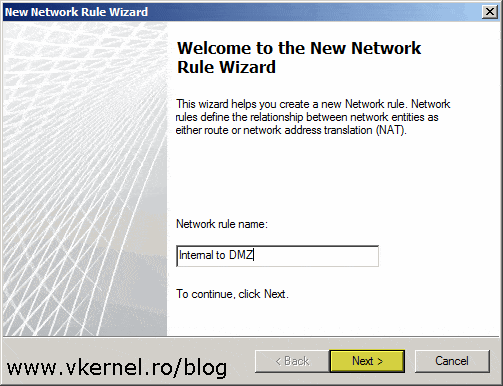
Give the rule a name then hit Next.
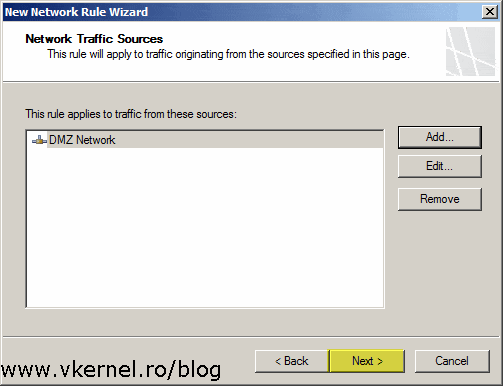
Click the Add button, then in the window that pops-up expand the Networks folder and select the DMZ network we created before. Add the network to the list then continue the wizard.
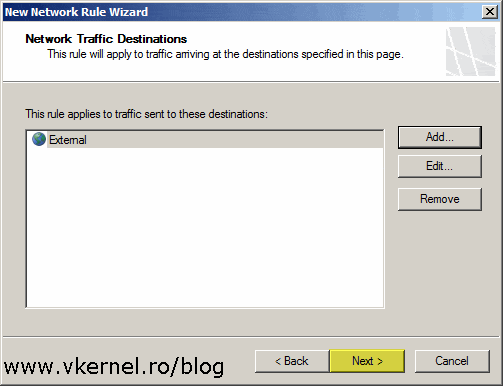
In the Network Traffic Destinations screen, again, click the Add button to open the Add Network Entities window, but this time select the External network from the Networks folder.
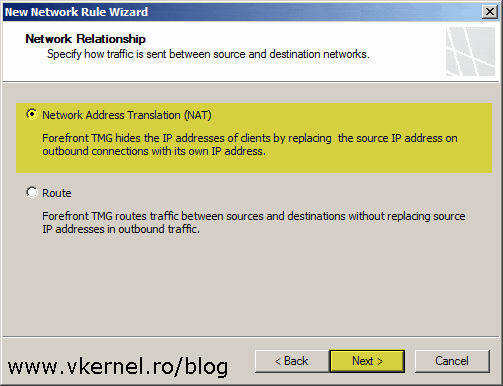
In the Network Relationship page select the Network Address Translation (NAT) option then click Next.
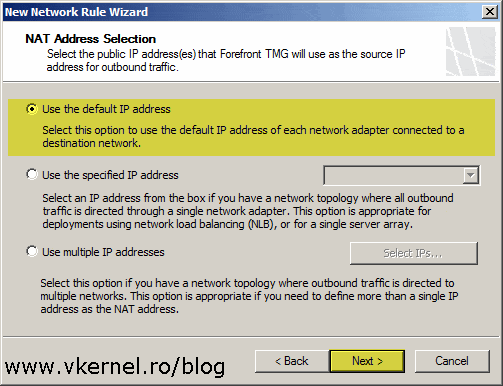
In this screen leave the default option and continue the wizard.
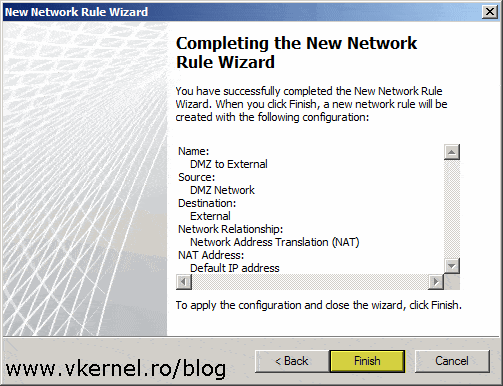
Hit Finish to create the network rule.
Now we have a rule between the DMZ network and the external one, but we don’t have a rule between the internal network and the DMZ network, and this is going to be our next task.
Click the Create a Network rule link again to open the New Network Rule Wizard. Name the rule then click Next.
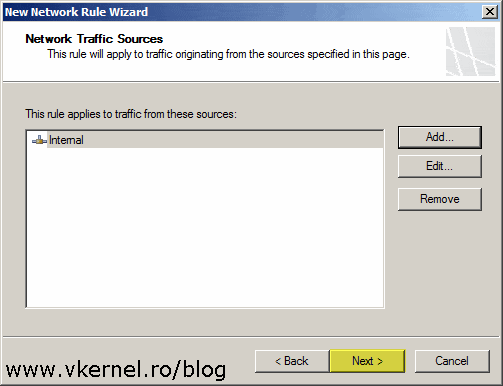
In the Network Traffic Sources screen click the Add button then add the internal network.
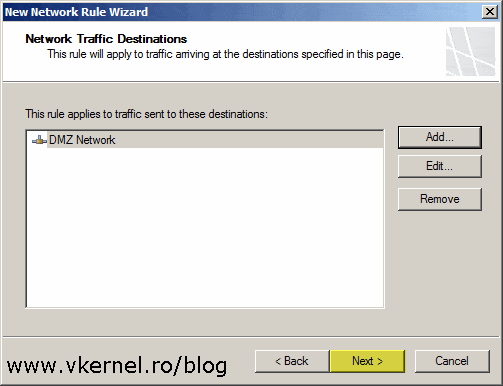
The same goes here, click the Add button, but this time choose the DMZ network as the destination network traffic.
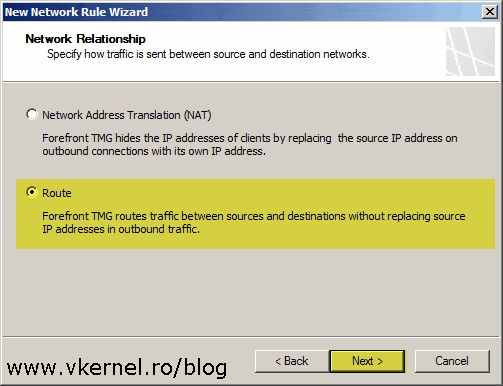
Depending on the network where the TMG 2010 server is deployed you might need to go with the first option here, but most of the times the traffic between the internal network and the DMZ network is routed. This will also be our choice for this lab, so select the second option then click Next.
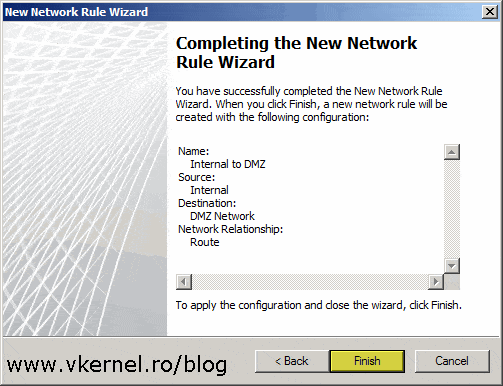
Click Finish to create the rule.
Now go ahead and apply all these changes.
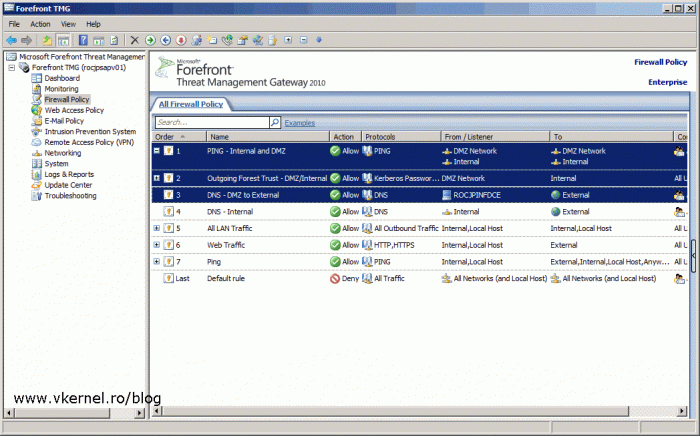
Right now our DMZ network is created, the network relationships are also created, but traffic is still not flowing in or out the DMZ network. That’s because there are no firewall policies to allow the traffic, and again, I’m not going to repeat myself here and walk you trough the wizard to create this policies because I have an article that guides you step-by-step on this. In the end you should have one or more firewall policies similar to the ones bellow.
Having a perimeter network in the company is sometimes necessary even if this bring more maintenance to the table, and by using TMG 2010 to build this network it comes very easy. Now don’t get your hopes up and think that by running services in the perimeter network you are bullet proof, because you are not. Leaks can always happen, but you can reduce them by hardening your network security and that’s opening a few ports as possible, inspecting your traffic, monitor your servers and especially making sure that users have or don’t have right to access sensitive services.
Want content like this delivered right to your
email inbox?
thx.. but i have a DC at 1.0 network and Perimeter network at 2.0 network. i have a client at 2.0 network and DHCP server at DC machine.. and how to DHCP server give ip that client ? please i need help 🙂
Hi,
That’s not something you should implement; a DHCP server in the internal network that serves clients on the DMZ network. I will just go and put another DHCP server in the DMZ zone.