Upgrading 2012 R2 Cluster to 2016 using Cluster OS Rolling Upgrade
Server 2016 is out for a while now, so I thought it will be a good time to write about one of the new features that Microsoft implemented in their latest server operating system for which I was really hopping for. They called it Cluster OS Rolling Upgrade. I know…the name doesn’t tell much, but it’s a way for us to upgrade our Hyper-V cluster nodes without downtime or extra hardware (if the existing hardware supports server 2016). Until now the way to go was buying extra hardware, build another Hyper-V cluster, then migrate the VMs to the new cluster. It was difficult, we needed maintenance hours, and it was costly. By using the Cluster OS Rolling Upgrade feature all we have to do is evict the nodes from the existing Hyper-V cluster one by one, install server 2016 on the evicted nodes, then joined them back to the cluster.
All this sounds very good, but in order to make it work the existing Hyper-V environment needs to run at least Windows Server 2012 R2. Everything bellow this version and you will have to use to old method to migrate your Hyper-V cluster.
There are some steps to follow which Microsoft created to describes the upgrade process, and to my surprise they really work:
- Backup the cluster database
- Backup the workload data. It means backing up you virtual machines running on your Hyper-V cluster(s) but I recommend you also backup the Hyper-V hosts
- Stop the Cluster Aware Updating (CAU) service (if used) so no patches get installed during the upgrade process and reboot the hosts
- Pause the Hyper-V node so all the virtual machines get migrated on the remaining nodes in the cluster
- Evict the 2012 R2 node from the cluster. It has to be in a Pause state and no virtual machines should run on it
- Install a fresh copy of Windows Server 2016 on the evicted node
- Configure networking and install the Failover Cluster feature and Hyper-V role on the new 2016 host
- Re-join the host to the cluster and migrate the workload to this node
- Repeat the operations for the rest of the 2012 R2 nodes in the cluster
- Update the Cluster Functional Level
As you can see there are quite a few steps to follow, but they are easy and straight forward, so let’s get to it.
Backing up the environment
Yes, even if we have a Failover Cluster, we still need to backup up the data. We can use the Windows Backup utility since it’s free and does the job pretty well, but if you have third party backup software, then be my guest and use it. To backup the cluster database we just have to follow the wizard and do a full system backup of the nodes.

I want to say that Microsoft’s backup utility does the same good job in saving the VMs, but it doesn’t. If you use it, your VMs will be put in a saved state in order to be backed up, which is not good because it beats the purpose of this article; upgrading the cluster with no downtime. For this one I recommend using a third party backup tool, if the budget permits so you can eliminate the downtime.

Stopping Cluster Aware Updating (CAU)
As you know, Microsoft introduced Cluster Aware Updating to patch Windows Failover Clusters, and it’s a great tool, but when upgrading a cluster however it needs to be stopped if it’s running. This section is more about stopping everything that means patching, not just the Cluster Aware Updating service so the nodes don’t reboot during the upgrade.
To stop the Cluster Aware Updating service just open it’s console from the Administrative Tools menu and click the Cancel Updating Run button if patching is running.

For those that want to use PowerShell, use the bellow command on one of the Hyper-V nodes to check if CAU is running. If is running you will get the RunInProgress message and list the nodes on which is running.
Get-CauRun

If is not, the RunNotInProgress message is displayed.

To stop the service just type:
Stop-CauRun -ClusterName <name of the Hyper-V cluster>

Evicting Hyper-V node from the cluster
Now that we have our backups in place and the cluster working properly, it’s time to upgrade the first node in the cluster. As mentioned before, no VMs should be sitting on this host, so we need to migrate them to the other ones available in the cluster.
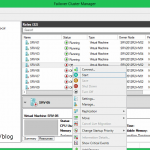
We do this by putting the node in a pause state by right-clicking it and go to Pause > Drain Roles.

As soon as we give the command, the VMs will start migrating from this host. There might be some VMs that will not migrate, and usually this happens when the Hyper-V hosts don’t have the same settings configured like networking, storage etc. If that’s the case, fix the problem then migrate the VMs manually.


Once the Hyper-V node is in a paused state, right-click it again and go to More Actions > Evict in order to remove the node from the cluster. Answer Yes on the message that pops-up. This is a warning telling us that the cluster might get unstable if we remove one of the nodes, but we know better since we have migrated all the VM from the node and we also have our backups.


We can also use PowerShell for this operation which in my opinion is a lot easier than clicking those windows and menus. All we have to do is type two command lines to get this done. The first one will put the node in maintenance mode, or pause mode in Microsoft’s language.
Suspend-ClusterNode -Name <Hyper-V node name>

The second command will remove the Hyper-V host from the cluster.
Remove-ClusterNode -Name <Hyper-V node name>

Install new OS on the evicted node
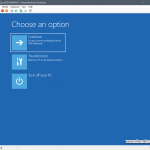
The time has come to re-format the drive on the evicted node and install Windows Server 2016. Yes, we can upgrade the OS, but a clean, fresh install does the job a lot better; so go ahead, boot your server from the installation media and follow the wizard. When you get to the Where do you want to install Windows page, make sure you delete or re-format your boot drive just so the previous installation will no longer exist.


Once the OS is up and running, some post-installation tasks need to be done, like install the proper drivers, configure the network adapters as they were before, and join the server to the domain using either the old name or a new one. For this example I will give the server a different name in order to recognize it much easier in the pictures that follow.


Configure the storage so the cluster LUNs are seen on the new server. Don’t try to mess with the disks because they are part of the cluster and manged by the cluster service. All we need to do here is be sure the disks are seen in the Disk Management console.

After the configuration is done, install the Failover Cluster feature and the Hyper-V role on the server.


Configuring the Hyper-V network
Before joining the Windows Server 2016 host back to the Hyper-V Failover Cluster, we need to configure it’s virtual switches. Make sure you configure them exactly as they were before we re-install the OS.


Joining the 2016 Hyper-V node to the cluster
And we are finally at the part where we re-join the host back to the cluster, but this time with a new OS version. We are going to do this from the 2016 server itself since it has an updated version of the administrative consoles.
Open the Failover Cluster Manager console and from the Actions pane click Connect to Cluster. On the Select Cluster window that pops-up you can either type the cluster name in the Cluster Name box or hit the Browse button and search for it.

Once we are connected to the cluster, right-click Nodes and choose Add Node.

The Add Node Wizard will open. Type the Windows Server 2016 computer name (NetBIOS or FQDN) in the text box then hit the Add button. You can also click Browse and search for the server name. Once it’s validated it will be automatically added to the Selected Servers list. Click Next.

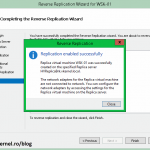
Continue the wizard to add the node to the cluster. If any warnings or errors occur, they will be displayed in the Summary page report.
For more information about adding nodes to the cluster you can read this article where I explain the process in greater detail.

And after a few seconds we should have our Windows 2016 Hyper-V node added to the cluster.

If you want to user PowerShell for this operation just type:
Add-ClusterNode -Name <node name> -Cluster <cluster name>


Looks like we had a success here, but we are not done. What’s left now is upgrading the rest of the nodes to Windows Server 2016 by following the above mentioned steps. You can upgrade the nodes one at a time, or in bunches. It all depends how many resources you have on the cluster so the VMs can be migrated on the remaining hosts.

Upgrading the Hyper-V Failover Cluster functional level
Now that all the nodes in the cluster are upgraded to Windows 2016, the last operation needed is to also upgrade the cluster functional level. This needs to be done in order to benefit of the new Windows Server 2016 cluster features.
Right now if we issue the bellow command we can see that the cluster functional level is at level 8 which is Windows Server 2012 R2.
Get-Cluster <Failover Cluster Name> | Select ClusterFunctionalLevel

In order to upgrade it, run:
Update-ClusterFunctionalLevel -Cluster <Failover Cluster Name>

The operation takes half of a second, and when it’s done we should have our Hyper-V Failover Cluster running at level 9, which is Windows Server 2016.

Summary
In my opinion Microsoft did a great a job on this one, and it was about time, because in VMware’s world this types of upgrades exist from the beginning. Looks like competition has it’s benefits. Test it and see how it works, but the most important things in this type of upgrade is the hardware compatibility with Windows Server 2016 and the post-configurations; especially the networking. Hope this was informative and beneficial.
Want content like this delivered right to your
email inbox?
More similar articles
 Converting UEFI + GPT Windows Server to Hyper-V VM
- Deploying VDI using Windows Server 2012/R2
- Migrating a Hyper-V Cluster to Windows Server 2012 R2
- Configuring Hyper-V Replica in Windows Server 2012/R2
- Delegate Access Control and Management in Hyper-V
- Deploying Personal Virtual Desktops and Virtual Desktop Pools with Server 2008 R2
Another good article.
What backup solutions are you using in production environment?
Thank
Adrian
Thanks.
We have an enterprise backup product called NetWorker from EMC. This is for very large environments but if t was me, I will just go with Veeam.