Publishing Exchange 2010 Outlook Anywhere with TMG 2010
OK, so you configured Outlook Anywhere, you installed a proper certificate, but now you need to allow the connection from the internet to your Exchange server so clients can use the service. I this guide I will show how to allow that connection using TMG 2010. For this lab I have an Exchange 2010 server, a TMG 2010 server, a Domain Controller, and an external Windows 7 client, not joined to the domain. Certificates will be issued by an Internal Enterprise Root CA running on the Domain Controller. The external client has the root certificate installed so I don’t have certificates trust problems. If you plan to implement this on a production environment a commercial certificate is recommended. I will also use a subdomain of my root (vkernel.ro) domain, just because the root domain already has an email server configured, so I don’t want to mess it up.
To begin, let’s start by publishing the service. Log on to your TMG 2010 server, launch the console and click the Firewall Policy object. On the Tasks pane click the Publish Exchange Web Client Access link.

On the first screen of the wizard, type the name of the rule and click Next to continue.

On the Exchange Version drop-down-box select Exchange Server 2010. If you have an older version of Exchange, select the proper one from the list. Still on this screen of the wizard, check the box Outlook Anywhere (RPC/HTTP(s)). If you still have Outlook 2007 clients in your environment also check Publish additional folders on the Exchange Server for Outlook 2007 clients. If not just hit Next.

On the Publishing Type page, leave the default option and continue.

Since this is going to an encrypted connection, we need to select Use SSL to connect to the published Web server or server farm button.

Here you need to type the FQDN that clients will type in Outlook to connect to the CAS server. The FQDN must be present in your Exchange certificate. On the Computer name or IP address box provide the name of your Exchange CAS server. You can also click the Browse button and search for it.

Again type the FQDN that your clients use to connect to the CAS server, then hit Next to continue.

Here, we need to create a HTTPS listener, because the one that already is in the list is listening on port 80, which is not secure. Click the New button to start the New Web Listener wizard. Give it a name and continue.


We need to use SSL, so just click Next here.

Configure the listener to listen on the external interface of your TMG server, because the traffic is coming from outside. Check the box next to External and click Next.

A certificate is need, and right now we don’t have one. If you click the Select Certificate button the list will be empty.

To import a certificate on the TMG 2010 server, first we need one, and the easiest way to have that is to export the certificate from the Exchange server. On the Exchange Management Console select the CAS server from the list of servers, right-click the certificate and choose Export Exchange Certificate. Give it a name and password then click Export. Copy the certificate on the TMG server.


Now on the TMG box open the Certificates Store (Start>Run>mmc) and choose the Computer account. Right-click the Personal folder and choose Import. Follow the wizard to import the certificate you copied from the Exchange server. After you’re done with the import, open the certificate and make sure it has a private key.


Back to the New Web Listener Definition Wizard, click Select Certificate. Now the Exchange certificate should be in the list and valid. Click the certificate then the Select button.


On the Authentication Settings page select HTTP Authentication from the list, then check Basic. Don’t worry, the credentials are not going to be sent in clear text just because you selected basic authentication here; credentials will be encrypted using the certificate key.

Single Sign On is not available for the authentication method we selected before. Just click Next then Finish to end this wizard.


On the New Exchange Publishing Rule Wizard make sure the new listener is selected. Click Next to continue.

Here choose No delegation, but client may authenticate directly.

Select on which users this rule will apply. If you want only specific users to be able to use Outlook Anywhere modify this list accordingly.

Click Finish to close the wizard.

Before you apply the changes, right-click the rule and choose Properties.

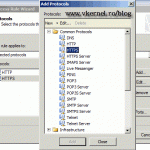
Go to the Public Name tab and add the autodiscover entry (autodiscover.domain.com).

Don’t forget to hit the Apply button so change will be saved on the TMG configuration store.

Let’s go to the client and configure Outlook. Complete the boxes with the required information then click Next.

It will take a few seconds until it finds the domain and the mailbox. You will be asked to authenticate, and here you/the user will need to type the Active Directory account, the one that is used to log in to the PC, NOT the mailbox account. I know I’ve said at the beginning of this guide that the client, the Windows 7 machine is not joined to the domain, but and AD account still needs to exist.


The connection should be successful.

Want content like this delivered right to your
email inbox?
Hi. Is there a way to publish Outlook Anywhere using this method, but for specific users (not all of them). I use Exchange 2013.
Hi,
Off course it is. Just create a security group in AD, put the users you want to have access to Outlook Anywhere in this group then add the group to the TMG wizard. Instead of all users in the wizard just add the security group you created in AD.
Let me know if it works for you.
Great, very useful information.