Creating an Offline MDT Deployment Media
Everything is working fine in your main office, you capture, you deploy, you migrate, but you have a bunch of small branch offices (10-20 PC’s) with limited bandwidth where you need to do the same thing. Well…you could just tell the people in those offices to leave their desktops and laptops on and deploy or migrate those over night, but still there are a lot of GB to transfer. The second thing is that not all of those workers can leave their laptops at the office, or they just don’t want to, who knows… An investment in a server is out of the question, maybe later. So how can you deploy using MDT those PC’s in those branch offices ? The answer is:
create a deployment media where you put all the operating systems, drivers, applications you need for those PC’s and use this DVD to deploy those systems. Now let me show you how to create this MDT media. I will use MDT 2013 for this demo.
I presume you have your applications,

your OS’s,

and your drivers imported in MDT. I recommend to be very granular and create a folder for every platform, OS type, OS version, because it will help you so much later on.

Besides those, I also presume you have your Task Sequences created and ready to rule.

Now expand Advance Configuration, right-click Selection Profiles and choose New Selection Profile. By creating a Selection Profile you control what’s included in the deployment media and what’s injected in the OS during the task sequence.

Give the Selection Profile a name and hit Next.

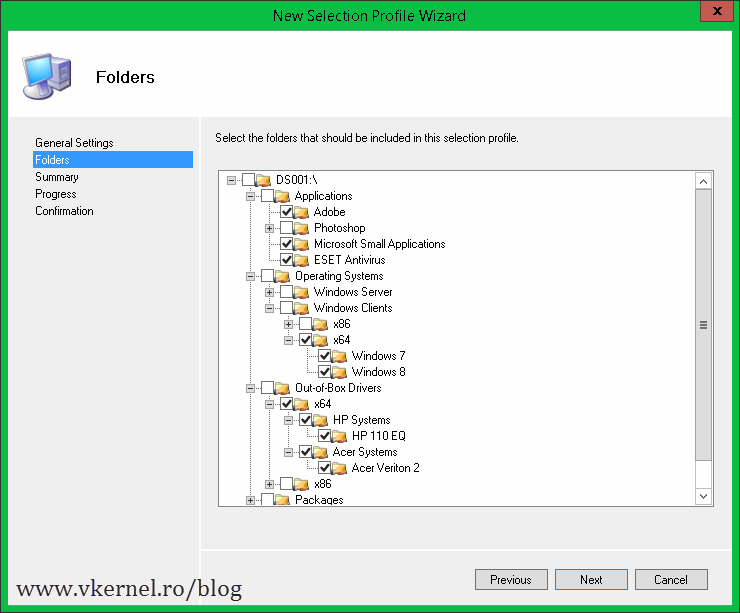
Here is the screen where you select what to include in the media. Now you see why I told you earlier to be granular with the folders. Since I want to deploy only Windows 7 and Windows 8 in those branch offices I will select only these OS’s and task sequences. If you select a root of the folder here and later on you create another folder under it in the Deployment Workbench and import OS’s, application, drivers or what have you, this folder (or subfolder we may cal it) will be automatically included in the selection profile.

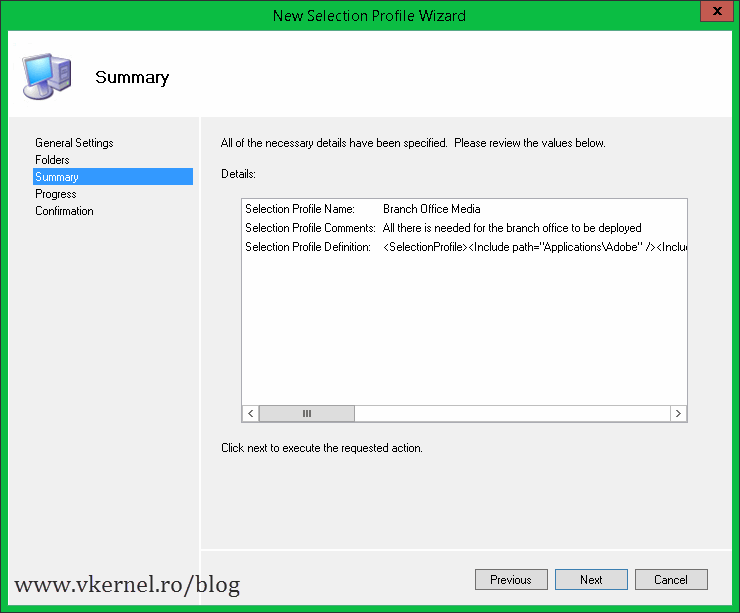
At the Summary screen click Next to save the changes, then hit Finish to close the wizard.
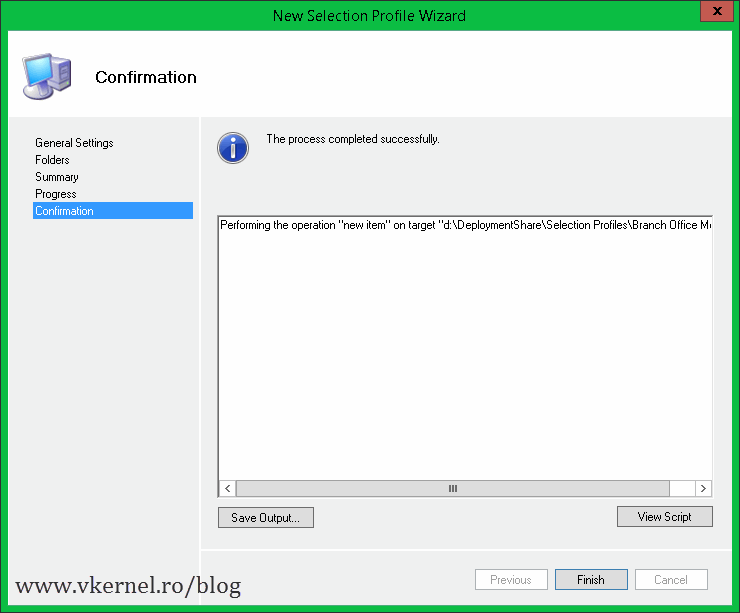
And a new Selection Profile is created.

If you forgot or you need to add a new task sequence later on, you can modify this Selection Profile by opening its properties.

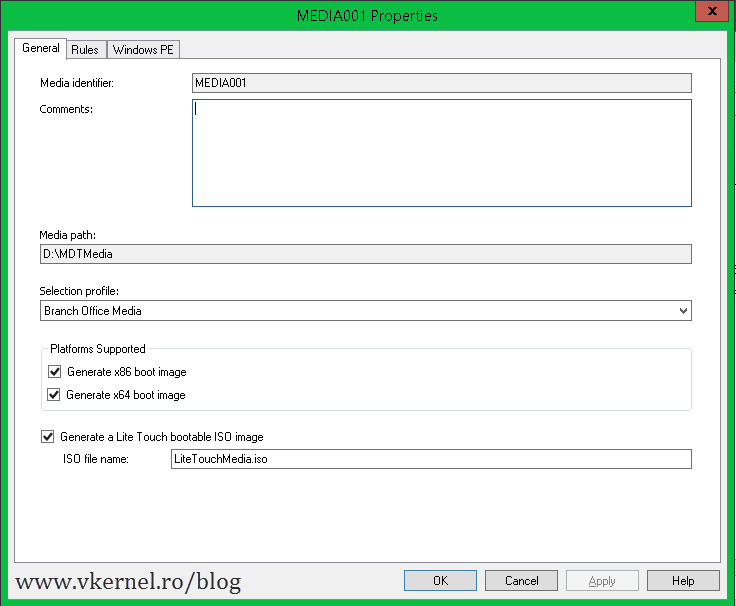
Now that we have a selection profile for our branch offices computers it is time to create a deployment media. Right-click the Media folder and choose New Media.

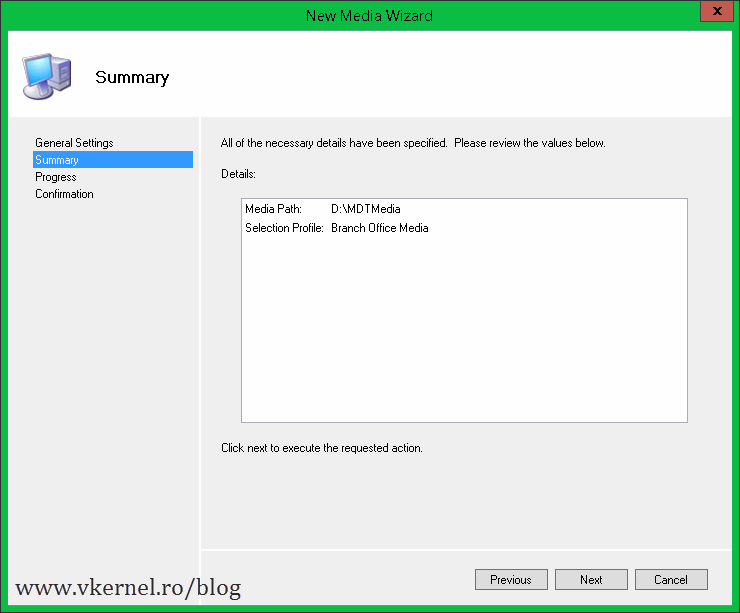
Give it a path where to save the media content but, do NOT, I repeat do NOT save it in your deployment share. The Selection profile drop-down-box is the important part here. If you click it, you should see the Selection Profile created earlier. Choose that and click Next.

On the Summary screen click Next and wait a few seconds for the wizard to finish

then close it.

Now you should see the new media created, and if you right-click it and choose Properties, a window similar to the one from the DeploymentShare should pop-up.

The Rules tab is the more interesting one. Here you can use the rules just like in the DeploymentShare, to automate the OS installation.
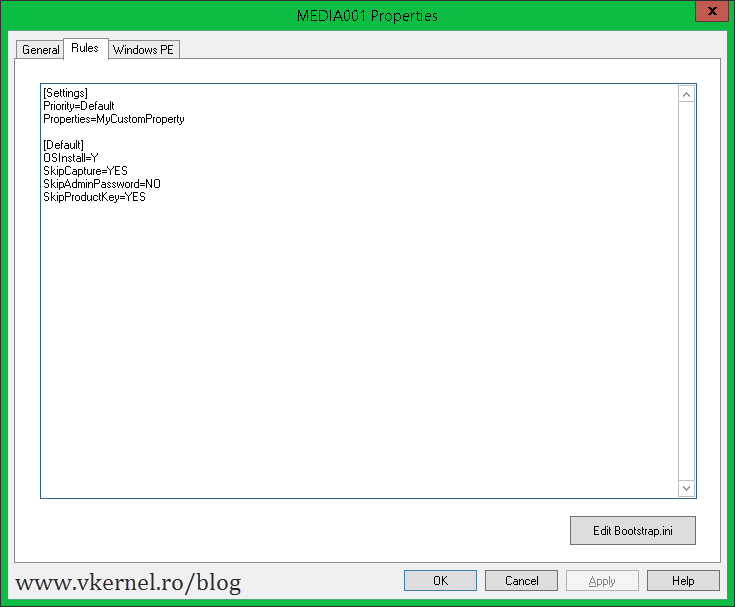
If you open Bootstrap.ini you can see that there is no root path specified, or credentials to connect to a deployment share. This is because WinPE has all the OS’s, drivers, applications on this media, so no deployment share is needed.

The folder specified during the wizard has the exact same structure as the DeploymentShare but if you take a closer look most of the folders are empty (operating systems, drivers, applications etc).

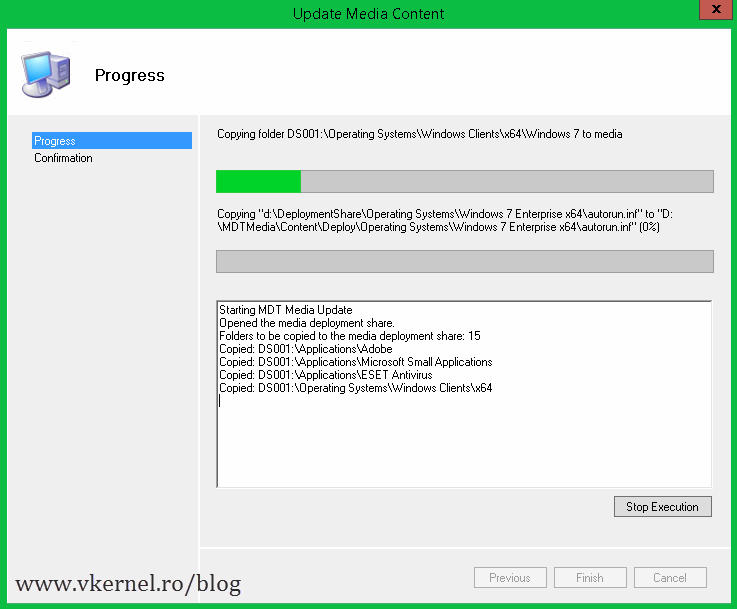
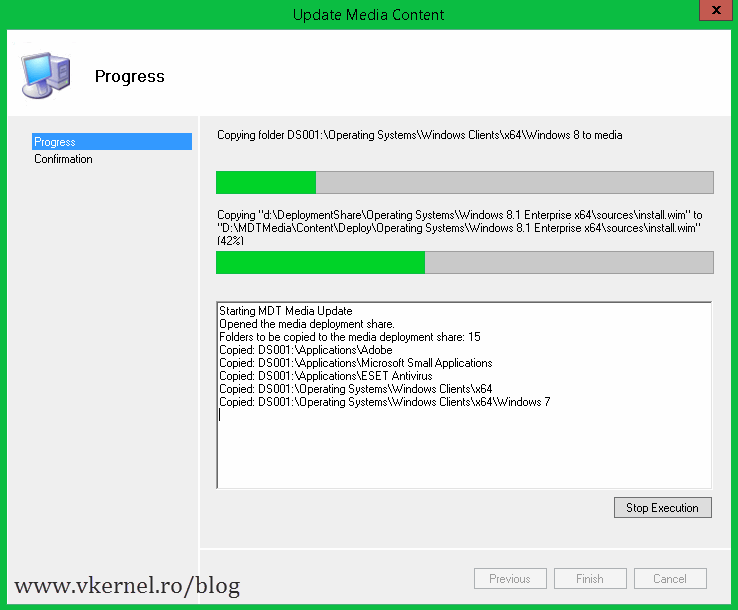
When you are done editing the rules and options click OK to close the media properties window than right-click the media from the Workbench and choose Update Media Content.

This will create an ISO image with all the OS’s, drivers, applications that you specified in the Selection Profile wizard. Depending on how many operating systems, applications, drivers you selected, the wizard can take a from a few minutes to a few dozen minutes to complete.
At the end hit Finish to close the window.

Now take a look in the root of the folder you specified during the media creation wizard (mine was D:\MDTMedia). You should see an ISO image created that has a few GB in size.

All you have to do now is burn this image to a DVD or Blue Ray media and boot the computers you want to deploy from this media. Select the type of platform and let it load the WinPE environment.
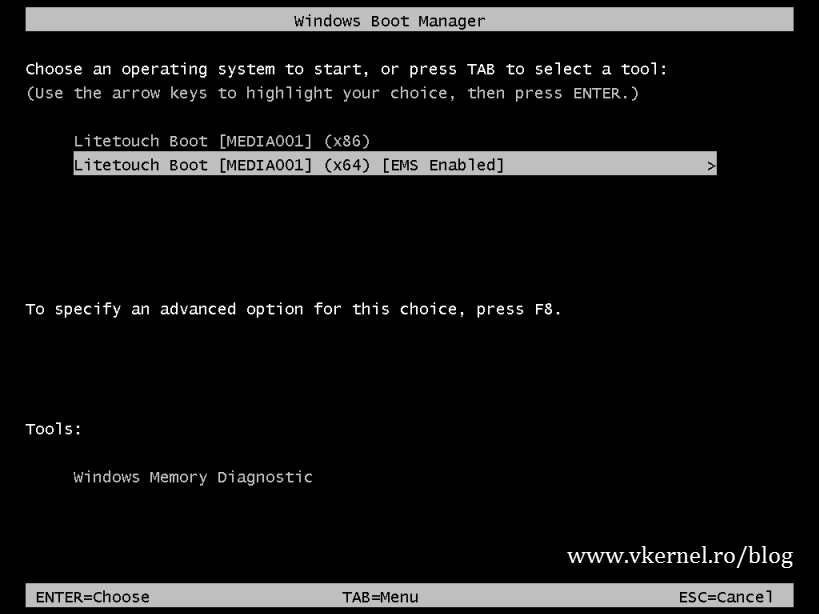
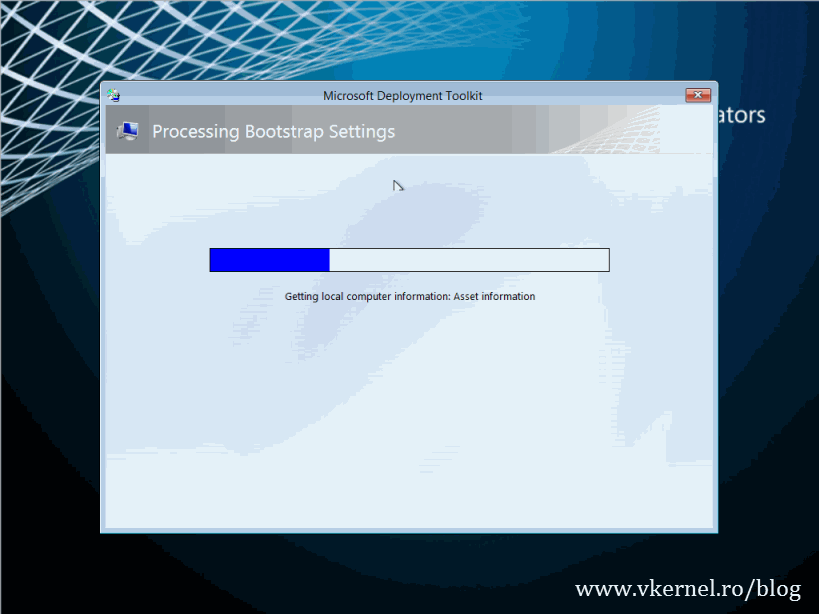
If you did not specified in the Bootstrap.ini to skip this part you will have to do it manually by clicking Run the Deployment Wizard to install a new Operating System.

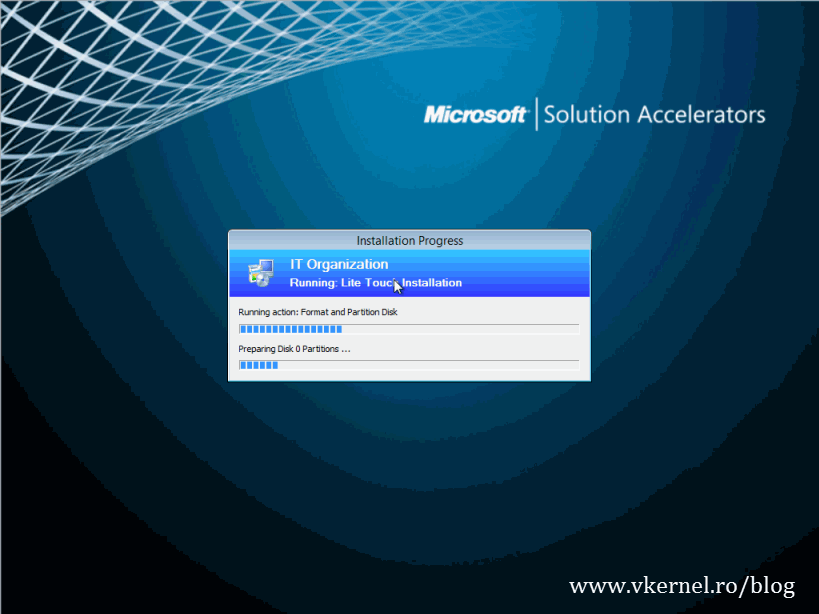
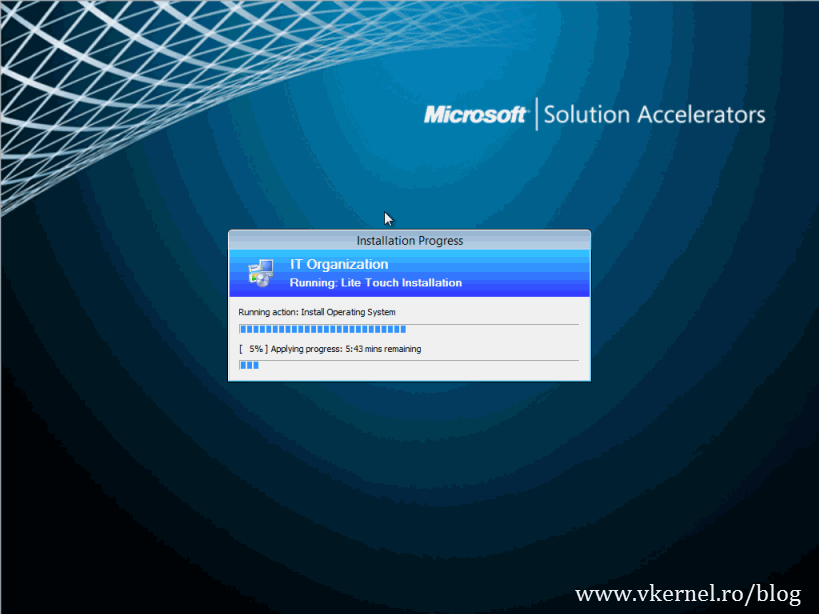
Select your Task Sequence

and hit Next to begin the deployment.
This is a neat feature of MDT and is heavily used in environments where booting from the network is not an option. Give it a try and see if it works for you.
Want content like this delivered right to your
email inbox?
More similar articles
 Installing and Configuring MDT with Windows 10 ADK
- Customizing the Default Local User Profile before imaging
- Integrating DaRT (8.x) with MDT (2013) and enable DaRT Remote Control
- Migrating from Windows XP to Windows 7 using MDT
- Adding drivers to WinPE boot image in MDT 2010/2012
- Sysprep and Capture a Windows Image with MDT 2012

Great!!! U really helped me instead of tons of trash tutorials on the net-
You are welcome
HI i know this is old but it is very useful. I get stuck right at the get go. At the second screen where you select the components nothing shows for me except drivers. None of my task sequences or applications are available for selection
Hi Michael,
You will have to create all the folders and add your desired OS for deployment. You can follow my articles on how to deploy Windows 7 with MDT. It also applies to Windows 10, since not much changed since then, just a few wizards.
I see it’s an old post, but maybe someone can advise. with this Offline media, how do i join to domain, for example i ship this media to branch with no direct connection to corporate network and they deploy a laptop. So once they done deploying they need to join it to domain, how usually people do it? Thank you in advance!
Well…if you don’t have a connection to the domain then you can use the Offline Domain join feature.
Thank you for your reply and suggestion, that is exactly i was thinking to do or some sort of VPN and join through VPN.
Sorry to bother, but I have another question, I got my offline ISO done and used Rufus to create a boot usb based on ISO, options i uses is “GPT partion scheme for UEFI”, NTFS – my problem is that nothing is loading or booting 🙁
laptop BIOS tell “UEFI Only” – not sure what i do wrong and why USB does not get to boot at all. Would highly appreciate if you can advice!
Alex
Hi Alex,
I really can’t tell out of my head what could be the problem here. I know I just installed a few days ago a laptop on which I had to create a GPT partition with Rufus and it failed with build 1809 but worked with 1909.
If you have the time try to investigate by switching builds. I will try and test this myself and see if I can reproduce.
Was wondering if you can maybe advise as I’m still trying to get to the bottom of this and you’re the MDT expert…. I’ve got my deployment share, etc., can see all that. We don’t have a WDS server so I’m using the LiteTouchx64.iso burned to a USB using Rufus MBR method (Legacy and UEFI).
When I boot up to it, the PE/Windows Toolkit environment can see the share etc., however, one of my task sequences (in place upgrade) is missing… I’ve made a Selection Profile, I’ve made a Media set and burned the USB from that for the ultimate offline experience, however, when I boot up to it, the task sequences are just pure blank…
Any clues you can give me ?
Forgot to say – have started up my sequence from within a Windows 7 machine – \\deploymentshare2\Content\Deploy\Scripts\LiteTouch.vbs and it failed after about half an hour with just a number of random errors.
Hi,
Did you updated the offline media in MDT? not the deployment share, they are separated. Usually that’s where the problem comes from, but I really have to test this in order to see what’s going on, or even more useful will be an article about this.
Let me see if I can fire up a lab these days and test it.
Hi Adrian,
The whole process got completed, when i boot from the usb it take me to MDt deploymnet and is looking for deployment share path.
Can you suggest what should i do Please
I will have to create an article on how to put this on a USB drive because more and more people are asking for it.
I’ll be back with an article.
I’m trying to create a fully offline USB drive deployment, but the main deployment server doesn’t have enough disk space to hold all the applications. Currently, we create applications as “Application without source files or elsewhere on the network” and not “Application with source files”.
Is there a way to “cheat” around having to copy the application source files to the deployment share, by copying them from the file server directly to the USB drive? Something like creating the application as “Application without source files or elsewhere on the network” and setting the working directory as relative to the USB drive root? Is the working directory based off the deploy root in the bootstrap.ini file (and could I then leave it blank to keep it looking on the USB drive)?
Currently the deployroot is the MDT server, and the working directory for all the application installs is “\\fileserver.domain.foo\application name. If I create a new folder with “copies” of the applications that have a working directory not pointed out at a file server, will it look locally?
Hi Dann,
To be honest I don’t know the answer to this because I never tried it. I guess you can copy the application files from your file server on the USB drive on the designated subfolder. So if you have a directory named Firefox under Applications on the Deployment Share, you should copy the source files on the same directory on the USB drive.
Let me know how it goes, if not I will test it myself.
Hi Adrian,
Great post! I wonder if you can help, post install of the OS the machine boots into Windows as expected but it then doesn’t continue with the remainder of the Task Sequence (so the Post Install stages where there are some bespoke cmd’s to run locally i.e. Disable the Administrator Account) and so it never actually comes up with a completion screen or any errors, it’s like it just doesn’t continue through the Task Sequence. I have recreated the Task Sequence and Updated the Offline Media many times now…
Also, this wasn’t mentioned in your post, but with a Normal MDT PXE Task Sequence Deploy I edit the Unattend.xml in the Control Folder and Link it to the Operating System in the Deployment Share. I did the same with the Task Sequence and Operating System prior to creating the Offline Media assuming that would transfer as part of the Offline Media creation but it hasn’t. So how does one do OOBE Personalization like creating Local Accounts etc…
Any advise would be appreciated 🙂
Hi Holly,
First of all make sure you test your scripts before you add them to MDT. The second thing is to first update the Deployment Share then the Media Content.
If you are still having problems let me know on the Contact page so we can try a remote session and see what’s there.
I did all the steps and everything was deployed (so it seemed). I received 10 errors at the end and unable to get to windows.
I’m hoping there is something simple i missed.
Thank for any help you can provide.
FAILURE (5616 ): 15250: Verify BCDBootEx
Litetouch deployment failed, Return Code = 2147467259 0x80004005
Failed to run the action: 1809
Unknown error (Error: 000015F0; Source: Unknown)
the execution of the gourp (Install) has failed and the execution has been aborted. An action failed
Operation aborted (Error: 800004004; Source: Windows)
Failed to run the last action 1809. Execution of the task sequence failed
Unknown error (Error: 000015F0; Source: Unknown)
Task Sequence Engine failed! code: enExecutionFail
Task sequence execution failed with error code 80004004
SetNamedSecurityinfo() failed
setObjectOwner() failed. 0x80070005.
RegQueryValueExW is unsuccessful for software\micorsoft\SMS\Task Sequence, SMSTSEndProgram
GetTsRegValue() is unsuccessful. 0x80070002.
Error Task Sequence Manager failed to execute task sequence Code 0x8004005
Just wanted to say thank you!
You are welcome. Thanks for passing by.
Hi,
I have successfully created a offline ISO file using your walk-through. Thank you very much! I do have one lingering question and that is how to split the offline ISO file to fit two 32GB USB drives? I am unable to use ISO to USB because the offline ISO file is too large. Any advice?
Hi,
Just put in the image the minimal drivers needed for the systems. For applications and the rest of the stuff you can use a deployment software or GPO to install them. This way your offline deployment image will not get over 5 GB.